2021 VOLVO V90 CROSS COUNTRY keyless
[x] Cancel search: keylessPage 8 of 683
6
Parking climate*
234
Preconditioning *
234
Starting and stopping precondi- tioning * 234
Preconditioning timer *
235
Adding and editing timer settingsfor preconditioning * 235
Activating and deactivating pre-conditioning timer * 236
Deleting preconditioning timersettings * 237
Pre-cleaning *
238
Starting and stopping pre-cleaning *
238
Climate comfort retaining function *
239
Starting and switching off the cli-mate retaining function when parking *239
Parking climate symbols and mes-sages * 241
KEY, LOCKS AND ALARM
Locking and unlocking
244
Lock indication 244
Lock confirmation settings 246
Remote key 246
Locking and unlocking using the remote key 249
Settings for remote and insidedoor unlock 250
Unlocking the tailgate using theremote key 251
Remote key range 251
Replacing the remote key's battery 252
Ordering additional remote keys 256
Care Key – restricted remote key 256
Care Key settings 257
Detachable key blade 257
Locking and unlocking withdetachable key blade 258
Electronic immobilizer 260
Start and lock system type desig-nations 260
Keyless and touch-sensitive surfaces *
262
Keyless locking and unlocking *
263
Keyless unlock settings *
264
Keyless tailgate unlock *
264
Antenna locations for the start and lock system 265
Locking and unlocking from insidethe vehicle 266
Unlocking the tailgate from insidethe vehicle 267
Activating and deactivating child locks 267
Automatic locking when driving 268
Closing and locking the tailgate using the buttons * 269
Setting maximum opening heightfor the power tailgate *271
Operating the tailgate with a footmovement * 271
Private Locking 272
Activating and deactivating pri- vate locking 273
Alarm 274
Arming and disarming the alarm 275
Page 177 of 683
WINDOWS, GLASS AND MIRRORS
* Option/accessory.175
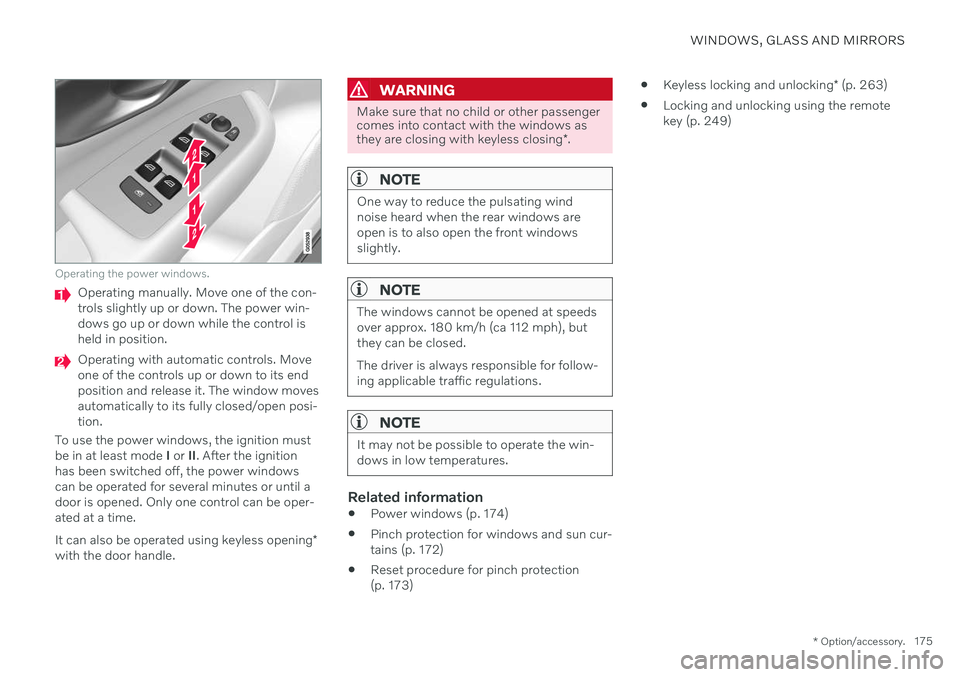
Operating the power windows.
Operating manually. Move one of the con- trols slightly up or down. The power win-dows go up or down while the control isheld in position.
Operating with automatic controls. Move one of the controls up or down to its endposition and release it. The window movesautomatically to its fully closed/open posi-tion.
To use the power windows, the ignition mustbe in at least mode I or II. After the ignition
has been switched off, the power windowscan be operated for several minutes or until adoor is opened. Only one control can be oper-ated at a time. It can also be operated using keyless opening *
with the door handle.
WARNING
Make sure that no child or other passenger comes into contact with the windows as they are closing with keyless closing *.
NOTE
One way to reduce the pulsating wind noise heard when the rear windows areopen is to also open the front windowsslightly.
NOTE
The windows cannot be opened at speeds over approx. 180 km/h (ca 112 mph), butthey can be closed. The driver is always responsible for follow- ing applicable traffic regulations.
NOTE
It may not be possible to operate the win- dows in low temperatures.
Related information
Power windows (p. 174)
Pinch protection for windows and sun cur- tains (p. 172)
Reset procedure for pinch protection(p. 173)
Keyless locking and unlocking
* (p. 263)
Locking and unlocking using the remotekey (p. 249)
Page 182 of 683
WINDOWS, GLASS AND MIRRORS
* Option/accessory.
180
Keyless locking and unlocking
* (p. 263)
Locking and unlocking using the remote key (p. 249)
Operating the panoramic roof
*
The panoramic roof and sun curtain are oper- ated using a control in the ceiling panel, andboth are equipped with pinch protection.
WARNING
Children, other passengers or objects can be trapped by the moving parts.
Always operate the windows with cau- tion.
Do not allow children to play with theoperating controls.
Never leave a child alone in the vehicle.
Remember to always cut the current tothe power windows by setting thevehicle's electrical system to ignitionmode
0 and then taking the key with
you when leaving the vehicle.
Never stick objects or body parts outthrough the windows, even if the vehi-cle electrical system is completelyturned off.
CAUTION
Do not open the panoramic roof when load carriers are installed.
Never place heavy objects on the pan-oramic roof.
CAUTION
Remove ice and snow before opening the panoramic roof. Be careful not toscratch any surfaces or damage thetrim.
Do not operate the panoramic roof if itis frozen in place.
To operate the panoramic roof and sun cur- tain, the ignition must be in mode
I or II.
It can also be operated using keyless opening *
with the door handle.
WARNING
Make sure that no child or other passenger comes into contact with the windows as they are closing with keyless closing *.
Page 184 of 683
||
WINDOWS, GLASS AND MIRRORS
* Option/accessory.
182
Manual operation
1. To open the sun curtain, pull the control
backward to the manual open mode.
2. To open the panoramic roof to the comfort position, pull the control backward a sec- ond time to the manual opening position.
3. To open the panoramic roof fully, pull the control backward a third time to the man-ual opening position.
Close by repeating the above procedure inreverse - push the control forward/down tothe manual closing position.
Auto operation
1. To open the sun curtain to the fully open position, pull the control backward to the auto open mode and release.
2. To open the panoramic roof to the comfort position, pull the control backward a sec-ond time to the automatic opening posi-tion and release.
3. To open the panoramic roof fully, pull the control backward a third time to the auto-matic opening position and release.
Close by repeating the above procedure inreverse - push the control forward/down tothe auto close position.
Automatic operation - rapid opening or closing
The panoramic roof and sun curtain can be opened or closed simultaneously:
–Open - press the control backward twice to the automatic operation position andrelease.
–Close - press the control forward/down twice to the automatic operation positionand release.
Related information
Panoramic roof
* (p. 179)
Auto closing the panoramic roof
* sun cur-
tain (p. 182)
Pinch protection for windows and sun cur-tains (p. 172)
Keyless locking and unlocking
* (p. 263)
Locking and unlocking using the remotekey (p. 249)
Auto closing the panoramic roof
*
sun curtain
With this function, the sun curtain closes automatically 15 minutes after the vehicle hasbeen locked if it is parked in hot weather. Thisis done to lower the passenger compartmenttemperature and protect the upholsteryagainst being bleached by the sun.
The function is deactivated as the default fac- tory setting and can be activated or deacti-vated using the center display. 1. Tap
Settings in the Top view in the center
display.
2. Tap
My CarLocking.
Select
Auto Close Sunroof Curtain to
activate/deactivate.
NOTE
The sun curtain also closes when all win- dows are closed with keyless closing *.
Related information
Panoramic roof
* (p. 179)
Operating the panoramic roof
* (p. 180)
Pinch protection for windows and sun cur- tains (p. 172)
Page 185 of 683

WINDOWS, GLASS AND MIRRORS
}}
* Option/accessory.183
Keyless locking and unlocking
* (p. 263)
Locking and unlocking using the remote key (p. 249)
Wiper blades and washer fluid The wipers and the washer fluid are designed to improve visibility and the headlight pat-tern.
The washer nozzles are heated
* automatically
in cold weather to prevent the washer fluid from freezing. When there is approximately 1 liter (1 qt) of washer fluid remaining, a message to refill willappear in the instrument panel.
Related information
Using the rain sensor (p. 184)
Using the windshield and headlight wash-ers (p. 186)
Using automatic rear window wipingwhen backing up (p. 188)
Activating and deactivating the rain sen-sor's memory function (p. 185)
Using the rear window wiper/washer(p. 187)
Filling washer fluid (p. 646)
Putting the wiper blades in service posi-tion (p. 645)
Replacing windshield wiper blades(p. 644)
Changing rear window wipers (p. 643)
Using the windshield wipers (p. 183)
Using the windshield wipers
The windshield wipers are designed to clean the windshield. The right-side steering wheellever is used to adjust windshield wiper set-tings.
Right-hand steering wheel lever.
The thumb wheel is used to set rain sen- sor sensitivity and interval wiper speed.
Single sweepMove the lever down and release for asingle sweep.
Wipers offMove the lever to position 0 to turn off
the windshield wipers.
Page 246 of 683
KEY, LOCKS AND ALARM
* Option/accessory.
244
Locking and unlocking
The vehicle can be locked and unlocked in several different ways.
The vehicle can be locked and unlocked
using the buttons on the remote key
with the detachable key blade (if the bat- tery in the remote key is discharged)
keyless
* (Passive Entry), the remote key
must be within range
from inside the vehicle using the lock con-trols in the doors
remote door unlocking with Volvo On Call.
There are also several types of remote keysthat can be used. For vehicles equipped with keyless locking and unlocking *, a smaller, lighter and button-
less key is provided (Key Tag). A Care Key * (restricted key) makes it possible
to set restrictions for some of the vehicle's functions e.g. maximum speed and maximumaudio system volume.
Related information
Locking and unlocking using the remotekey (p. 249)
Keyless locking and unlocking
* (p. 263)
Locking and unlocking from inside thevehicle (p. 266)
Private Locking (p. 272)
Alarm (p. 274)
Lock indication
The turn signals will flash when the vehicle is locked or unlocked.
Exterior confirmationLocking
The turn signals will flash once and the door mirrors will fold in 1
to confirm the
vehicle is locked.
Unlocking
The turn signals will flash twice and thedoor mirrors will fold out 1
to confirm the
vehicle is unlocked.
The tailgate, hood and all doors must be closed for confirmation to be given. If only thedriver's door is closed when the vehicle is locked 2
, the vehicle will be locked but the turn
signals will only flash to indicate locking when all doors and the tailgate and hood have beenclosed.
Page 247 of 683
KEY, LOCKS AND ALARM
* Option/accessory.245
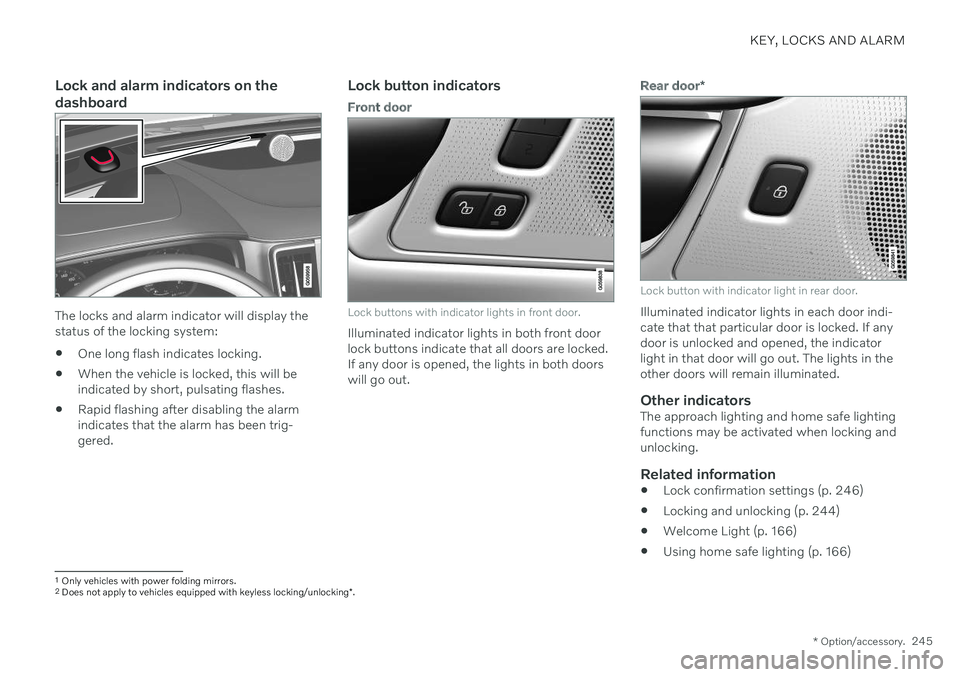
Lock and alarm indicators on the dashboard
The locks and alarm indicator will display the status of the locking system:
One long flash indicates locking.
When the vehicle is locked, this will beindicated by short, pulsating flashes.
Rapid flashing after disabling the alarmindicates that the alarm has been trig-gered.
Lock button indicators
Front door
Lock buttons with indicator lights in front door.
Illuminated indicator lights in both front door lock buttons indicate that all doors are locked.If any door is opened, the lights in both doorswill go out.
Rear door
*
Lock button with indicator light in rear door.
Illuminated indicator lights in each door indi- cate that that particular door is locked. If anydoor is unlocked and opened, the indicatorlight in that door will go out. The lights in theother doors will remain illuminated.
Other indicatorsThe approach lighting and home safe lightingfunctions may be activated when locking andunlocking.
Related information
Lock confirmation settings (p. 246)
Locking and unlocking (p. 244)
Welcome Light (p. 166)
Using home safe lighting (p. 166)
1
Only vehicles with power folding mirrors.
2 Does not apply to vehicles equipped with keyless locking/unlocking *.
Page 248 of 683
KEY, LOCKS AND ALARM
* Option/accessory.
246
Lock confirmation settings
Settings for how the vehicle confirms locking and unlocking can be adjusted in the centerdisplay's Settings menu.
To change the locking response settings: 1. Tap
Settings in the center display's Top
view.
2. Tap
My CarLocking.
3. Tap
Visible Locking Feedback to select
when the vehicle should provide a visible response:
Lock
Unlock
Both
Or turn off the function by marking Off .
4. Select to receive an audible response when locking the vehicle by marking
Audible Locking Feedback.
To change the settings for folding door mir- rors * when locking:
1. Tap
Settings in the center display's Top
view.
2. Tap
My CarMirrors and Convenience.
3. Select
Fold Mirror When Locked to acti-
vate or deactivate the function.
Related information
Lock indication (p. 244)
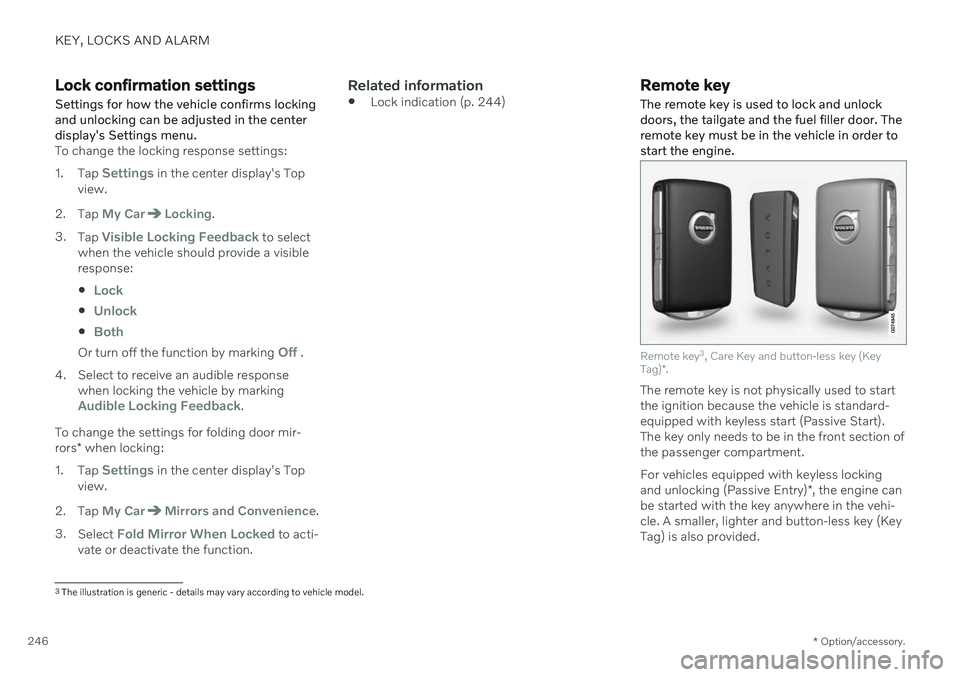
Remote key
The remote key is used to lock and unlock doors, the tailgate and the fuel filler door. Theremote key must be in the vehicle in order tostart the engine.
Remote key 3
, Care Key and button-less key (Key
Tag) *.
The remote key is not physically used to start the ignition because the vehicle is standard-equipped with keyless start (Passive Start).The key only needs to be in the front section ofthe passenger compartment. For vehicles equipped with keyless locking and unlocking (Passive Entry) *, the engine can
be started with the key anywhere in the vehi- cle. A smaller, lighter and button-less key (Key Tag) is also provided.
3 The illustration is generic - details may vary according to vehicle model.