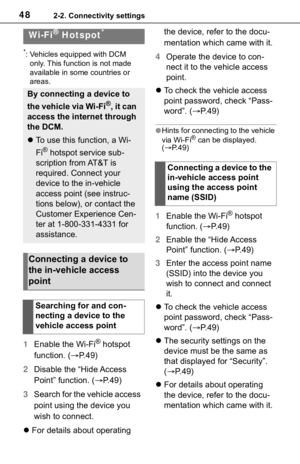
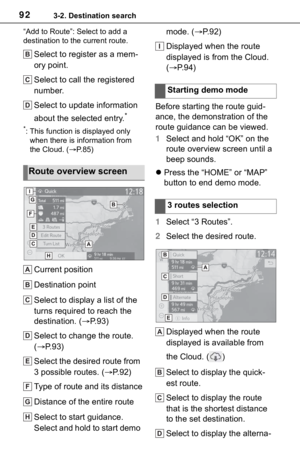
Page 257 of 312

2578-1. Phone operation (Hands-free system for cellular phones)
8
Phone
sender.
●Depending on the type of Blue-
tooth® phone used for receiving
messages, or its registration sta-
tus with the system, some infor-
mation may not be displayed.
●The pop-up screen is separately
available for incoming e-mail and
SMS/MMS messages under the
following conditions:
E-mail:
• “Incoming E-mail Display” is set to
“Full Screen”. (P.262)
• “E-mail Notification Pop-up” is set
to on. (P.262)
SMS/MMS:
• “Incoming SMS/MMS Display” is
set to “Full Screen”. (P.262)
• “SMS/MMS Notification Pop-up” is
set to on. (P.262)
●Depending on the type of Blue-
tooth® phone being connected, E-
Mail function cannot be used via
Bluetooth
®.
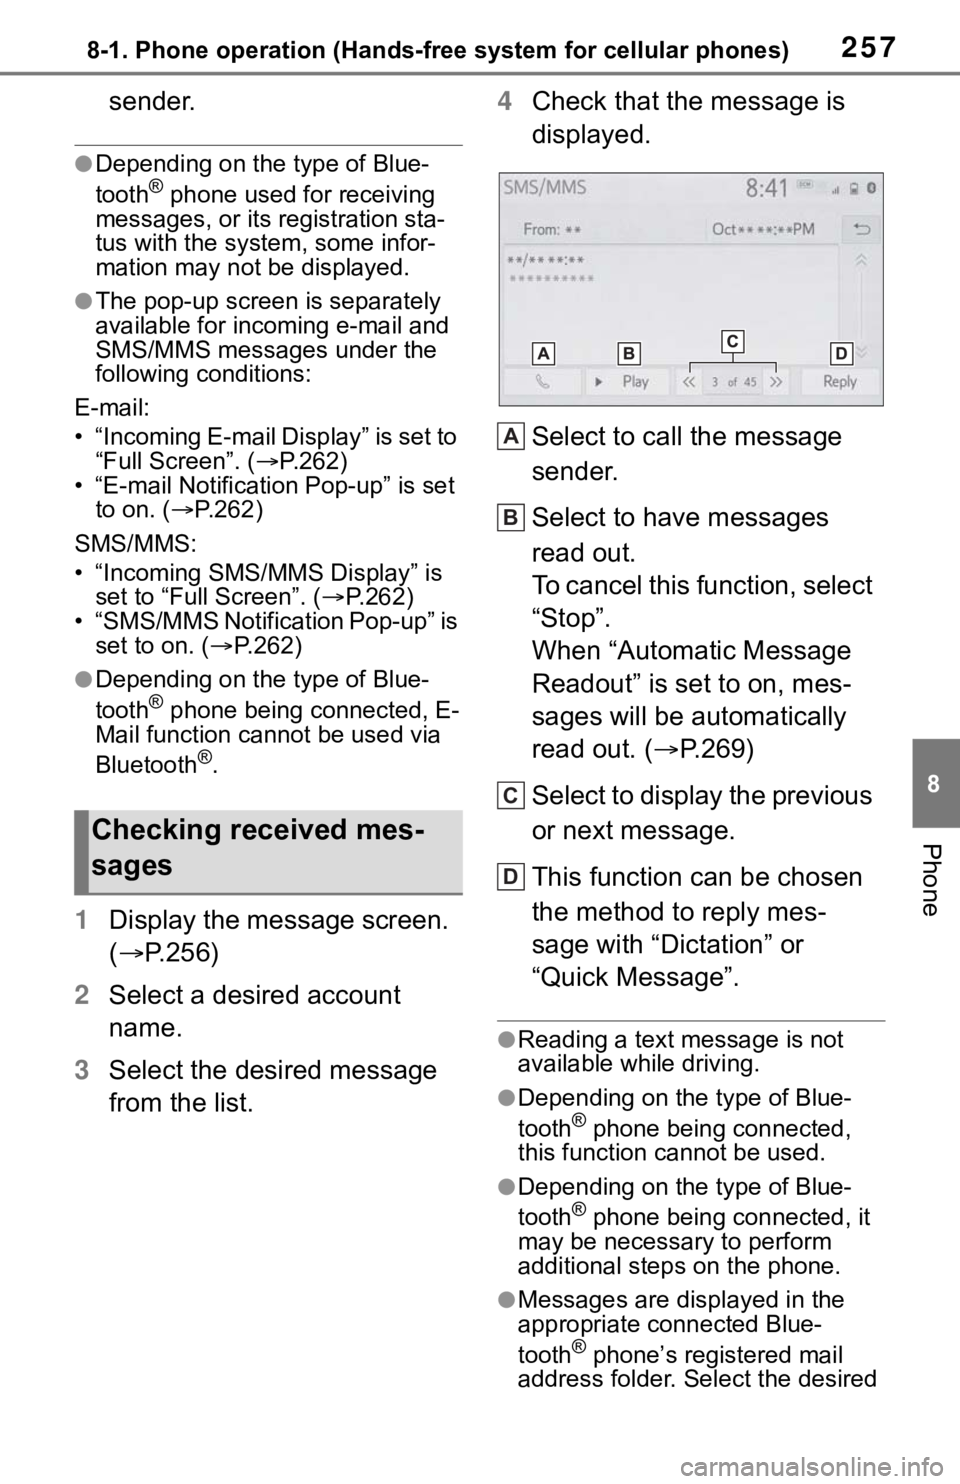
1Display the message screen.
(P.256)
2Select a desired account
name.
3Select the desired message
from the list.4Check that the message is
displayed.
Select to call the message
sender.
Select to have messages
read out.
To cancel this function, select
“Stop”.
When “Automatic Message
Readout” is set to on, mes-
sages will be automatically
read out. (P.269)
Select to display the previous
or next message.
This function can be chosen
the method to reply mes-
sage with “Dictation” or
“Quick Message”.
●Reading a text message is not
available while driving.
●Depending on the type of Blue-
tooth® phone being connected,
this function cannot be used.
●Depending on the type of Blue-
tooth® phone being connected, it
may be necessary to perform
additional steps on the phone.
●Messages are displayed in the
appropriate connected Blue-
tooth
® phone’s registered mail
address folder. Select the desired
Checking received mes-
sages
A
B
C
D
Page 258 of 312

2588-1. Phone operation (Hands-free system for cellular phones)
folder to be displayed.
●Only received messages on the
connected Bluetooth® phone can
be displayed.
●The text of the message is not dis-
played while driving.
●Turn the “POWER VOLUME”
knob, or use the volume control
switch on the steering wheel to
adjust the message read out vol-
ume.
●“Subject:” field is not shown on
SMS case.
●E-mail only: Select “Mark Unread”
or “Mark Read” to mark mail
unread or read on the message
screen.
This function is available when
“Update Message Read Status on
Phone” is set to on. (P.269)
*: If equipped
1Display the message screen.
(P.256)
2Select the desired message
from the list.
3Select “Reply”.
4Select “Dictation”.
5When the “Say Your Mes-
sage” screen is displayed,
speak message that you
want to send.
6Select “Send” to send mes-
sage.
“Cancel”: Select to cancel sending
the message.
“Retry”: Select to retry speaking
message that you want to send.
While the message is being
sent, a sending message
screen is displayed.
7Check that a confirmation
screen is displayed when the
operation is complete.
If an error message is dis-
played, follow the guidance
on the screen to try again.
15 messages have already
been stored.
1Display the message screen.
(P.256)
2Select the desired message
from the list.
3Select “Reply”.
4Select “Quick Message”.
5Select the desired message.
: Select to edit the message.
(P.259)
6Select “Send”.
“Cancel”: Select to cancel sending
the message.
While the message is being
sent, a sending message
screen is displayed.
7Check that a confirmation
screen is displayed when the
operation is complete.
If an error message is dis-
played, follow the guidance
on the screen to try again.
Replying to a message
(dictation reply)*
Replying to a message
(quick reply)
Page 259 of 312

2598-1. Phone operation (Hands-free system for cellular phones)
8
Phone
●Depending on the type of Blue-
tooth® phone, reply function is not
available.
■Editing quick reply mes-
sages
This operation cannot be per-
formed while driving.
1Select corresponding to
the desired message to edit.
2Select “OK” when editing is
completed.
●To reset the edited quick reply
messages, select “Default”.
●Quick message 1 (“I am driving
and will arrive in approximately
[##] minutes.”)
*:
This message cannot be edited
and will automatically fill in [##]
with the navigation calculated esti-
mated time of arrival on the con-
firm message screen.
If there are waypoints set, [##] to
the next waypoint will be shown.
If there is no route currently set in
the navigation system, quick mes-
sage 1 cannot be selected.
*: Premium Audio only
Calls can be made to an e-
mail/SMS/MMS message
sender’s phone number.
This operation can be per-
formed while driving.
■Calling from e-
mail/SMS/MMS message
display
1Display the message screen.
(P.256)
2Select the desired message.
3Select , or press the
switch on the steering wheel.
If there are 2 or more phone
numbers, select the desired
number.
4Check that the dialing screen
is displayed.
■Calling from a number
within a message
Calls can be made to a number
identified in a message’s text
area.
This operation cannot be per-
formed while driving.
1Display the message screen.
(P.256)
2Select the desired message.
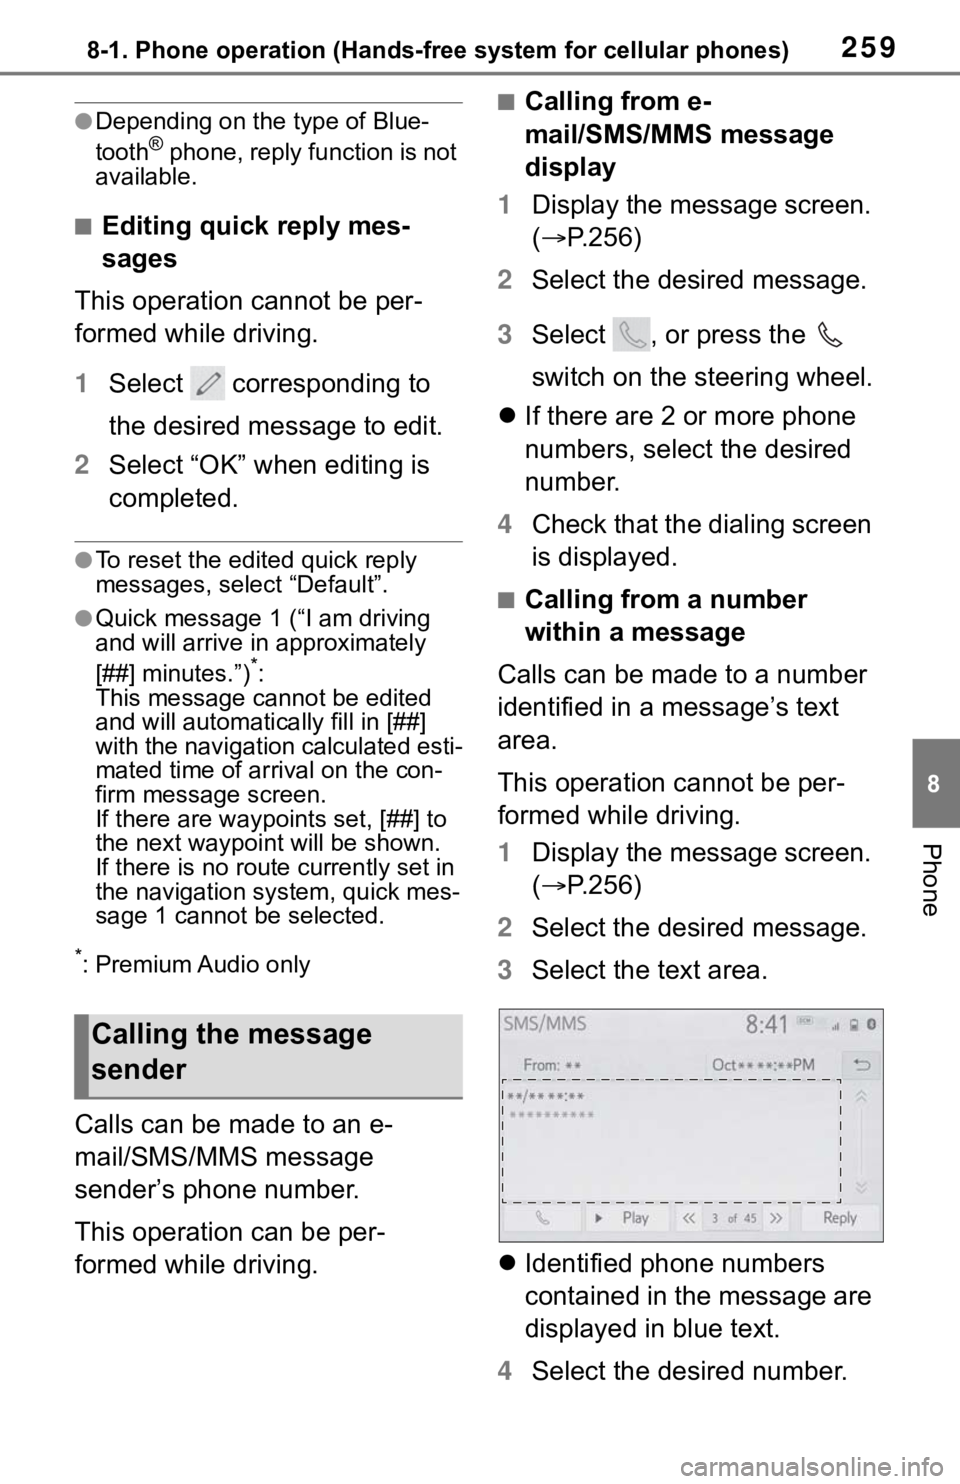
3Select the text area.
Identified phone numbers
contained in the message are
displayed in blue text.
4Select the desired number.
Calling the message
sender
Page 260 of 312
2608-1. Phone operation (Hands-free system for cellular phones)
5Check that the dialing screen
is displayed.
●A series of numbers may be rec-
ognized as a phone number. Addi-
tionally, some phone numbers
may not be recognized, such as
those for other countries.
■Calling from the incoming
message screen
For detail, refer to “Receiving a
message”. (P.256)
Page 261 of 312
2618-2. Setup
8
Phone
8-2.Setup
1Press the “MENU” button.
2Select “Setup”.
3Select “Phone”.
4Select the desired item to be
set.
Connecting a Bluetooth
®
device and editing the Blue-
tooth
® device information
(P.41, 43)
Sound settings
* (P.261)
Notifications/display set-
tings
* (P.262)
Contact/call history settings
* (P.263)
Message settings
* (P.269)
*: This operation cannot be per-
formed while driving.
The call and ringtone volume
can be adjusted. A ringtone can
be selected.
1Display the phone settings
screen. (P.261)
2Select “Sounds”.
3Select the desired item to be
set.
Select to set the desired ring-
tone.
Select “-” or “+” to adjust the
ringtone volume.
Select “-” or “+” to adjust the
default volume of the other
party’s voice.
Phone settings
Displaying the phone set-
tings screen
Phone settings screen
A
B
C
D
6 R X Q G V V H W W L Q J V V F U H H Q
E
A
B
C
Page 262 of 312

2628-2. Setup
Select to set the desired
incoming e-mail tone.
Select to set the desired
incoming SMS/MMS tone.
Select “-” or “+” to adjust the
incoming SMS/MMS tone
volume.
Select “-” or “+” to adjust the
incoming e-mail tone volume.
Select “-” or “+” to adjust the
message readout volume.
Select to reset all setup
items.
●Depending on the type of Blue-
tooth® phone, certain functions
may not be available.
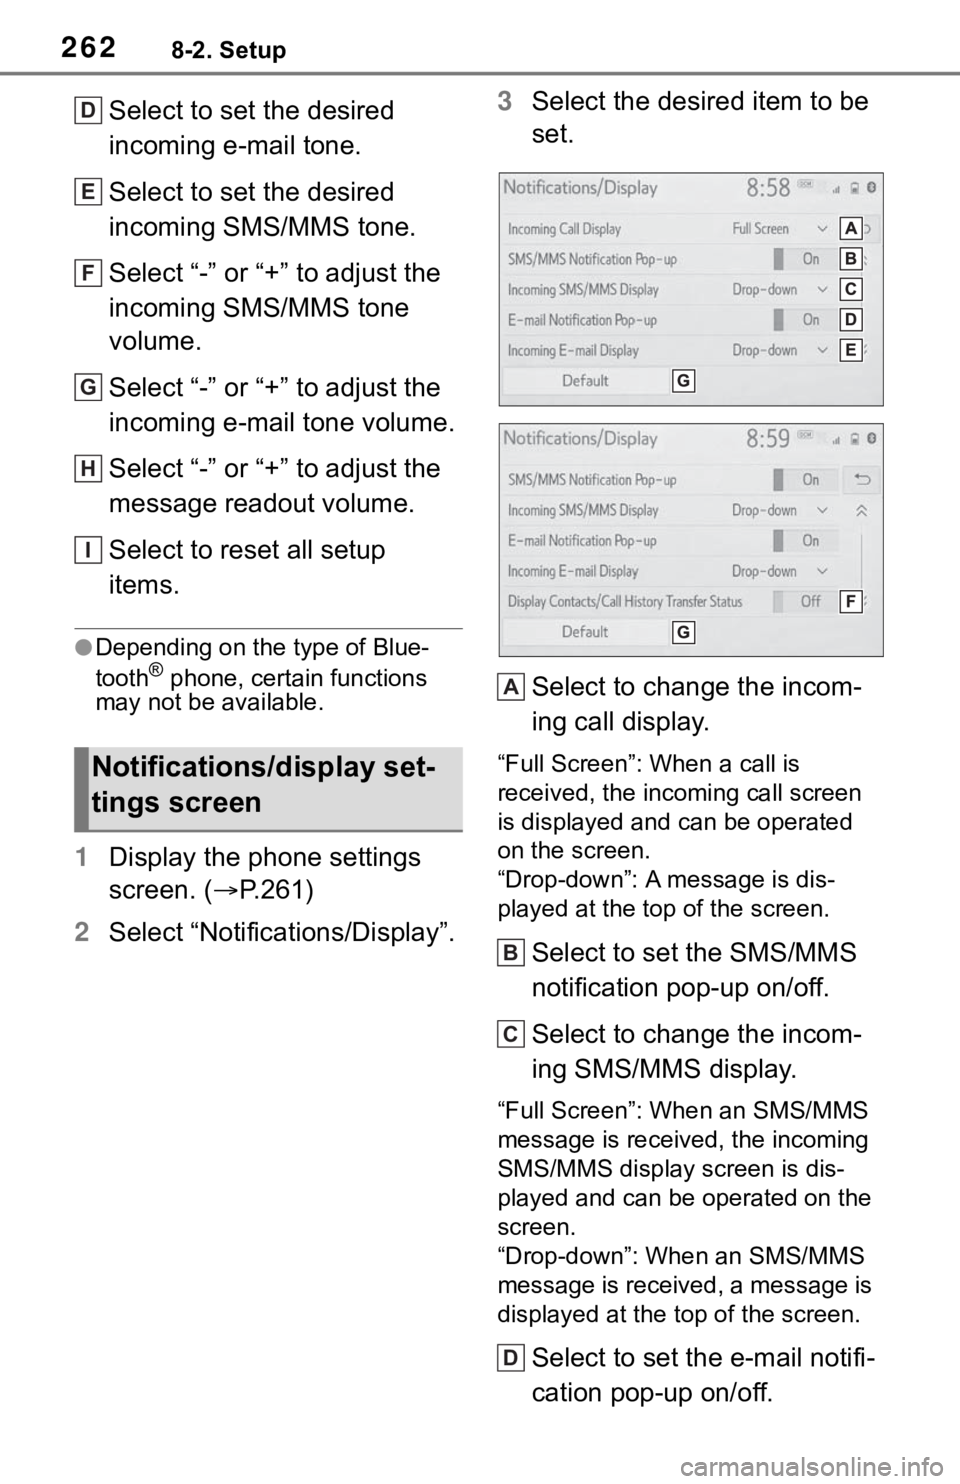
1Display the phone settings
screen. (P.261)
2Select “Notifications/Display”.3Select the desired item to be
set.
Select to change the incom-
ing call display.
“Full Screen”: When a call is
received, the incoming call screen
is displayed and can be operated
on the screen.
“Drop-down”: A message is dis-
played at the top of the screen.
Select to set the SMS/MMS
notification pop-up on/off.
Select to change the incom-
ing SMS/MMS display.
“Full Screen”: When an SMS/MMS
message is received, the incoming
SMS/MMS display screen is dis-
played and can be operated on the
screen.
“Drop-down”: When an SMS/MMS
message is received, a message is
displayed at the top of the screen.
Select to set the e-mail notifi-
cation pop-up on/off.
Notifications/display set-
tings screen
D
E
F
G
H
I
A
B
C
D
Page 263 of 312

2638-2. Setup
8
Phone
Select to change the incom-
ing e-mail display.
“Full Screen”: When an e-mail is
received, the incoming e-mail dis-
play screen is displayed and can be
operated on the screen.
“Drop-down”: When an e-mail is
received, a message is displayed at
the top of the screen.
Select to set display of the
contact/history transfer com-
pletion message on/off.
Select to reset all setup
items.
●Depending on the type of Blue-
tooth® phone, these functions
may not be available.
Contacts can be transferred
from a Bluetooth
® phone to this
system. Contacts and favorites
can be added, edited and
deleted. Also, the call history
can be deleted.
1Display the phone settings
screen. (P.261)
2Select “Contacts/Call His-
tory”.3Select the desired item to be
set.
For PBAP compatible Blue-
tooth
® phones: Select to
change the contact/history
transfer settings. (P.264)
Select to update contacts
from the connected device.
(P.265)
Select to sort contacts by the
first name or last name field.
Select to add contacts to the
favorites list. (P.267)
Select to delete contacts
from the favorites list.
(P.268)
Select to clear the call his-
tory.
*
Select to add new contacts to
the contact list.
* (P.266)
Contacts/Call history set-
tings screen
E
F
G
A
B
C
D
E
F
G
Page 264 of 312

2648-2. Setup
Select to edit contacts in the
contact list.
* (P.267)
Select to delete contacts
from the contact list.
*
(P.267)
Select to set the voice tags.
(P.268)
Select to reset all setup
items.
*: For PBAP compatible Bluetooth®
phones, this function is available
when “Automatic Transfer” is set
to off. (P.264)
●Depending on the type of Blue-
tooth® phone, certain functions
may not be available.
●Contact data is managed inde-
pendently for every registered
phone. When one phone is con-
nected, another phone’s regis-
tered data cannot be read.
The automatic contact/history
function is available for PBAP
compatible Bluetooth
® phones
only.
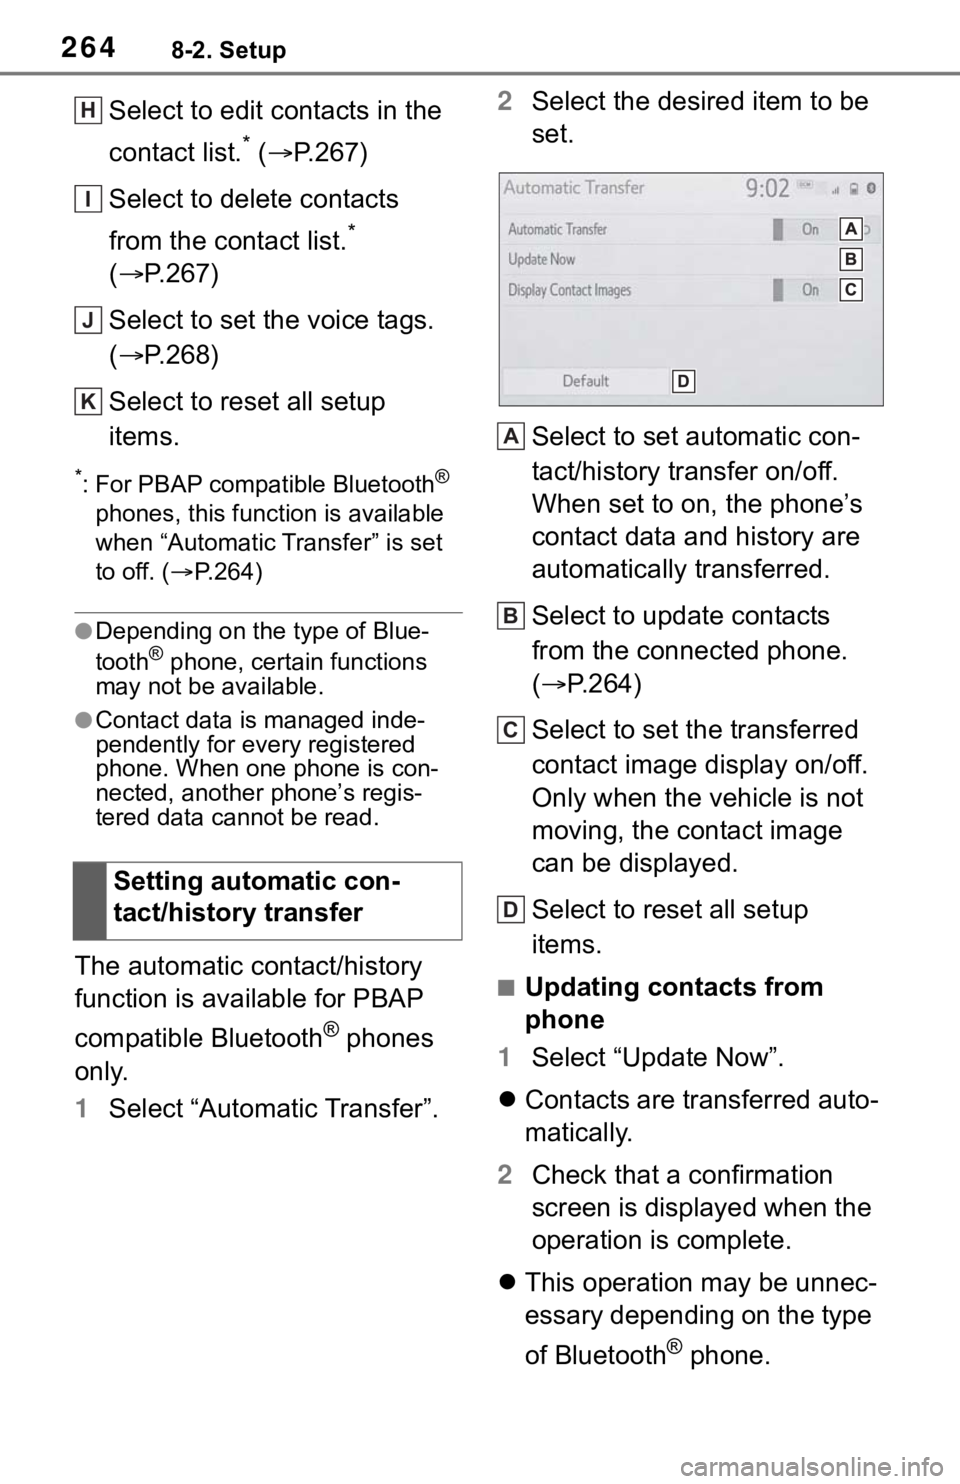
1Select “Automatic Transfer”.2Select the desired item to be
set.
Select to set automatic con-
tact/history transfer on/off.
When set to on, the phone’s
contact data and history are
automatically transferred.
Select to update contacts
from the connected phone.
(P.264)
Select to set the transferred
contact image display on/off.
Only when the vehicle is not
moving, the contact image
can be displayed.
Select to reset all setup
items.
■Updating contacts from
phone
1Select “Update Now”.
Contacts are transferred auto-
matically.
2Check that a confirmation
screen is displayed when the
operation is complete.
This operation may be unnec-
essary depending on the type
of Bluetooth
® phone. Setting automatic con-
tact/history transfer
H
I
J
K
A
B
C
D