2021 FORD F-150 center console
[x] Cancel search: center consolePage 100 of 796

Programming Backup Location
1. Place the first programmed remote in
the backup slot inside the cup holder
or center console with your foot off the
brake pedal, press and release the push
button ignition switch.
2. Wait five seconds and then press and release the push button ignition switch
again.
3. Remove the remote control.
4. Within 10 seconds, place a second programmed remote control in the
backup slot. Press and release the
push button ignition switch.
5. Wait five seconds and then press and release the push button ignition switch
again. Keep the ignition on for at least
three seconds, but no more than 10
seconds.
6. Remove the remote control. 7. Place the unprogrammed remote
control in the backup slot and press
and release the push button ignition
switch.
Programming is now complete. With your
foot on the brake pedal, press the push
button ignition switch to verify the remote
control functions operate and your vehicle
starts with the new remote control.
If programming was not successful, wait
10 seconds and repeat Steps 1 through 7.
If you are still unsuccessful, take your
vehicle to an authorized dealer.
PROGRAMMING THE REMOTE
CONTROL - VEHICLES WITH:
FLIP KEY
General Information
You can program your own remote control
to your vehicle. This procedure programs
both the engine immobilizer keycode and
the remote entry portion of the remote
control to your vehicle.
Only use remote controls with an
integrated mechanical key.
You must have two previously
programmed coded remote controls and
the new un–programmed remote readily
accessible. Contact an authorized dealer
to have the spare remote control
programmed if the two previously
programmed coded remote controls are
not available.
Read and understand the entire procedure
before you begin.
Steps for Programming Your Spare
Remote Control
1. Insert the first previously programmed
coded key into the ignition.
96
F-150 (TFD) Canada/United States of America, enUSA, Edition date: 202104, Second-Printing Keys and Remote ControlsE312216 E269950
Page 103 of 796

Emergency Assistance
If you set emergency assistance to always
on, you cannot switch it off with a MyKey.
Do Not Disturb
If you set do not disturb to always on, you
cannot switch it off with a MyKey.
Note:
If a phone is connected using Apple
CarPlay or Android Auto while driving with
a MyKey, the driver can receive phone calls
and text messages even if the do not disturb
restriction is on, and if the vehicle comes
with satellite radio, there is no restriction on
the adult content.
Traction and Stability Control
If you set traction control or stability
control to always on, you cannot switch it
off with a MyKey.
CREATING A MYKEY -
VEHICLES WITH: PUSH
BUTTON START
Vehicles with a center console shifter: 1. Remove the mat from the center
console cup holder.
2. Remove the key blade from the transmitter. 3.
Place the remote control in the backup
slot with the buttons facing toward the
front of the vehicle.
4. Switch the ignition on using an admin key.
5. Press Settings on the touchscreen.
6. Press
Vehicle Settings.
7. Press
MyKey.
8. Press
Create MyKey.
9. Press
Yes.
Note: After you confirm the creation of a
MyKey, we recommend that you label this
key.
Vehicles with a column shifter. 1. Raise the front center seat storage lid.
2.
Place the remote control in the backup
slot with the buttons facing toward the
front of the vehicle.
3. Switch the ignition on using an admin key.
4. Press
Settings on the touchscreen.
5. Press
Vehicle Settings.
6. Press
MyKey.
7. Press
Create MyKey.
8. Press
Yes.
Note: After you confirm the creation of a
MyKey, we recommend that you label this
key.
99
F-150 (TFD) Canada/United States of America, enUSA, Edition date: 202104, Second-Printing MyKey
™
(If Equipped)E312216 E269950
Page 209 of 796
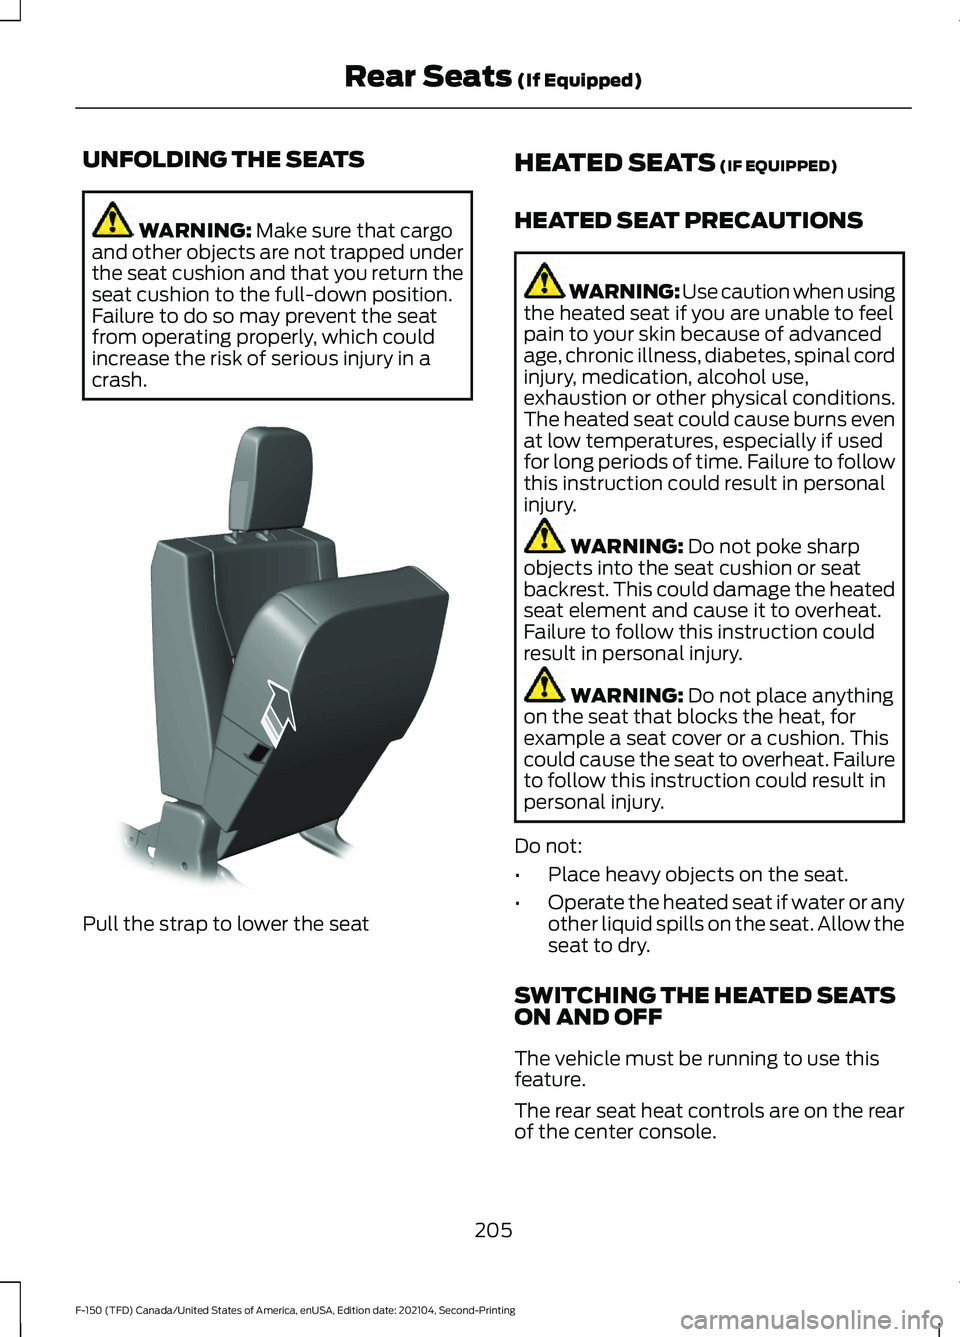
UNFOLDING THE SEATS
WARNING: Make sure that cargo
and other objects are not trapped under
the seat cushion and that you return the
seat cushion to the full-down position.
Failure to do so may prevent the seat
from operating properly, which could
increase the risk of serious injury in a
crash. Pull the strap to lower the seat HEATED SEATS
(IF EQUIPPED)
HEATED SEAT PRECAUTIONS WARNING: Use caution when using
the heated seat if you are unable to feel
pain to your skin because of advanced
age, chronic illness, diabetes, spinal cord
injury, medication, alcohol use,
exhaustion or other physical conditions.
The heated seat could cause burns even
at low temperatures, especially if used
for long periods of time. Failure to follow
this instruction could result in personal
injury. WARNING:
Do not poke sharp
objects into the seat cushion or seat
backrest. This could damage the heated
seat element and cause it to overheat.
Failure to follow this instruction could
result in personal injury. WARNING:
Do not place anything
on the seat that blocks the heat, for
example a seat cover or a cushion. This
could cause the seat to overheat. Failure
to follow this instruction could result in
personal injury.
Do not:
• Place heavy objects on the seat.
• Operate the heated seat if water or any
other liquid spills on the seat. Allow the
seat to dry.
SWITCHING THE HEATED SEATS
ON AND OFF
The vehicle must be running to use this
feature.
The rear seat heat controls are on the rear
of the center console.
205
F-150 (TFD) Canada/United States of America, enUSA, Edition date: 202104, Second-Printing Rear Seats
(If Equipped)E308139
Page 218 of 796
LOCATING THE USB PORTS
Data Transfer USB Ports
The USB ports could be in the following
locations:
•
On the lower instrument panel below
the climate control.
• Inside the center console.
Note: These USB ports can also charge
devices.
Note: Not all USB ports in your vehicle have
data transfer capabilities.
Note: We recommend using only USB-IF
certified cables and adapters. Non-certified
cables and adapters may not work.
Charge Only USB Ports The USB ports could be in the following
locations:
•
On the lower instrument panel.
• On the upper instrument panel.
• Inside the media bin.
• Inside the center console.
• On the rear of the center console.
• In the cargo area.
LOCATING THE USB PORTS -
RAPTOR
Data Transfer USB Ports The USB Ports could be in the following
locations: •
Inside the media bin.
• Inside the center console.
Note: These USB ports can also charge
devices.
Note: Not all USB ports in your vehicle have
data transfer capabilities.
Note: We recommend using only USB-IF
certified cables and adapters. Non-certified
cables and adapters may not work.
Charge Only USB Ports The USB ports could be in the following
locations:
•
On the lower instrument panel.
• On the upper instrument panel.
• Inside the media bin.
• Inside the center console.
• On the rear of the center console.
• In the cargo area.
PLAYING MEDIA USING THE
USB PORT WARNING: Driving while distracted
can result in loss of vehicle control, crash
and injury. We strongly recommend that
you use extreme caution when using any
device that may take your focus off the
road. Your primary responsibility is the
safe operation of your vehicle. We
recommend against the use of any
hand-held device while driving and
encourage the use of voice-operated
systems when possible. Make sure you
are aware of all applicable local laws
that may affect the use of electronic
devices while driving.
214
F-150 (TFD) Canada/United States of America, enUSA, Edition date: 202104, Second-Printing USB Ports
Page 229 of 796

WHAT IS THE POWER OUTLET
The power outlet can power devices that
require up to the rating on the outlet cover.
Note:
The total power delivered is divided
if more than one outlet is used.
POWER OUTLET
PRECAUTIONS WARNING: Do not use an
extension cord or connect multiple
devices to the power outlet. Doing so
could result in overloading the power
outlet. Failure to follow this instruction
could result in fire, personal injury or
property damage. WARNING:
Do not keep electrical
devices plugged into the power outlet
whenever the device is not in use. The
outlet provides power when the vehicle
is on. Failure to follow this instruction
could result in personal injury.
POWER OUTLET LIMITATIONS
You should not use the power outlet for
these types of electric devices:
• Cathode ray tube type televisions.
• Motor loads, such as vacuum cleaners,
electric saws or other electric power
tools and compressor-driven
refrigerators.
• Measuring devices which process
precise data, such as medical
equipment or measuring equipment.
• Other appliances requiring an
extremely stable power supply, such
as microcomputer-controlled electric
blankets or touch sensor lamps. Note:
Some devices may exceed the power
rating on the device label when they are
initially plugged-in and may require you to
press the device power button more than
one time in order to allow a soft start. After
multiple attempts, if the device remains off,
please consider that your device may require
more than the available power.
Note: The power outlet provides full
available power when the vehicle is in park
(P). Power availability may be reduced
when the vehicle is in drive (D). If more than
one outlet is available in the vehicle, power
is divided between the outlets that are in
use at the same time.
LOCATING THE POWER
OUTLETS
The power outlet may be located on the
instrument panel, the rear of the center
console or the in the bed.
Instrument Panel 225
F-150 (TFD) Canada/United States of America, enUSA, Edition date: 202104, Second-Printing Power Outlet - Vehicles With: 120V Power OutletE337927
Page 230 of 796
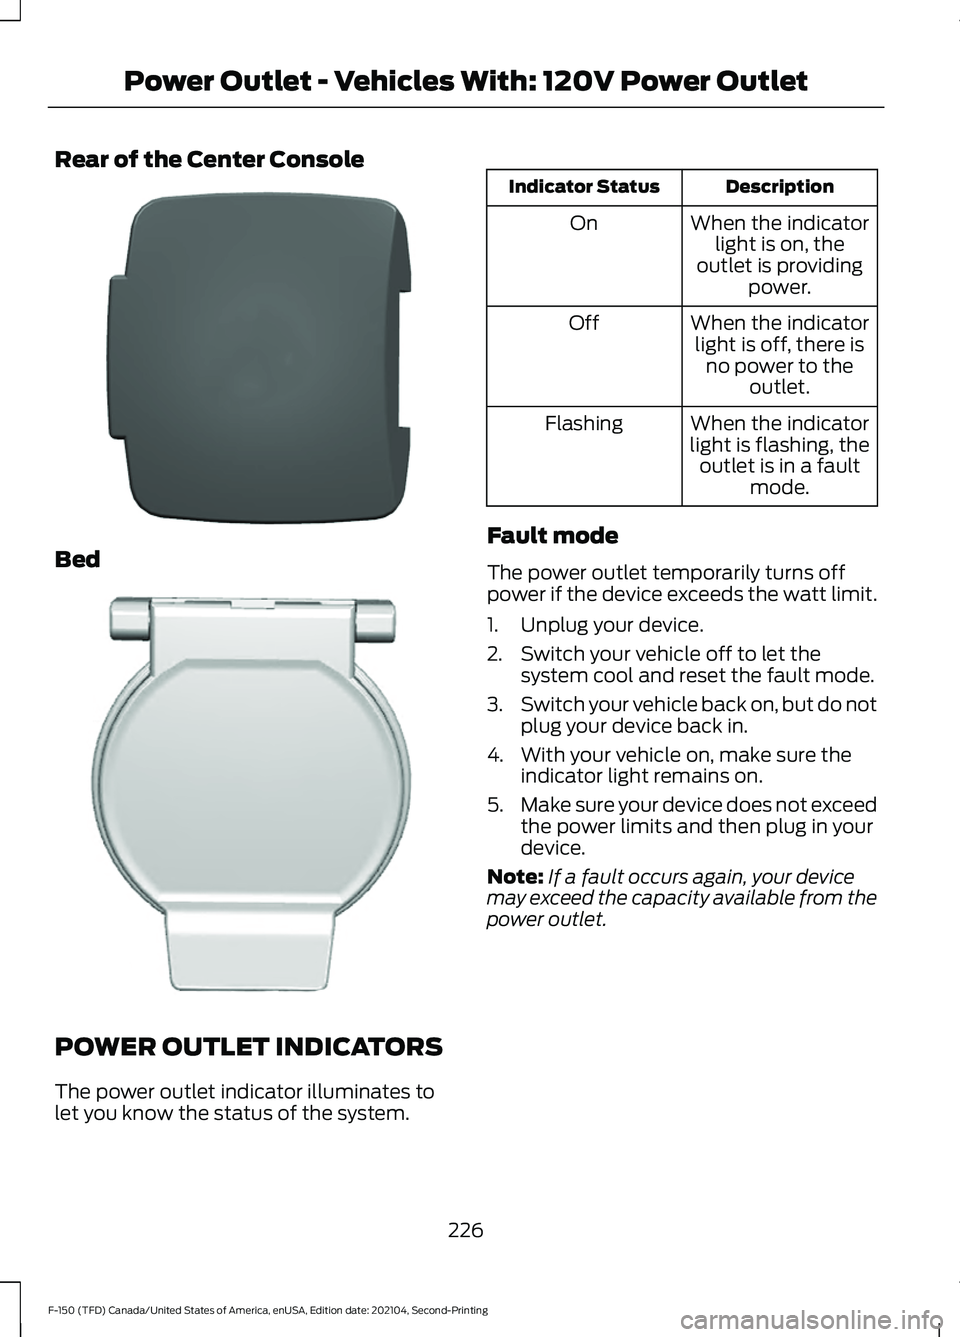
Rear of the Center Console
Bed
POWER OUTLET INDICATORS
The power outlet indicator illuminates to
let you know the status of the system. Description
Indicator Status
When the indicatorlight is on, the
outlet is providing power.
On
When the indicatorlight is off, there is no power to the outlet.
Off
When the indicator
light is flashing, the outlet is in a fault mode.
Flashing
Fault mode
The power outlet temporarily turns off
power if the device exceeds the watt limit.
1. Unplug your device.
2. Switch your vehicle off to let the system cool and reset the fault mode.
3. Switch your vehicle back on, but do not
plug your device back in.
4. With your vehicle on, make sure the indicator light remains on.
5. Make sure your device does not exceed
the power limits and then plug in your
device.
Note: If a fault occurs again, your device
may exceed the capacity available from the
power outlet.
226
F-150 (TFD) Canada/United States of America, enUSA, Edition date: 202104, Second-Printing Power Outlet - Vehicles With: 120V Power OutletE337926 E338700
Page 231 of 796
WHAT IS THE POWER OUTLET
The power outlet can power devices using
a 12 V outlet adapter.
POWER OUTLET
PRECAUTIONS WARNING:
Do not plug optional
electrical accessories into the cigar
lighter socket. Incorrect use of the cigar
lighter can cause damage not covered
by the vehicle warranty, and can result
in fire or serious injury.
When you switch the vehicle on, you can
use the socket to power
12 V appliances
with a maximum current rating of 20 A. Do
not use the power point over the vehicle
capacity of
12 V DC 240 W or a fuse could
blow. Do not plug in any device that
supplies power to the vehicle through the
power points. This could result in damage
to vehicle systems. Do not hang any
accessory from the accessory plug. Always
keep the power point caps closed when
not in use. Do not insert objects other than
an accessory plug into the power point.
To prevent the battery from running out of
charge:
• Do not use the power point longer than
necessary when the vehicle is off.
• Do not leave devices plugged in
overnight or when you park your vehicle
for extended periods. LOCATING THE POWER
OUTLETS
Power outlets are in the following
locations:
•
On the instrument panel.
• Inside the center console.
• On the rear of the center console.
227
F-150 (TFD) Canada/United States of America, enUSA, Edition date: 202104, Second-Printing Power Outlet - Vehicles With: 12V Power Outlet
Page 232 of 796
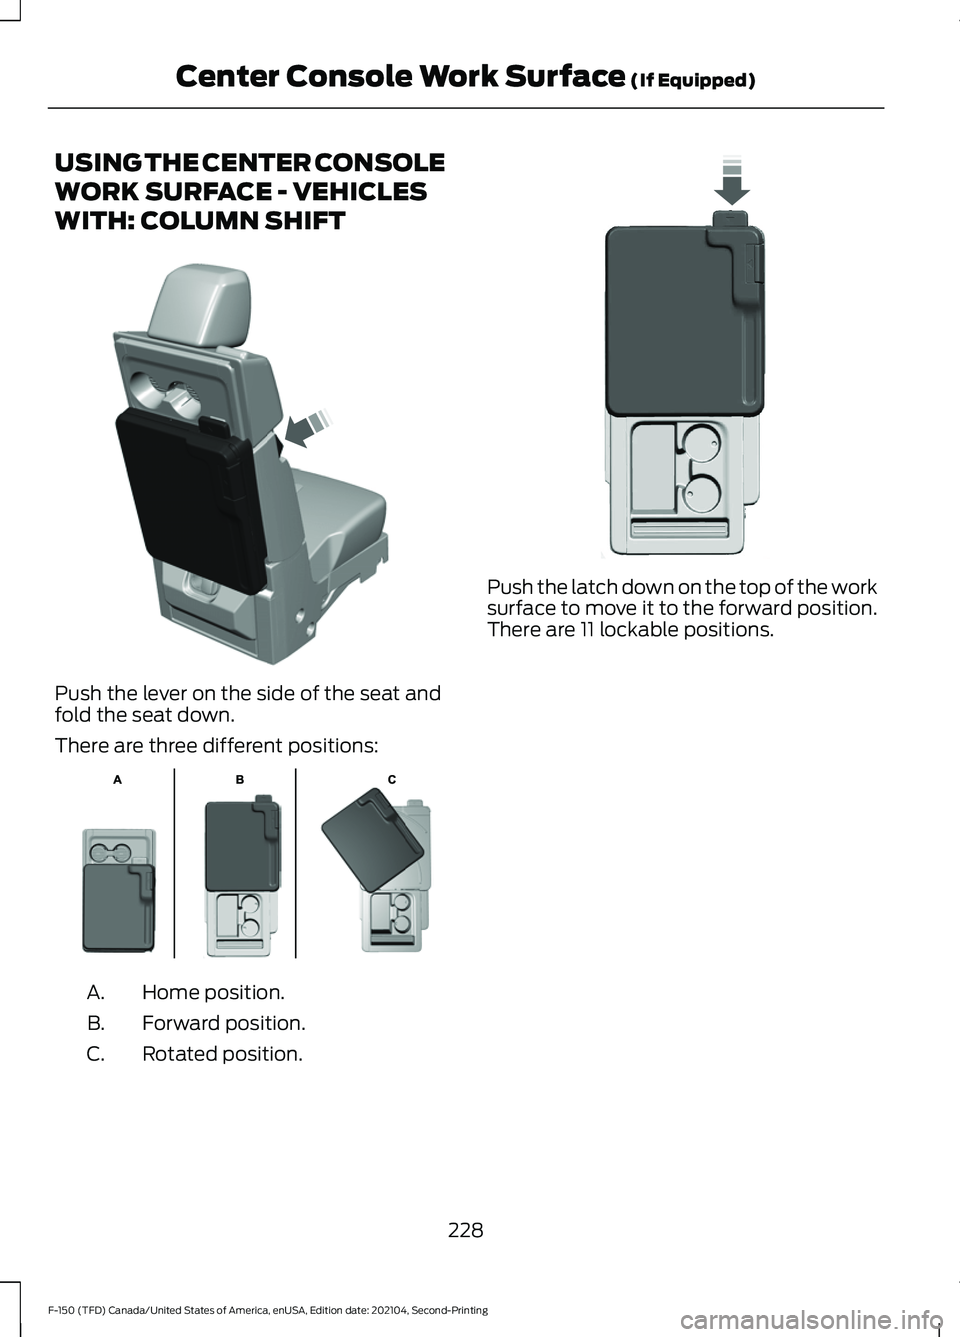
USING THE CENTER CONSOLE
WORK SURFACE - VEHICLES
WITH: COLUMN SHIFT
Push the lever on the side of the seat and
fold the seat down.
There are three different positions:
Home position.
A.
Forward position.
B.
Rotated position.
C. Push the latch down on the top of the work
surface to move it to the forward position.
There are 11 lockable positions.
228
F-150 (TFD) Canada/United States of America, enUSA, Edition date: 202104, Second-Printing Center Console Work Surface (If Equipped)E313248 E312215 E327628