2021 ALFA ROMEO STELVIO brake light
[x] Cancel search: brake lightPage 78 of 280
GETTING TO KNOW YOUR INSTRUMENT PANEL
76
required. However, the conventional brake
system will continue to operate normally if the
brake indicator light is not on.
If the ABS light is on, the brake system should
be serviced as soon as possible to restore the
benefits of Anti-Lock Brakes. If the ABS light
does not turn on when the ignition is placed in
the ON/RUN position, have the light inspected
by an authorized dealer.
Electronic Stability Control (ESC) Indicator
Light — If Equipped
When the ignition is cycled to ON, the
indicator light illuminates, but
should turn off as soon as the engine
is started.
ESC System Intervention : Intervention by the
system is indicated by the flashing of the indi -
cator light: it indicates that the vehicle is in crit -
ical stability and grip conditions.
ESC System Failure : If the indicator light does
not turn off, or if it stays on with the engine
running, a failure was found in the ESC
system.
Hill Start Assist System Failure : The illumina-
tion of the indicator light indicates a Hill Start
Assist system failure.
In these cases, contact an authorized dealer
as soon as possible.
Electronic Stability Control (ESC) OFF
Indicator Light — If Equipped
When the ignition is cycled to ON, the
indicator light illuminates, but
should turn off as soon as the engine
is started.
The indicator light illuminates to indicate that
some active safety systems have been
partially or totally deactivated
Ú
page 145.
When the active safety systems are reacti -
vated, the indicator light turns off.
Tire Pressure Low Warning Light
The indicator light will illuminate to
indicate that the tire pressure is
lower than the recommended value
and/or that slow pressure loss is
occurring. In these cases, optimal tire duration
and fuel consumption may not be guaranteed.
In any situation in which the message on the
display is “See Manual”
Ú
page 161.
Tire Pressure Monitoring System (TPMS)
Warning Light
The warning light switches on and a
message is displayed to indicate
that the tire pressure is lower than
the recommended value and/or that
slow pressure loss is occurring. In these cases,
optimal tire duration and fuel consumption
may not be guaranteed. Should one or more tires be in the condition
mentioned above, the display will show the
indications corresponding to each tire.
Each tire, including the spare (if provided),
should be checked monthly when cold and
inflated to the inflation pressure recom
-
mended by the vehicle manufacturer on the
vehicle placard or tire inflation pressure label.
If your vehicle has tires of a different size than
the size indicated on the vehicle placard or tire
inflation pressure label, you should determine
the proper tire inflation pressure for those
tires.
As an added safety feature, your vehicle has
been equipped with a TPMS that illuminates a
low tire pressure telltale when one or more of
your tires is significantly underinflated. Accord -
ingly, when the low tire pressure telltale illumi -
nates, you should stop and check your tires as
soon as possible, and inflate them to the
proper pressure. Driving on a significantly
underinflated tire causes the tire to overheat
and can lead to tire failure. Under inflation
CAUTION!
Do not continue driving with one or more
flat tires as handling may be compromised.
Stop the vehicle, avoiding sharp braking
and steering. If a tire puncture occurs,
repair immediately using the dedicated tire
repair kit and contact an authorized dealer
as soon as possible.
21_GU_OM_EN_USC_t.book Page 76
Page 83 of 280
81
Engine Oil Level Sensor Failure
The telltale will illuminate in the
event of engine oil level sensor
failure.
Contact an authorized dealer as soon as
possible.
Forward Collision Warning (FCW) System
Failure — If Equipped
The telltale will illuminate in the case
of failure of the Forward Collision
Warning system.
Contact an authorized dealer as soon as
possible.
Stop/Start System Failure
This telltale will illuminate to report a
Stop/Start system failure.
Contact an authorized dealer as soon as
possible to have the failure eliminated.
Rain Sensor Failure
The telltale will illuminate in the case
of failure of the automatic wind -
shield wiper.
Contact an authorized dealer as soon as
possible.
Dusk Sensor Failure
The telltale will illuminate in the case
of failure of the automatic low beam
alignment. Contact an authorized dealer as soon as
possible.
Blind Spot Monitoring System Failure — If
Equipped
The telltale will illuminate in the
event of a Blind Spot Monitoring
system failure.
Contact an authorized dealer as soon as
possible.
Fuel Level Sensor Failure
The telltale will illuminate in the
event of fuel level sensor failure.
Contact an authorized dealer as soon as
possible.
Exterior Lights Failure
The telltale will illuminate to indicate
a failure on the following lights:
Daytime Running Lights (DRLs) /
parking lights / trailer turn signal
indicators (if present) / trailer lights (if
present) / side lights / turn signal indicators /
rear fog light / reversing light / brake lights /
license plate lights.
The failure may be caused by a blown bulb, a
blown protection fuse, or an interruption of the
electrical connection.
Replace the bulb or the relevant fuse. Contact
an authorized dealer.
Keyless System Failure
The telltale will illuminate in the
event of keyless system failure.
Contact an authorized dealer as soon as
possible.
Fuel Cut-Off System Failure
The telltale will illuminate in the
event of fuel cut-off system failure.
Contact an authorized dealer as soon as
possible.
Lane Departure Warning (LDW) System
Failure — If Equipped
The telltale will illuminate in the
event of a fault in the Lane Depar -
ture Warning system.
Contact an authorized dealer as soon as
possible.
Automatic High Beam Headlights Failure —
If Equipped
The telltale will illuminate to report a
failure of the automatic high beam
headlights.
Contact an authorized dealer as soon as
possible to have the failure eliminated.
21_GU_OM_EN_USC_t.book Page 81
Page 84 of 280

GETTING TO KNOW YOUR INSTRUMENT PANEL
82
Automatic Transmission Fluid Overheating
The telltale will illuminate in the case
of transmission overheating, after a
particularly demanding use. In this
case an engine performance limita-
tion is carried out.
Wait for the telltale to turn off with the engine
off or idling.
Audio System Failure
The telltale will illuminate to report a
failure of the audio system.
Contact an authorized dealer as soon as
possible to have the failure eliminated.
Speed Limiter System Failure
While driving, the telltale will illumi -
nate to signal a Speed Limiter
system failure.
Contact an authorized dealer as soon as
possible to have the failure eliminated.
Loose Fuel Filler Cap
Lights up if the fuel tank cap is open
or not properly closed.
Tighten the cap properly.
Electric Park Brake Failure
The telltale will illuminate and a
message will display to signal a
failure in the electric park brake
system.
This failure may partially or completely block
the vehicle because the park brake could
remain activated even if automatically or
manually disengaged using the relevant
controls. In these circumstances, you can
disengage the park brake following the emer -
gency disengagement procedure
Ú
page 90.
If you are still able to drive the vehicle (park
brake is not engaged), drive to the nearest
authorized dealer and remember, when
executing any maneuvers/commands, that
the electric park brake is not operational.
Low Coolant Level — If Equipped
This telltale will illuminate to indicate
that the vehicle coolant level is low.
Service Adaptive Cruise Control (ACC)
System
This light will illuminate when the
ACC is not operating and needs
service.
Contact an authorized dealer to have the
system checked.
Wear On Brake Pads
This light will illuminate when the
brake pads have reached their wear
limit.
Contact an authorized dealer as soon as
possible.
NOTE:
Always use genuine parts or similar because
the Integrated Brake System (IBS) system
could detect anomalies.
Dynamic Drive Control System Failure
The telltale will illuminate to signal a
failure in the dynamic drive control
system.
Windshield Wiper Failure
Signals a windshield wiper failure.
Contact an authorized dealer.
WARNING!
If a failure is present with sharp braking,
the rear wheels may lock and the vehicle
may swerve.
21_GU_OM_EN_USC_t.book Page 82
Page 85 of 280
83
Generic Indication
Signals information and failures.
The accompanying messages
describe the failure.
All Wheel Drive Failure
This telltale will illuminate along with
an accompanying message when
the AWD dynamic control system is
temporarily deactivated to prevent
damage. The traction system will work in RWD
mode in this instance.
Contact an authorized dealer as soon as
possible to have the failure eliminated.
Temporary All Wheel Drive Failure — If
Equipped
This telltale will illuminate to indicate
that the AWD dynamic control
system is temporarily deactivated to
prevent damage. The traction
system will work in RWD mode in this instance.
In the event that this telltale illuminates,
reduce the load to allow the system to cool
down. The AWD system will resume normal
operation when the symbol disappears from
the display.
ABS Activation
This telltale will illuminate to indicate
that the ABS system has activated.
Adaptive Front Lighting System Failure
The telltale will illuminate to indicate
the automatic directional light
system failure.
Go to an authorized dealer to have the system
checked.
Soft Suspension Calibration Insertion — If
Equipped
The telltale will illuminate when the
most comfortable suspension
setting is activated.
Shock Absorbers Failure
While driving, if the telltale illumi -
nates, it signals a failure in the
suspension system.
Contact an authorized dealer to have the
system checked.
Windshield Washer Liquid Level
The telltale will illuminate to indicate
that the level of the windshield and
headlight washing fluid (if any) is
low.
Always use liquid with the features indicated in
the “Fluids And Lubricants”
Ú
page 217.
WEAR ON Carbon Ceramic Material (CCM)
Brake Discs — If Equipped
This light will illuminate when the
carbon ceramic material brake discs
have reached their wear limit.
Contact an authorized dealer as soon as
possible.
Driver Attention Assist (DAA) System Failure
The symbol comes on in the event of
a DAA system failure.
Contact an Alfa Romeo Dealership as soon as
possible to have the failure eliminated.
Highway Assist System (HAS)/Traffic Jam
Assist (TJA) System Failure
The symbol lights up in case of HAS
or TJA system failure.
Contact an Alfa Romeo Dealership as soon as
possible to have the failure eliminated.
WARNING!
It is recommended to use only OEM brake
pads to ensure the original performance of
the braking system.
21_GU_OM_EN_USC_t.book Page 83
Page 92 of 280
STARTING AND OPERATING
90
For the first 1,500 miles (2,414 km):
Do not participate in track events, sport
driving schools, or similar activities during
the first 1,500 miles (2,414 km).
NOTE:
Monitor engine oil with every refueling and add
if necessary. Oil and fuel consumption may be
higher through the first oil change interval.
ELECTRIC PARK BRAKE (EPB)
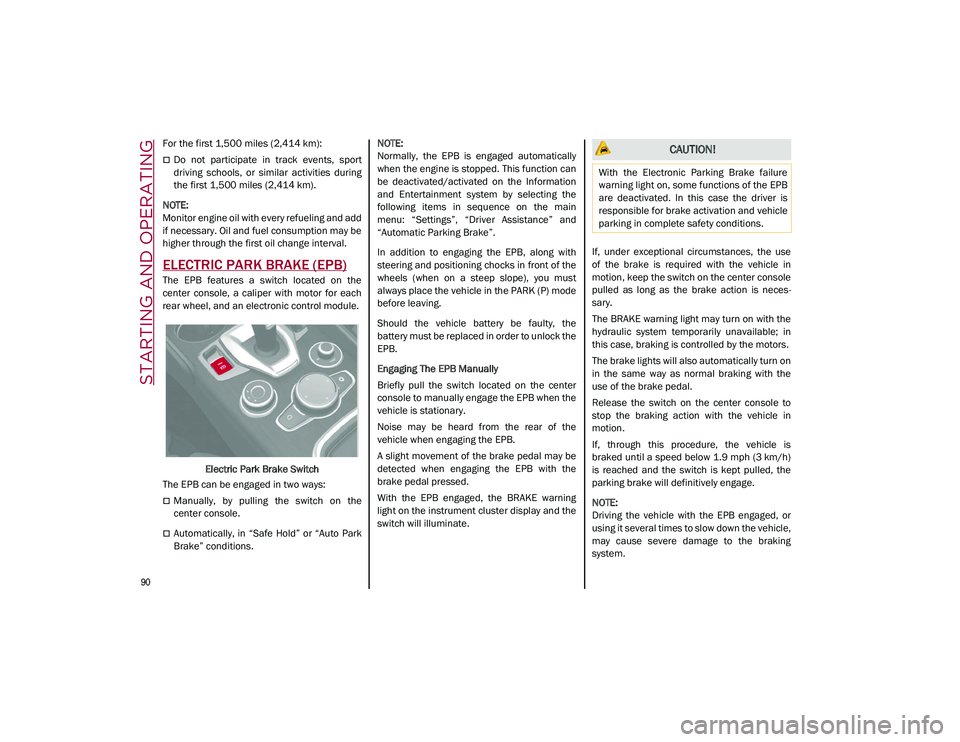
The EPB features a switch located on the
center console, a caliper with motor for each
rear wheel, and an electronic control module.
Electric Park Brake Switch
The EPB can be engaged in two ways:
Manually, by pulling the switch on the
center console.
Automatically, in “Safe Hold” or “Auto Park
Brake” conditions.
NOTE:
Normally, the EPB is engaged automatically
when the engine is stopped. This function can
be deactivated/activated on the Information
and Entertainment system by selecting the
following items in sequence on the main
menu: “Settings”, “Driver Assistance” and
“Automatic Parking Brake”.
In addition to engaging the EPB, along with
steering and positioning chocks in front of the
wheels (when on a steep slope), you must
always place the vehicle in the PARK (P) mode
before leaving.
Should the vehicle battery be faulty, the
battery must be replaced in order to unlock the
EPB.
Engaging The EPB Manually
Briefly pull the switch located on the center
console to manually engage the EPB when the
vehicle is stationary.
Noise may be heard from the rear of the
vehicle when engaging the EPB.
A slight movement of the brake pedal may be
detected when engaging the EPB with the
brake pedal pressed.
With the EPB engaged, the BRAKE warning
light on the instrument cluster display and the
switch will illuminate.
If, under exceptional circumstances, the use
of the brake is required with the vehicle in
motion, keep the switch on the center console
pulled as long as the brake action is neces
-
sary.
The BRAKE warning light may turn on with the
hydraulic system temporarily unavailable; in
this case, braking is controlled by the motors.
The brake lights will also automatically turn on
in the same way as normal braking with the
use of the brake pedal.
Release the switch on the center console to
stop the braking action with the vehicle in
motion.
If, through this procedure, the vehicle is
braked until a speed below 1.9 mph (3 km/h)
is reached and the switch is kept pulled, the
parking brake will definitively engage.
NOTE:
Driving the vehicle with the EPB engaged, or
using it several times to slow down the vehicle,
may cause severe damage to the braking
system.
CAUTION!
With the Electronic Parking Brake failure
warning light on, some functions of the EPB
are deactivated. In this case the driver is
responsible for brake activation and vehicle
parking in complete safety conditions.
21_GU_OM_EN_USC_t.book Page 90
Page 93 of 280
91
(Continued)
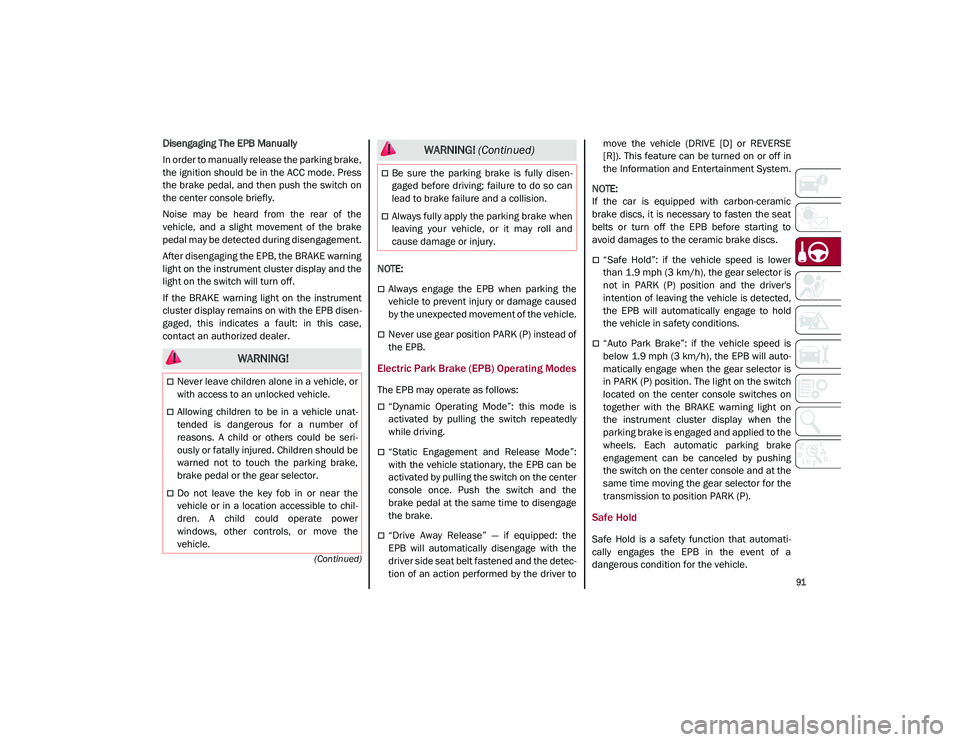
Disengaging The EPB Manually
In order to manually release the parking brake,
the ignition should be in the ACC mode. Press
the brake pedal, and then push the switch on
the center console briefly.
Noise may be heard from the rear of the
vehicle, and a slight movement of the brake
pedal may be detected during disengagement.
After disengaging the EPB, the BRAKE warning
light on the instrument cluster display and the
light on the switch will turn off.
If the BRAKE warning light on the instrument
cluster display remains on with the EPB disen-
gaged, this indicates a fault: in this case,
contact an authorized dealer.
NOTE:
Always engage the EPB when parking the
vehicle to prevent injury or damage caused
by the unexpected movement of the vehicle.
Never use gear position PARK (P) instead of
the EPB.
Electric Park Brake (EPB) Operating Modes
The EPB may operate as follows:
“Dynamic Operating Mode”: this mode is
activated by pulling the switch repeatedly
while driving.
“Static Engagement and Release Mode”:
with the vehicle stationary, the EPB can be
activated by pulling the switch on the center
console once. Push the switch and the
brake pedal at the same time to disengage
the brake.
“Drive Away Release” — if equipped: the
EPB will automatically disengage with the
driver side seat belt fastened and the detec
-
tion of an action performed by the driver to move the vehicle (DRIVE [D] or REVERSE
[R]). This feature can be turned on or off in
the Information and Entertainment System.
NOTE:
If the car is equipped with carbon-ceramic
brake discs, it is necessary to fasten the seat
belts or turn off the EPB before starting to
avoid damages to the ceramic brake discs.
“Safe Hold”: if the vehicle speed is lower
than 1.9 mph (3 km/h), the gear selector is
not in PARK (P) position and the driver's
intention of leaving the vehicle is detected,
the EPB will automatically engage to hold
the vehicle in safety conditions.
“Auto Park Brake”: if the vehicle speed is
below 1.9 mph (3 km/h), the EPB will auto -
matically engage when the gear selector is
in PARK (P) position. The light on the switch
located on the center console switches on
together with the BRAKE warning light on
the instrument cluster display when the
parking brake is engaged and applied to the
wheels. Each automatic parking brake
engagement can be canceled by pushing
the switch on the center console and at the
same time moving the gear selector for the
transmission to position PARK (P).
Safe Hold
Safe Hold is a safety function that automati -
cally engages the EPB in the event of a
dangerous condition for the vehicle.
WARNING!
Never leave children alone in a vehicle, or
with access to an unlocked vehicle.
Allowing children to be in a vehicle unat -
tended is dangerous for a number of
reasons. A child or others could be seri -
ously or fatally injured. Children should be
warned not to touch the parking brake,
brake pedal or the gear selector.
Do not leave the key fob in or near the
vehicle or in a location accessible to chil -
dren. A child could operate power
windows, other controls, or move the
vehicle.
Be sure the parking brake is fully disen -
gaged before driving; failure to do so can
lead to brake failure and a collision.
Always fully apply the parking brake when
leaving your vehicle, or it may roll and
cause damage or injury.
WARNING! (Continued)
21_GU_OM_EN_USC_t.book Page 91
Page 95 of 280
93
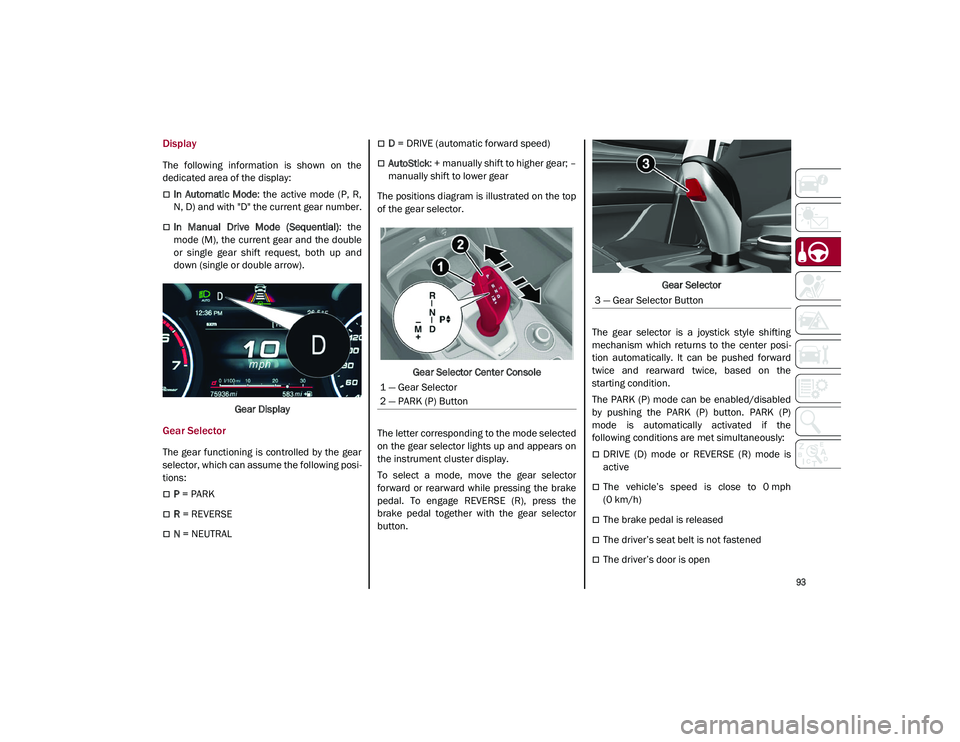
Display
The following information is shown on the
dedicated area of the display:
In Automatic Mode: the active mode (P, R,
N, D) and with "D" the current gear number.
In Manual Drive Mode (Sequential) : the
mode (M), the current gear and the double
or single gear shift request, both up and
down (single or double arrow).
Gear Display
Gear Selector
The gear functioning is controlled by the gear
selector, which can assume the following posi -
tions:
P = PARK
R = REVERSE
N = NEUTRAL
D = DRIVE (automatic forward speed)
AutoStick : + manually shift to higher gear; –
manually shift to lower gear
The positions diagram is illustrated on the top
of the gear selector.
Gear Selector Center Console
The letter corresponding to the mode selected
on the gear selector lights up and appears on
the instrument cluster display.
To select a mode, move the gear selector
forward or rearward while pressing the brake
pedal. To engage REVERSE (R), press the
brake pedal together with the gear selector
button. Gear Selector
The gear selector is a joystick style shifting
mechanism which returns to the center posi -
tion automatically. It can be pushed forward
twice and rearward twice, based on the
starting condition.
The PARK (P) mode can be enabled/disabled
by pushing the PARK (P) button. PARK (P)
mode is automatically activated if the
following conditions are met simultaneously:
DRIVE (D) mode or REVERSE (R) mode is
active
The vehicle’s speed is close to 0 mph
(0 km/h)
The brake pedal is released
The driver’s seat belt is not fastened
The driver’s door is open
1 — Gear Selector
2 — PARK (P) Button
3 — Gear Selector Button
21_GU_OM_EN_USC_t.book Page 93
Page 98 of 280
STARTING AND OPERATING
96
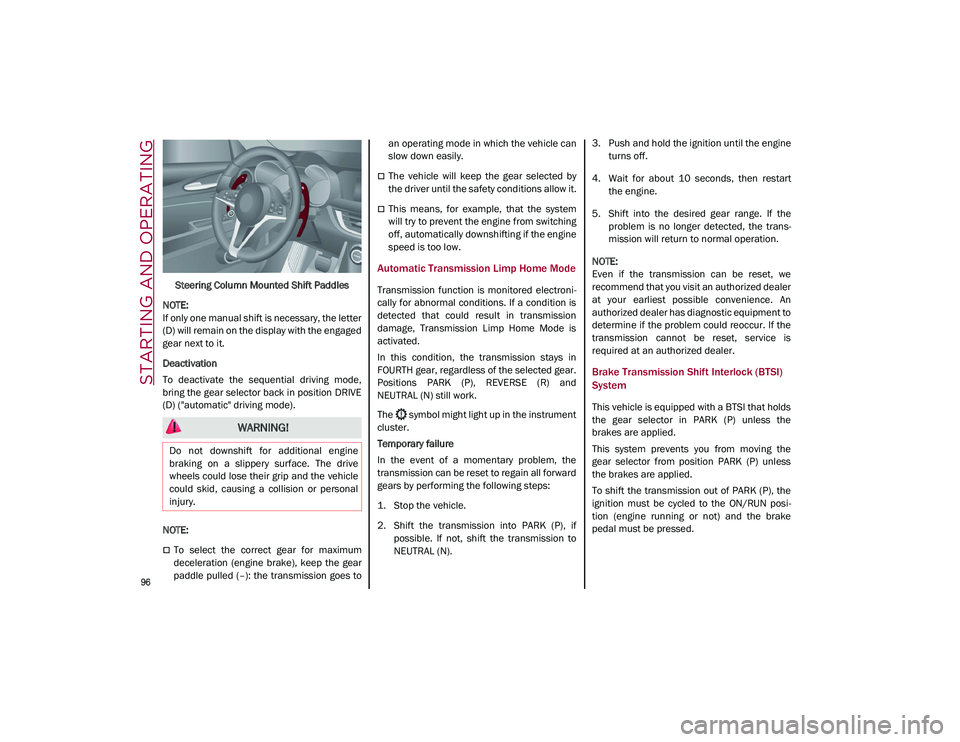
Steering Column Mounted Shift Paddles
NOTE:
If only one manual shift is necessary, the letter
(D) will remain on the display with the engaged
gear next to it.
Deactivation
To deactivate the sequential driving mode,
bring the gear selector back in position DRIVE
(D) ("automatic" driving mode).
NOTE:
To select the correct gear for maximum
deceleration (engine brake), keep the gear
paddle pulled (–): the transmission goes to an operating mode in which the vehicle can
slow down easily.
The vehicle will keep the gear selected by
the driver until the safety conditions allow it.
This means, for example, that the system
will try to prevent the engine from switching
off, automatically downshifting if the engine
speed is too low.
Automatic Transmission Limp Home Mode
Transmission function is monitored electroni
-
cally for abnormal conditions. If a condition is
detected that could result in transmission
damage, Transmission Limp Home Mode is
activated.
In this condition, the transmission stays in
FOURTH gear, regardless of the selected gear.
Positions PARK (P), REVERSE (R) and
NEUTRAL (N) still work.
The symbol might light up in the instrument
cluster.
Temporary failure
In the event of a momentary problem, the
transmission can be reset to regain all forward
gears by performing the following steps:
1. Stop the vehicle.
2. Shift the transmission into PARK (P), if possible. If not, shift the transmission to
NEUTRAL (N). 3. Push and hold the ignition until the engine
turns off.
4. Wait for about 10 seconds, then restart the engine.
5. Shift into the desired gear range. If the problem is no longer detected, the trans -
mission will return to normal operation.
NOTE:
Even if the transmission can be reset, we
recommend that you visit an authorized dealer
at your earliest possible convenience. An
authorized dealer has diagnostic equipment to
determine if the problem could reoccur. If the
transmission cannot be reset, service is
required at an authorized dealer.
Brake Transmission Shift Interlock (BTSI)
System
This vehicle is equipped with a BTSI that holds
the gear selector in PARK (P) unless the
brakes are applied.
This system prevents you from moving the
gear selector from position PARK (P) unless
the brakes are applied.
To shift the transmission out of PARK (P), the
ignition must be cycled to the ON/RUN posi -
tion (engine running or not) and the brake
pedal must be pressed.
WARNING!
Do not downshift for additional engine
braking on a slippery surface. The drive
wheels could lose their grip and the vehicle
could skid, causing a collision or personal
injury.
21_GU_OM_EN_USC_t.book Page 96