Page 41 of 118
 features a dual electronic co")
Instrument and control functions
4-15
4 the vehicle is stopped before mov-
ing the rear brake lock lever to the
left.
EAU78200
ABS
The Yamaha ABS (Anti-lock Brake
System) features a dual electronic con-
trol system, which acts on the front and
rear brakes independently.
Operate the brakes with ABS as you
would conventional brakes. If the ABS
is activated, a pulsating sensation may
be felt at the brake levers. In this situa-
tion, continue to apply the brakes and
let the ABS work; do not “pump” the
brakes as this will reduce braking ef-
fectiveness.
WARNING
EWA16051
Always keep a sufficient distance
from the vehicle ahead to match the
riding speed even with ABS.
The ABS performs best with
long braking distances.
On certain surfaces, such as
rough or gravel roads, the brak-
ing distance may be longer with
the ABS than without.
The ABS is monitored by an ECU,
which will revert the system to conven-
tional braking if a malfunction occurs.
TIP
The ABS performs a self-diagno-
sis test each time the vehicle first
starts off after the main switch is
turned to “ON” and the vehicle has
traveled at a speed of 10 km/h (6
mi/h) or higher. During this test, a
“clicking” noise can be heard from
the front of the vehicle, and if ei-
ther brake lever is even slightly ap-
plied, a vibration can be felt at the
lever, but these do not indicate a
malfunction.
UBL1E0E0.book Page 15 Thursday, May 11, 2017 8:51 AM
Page 42 of 118

Instrument and control functions
4-16
4This ABS has a test mode which
allows the owner to experience
the pulsation at the brake levers
when the ABS is operating. How-
ever, special tools are required, so
please consult your Yamaha deal-
er.
NOTICE
ECA20100
Be careful not to damage the wheel
sensor or wheel sensor rotor; other-
wise, improper performance of the
ABS will result.
EAU78611
Traction control system
The traction control system (TCS)
helps maintain traction when acceler-
ating on slippery surfaces, such as un-
paved or wet roads. If sensors detect
that the rear wheel is starting to slip
(uncontrolled spinning), the traction
control system assists by regulating
engine power until traction is restored.
When traction control has engaged,
the “ ” indicator light will flash. You
may notice changes in engine re-
sponse or exhaust sound.
WARNING
EWA18860
The traction control system is not a
substitute for riding appropriately
for the conditions. Traction control
cannot prevent loss of traction due
to excessive speed when entering
turns, when accelerating hard at a
sharp lean angle, or while braking,
and cannot prevent front wheel slip-
ping. As with any vehicle, approach
surfaces that may be slippery with
caution and avoid especially slip-
pery surfaces.
Setting the traction control system
1. Front wheel sensor
2. Front wheel sensor rotor
1. Rear wheel sensor
2. Rear wheel sensor rotor
2
1
2
1
ZAUM1520
1. Traction control system indicator light Ž
2. Traction control system display
ZAUM1498
12
UBL1E0E0.book Page 16 Thursday, May 11, 2017 8:51 AM
Page 43 of 118

Instrument and control functions
4-17
4 When the vehicle is turned on, traction
control is automatically turned on.
To turn the traction control system off,
use the “INFO” switch to change the
information display to the traction con-
trol system display. Then push the “IN-
FO” switch for three seconds. The
display will show “TCSOFF” , and the
“TCS” indicator light will come on.
TIP
Turn the traction control system off to
help free the rear wheel if the vehicle
gets stuck in mud, sand, or other soft
surfaces.
NOTICE
ECA16801
Use only the specified tires. (See
page 7-18.) Using different sized
tires will prevent the traction control
system from controlling tire rotation
accurately.
Resetting the traction control sys-
tem
The traction control system will auto-
matically disable under certain condi-
tions; such as when a sensor fault is
detected, or when only one wheel is al-
lowed to rotate for more than a fewseconds. Should this happen, the “ ”
indicator light will come on, and possi-
bly the “ ” warning light, too.
TIP
When the vehicle is on the centerstand,
do not rev the engine for an extended
period of time. Otherwise, the traction
control system will automatically dis-
able and need to be reset.
If the traction control system automat-
ically disables, try resetting it as fol-
lows.
1. Stop the vehicle and turn it off
completely.
2. Wait a few seconds and then turn
the vehicle power on.
3. The Ž indicator light should
turn off and the system be en-
abled.
TIP
If the Ž indicator light remains on af-
ter resetting, the vehicle may still be
ridden; however, have a Yamaha deal-
er check the vehicle as soon as possi-
ble.
4. Have a Yamaha dealer check the
vehicle and turn off the Ž
warning light.
1. Traction control system indicator light Ž
2. Traction control system display
ZAUM1499
12
1. Traction control system indicator light Ž
2. Engine trouble warning light Ž
ZAUM1500
UBL1E0E0.book Page 17 Thursday, May 11, 2017 8:51 AM
Page 44 of 118
Instrument and control functions
4-18
4
EAU78502
Fuel tank cap
To remove the fuel tank cap
1. Turn the main switch to “ ” to
open the fuel tank cap lid.
2. Turn the fuel tank cap counter-
clockwise until the release
mark “ ” aligns with “ ”, and
then pull the cap off.
To install the fuel tank cap
1. Insert the fuel tank cap onto the
tank opening and turn it clockwise
until the install mark “ ” aligns
with “ ”.2. Close the fuel tank cap lid.
WARNING
EWA11092
Make sure that the fuel tank cap is
properly closed after filling fuel.
Leaking fuel is a fire hazard.
1. Fuel tank cap lid
1. Fuel tank cap
2. Release mark “ ”
1
1
2
1. Install mark Ž
1
UBL1E0E0.book Page 18 Thursday, May 11, 2017 8:51 AM
Page 45 of 118

Instrument and control functions
4-19
4
EAU13213
Fuel
Make sure there is sufficient gasoline in
the tank.
WARNING
EWA10882
Gasoline and gasoline vapors are
extremely flammable. To avoid fires
and explosions and to reduce the
risk of injury when refueling, follow
these instructions.
1. Before refueling, turn off the en-
gine and be sure that no one is sit-
ting on the vehicle. Never refuel
while smoking, or while in the vi-
cinity of sparks, open flames, or
other sources of ignition such as
the pilot lights of water heaters
and clothes dryers.
2. Do not overfill the fuel tank. Stop
filling when the fuel reaches the
bottom of the filler tube. Because
fuel expands when it heats up,
heat from the engine or the sun
can cause fuel to spill out of the
fuel tank.
3. Wipe up any spilled fuel immedi-
ately. NOTICE: Immediately
wipe off spilled fuel with a clean,dry, soft cloth, since fuel may
deteriorate painted surfaces or
plastic parts.
[ECA10072]
4. Be sure to securely close the fuel
tank cap.
WARNING
EWA15152
Gasoline is poisonous and can
cause injury or death. Handle gaso-
line with care. Never siphon gasoline
by mouth. If you should swallow
some gasoline or inhale a lot of gas-
oline vapor, or get some gasoline in
your eyes, see your doctor immedi-
ately. If gasoline spills on your skin,
wash with soap and water. If gaso-
line spills on your clothing, change
your clothes.
EAU75300
NOTICE
ECA11401
Use only unleaded gasoline. The use
of leaded gasoline will cause severe
damage to internal engine parts,
such as the valves and piston rings,
as well as to the exhaust system.
1. Fuel tank filler tube
2. Maximum fuel level
1
2
Recommended fuel:
Premium unleaded gasoline (Gaso-
hol [E10] acceptable)
Fuel tank capacity:
13 L (3.4 US gal, 2.9 Imp.gal)
Fuel reserve amount:
2.4 L (0.63 US gal, 0.53 Imp.gal)
UBL1E0E0.book Page 19 Thursday, May 11, 2017 8:51 AM
Page 46 of 118
.
Check that gasoline nozzle has
the same ide")
Instrument and control functions
4-20
4
TIP
This mark identifies the recom-
mended fuel for this vehicle as
specified by European regulation
(EN228).
Check that gasoline nozzle has
the same identifier when fueling.
Your Yamaha engine has been de-
signed to use premium unleaded gas-
oline with a research octane number of
95 or higher. If knocking (or pinging)
occurs, use a gasoline of a different
brand. Use of unleaded fuel will extend
spark plug life and reduce mainte-
nance costs.
Gasohol
There are two types of gasohol: gaso-
hol containing ethanol and that con-
taining methanol. Gasohol containing
ethanol can be used if the ethanol con-
tent does not exceed 10% (E10). Gas-
ohol containing methanol is not
recommended by Yamaha because it
can cause damage to the fuel system
or vehicle performance problems.
EAU58301
Fuel tank overflow hose
Before operating the vehicle:
Check the fuel tank overflow hose
connection and routing.
Check the fuel tank overflow hose
for cracks or damage, and replace
it if necessary.
Make sure that the fuel tank over-
flow hose is not blocked, and
clean it if necessary.
E5E10
1. Fuel tank overflow hose
ZAUM1510
1
UBL1E1E0.book Page 20 Wednesday, May 23, 2018 11:03 AM
Page 47 of 118

Instrument and control functions
4-21
4
EAU13447
Catalytic converters
This vehicle is equipped with catalytic
converters in the exhaust system.
WARNING
EWA10863
The exhaust system is hot after op-
eration. To prevent a fire hazard or
burns:
Do not park the vehicle near
possible fire hazards such as
grass or other materials that
easily burn.
Park the vehicle in a place
where pedestrians or children
are not likely to touch the hot
exhaust system.
Make sure that the exhaust sys-
tem has cooled down before
doing any maintenance work.
Do not allow the engine to idle
more than a few minutes. Long
idling can cause a build-up of
heat.
NOTICE
ECA10702
Use only unleaded gasoline. The use
of leaded gasoline will cause unre-
pairable damage to the catalytic
converter.
EAU78514
Storage compartments
This model is equipped with 3 storage
compartments. The front storage com-
partments and rear storage compart-
ment are located as shown.
TIP
Storage compartment A must be
opened using the smart key sys-
tem. (See page 3-9.)
The seat/rear storage compart-
ment can be opened using the
smart key system or the mechani-
cal key.
Some helmets cannot be stored in
the rear storage compartment be-
cause of their size or shape.
1. Storage compartment A
2. Storage compartment B
1. Rear storage compartment
2
1
1
UBL1E0E0.book Page 21 Thursday, May 11, 2017 8:51 AM
Page 48 of 118

Instrument and control functions
4-22
4Storage compartment A
To open storage compartment A, turn
the main switch to “OPEN” and then
push the “LID” button.
To close storage compartment A, push
the storage compartment lid until it is
closed.
Storage compartment B
To open storage compartment B, push
the storage compartment lid inward to
unlock it, and then pull to open.
To close storage compartment B, push
the storage compartment lid into the
original position.
Seat/rear storage compartment
To open the seat/rear storage com-
partment via the main switch
Turn the main switch to “OPEN”, and
then push the “SEAT” button.
To open the seat/rear storage com-
partment with the mechanical key
1. Open the keyhole cover.2. Insert the mechanical key into the
seat lock, and then turn it clock-
wise.
TIP
Be sure to close the seat and all stor-
age compartments before starting off.
NOTICE
ECA24020
Make sure that the keyhole cover is
installed when the mechanical key is
not being used.
NOTICE
ECA21150
Keep the following points in mind
when using the storage compart-
ment.
1. Lid
2. Storage compartment
12
1. Keyhole cover
1. Seat lock
2. Unlock.
1
1
2
UBL1E0E0.book Page 22 Thursday, May 11, 2017 8:51 AM
 1
1 2
2 3
3 4
4 5
5 6
6 7
7 8
8 9
9 10
10 11
11 12
12 13
13 14
14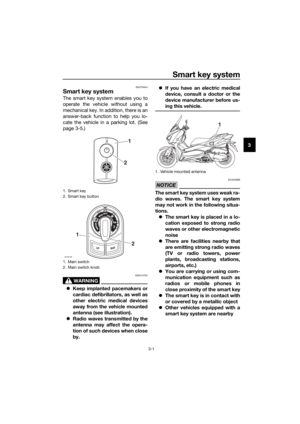 15
15 16
16 17
17 18
18 19
19 20
20 21
21 22
22 23
23 24
24 25
25 26
26 27
27 28
28 29
29 30
30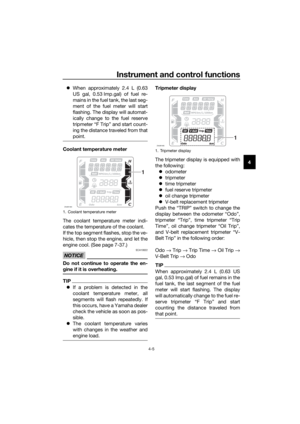 31
31 32
32 33
33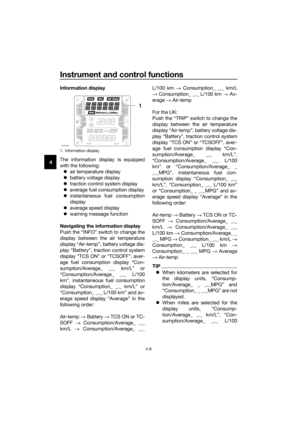 34
34 35
35 36
36 37
37 38
38 39
39 40
40 41
41 42
42 43
43 44
44 45
45 46
46 47
47 48
48 49
49 50
50 51
51 52
52 53
53 54
54 55
55 56
56 57
57 58
58 59
59 60
60 61
61 62
62 63
63 64
64 65
65 66
66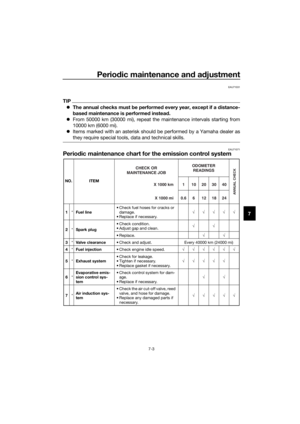 67
67 68
68 69
69 70
70 71
71 72
72 73
73 74
74 75
75 76
76 77
77 78
78 79
79 80
80 81
81 82
82 83
83 84
84 85
85 86
86 87
87 88
88 89
89 90
90 91
91 92
92 93
93 94
94 95
95 96
96 97
97 98
98 99
99 100
100 101
101 102
102 103
103 104
104 105
105 106
106 107
107 108
108 109
109 110
110 111
111 112
112 113
113 114
114 115
115 116
116 117
117