Page 529 of 729
#
Set the zones.
Setting the colour ef fects #
Select Effects. #
Swit chWelcome orClimate on or off.
% Further information on theto pic of setting
ambiance light (/ page164). Setting
the language in there ar passenger
comp artment Re
ar Seat En tertainment Sy stem:
4 © 5
Settings 5
System
5 Language #
Set the language. Selecting sy
stem settings in there ar com‐
partment Re
ar Seat En tertainment Sy stem:
4 © 5
Settings 5
System
Ad justing the brightness #
Select Display. #
Adjust the brightness.
Connecting a device in the device manager #
Select Device Manager. #
Select a device that is tobe connec ted.
Headphones and headsets are connec ted
with there ar displa y.
Mobile phones and other devices are con‐
nected with the multimedia sy stem.
Setting the sensitivity for the rear display #
Select Touch Sensitivity. #
Select Fast,Medium orSlow.
Showing sy stem information #
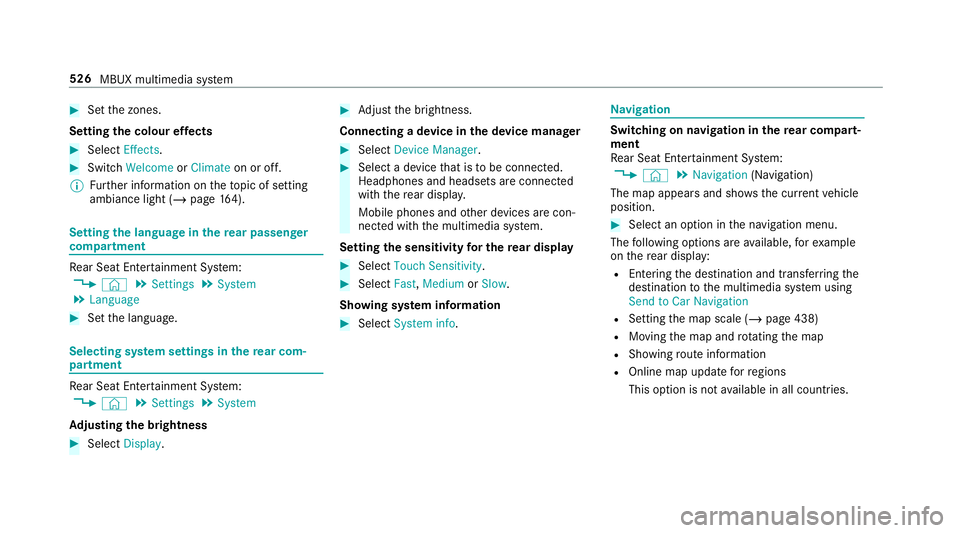
Select System info. Na
vigation Switching on navigation in
there ar comp art‐
ment
Re ar Seat En tertainment Sy stem:
4 © 5
Navigation (Navigation)
The map appears and sho ws the current vehicle
position. #
Select an option in the navigation menu.
The following options are available, forex ample
on there ar display:
R Entering the destination and transfer ring the
destination tothe multimedia sy stem using
Send to Car Navigation
R Setting the map scale (/ page 438)
R Moving the map and rotating the map
R Showing route information
R Online map update forre gions
This option is not available in all countries. 526
MBUX multimedia sy stem
Page 537 of 729
Opening
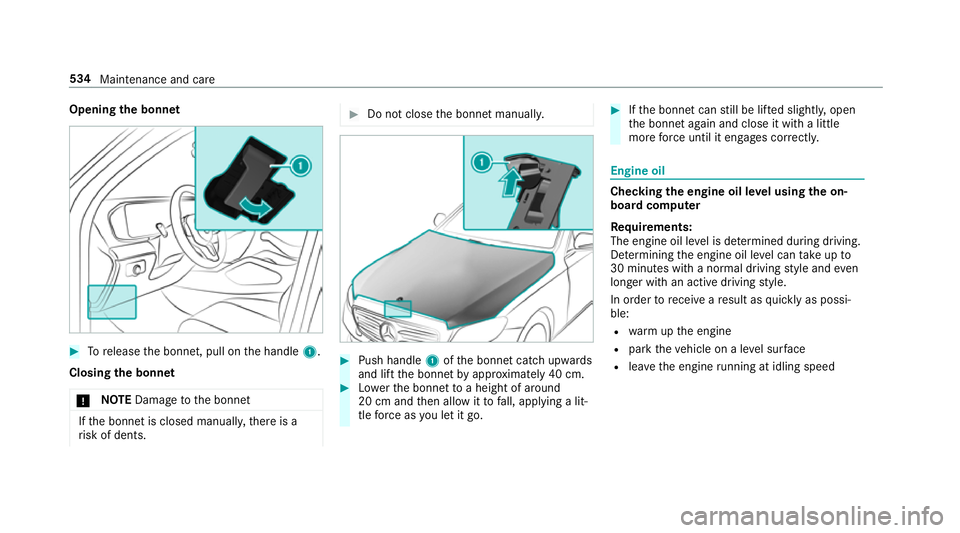
the bonnet #
Torelease the bonn et, pull on the handle 1.
Closing the bonnet
* NO
TEDama getothe bonn et If
th e bonn etis closed manuall y,there is a
ri sk of dents. #
Do not close the bonn etmanually. #
Push handle 1ofthe bonn etcatch up wards
and lift the bonn etby appr oximately 40 cm. #
Lowe rth e bonn etto a height of around
20 cm and then allow it tofall, applying a lit‐
tle forc e as you let it go. #
Ifth e bonn etcan still be lif ted slightl y,open
th e bonn etagain and close it with a little
more forc e until it engages cor rectly. Engine oil
Che
cking the engine oil le vel using the on-
board compu ter
Re quirements:
The engine oil le vel is de term ined during driving.
De term ining the engine oil le vel can take up to
30 minutes with a normal driving style and even
longer with an active driving style.
In order torecei veare sult as quickly as possi‐
ble:
R warm upthe engine
R park theve hicle on a le vel sur face
R leave the engine running at idling speed 534
Maintenance and care
Page 543 of 729
Ac
tivating/deactivating automatic car wash
mode Re
quirements:
R theve hicle is stationary
R the engine is running.
Multimedia sy stem:
4 © 5
Settings
5 Schnellzugriff (Quick access)
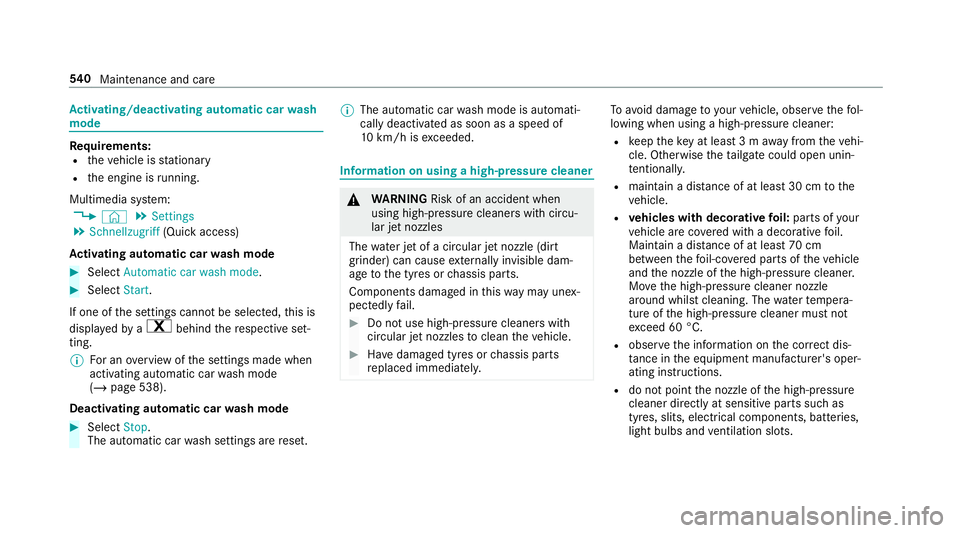
Ac tivating automatic car wash mode #
Select Automatic car wash mode. #
Select Start.
If one of the settings cann otbe selected, this is
displa yedby a% behind there spective set‐
ting.
% For an overview of the settings made when
activating automatic car wash mode
(/ page 538).
Deactivating automatic car wash mode #
Select Stop.
The automatic car wash settings are reset. %
The automatic car wash mode is automati‐
cally deactivated as soon as a speed of
10 km/h is exceeded. Information on using a high-p
ressure cleaner &
WARNING Risk of an accident when
using high-pressure cleane rswith circu‐
lar jet nozzles
The wate r jet of a circular jet nozzle (dirt
grinder) can cause extern ally invisible dam‐
age tothe tyres or chassis parts.
Components damaged in this wa y may unex‐
pec tedly fail. #
Do not use high-pressure cleaners with
circular jet nozzles toclean theve hicle. #
Have damaged tyres or chassis parts
re placed immediatel y. To
avo id damage to yourvehicle, obser vethefo l‐
lowing when using a high-pressure cleaner:
R keep theke y at least 3 m away from theve hi‐
cle. Otherwise theta ilgate could open unin‐
te ntional ly.
R maintain a dis tance of at least 30 cm tothe
ve hicle.
R vehicles with deco rative foil: parts of your
ve hicle are co vered with a decorative foil.
Maintain a dis tance of at least 70 cm
between thefo il-c ove red parts of theve hicle
and the nozzle of the high-pressure cleaner.
Mo vethe high-pressure cleaner nozzle
around whilst cleaning. The waterte mp era‐
ture of the high-pressure cleaner must not
exc eed 60 °C.
R obser vethe information on the cor rect dis‐
ta nce in the equipment manufacturer's oper‐
ating instructions.
R do not point the nozzle of the high-pressure
cleaner directly at sensitive parts such as
tyres, slits, electrical components, bat teries,
light bulbs and ventilation sl ots. 540
Maintenance and care
Page 544 of 729
Wa
shing theve hicle byhand Obser
vethe legal requ irements, e.g. in a number
of countries, washing byhand is only permitted
in specially designated wash ba ys. #
Use a mild cleaning agent, e.g. car shampoo. #
Washtheve hicle with luk ewarmwate r using
a soft car sponge. When doing so, do not
ex pose theve hicle todirect sunlight. #
Carefully hose theve hicle off with water and
dry using a chamois. Take care not topoint th
ewate r jet directly towa rdsth e air inlet
grille below the bonn et. Maintenance and care
541
Page 545 of 729
Note
s on paint work/matt finish paint workcare Obser
vethefo llowing information: Cleaning and car
eA voiding paintwork damage and inter fere nce tothe
dr iver assistance sy stems
Pa intwork R
Insect remains: soak with insect remo ver and rinse off the
trea ted areas af terw ards.
R Bird droppings: soak with water and rinse off af terw ards.
R Tree resin, oils, fuels and greases: remo veby rubbing gen‐
tly wi tha clo thsoaked in petroleum ether or lighter fluid.
R Coolant and brake fluid: remo vewith a damp clo thand
clean water.
R Tarst ains: use tarre mo ver.
R Wax: use silicone remo ver. R
Do not attach sticke rs,fi lms or similar materials. Only
ha ve film attached tothe bumper at a qualified specialist
wo rkshop.
R Remo vedirt immediately, where possible. 542
Maintenance and care
Page 546 of 729
Cleaning and car
eA voiding paintwork damage and inter fere nce tothe
dr iver assistance sy stems
Matt finish R
Only use care products appr ovedfo r Mercedes-Benz. R
Do not attach sticke rs,fi lms or similar materials. Only
ha ve film attached tothe bumper at a qualified specialist
wo rkshop.
R Do not polish theve hicle and light-alloy wheels.
R Only use car washes that cor respond tothe latest engi‐
neering standards.
R Do not use car wash programmes with a final hot wax
treatment.
R Do not use paint cleane rs, buf fing or polishing products,
gl oss preser vers, e.g. wax. In
theeve nt of paintwork dama ge:
R Alw ays ha vepaintwork repairs car ried out at
a qu alified specialist workshop.
R Make sure thera dar sensors function
(/ page 228). Note
s on cleaning decorative foils Obser
vethe no tes on matt finish care in the
ch ap ter "No tes on paintwork/matt finish paint‐
wo rkcare" (/ page 542). Th eyalso apply to
matt decorative foils. Maintenance and care
543
Page 547 of 729
Obser
vethefo llowing information: Cleaning
Avoiding dama getothe decorative foil
R For cleaning, use plenty of water and a mild cleaning agent without
additives or abrasive substances, e.g. a car sha mpoo appr ovedfor
Mercedes-Benz.
R Remo vedirt immediately, where possible, whilst avoiding rubbing
to o hard. There is otherwise a risk of damaging the decorative foil
ir re parably.
R Ifth ere is dirt on thefinish or if the decorative foil is dull: use the
Pa int Cleaner recommended and appr ovedfo r Mercedes-Benz.
R Insect remains: soak with insect remo ver and rinse off the treated
areas af terw ards.
R Bird droppings: soak with water and rinse off af terw ards.
R Toprev ent waterst ains, dry a foil-wrapped vehicle with a soft,
absorbent clo thafte reve rycar wash. R
The service life and colouring of decorative foils are impaired by:
- sunlight
- temp erature, e.g. hot air blo wer
- weather conditions
- stone chippings and dirt
- chemical cleaning agents
- oily products
R Do not use polish on matt decorative foil. Po lishing will ha vethe ef fect of
shining thefo il-wrapped sur face.
R Do not treat matt or stru ctured deco rative foils with wax.Pe rm anent
st ains may occur. Sc
ratches, cor rosive deposits, areas af fected by
cor rosion and damage caused byincor rect care
cannot al ways be comple tely repaired. In such
cases, visit a qualified specialist workshop.
Yo u can obtain more information on care and
cleaning products from the manufacturer. In
the case of foil-wrapped sur faces, optical dif‐
fe re nces may occur between the sur faces that
we renot pr otected bya decorative foil af ter
re moving a decorative foil. %
Have wo rkor repairs todecorative foils car‐
ri ed out at a qualified specialist workshop,
e.g. in a Mercedes-Benz Service Centre. 544
Maintenance and care
Page 549 of 729
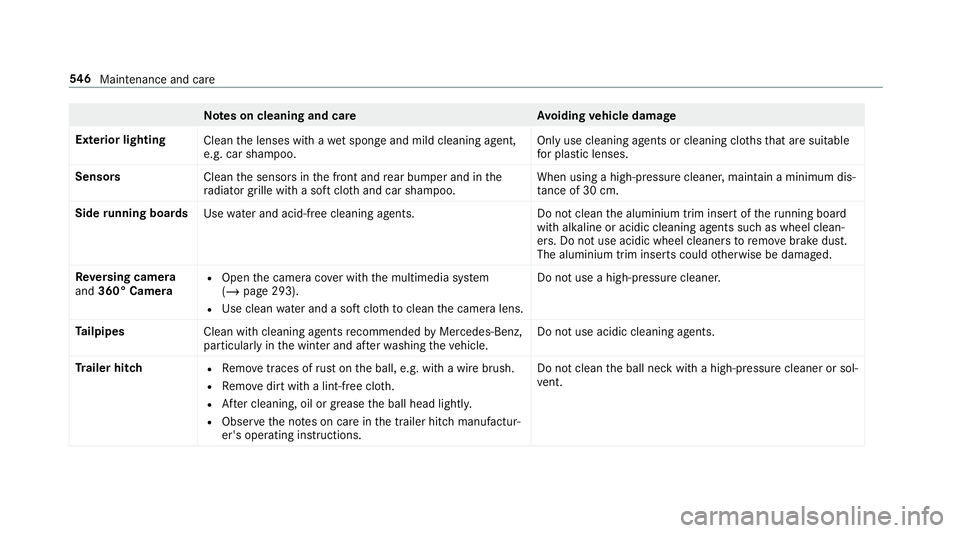
Note
s on cleaning and car eA voiding vehicle damage
Exterior lighting Cleanthe lenses with a wet sponge and mild cleaning agent,
e.g. car sha mpoo. Only use cleaning agents or cleaning clo
thsth at are suitable
fo r plast ic lenses.
Sensors Cleanthe sensors in the front and rear bumper and in the
ra diator grille with a soft clo thand car shampoo. When using a high-pressure cleaner, main
tain a minimum dis‐
ta nce of 30 cm.
Side running boards
Usewate r and acid-free cleaning agents. Do not cleanthe aluminium trim insert of theru nning board
wi th alkaline or acidic cleaning agents such as wheel clean‐
ers. Do not use acidic wheel cleaners toremo vebrake dust.
The aluminium trim inserts could otherwise be damaged.
Re versing camera
and 360° Camera R
Open the camera co ver with the multimedia sy stem
(/ page 293).
R Use clean water and a soft clo thtoclean the camera lens. Do not use a high-pressure cleaner.
Ta ilpipes
Clean with cleaning agents recommended byMercedes-Benz,
particularly in the winter and af terwa shing theve hicle. Do not use acidic cleaning agents.
Tr ailer hitch R
Remo vetraces of rust on the ball, e.g. with a wire brush.
R Remo vedirt with a lint-free clo th.
R After cleaning, oil or grease the ball head lightl y.
R Obser vethe no tes on care in the trailer hitch manufactur‐
er's operating instructions. Do not clean
the ball neck with a high-pressure cleaner or sol‐
ve nt. 546
Maintenance and care