Page 135 of 697
1
Tie-down eyes Overview of bag hooks
&
WARNING Risk of inju rywhen using bag
hooks with heavy objects
The bag hooks cannot restra in heavy objects
or items of luggage. Objects or items of luggage could be
thrown
around and thereby hit vehicle occupants
when braking or abruptly changing direc‐
tions. #
Onlyhang light objects on the bag
hooks. #
Never hang hard, sharp-edged or fragile
objects on the bag hooks. Obser
vethe no tes on loading theve hicle
(/ page 122).
Subject the bag hooks toa maximum load of
3 kg and do not attach any goods tothem. 1
Bag hook 13 2
Seats and stowing
Page 136 of 697
Coat hook on
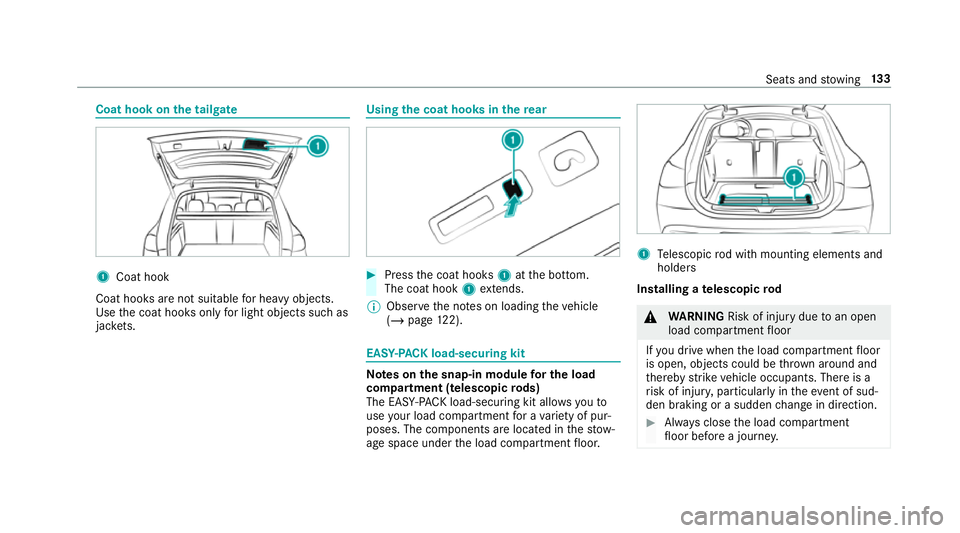
the tailgate 1
Coat hook
Coat hooks are not suitable for heavy objects.
Use the coat hooks only for light objects such as
jac kets. Using the coat hooks in the
rear #
Press the coat hooks 1atthe bottom.
The coat hook 1extends.
% Obser vethe no tes on loading theve hicle
(/ page 122). EASY
-PAC K load-secu ring kit Note
s onthe snap-in module for the load
co mp artment (telescopic rods)
The EAS Y-PA CK load-securing kit allo wsyouto
use your load co mpartment for a variet y of pur‐
poses. The co mponents are located in thestow‐
age space under the load compartment floor. 1
Telescopic rod with mounting elements and
holders
Installing a telescopic rod &
WARNING Risk of inju rydue toan open
load compartment floor
If yo u drive when the load compartment floor
is open, objects could be thro wn around and
th ereby strike vehicle occupants. There is a
ri sk of injur y,particular lyin theeve nt of sud‐
den braking or a sudden change in direction. #
Alw ays close the load compartment
fl oor before a journe y. Seats and
stowing 13 3
Page 142 of 697
Switching
the cooling or heating function for
th etemp erature-cont rolled cup holder on or
off &
WARNING Risk of inju ryby touching the
heating elements
The cup holder's heating elements may be
ve ry hot.
Yo u can burn yourself on them. #
Do not touch the cup holder's hot heat‐
ing elements. #
Ensure that no children can access the
cup holder's hot heating elements. #
Never lea vechildren unat tended in the
ve hicle. *
NO
TEDama getoobjects in thete mp era‐
ture-contro lled cupholder If
yo u place objects into thete mp erature-
controlled cup holder, they may become
dama ged. #
Do not place objects into thete mp era‐
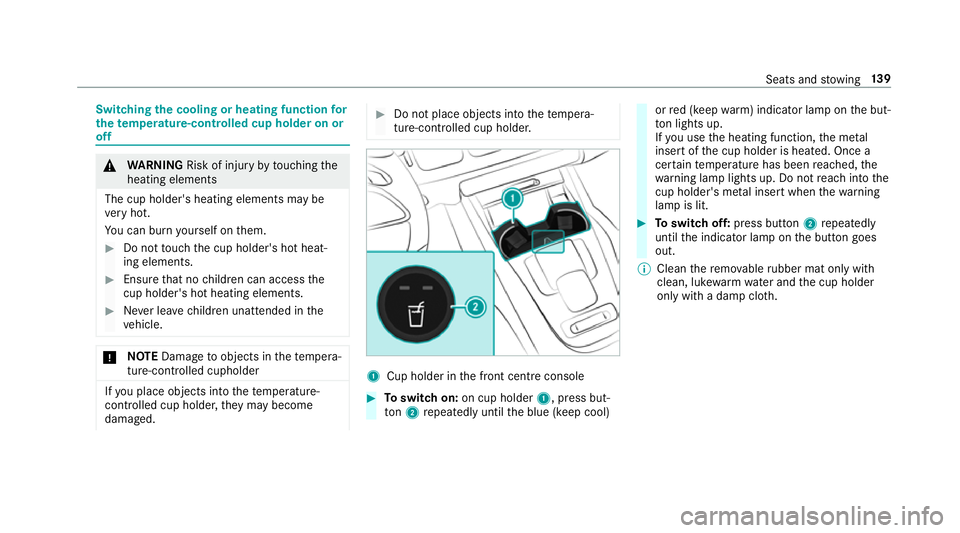
ture-contro lled cup holder. 1
Cup holder in the front cent reconsole #
Toswitch on: on cup holder 1, press but‐
to n2 repeatedly until the blue (keep cool) or
red (keep warm) indicator lamp on the but‐
to n lights up.
If yo u use the heating function, the me tal
inse rtof the cup holder is heated. Once a
cer tain temp erature has been reached, the
wa rning lamp lights up. Do not reach into the
cup holder's me tal inse rtwhen thewa rning
lamp is lit. #
Toswitch off: press button 2repeatedly
until the indicator lamp on the button goes
out.
% Clean there mo vable rubber mat only with
clean, luk ewarmwate r and the cup holder
only with a damp clo th. Seats and
stowing 13 9
Page 143 of 697
Asht
ray and cigar ette lighter Using
the ashtr ay #
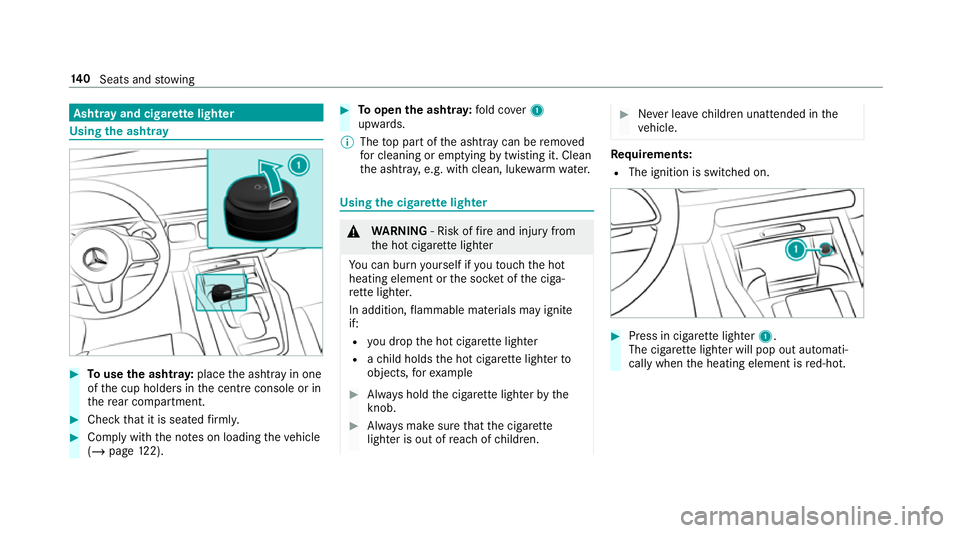
Touse the ashtr ay:place the ashtray in one
of the cup holders in the cent reconsole or in
th ere ar compartment. #
Check that it is seated firm ly. #
Comply with the no tes on loading theve hicle
(/ page 122). #
Toopen the ashtr ay:fold co ver1
upwards.
% The top part of the ashtr aycan be remo ved
fo r cleaning or em ptying bytwi sting it. Clean
th e ashtr ay, e.g. with clean, luk ewarmwate r. Using
the cigar ette lighter &
WARNING ‑ Risk of fire and injury from
th e hot cigar ette lighter
Yo u can burn yourself if youto uch the hot
heating element or the soc ket of the ciga‐
re tte lighter.
In addition, flammable materials may ignite
if:
R you drop the hot cigar ette lighter
R ach ild holds the hot cigar ette lighter to
objects, forex ample #
Alw ays hold the cigar ette lighter bythe
knob. #
Alw ays make sure that the cigar ette
lighter is out of reach of children. #
Never lea vechildren unat tended in the
ve hicle. Re
quirements:
R The ignition is switched on. #
Press in cigar ette lighter 1.
The cigar ette lighter will pop out automati‐
cally when the heating element is red-hot. 14 0
Seats and stowing
Page 145 of 697
#
Open flap 3. #
Insert the plug of the device into 230 V
soc ket1.
When the on-board electrical sy stem voltage
is suf ficient, indicator la mp2lights up. Using
the12 V so cket inthe load compa rt‐
ment Re
quirements:
R Only devices up toa maximum of 240 W
(20 A) are permissible. #
Lift up cap 1ofthe soc ket and insert the
plug of the device. Overview of USB ports
Depending on
theve hicle equipment, theve hicle
has thefo llowing USB ports:
R inthestow age compartment of the cockpit
armrest (/ page123)
R inthe front cent reconsole next tothe mobile
phone stowage compartment
R Inthere ar passenger compartment centre
console 14 2
Seats and stowing
Page 149 of 697
Exterior lighting
Note
s on adjusting the lights when driving
abroad Ve
hicles with static LED headlamps: It is not
necessa ryto change the headlamps. The legal
re qu irements are also met in countries in which
traf fic drives on theot her side of thero ad.
Ve hicles with Intelligent Light Sy stem: The
headlamps are automatically adjus ted when the
ve hicle enters countries in which traf fic drives
on theot her side of thero ad. If necessar y,the
headlamp s can also be switched over manually
(/ page 154).
In thefo llowing cases, check the setting of the
headlamp s andchange it manually if necessary:
R Ifth eDipped-beam setting (left/right-side
traffic) Manual adjustment only display mes‐
sage is displa yed.
R Ifth eCheck dipped-beam setting (left/right-
side traffic) display message is displa yed.
Once the headlamps ha vebeen adjus ted:
R Oncoming tra ffic will not be dazzled R
The edge of thero ad will not be illuminated
as far or as high
R The "mo torw ay mode" and "enhanced fog
light" functions will not be available Information about lighting sy
stems and your
re sponsibility The
various lighting sy stems of theve hicle are
only aids. The driver of theve hicle is responsible
fo r cor rect vehicle illumination in accordance
with the pr evailing light and visibility conditions,
legal requ irements and traf fic situation. Light switch
Ope
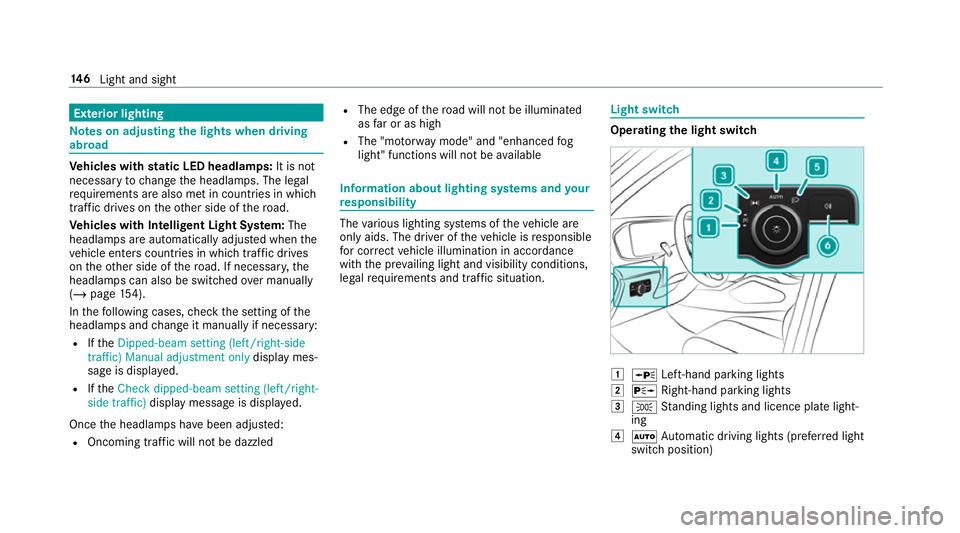
rating the light switch 1
W Left-hand pa rking lights
2 X Right-hand parking lights
3 T Standing lights and licence plate light‐
ing
4 Ã Automatic driving lights (prefer red light
switch position) 14 6
Light and sight
Page 150 of 697
5
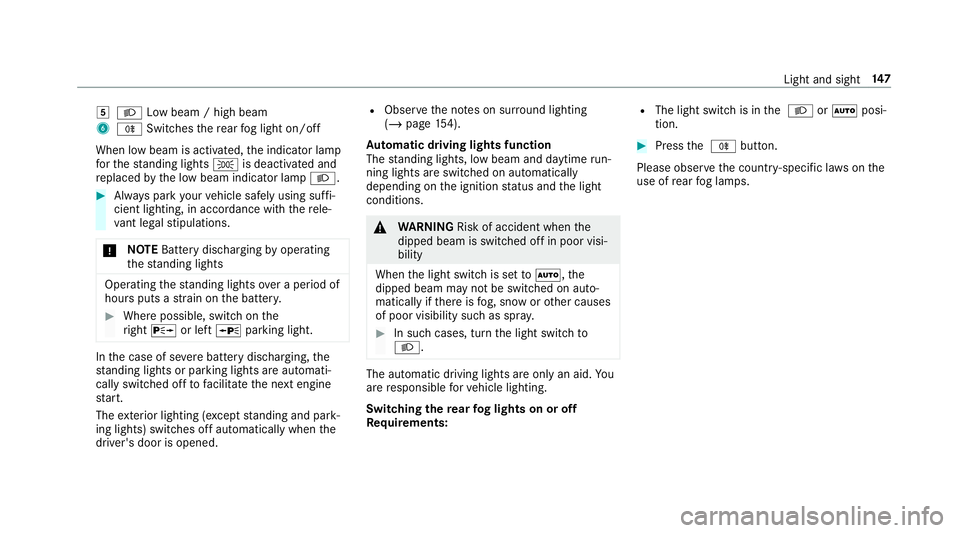
L Low beam / high beam
6 R Switches there ar fog light on/off
When low beam is activated, the indicator lamp
fo rth est anding lights Tis deactivated and
re placed bythe low beam indicator lamp L.#
Alw ays park your vehicle safely using suf fi‐
cient lighting, in acco rdance with there le‐
va nt le galst ipulations.
* NO
TEBattery discharging byoperating
th est anding lights Operating
thest anding lights over a period of
hours puts a stra in on the batter y. #
Where possible, switch on the
ri ght X or left Wparking light. In
the case of se vere battery discharging, the
st anding lights or parking lights are automati‐
cally swit ched off tofacilitate the next engine
st art.
The exterior lighting (e xcept standing and park‐
ing lights) swit ches off automatically when the
driver's door is opened. R
Obser vethe no tes on sur round lighting
(/ page 154).
Au tomatic driving lights function
The standing lights, low beam and daytime run‐
ning lights are switched on au tomatically
depending on the ignition status and the light
conditions. &
WARNING Risk of accident when the
dipped beam is switched off in poor visi‐
bility
When the light switch is set toà ,the
dipped beam may not be switched on auto‐
matically if there is fog, snow or other causes
of poor visibility such as spr ay. #
In such cases, turn the light switch to
L . The automatic driving lights are only an aid.
Yo u
are responsible forve hicle lighting.
Switching there ar fog lights on or off
Re quirements: R
The light switch is in the L orà posi‐
tion. #
Press the R button.
Please obser vethe count ry-specific la wsonthe
use of rear fog lamps. Light and sight
147
Page 151 of 697
Operating
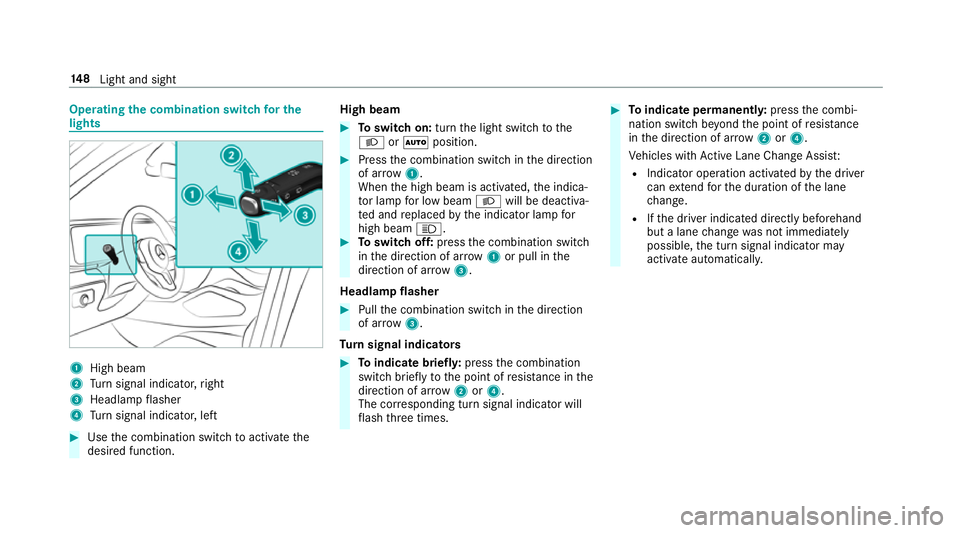
the combination switch for the
lights 1
High beam
2 Turn signal indicator, right
3 Headlamp flasher
4 Turn signal indicator, left #
Use the combination switch toactivate the
desired function. High beam #
Toswitch on: turnthe light switch tothe
L orà position. #
Press the combination switch in the direction
of ar row1.
When the high beam is activated, the indica‐
to r lamp for low beam Lwill be deactiva‐
te d and replaced bythe indicator lamp for
high beam K. #
Toswitch off: pressthe combination switch
in the direction of ar row1or pull in the
direction of ar row3.
Headlamp flasher #
Pull the combination switch in the direction
of ar row3.
Tu rn signal indicators #
Toindicate briefl y:press the combination
switch briefly tothe point of resis tance in the
direction of ar row2or4.
The cor responding turn signal indicator will
fl ash thre e times. #
Toindicate permanentl y:press the combi‐
nation switch be yond the point of resis tance
in the direction of ar row2or4.
Ve hicles with Active Lane Change Assi st:
R Indicator operation activated bythe driver
can extend forth e duration of the lane
ch ange.
R Ifth e driver indicated directly beforehand
but a lane change was not immediately
possible, the turn signal indicator may
activate automaticall y.14 8
Light and sight