2019 MERCEDES-BENZ GLE COUPE wipers
[x] Cancel search: wipersPage 5 of 697

Symbols
........................................................ 5At
agl ance .................................................... 6
Cockpit ........................................................... 6
Indica tor and warning lamps ........................ .10
Overhead contro l panel ................................ 12
Door control panel and seat adjustment ....... 14
Control settings in there ar passenger
compartment ................................................ 16
Emergencies and breakdowns ...................... 18Digital Owner's Manual
.............................20
Calling up the Digital Owner's Manual ..........20 Genera
l notes............................................. 22
Pr otection of the environment ......................22
Ta ke -ba ckof end-of-life vehicles ...................22
Mercedes-Benz Genuine Parts ......................23
Owner's Manual ............................................ 24
Operating saf ety .......................................... .24
Declaration of Conformity ............................ 26
Diagno stics connection ................................ 30
Qualified specialist workshop ....................... 31Ve
hicle registration ....................................... 31
Cor rect use of theve hicle ............................32
Information on the REA CHregulation ........... 32
Implied warranty .......................................... .32
QR code forre scue card ...............................32
Data storage .................................................33
Copyrights .................................................... 35 Occupant saf
ety......................................... 36
Re stra int sy stem ...........................................36
Seat belts ..................................................... 38
Airbags ......................................................... 42
PRE-SAFE ®
sy stem ....................................... 50
Safely transporting children in theve hi‐
cle ................................................................. 51
No tes on pets in theve hicle .......................... 76 Opening and closing
.................................. 78
Ke y .............................................................. .78
Doo rs............................................................ 82
Load compa rtment ....................................... 88
Side windo ws............................................... 93
Sliding sunroof .............................................. 97
Ro ller sunblinds .......................................... 103Anti-theft pr
otection ................................... 104 Seats and
stowing ................................... 108
No tes on the cor rect driver's seat posi‐
tion ............................................................. 108
Seats .......................................................... 109
St eering wheel ............................................ 11 8
Easy entry and exitfeature .......................... 11 9
Operating the memory function .................. 121
St ow age areas ............................................ 12 2
Cup holders ................................................ 137
Ashtr ayand cigar ette lighter ...................... .140
Soc kets ....................................................... 141
Wi reless charging of the mobile phone
and connection with theex terior aerial ...... 14 3
Fitting/removing thefloor mats ................. 14 5 Light and sight
......................................... 14 6
Exterior lighting .......................................... 14 6
Interior lighting ........................................... 15 5
Wi ndsc reen wipers and windscreen
wa sher sy stem ............................................ 15 6
Mir rors ........................................................ 16 0
Operating the sun visors ............................. 16 32
Contents
Page 159 of 697
Ac
tivating welcome lighting #
Select Colour. #
Select Welcome.
When theve hicle is unloc ked, a special ambi‐
ent lighting sequence will run.
Ac tivating dependency on air conditioning
settings #
Select Colour. #
Select Climate.
If ch anges are made tothete mp erature set‐
ting in theve hicle, the colour of the ambient
lighting will change brief ly. Switching
the interior lighting switch-off
delay time on/off Multimedia sy
stem:
4 © 5
Settings 5
Lights
5 Int. light. del. sw. off #
Switch the lighting switch-off delay time on
or off.
When this function is active, the interior light‐
ing is lit up for short time af terth eve hicle
has been loc ked. Wi
ndscreen wipers and windscreen washer
sy stem Switching
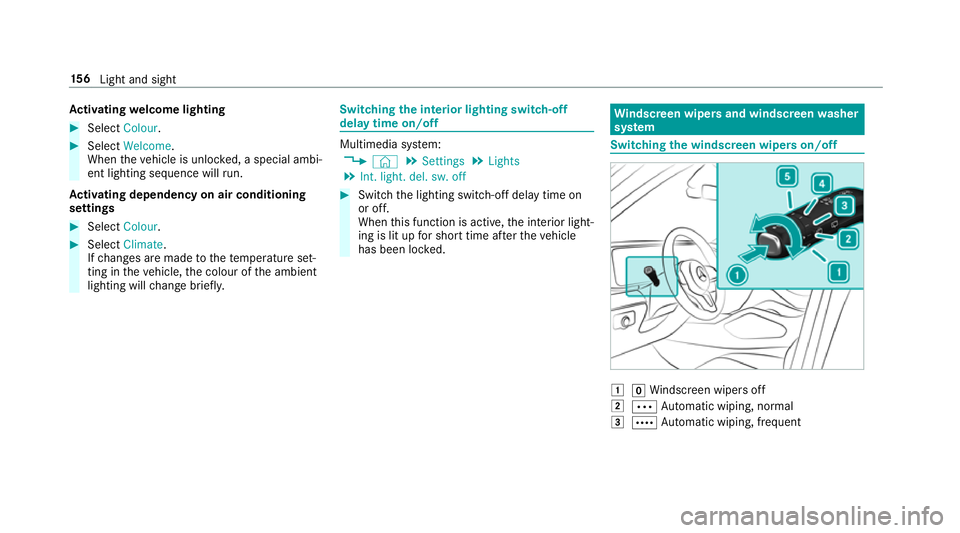
the windscreen wipers on/off 1
gWindsc reen wipers off
2 Ä Automatic wiping, normal
3 Å Automatic wiping, frequent 15 6
Light and sight
Page 160 of 697
4
° Continuous wiping, slow
5 ¯ Continuous wiping, fast #
Turn the combination switch tothe cor rect
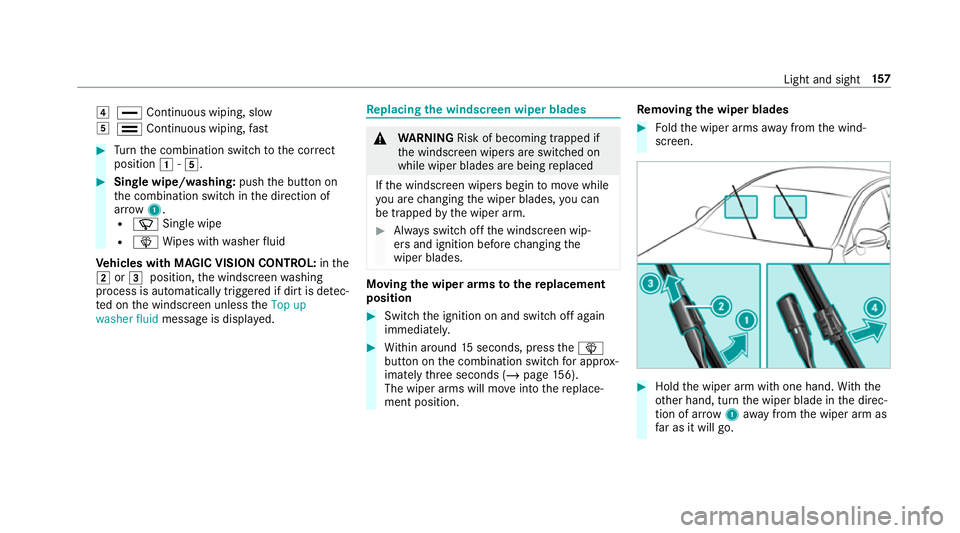
position 1-5. #
Single wipe/washing: pushthe button on
th e combination switch in the direction of
ar row 1.
R í Single wipe
R î Wipes with washer fluid
Ve hicles with MAGIC VISION CONTROL: inthe
2 or3 position, the windscreen washing
process is automatically triggered if dirt is de tec‐
te d on the windscreen unless theTop up
washer fluid message is displa yed. Re
placing the windsc reen wiper blades &
WARNING Risk of becoming trapped if
th e windscreen wipers are switched on
while wiper blades are being replaced
If th e windscreen wipers begin tomo vewhile
yo u are changing the wiper blades, you can
be trapped bythe wiper arm. #
Alw ays switch off the windscreen wip‐
ers and ignition before changing the
wiper blades. Moving
the wiper arms tothere placement
position #
Switch the ignition on and switch off again
immediatel y. #
Within around 15seconds, press theî
button on the combination switch for appro x‐
ima tely thre e seconds (/ page156).
The wiper arms will mo veinto there place‐
ment position. Re
moving the wiper blades #
Foldthe wiper arms away from the wind‐
screen. #
Hold the wiper arm with one hand. With the
ot her hand, turn the wiper blade in the direc‐
tion of ar row1away from the wiper arm as
fa r as it will go. Light and sight
157
Page 172 of 697
air distribution setting
forth e driver side is adop‐
te d automatically for all clima tecontrol zones. #
Press the 0 button.
The synchronisation function is deactivated if
th e settings for one of theot her climate zones
are changed. Ac
tivating/deactivating the climate control
syn chro nisation function using the multime‐
dia sy stem Climate control can be set centrally using
the
synchronisation function. The driver's settings
fo rte mp erature, air quantity and air distribution
are adop ted automatically for all clima tezones. #
Call up the air conditioning menu
(/ page 167). #
Select First row of seats. #
Select SYNC.
Depending on the pr evious status, the func‐
tion is activated or deactivated. Demisting
the windo ws Wi
ndo wsmis ted up on the inside #
Press theà button. #
Ifth e windo wscontinue tomist up: press the
¬ button.
Wi ndo wsmis ted up on the outside #
Switch on the windscreen wipers. #
Press theà button. Switching air-recirculation mode on/off
#
Press theg button.
The interior air will be recirculated.
Air-reci rculation mode automatically swit ches to
fresh air mode af ter some time.
% If air-recirculation mode is switched on, the
windo wsmay mist up more quickl y.Switch
on ai r-re circulation mode only brie fly. Switches
there sidual heat on/off Re
quirements: R
theve hicle is par ked.
It is possible tomake use of there sidual heat
from the engine tocontinue heating or ventilat‐
ing the front compartment of theve hicle for
appr oximately 30 minutes, depending on the
te mp erature set. #
Toactivate: press button Á.
Re sidual heat will be switched off automaticall y. Switching
there sidual heat in there ar
on/off Re
quirements:
R theve hicle is par ked.
When there sidual heat of the engine is activated
in there ar compartment, you can heat or venti‐
la te there ar compartment for appro ximately
30 minutes. #
Press the 5 button (/ page166). Clima
tecontrol 16 9
Page 500 of 697
#
Intheeve nt of a fire inthe engine com‐
partment, keep the engine bonn et
closed and call thefire service. &
WARNING Risk of inju rydue tomoving
parts
Cer tain components in the engine compart‐
ment may continue tomo veor suddenly
mo veagain even af terth e ignition has been
switched off, e.g. the cooler fan.
Ma kesure of thefo llowing before per form ing
ta sks in the engine compartmen t:#
Switch the ignition off. #
Neverto uch the danger zone sur round‐
ing moving co mponent parts, e.g. the
ro tation area of thefa n. #
Remo vejewe llery and watches. #
Keep items of clo thing and hair away
from moving parts. &
WARNING Risk of inju ryfrom touching
co mp onent parts under voltage
The ignition sy stem and the fuel injection
sy stem workunder high voltage. If youto uch
co mp onent parts which are under voltage,
yo u could recei vean electric shoc k. #
Neverto uch co mponents of the ignition
sy stem or the fuel injection sy stem
when the ignition is switched on. &
WARNING Risk of bu rns from hot com‐
ponent parts in the engine compartment
Cer tain components in the engine compart‐
ment can be very hot, e.g. the engine, the
ra diator and parts of theex haust sy stem. #
Allow the engine tocool down and only
to uch co mponent parts described in
th efo llowing. &
WARNING Risk of inju ryfrom using the
windscreen wipers while the engine bon‐
net is open
When the engine bonn etis open, and the
windscreen wipers are set in motion, you can
be trapped bythe wiper linkage. #
Alw ays switch off the windscreen wip‐
ers and ignition before opening the
engine bonn et. Maintenance and care
497
Page 512 of 697
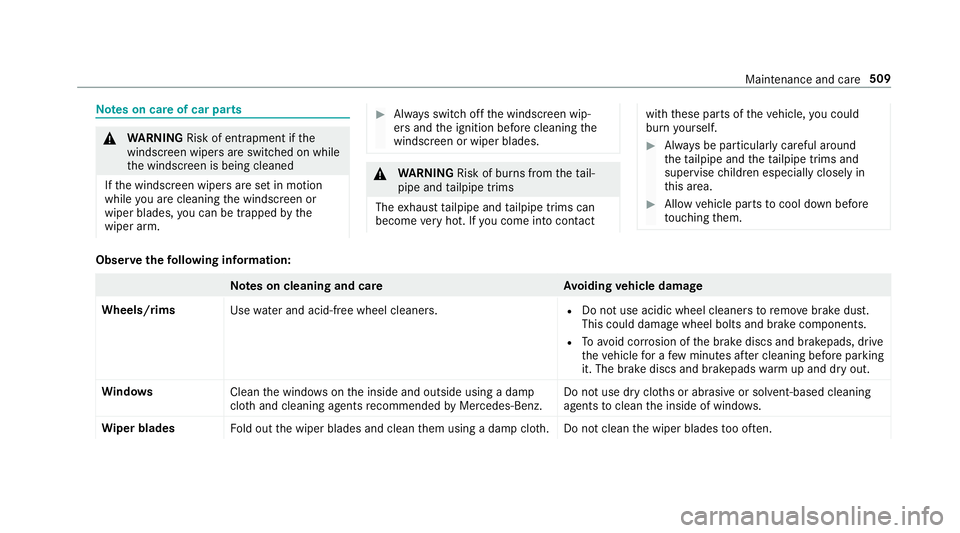
Note
s on care of car parts &
WARNING Risk of entrapment if the
windscreen wipers are swit ched on while
th e windscreen is being cleaned
If th e windscreen wipers are set in motion
while you are cleaning the windscreen or
wiper blades, you can be trapped bythe
wiper arm. #
Alw ays switch off the windscreen wip‐
ers and the ignition before cleaning the
windscreen or wiper blades. &
WARNING Risk of bu rns from theta il‐
pipe and tailpipe trims
The exhaust tailpipe and tailpipe trims can
become very hot. If you come into contact with
these parts of theve hicle, you could
burn yourself. #
Alw ays be particular lycareful around
th eta ilpipe and theta ilpipe trims and
supervise children especially closely in
th is area. #
Allow vehicle parts tocool down before
to uching them. Obser
vethefo llowing information: Note
s on cleaning and car eA voiding vehicle damage
Wheels/rims Usewate r and acid-free wheel cleaners. R
Do not use acidic wheel cleaners toremo vebrake dust.
This could damage wheel bolts and brake components.
R Toavoid cor rosion of the brake discs and brakepads, drive
th eve hicle for a few minutes af ter cleaning before parking
it. The brake discs and brakepads warm up and dry out.
Wi ndo ws
Cleanthe windo wsonthe inside and outside using a damp
clo thand cleaning agents recommended byMercedes-Benz. Do not use dry clo
ths or abrasive or sol vent-based cleaning
agents toclean the inside of windo ws.
Wi per blades
Fold out the wiper blades and clean them using a damp clo th.D o not clean the wiper blades too of ten. Maintenance and care
509
Page 535 of 697
#
When the fuse box is open, make sure
th at no moisture can enter the fuse
box. #
When closing the fuse box, make sure
th at the seal of the lid is positioned cor‐
re ctly on the fuse box. If
th e newly inser ted fuse also blo ws, ha vethe
cause traced and rectified at a qualified special‐
ist workshop.
Ensure thefo llowing before replacing a fuse:
R The vehicle is secured against rolling away.
R All electrical consumers are switched off.
R The ignition is switched off.
The electrical fuses are located in various fuse
bo xes:
R Fuse box in the engine compartment on the
left-hand side of theve hicle, when vie wed in
th e direction of tr avel (/ page 532)
R Fuse box on the driver's side of the cockpit
(/ page 533) R
Fuse box in the front passenger foot we ll
(/ page 533)
R Fuse box in the load compartment on the
ri ght-hand side of theve hicle, when vie wed
in the direction of tr avel (/ page 533) Opening and closing
the fuse box in the
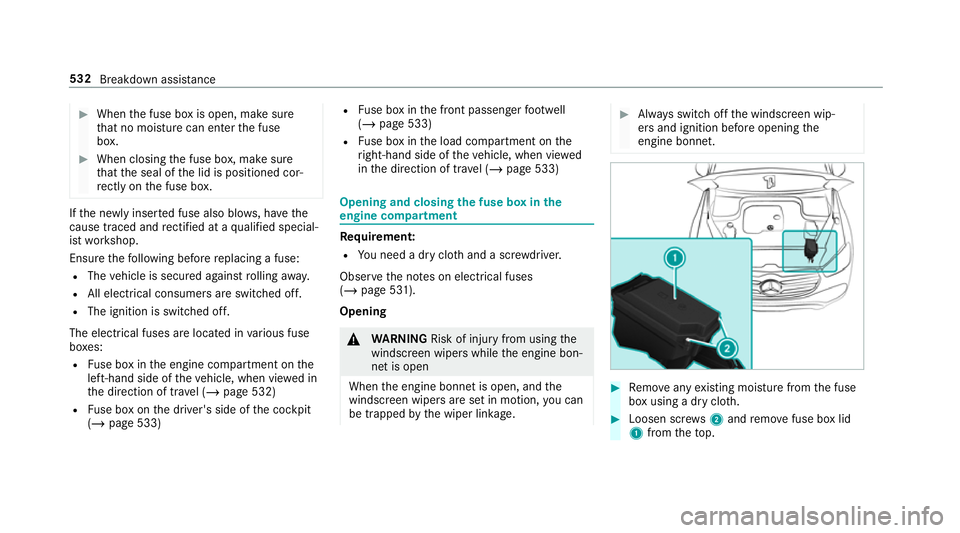
engine compa rtment Requ
irement:
R You need a dry clo thand a sc rewdriver.
Obser vethe no tes on electrical fuses
(/ page 531).
Opening &
WARNING Risk of inju ryfrom using the
windscreen wipers while the engine bon‐
net is open
When the engine bonn etis open, and the
windscreen wipers are set in motion, you can
be trapped bythe wiper linkage. #
Alw ays switch off the windscreen wip‐
ers and ignition before opening the
engine bonn et. #
Remo veany existing moisture from the fuse
box using a dry clo th. #
Loosen scr ews2 and remo vefuse box lid
1 from theto p. 532
Breakdown assis tance
Page 674 of 697
Lo
weri ngtheve hicle
Re ar of theve hicle ...............................1 27
Lu bricant additives
see Additives
Lu ggage
Securing .............................................. 12 2
Lu mbar support
see Lumbar support (4-w ay)
Lu mbar support (4-w ay).......................... 111 M
MAGIC VISION CONTROL Windsc reen wipers .............................. 15 9
Maintenance see ASS YST PLUS
Malfunction Parking Assist PARKTRONIC ................ 266
Re stra int sy stem .................................... 37
Manoeuvring Assist see Trailer Manoeuv ring Assi st
Map .................................................... 411, 41 5
Av oiding an area ..................................4 18
Av oiding an area (o verview) ................ .418 Changing an area ................................
.418
Del eting an area .................................. .419
Displ aying Qibla .................................. 420
Displaying the compass ....................... 420
Displaying the map version .................. 41 8
Displ aying the next intersecting
st re et ................................................... 417
Displ aying thera nge ............................ 421
Displaying the satellite map ................. 421
Displaying the tra ffic map .................... 411
Displ aying weather information .......... .421
Map data ............................................. 420
Moving .................................................4 15
Selecting POI symbols ......................... 416
Selecting text information .................... 417
Selecting the map orientation .............. 416
Setting the map scale .......................... 41 5
Setting the map scale automatically ....4 20
Showing in the multifunction display
of the instrument clus ter .................... .422
Switching mo torw ay information
on/off .................................................. 417
Up dating .............................................. 419
Massage prog rammes
Re setting the settings .......................... 11 6Massage prog
rams
Selecting the front seats ......................1 15
Massage settings Resetting ..............................................1 16
Maximum gross vehicle weight ............ .560
Maximum speed see Limi ter
Maximum speeds ................................... .572
MBUX Interior Assistant (multimedia
sy stem) .................................................... .347
No tes .................................................. 346
Operating functions thro ugh pr oxim‐
ity of the hand .....................................3 48
Operating functions using poses ......... 350
Overview ............................................. 347
Selecting settings ................................ 352
Switching there ading light forthe
driver and front passenger on/off .......3 51
Switching the sear chlight forthe
driver on/off ........................................ 351
Mecca .......................................................4 20
Media Menu (on-boa rdcompu ter) .................. 314 Index
671