2019 MERCEDES-BENZ GLE COUPE ad blue
[x] Cancel search: ad bluePage 31 of 697
Wire
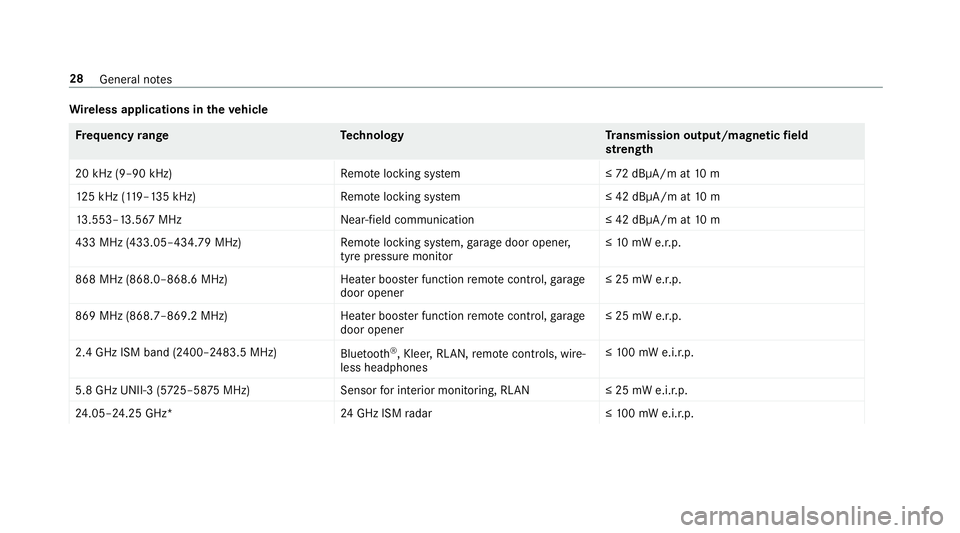
less applications in theve hicle Fr
equency rang eT echnology Transmission output/magn etic field
st re ngth
20 kHz (9–90 kHz)R emotelocking sy stem ≤72 dBμA/m at 10 m
12 5 kHz (1 19–135 kHz)R emotelocking sy stem ≤ 42 dBμA/m at10 m
13 .553–13.567 MHz Near-field communication ≤ 42 dBμA/m at10 m
433 MHz (433.05–434.79 MHz) Remo telocking sy stem, garage door opener,
tyre pressure monitor ≤
10 mW e.r.p.
868 MHz (868.0–868.6 MHz) Heater booster function remo tecontrol, garage
door opener ≤ 25 mW e.r.p.
869 MHz (868.7–869.2 MHz )Heater booster function remo tecontrol, garage
door opener ≤ 25 mW e.r.p.
2.4 GHz ISM band (2400–2483.5 MHz) Bluetooth ®
, Kleer, RLAN, remo tecontrols, wi re‐
less headphones ≤
10 0 mW e.i.r.p.
5.8 GHz UNII-3 (5 725–58 75MHz) Sensorfor interior monitoring, RLAN ≤ 25 mW e.i.r.p.
24 .05–24.25 GHz* 24GHz ISM radar ≤10 0 mW e.i.r.p. 28
General no tes
Page 142 of 697
Switching
the cooling or heating function for
th etemp erature-cont rolled cup holder on or
off &
WARNING Risk of inju ryby touching the
heating elements
The cup holder's heating elements may be
ve ry hot.
Yo u can burn yourself on them. #
Do not touch the cup holder's hot heat‐
ing elements. #
Ensure that no children can access the
cup holder's hot heating elements. #
Never lea vechildren unat tended in the
ve hicle. *
NO
TEDama getoobjects in thete mp era‐
ture-contro lled cupholder If
yo u place objects into thete mp erature-
controlled cup holder, they may become
dama ged. #
Do not place objects into thete mp era‐
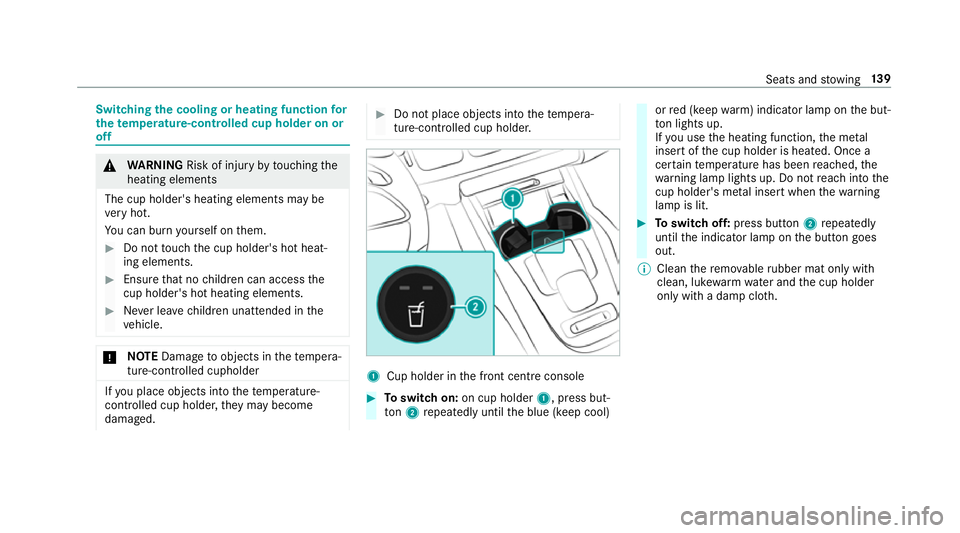
ture-contro lled cup holder. 1
Cup holder in the front cent reconsole #
Toswitch on: on cup holder 1, press but‐
to n2 repeatedly until the blue (keep cool) or
red (keep warm) indicator lamp on the but‐
to n lights up.
If yo u use the heating function, the me tal
inse rtof the cup holder is heated. Once a
cer tain temp erature has been reached, the
wa rning lamp lights up. Do not reach into the
cup holder's me tal inse rtwhen thewa rning
lamp is lit. #
Toswitch off: press button 2repeatedly
until the indicator lamp on the button goes
out.
% Clean there mo vable rubber mat only with
clean, luk ewarmwate r and the cup holder
only with a damp clo th. Seats and
stowing 13 9
Page 176 of 697
#
Press button 1.
The red or blue indicator lamp on button 1
will light up or go out.
Indicator lamp colours: R blue: stationary ventilation is switched on
R red: stationary heater is swit ched on
R Yello w: departure time preselected
The stationary heater/ stationary ventilation will
switch off au tomatically af ter 50 minutes.
Setting thest ationary heater / stationary
ve ntilation via the multimedia sy stem #
Call up the air conditioning menu
(/ page 167). #
Select Auxiliary heating.
Selecting the departu retime #
Select the time TIME A: XX, TIME B: XXor
TIME C: XX.
Setting the departu retime #
Select the time TIME A: XX, TIME B: XXor
TIME C: XX. #
Select the pen beside the time. #
Set a time.
Setting thest ationary heater/stationary ven‐
tilation via remo tecont rol
Re quirements:
R The fuel tank is filled toat least reser vefuel
le ve l.
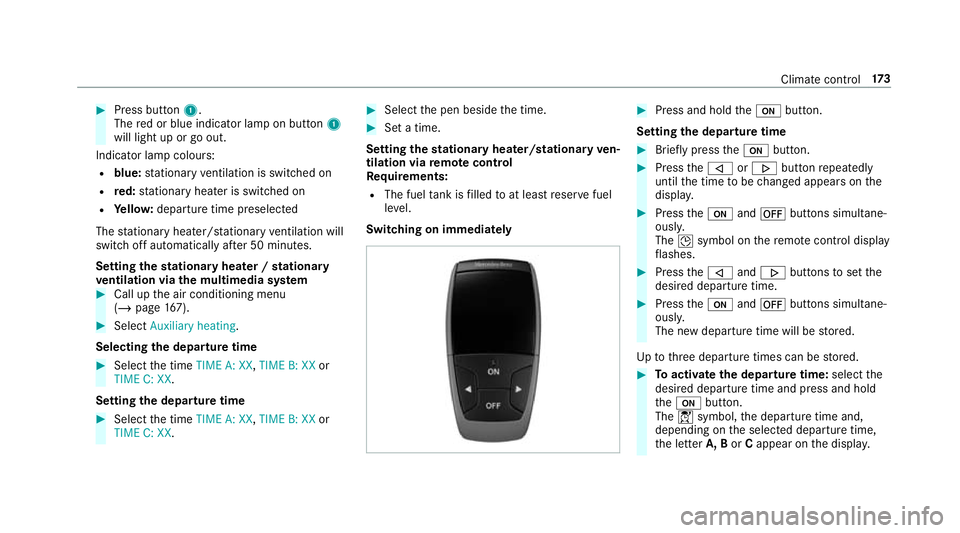
Switching on immedia tely #
Press and hold theu button.
Setting the departu retime #
Brie fly press theu button. #
Press the, or. button repeatedly
until the time tobe changed appears on the
displa y. #
Press theu and^ buttons simultane‐
ousl y.
The Îsymbol on there mo tecontrol displ ay
fl ashes. #
Press the, and. buttons toset the
desired departure time. #
Press theu and^ buttons simultane‐
ousl y.
The new departure time will be stored.
Up tothre e departure times can be stored. #
Toactivate the departu retime: select the
desired departure time and press and hold
th eu button.
The Ísymbol, the departure time and,
depending on the selected departure time,
th e letter A, BorCappear on the displa y. Climate cont
rol17 3
Page 190 of 697
#
When driving on unpa vedro ads or off-
ro ad, regular lych eck theve hicle under‐
side. #
Remo vetrapped plants or other flam‐
mable material, in particular. #
Ifth ere is damage, consult a qualified
specialist workshop immediately. When driving off-road, subs
tances su chas sand,
mud and water orwate r mixed with oil may get
into the brakes. This may lead toare duction in
braking ef fect or total brake failure as a result of
increased wear. The braking characteristics will
va ry depending on the material that has entered
th e sy stem. Clean the brakes af ter driving off-
ro ad. If youth en notice reduced braking ef fect
or hear scraping noises, ha vethe brake sy stem
ch ecked at a qualified specialist workshop.
Ad just your driving style to thech anged braking
ch aracteristics. *
NO
TEDama gecaused bydriving over
obs tacles The
vehicle can be damaged by:
R driving up on high kerbs or unpa ved
ro ads.
R quickly driving over obs tacles su chas
ke rbs, speed bumps or po tholes.
R heavy objects hitting the underbody or
ch assis components. #
Do not drive over obs tacles that could
damage theve hicle. #
Check theve hicle regular lyfor dama ge
during off-road driving. #
Adjust theve hicle speed tosuit the
ro ad sur face conditions. #
Ifth ere is damage, consult a qualified
specialist workshop immediately. +
ENVIRONMENTAL
NOTEEnvironmental
dama gedue tonon-obser vance of pro‐
hibition signs Environmental pr
otection has priority. Treat
nature with respect. #
Be sure toobser veprohibition signs. Checklist before driving off-road
Check
thefo llowing points before driving off-
ro ad:
R Fuel le vel
R Vehicles with a diesel engine: AdBlue ®
le vel
R Engine oil le vel:fill engine oil up tothe maxi‐
mum le velto ensure full gradeability
(/ page 498).
R Tyre-change tool kit and spare wheel
R Tyres and wheels
% Further information about special all-ter rain
tyres forre trofitting can be ob tained from a
qu alified specialist workshop. Driving and parking
187
Page 208 of 697
#
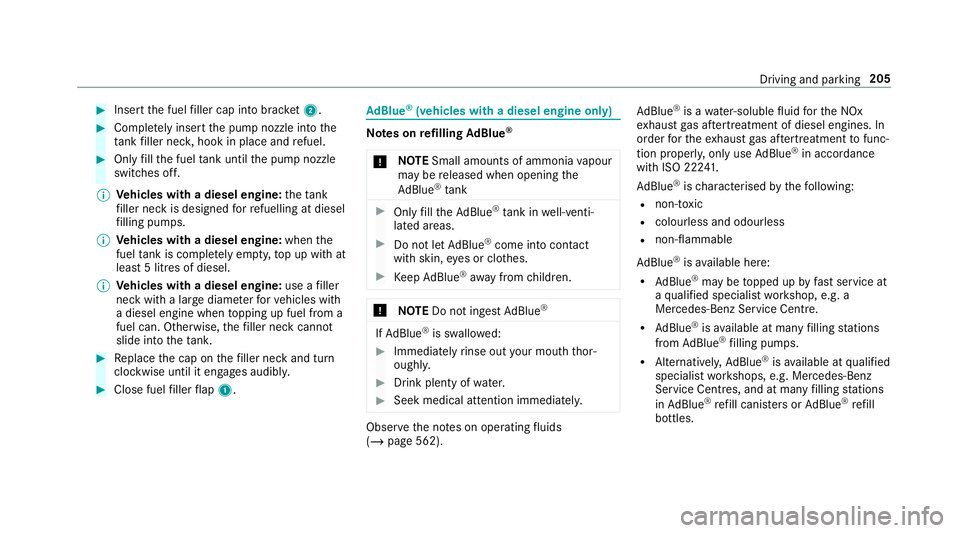
Insert the fuel filler cap into brac ket2. #
Comp lete ly inse rtthe pump nozzle into the
ta nk filler nec k,hook in place and refuel. #
Only fill th e fuel tank until the pump nozzle
switches off.
% Vehicles with a diesel engine: theta nk
fi ller neck is designed forre fuelling at diesel
fi lling pumps.
% Vehicles with a diesel engine: whenthe
fuel tank is compl etely em pty, top up with at
least 5 litres of diesel.
% Vehicles with a diesel engine: use afiller
neck with a lar gediame terfo rve hicles with
a diesel engine when topping up fuel from a
fuel can. Otherwise, thefiller neck cannot
slide into theta nk. #
Replace the cap on thefiller neck and turn
clockwise until it engages audibl y.#
Close fuel filler flap 1. Ad
Blue ®
(vehicles with a diesel engine on ly) Note
s onrefilling AdBlue ®
* NO
TESmall amounts of ammonia vapour
may be released when opening the
Ad Blue ®
tank #
Only fill th eAd Blue ®
tank in well-venti‐
lated areas. #
Do not let AdBlue ®
come into contact
wi th skin, eyes or clo thes. #
Keep AdBlue ®
aw ay from children. *
NOTEDo not ingest AdBlue ® If
Ad Blue ®
is swallo wed: #
Immediately rinse out your mouth thor‐
oughl y. #
Drink plenty of water. #
Seek medical attention immediately. Obser
vethe no tes on operating fluids
(/ page 562). Ad
Blue ®
is a water-soluble fluid forth e NOx
ex haust gas af tertre atment of diesel engines. In
order forth eex haust gas af tertre atment tofunc‐
tion properly, only use AdBlue ®
in acco rdance
with ISO 22 241.
Ad Blue ®
is ch aracterised bythefo llowing:
R non-t oxic
R colourless and odourless
R non-flammable
Ad Blue ®
is available here:
R AdBlue ®
may be topped up byfast service at
a qu alified specialist workshop, e.g. a
Mercedes-Benz Service Centre.
R AdBlue ®
is available at many filling stations
from AdBlue ®
filling pumps.
R Alternativel y,Ad Blue ®
is available at qualified
specialist workshops, e.g. Mercedes-Benz
Service Centres, and at many filling stations
in Ad Blue ®
re fill canis ters or AdBlue ®
re fill
bottles. Driving and parking
205
Page 209 of 697
%
Ensu rethe connection between there fill
con tainer and vehicle filler neck does not
drip.
Re fill Ad Blue ®
* NOTEEngine dama gedue toAd Blue ®
being in the fuel #
AdBlue ®
must not be used tofill the
fuel tank. #
Only use AdBlue ®
to fill th eAd Blue ®
ta nk. #
Do not overfill theAd Blue ®
tank. *
NO
TEContamination of theve hicle inte‐
ri or due toAd Blue ®
lea kage #
Afterto pping up, carefully close the
Ad Blue ®
re fill con tainer. #
Avoid car rying AdBlue ®
re fill con tainers
permanently in theve hicle. Re
quirements:
R The vehicle is unloc ked. The
following messages appear in order in the
multifunction display when theAd Blue ®
tank
requ irestopping up:
R Refill AdBlue See Owner’s Manual . The
Ad Blue ®
tan k is down tothere ser veleve l.
R AdBlue system fault Emergency op. in XXX
miles See Owner's Manual .Yo u can on ly
drive theve hicle over the dis tance shown.
The AdBlue ®
tank is down tothere ser ve
le ve l.
R Top up AdBlue Perf. reduced: XXX km/h No
start in XXX km .Yo u can on ly drivetheve hi‐
cle at the speed shown and overth e dis tance
shown. Top up AdBlue ®
as soon as possible.
R Refill AdBlue No start in XXX miles. You can
on ly drive theve hicle overth e dis tance
shown. Top up AdBlue ®
as soon as possible.
R XX,X l Top up AdBlue Engine start not possi-
ble. The vehicle can no longer be star ted.
Yo u can see theAd Blue ®
ra nge and le vel in the
multifunction display (/ page310). %
The AdBlue ®
ra nge shown depends strongly
on the driving style and operating condi‐
tions. The actual range can therefore deviate
from the calculated range.
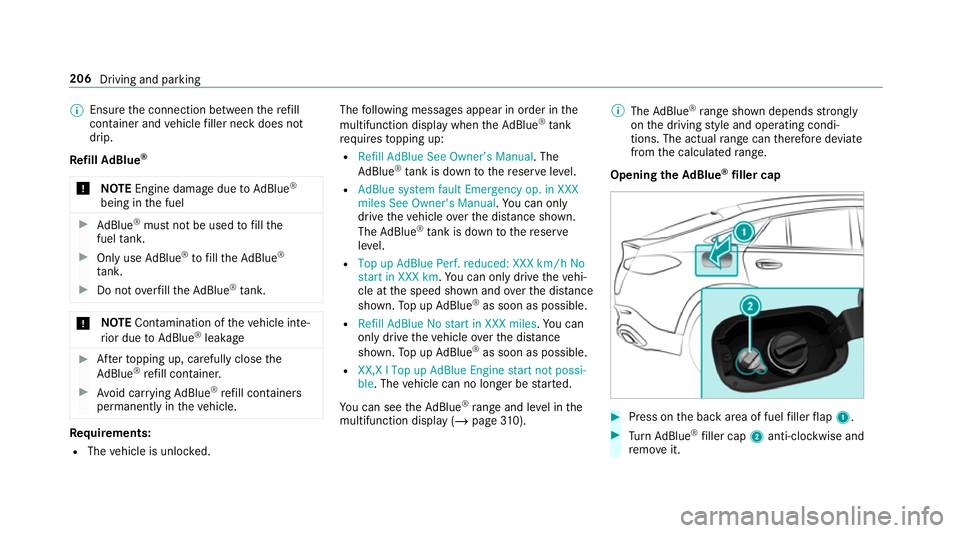
Opening the AdBlue ®
filler cap #
Press on the back area of fuel filler flap 1. #
Turn AdBlue ®
filler cap 2anti-clockwise and
re mo veit. 206
Driving and parking
Page 210 of 697
%
You can also store theAd Blue ®
filler cap in
th e fuel filler cap holder in the fuel filler flap
hin gearm.
Prepa ring theAd Blue ®
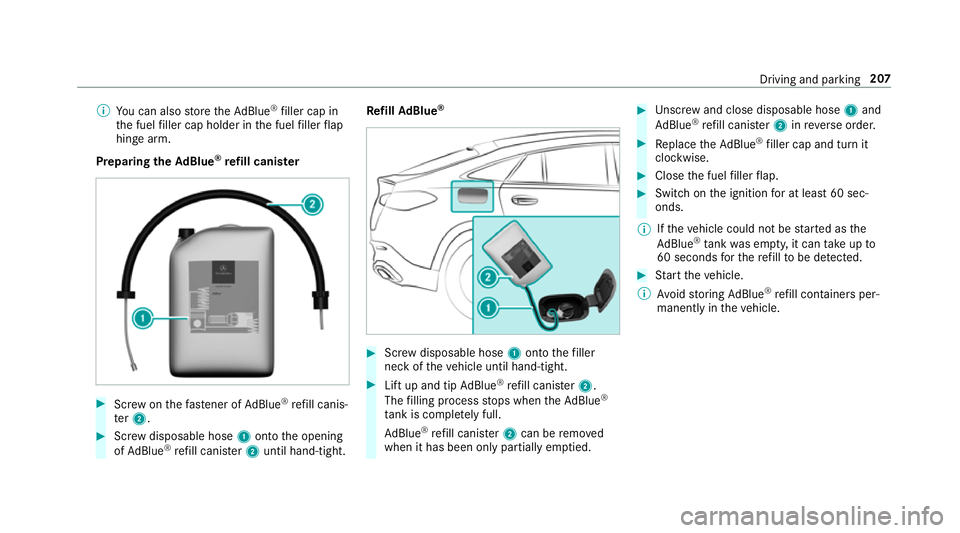
re fill canis ter #
Screw onthefast ener of AdBlue ®
re fill canis‐
te r2. #
Screw disposable hose 1onto the opening
of Ad Blue ®
re fill canis ter2 until hand-tight. Re
fill Ad Blue ® #
Screw disposable hose 1onto thefiller
neck of theve hicle until hand-tight. #
Lift up and tip AdBlue ®
re fill canis ter2.
The filling process stops when theAd Blue ®
ta nk is compl etely full.
Ad Blue ®
re fill canis ter2 can be remo ved
when it has been only partially em ptied. #
Unscr ew and close disposable hose 1and
Ad Blue ®
re fill canis ter2 inreve rse order. #
Replace theAd Blue ®
filler cap and turn it
clockwise. #
Close the fuel filler flap. #
Swit chon the ignition for at least 60 sec‐
onds.
% Ifth eve hicle could not be star ted as the
Ad Blue ®
tan kwa s em pty, it can take up to
60 seconds forth ere fill to be de tected. #
Start theve hicle.
% Avoid storing AdBlue ®
re fill con tainers per‐
manently in theve hicle. Driving and parking
207
Page 313 of 697
Ad
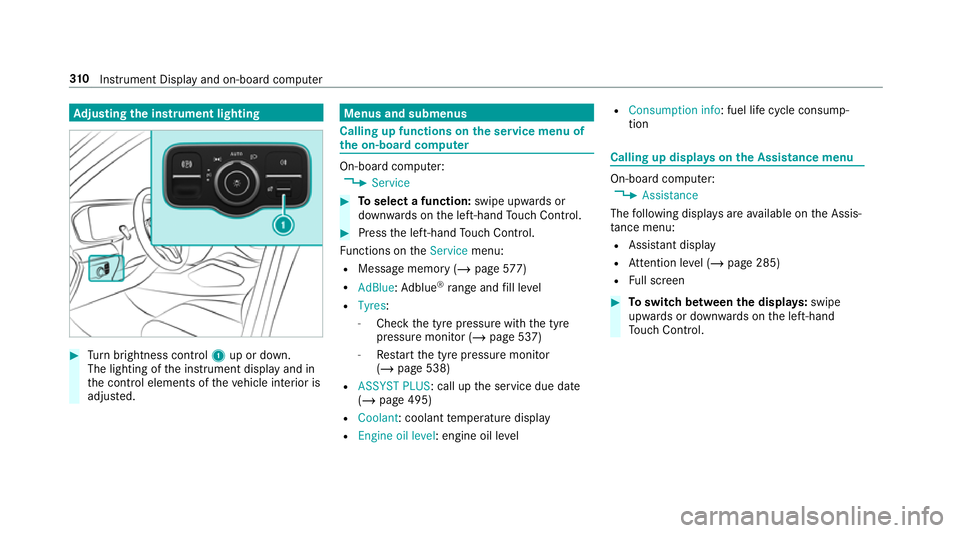
justing the in stru ment lighting #
Turn brightness control 1up or down.
The lighting of the instrument display and in
th e control elements of theve hicle interior is
adjus ted. Menus and submenus
Calling up functions on
the service menu of
th e on-boa rdcompu ter On-board computer:
4 Service #
Toselect a function: swipe upwards or
down wards on the left-hand Touch Control. #
Press the left-hand Touch Control.
Fu nctions on theService menu:
R Message memory (/ page577)
R AdBlue :Ad blue ®
ra nge and fill le vel
R Tyres:
- Check the tyre pressure with the tyre
pressure monitor (/ page 537)
- Restart the tyre pressure monitor
(/ page 538)
R ASSYST PLUS: call up the service due date
(/ page 495)
R Coolant : coolant temp erature display
R Engine oil level: engine oil le velR
Consumption info: fuel life cycle consump‐
tion Calling up displa
yson the Assistance menu On-board computer:
4 Assistance
The following displa ysare available on the Assis‐
ta nce menu:
R Assi stant display
R Attention le vel (/ page 285)
R Full screen #
Toswitch between the displa ys:swipe
upwards or down wards on the left-hand
To uch Control. 310
Instrument Display and on-board computer