2019 MERCEDES-BENZ EQC SUV display
[x] Cancel search: displayPage 462 of 629
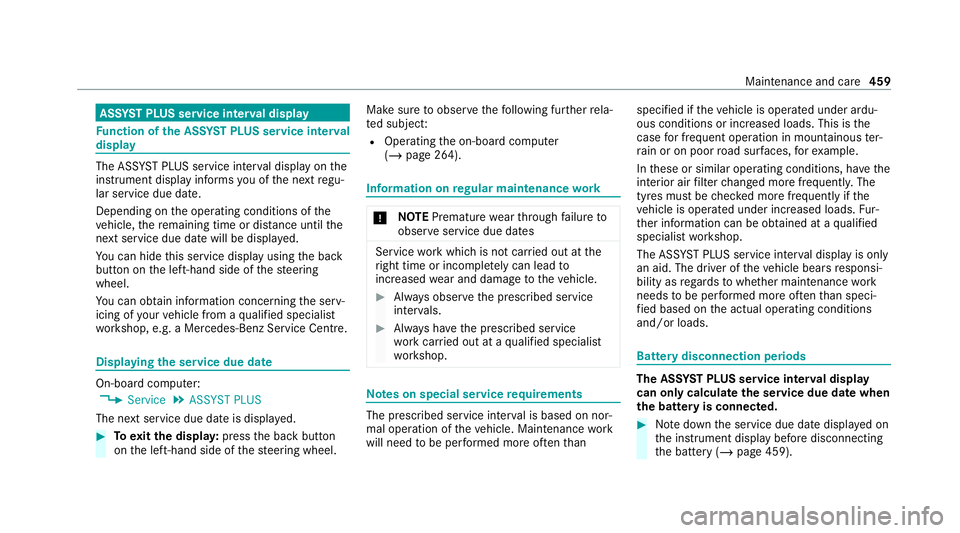
ASS
YST PLUS se rvice inter val display Fu
nction of the ASS YST PLUS se rvice inter val
displ ay The ASS
YST PLUS service inter val display on the
instrument display informs you of the next regu‐
lar service due date.
Depending on the operating conditions of the
ve hicle, there maining time or dis tance until the
next service due da tewill be displa yed.
Yo u can hide this service display using the back
button on the left-hand side of thesteering
wheel.
Yo u can obtain information concerning the serv‐
icing of your vehicle from a qualified specialist
wo rkshop, e.g. a Mercedes-Benz Service Centre. Displaying
the service due da te On-board computer:
4 Service 5
ASSYST PLUS
The next service due date is displa yed. #
Toexitth e displa y:press the back button
on the left-hand side of thesteering wheel. Make sure
toobser vethefo llowing fur ther rela‐
te d subjec t:
R Operating the on-board computer
(/ page 264). Information on
regular main tenance work *
NO
TEPremature wearthro ugh failure to
obser veservice due dates Service
workwhich is not car ried out at the
ri ght time or incomple tely can lead to
inc reased wear and damage totheve hicle. #
Alw ays obser vethe prescribed service
inter vals. #
Alw ays ha vethe prescribed service
wo rkcar ried out at a qualified specialist
wo rkshop. Note
s on special service requ irements The prescribed service inter
val is based on nor‐
mal operation of theve hicle. Maintenance work
will need tobe per form ed more of tenth an specified if
theve hicle is operated under ardu‐
ous conditions or increased loads. This is the
case for frequent operation in mountainous ter‐
ra in or on poor road sur faces, forex ample.
In these or similar operating conditions, ha vethe
interior air filter changed more frequent ly. The
tyres must be checked more frequently if the
ve hicle is operated under increased loads. Fur‐
th er information can be obtained at a qualified
specialist workshop.
The ASS YST PLUS service inter val display is only
an aid. The driver of theve hicle bears responsi‐
bility as rega rdsto whe ther maintenance work
needs tobe per form ed more of tenth an speci‐
fi ed based on the actual operating conditions
and/or loads. Batte
rydisconnection periods The AS
SYST PLUS service inter val display
can only calculate the service due da tewhen
th e bat tery is connected. #
Notedown the service due date displa yed on
th e instrument display before disconnecting
th e battery (/ page 459). Maintenance and care
459
Page 465 of 629

#
When opening the cap, wear pr otective
gl ove s and saf etygl asses. #
Open the cap slowly torelease pres‐
sure. #
Park theve hicle on a le vel sur face. #
Check the coolant temp erature display in the
instrument clus ter (/ page 329).
The coolant temp erature must be below
40 °C. #
Slowly turn cap 1anti-clockwise torelie ve
ov erpressure. #
Continue turning cap 1anti-clockwise and
re mo veit. #
Ifth e coolant le vel is below the mar ker bar
2, visit a qualified specialist workshop, e.g.
a Mercedes-Benz Service Centre. Only ha ve
coolant checked or refilled at a qualified spe‐
cialist workshop. To
pping up the windsc reen washer sy stem &
WARNING Risk of bu rns from hot com‐
ponent parts in the engine compartment
Cer tain components in the engine compart‐
ment can be very hot, e.g. drive sy stem and
ra diator. #
Allow the drive sy stem tocool down
and only touch the component parts
described belo w. &
WARNING Risk of inju rydue to ov erhea‐
te d drive sy stem
If yo u open the bonn etwhen the drive sys‐
te m has overheated or during a fire inthe
engine compartment, you could come into
contact with hot gases or other escaping
operating fluids. #
Before opening the bonn et, allow the
ove rheated drive sy stem tocool down. #
Intheeve nt of a fire inthe engine com‐
partment, keep the bonn etclosed and
call thefire service. &
WARNING Risk offire and injury from
windsc reen washer concentrate
Wi ndsc reen washer concentrate is highly
fl ammable. 462
Maintenance and care
Page 474 of 629
Note
s on care of the interior &
WARNING Risk of inju ryfrom pla stic
parts breaking off af terth e use of sol‐
ve nt-based care products
Ca reand cleaning products con taining sol‐
ve nts can cause su rfaces in the cockpit to
become porous. When
the airbags are deplo yed, plastic parts
may break away. #
Do not use any care or cleaning prod‐
ucts containing sol vents toclean the
cockpit. &
WARNING Risk of inju ryor death from
bleached seat belts
Bleaching or dyeing seat belts can se verely
we aken them.
This can, forex ample, cause seat belts to
te ar or fail in an accident. #
Never blea chor dye seat belts. Obser
vethefo llowing information: Cleaning and car
eA voiding vehicle damage
Seat belts Clean with lukewarmand soapy water. R
Do not use chemical cleaning agents.
R Do not dry seat belts byheating them toove r 80 °C or
ex posing them todirect sunlight.
Display Cleanthe sur face carefully wi tha mic rofibre clo thand a suit‐
able display care product (TFT/LCD). R
Swit choff the display and let it cool down.
R Do not use any other cleaning products.
Plastic trim R
Clean with a damp microfibre clo th.
R For heavy soiling: use care product recommended for
Mercedes-Benz. R
Do not attach sticke rs,fi lms or similar materials.
R Do not allow cosmetics, insect repellent or sun cream to
come in contact wi th the plastic trim. Maintenance and care
471
Page 486 of 629
If
yo u notice that theve hicle has lost coolant, do
not ha veitto we daw ay. Ha vetheve hicle trans‐
por ted ins tead. *
NO
TEDama getotheve hicle due to tow‐
ing away incor rectly #
Obser vethe instructions and no tes on
to wing away. Pe
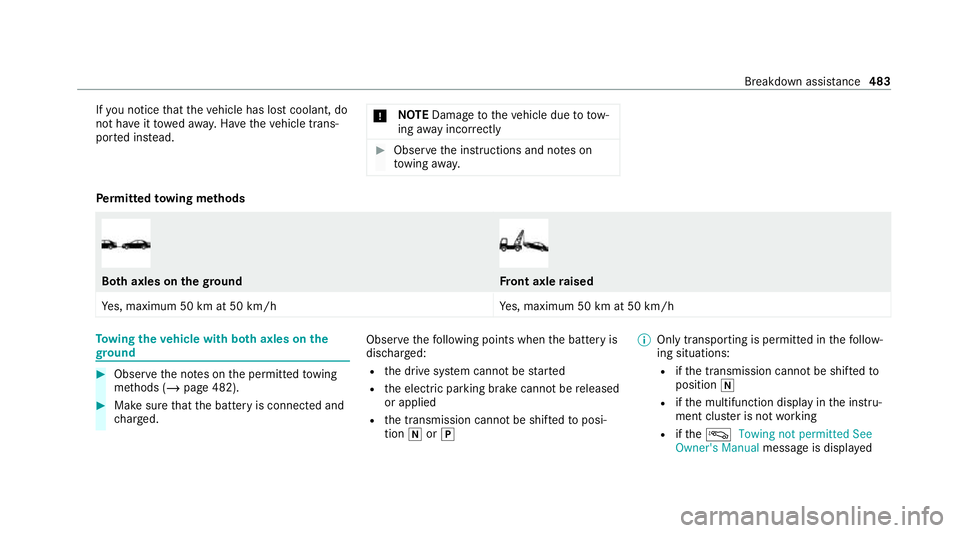
rm itted towing me thods Bo
th axles on thegr ound Fr
ont axle raised
Ye s, maximum 50 km at 50 km/h Yes, maximum 50 km at 50 km/h To
wing theve hicle with bo thaxles on the
gr ound #
Obser vethe no tes on the permitted towing
me thods (/ page 482). #
Make sure that the battery is connected and
ch arge d. Obser
vethefo llowing points when the battery is
dischar ged:
R the drive sy stem cann otbe star ted
R the electric parking brake cann otbe released
or applied
R the transmission cann otbe shif tedto posi‐
tion iorj %
Only transporting is permitted in thefo llow‐
ing situations:
R ifth e transmission cann otbe shif tedto
position i
R ifth e multifunction display in the instru‐
ment clus ter is not working
R ifth eá Towing not permitted See
Owner's Manual message is displa yed Breakdown assis
tance 483
Page 496 of 629
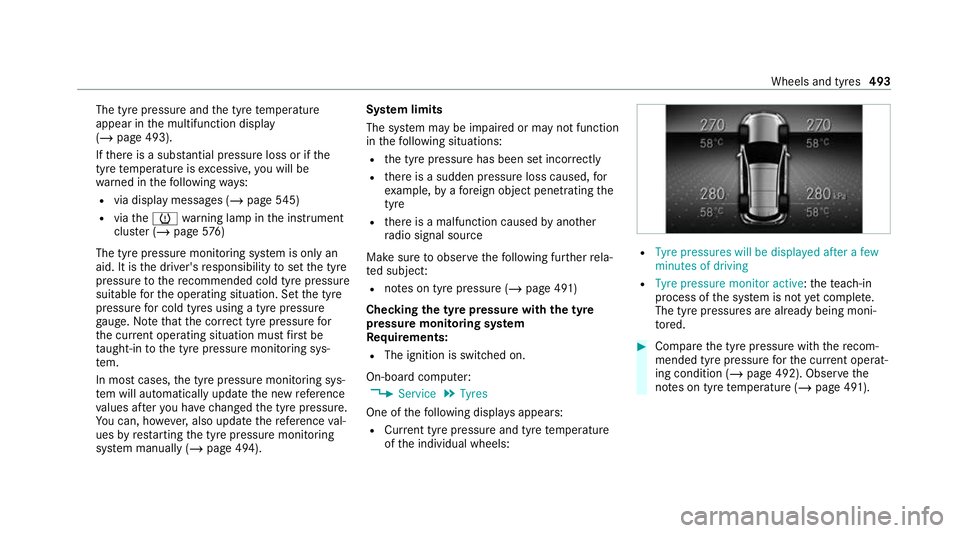
The tyre pressure and
the tyre temp erature
appear in the multifunction display
(/ page 493).
If th ere is a subs tantial pressure loss or if the
tyre temp erature is excessive, you will be
wa rned in thefo llowing ways:
R via display messa ges (/ page545)
R viatheh warning lamp in the instrument
clus ter (/ page576)
The tyre pressu remonitoring sy stem is only an
aid. It is the driver's responsibility toset the tyre
pressure tothere commended cold tyre pressure
suitable forth e operating situation. Set the tyre
pressure for cold tyres using a tyre pressu re
ga uge. No tethat the cor rect tyre pressure for
th e cur rent operating situation mu stfirs t be
ta ught-in tothe tyre pressure monitoring sys‐
te m.
In most cases, the tyre pressure monitoring sys‐
te m will auto maticallyupdate the new refere nce
va lues af teryo u ha vechanged the tyre pressure.
Yo u can, ho wever,also update there fere nce val‐
ues byrestarting the tyre pressure monitoring
sy stem manually (/ page 494). Sy
stem limits
The sy stem may be impaired or may not function
in thefo llowing situations:
R the tyre pressure has been set incor rectly
R there is a sudden pressure loss caused, for
ex ample, byafo re ign object penetrating the
tyre
R there is a malfunction caused byano ther
ra dio signal source
Make sure toobser vethefo llowing fur ther rela‐
te d subjec t:
R notes on tyre pressure (/ page 491)
Checking the ty repressure with the tyre
pressure moni toring sy stem
Requ irements:
R The ignition is switched on.
On-board computer: 4 Service 5
Tyres
One of thefo llowing displa ysappears:
R Cur rent tyre pressure and tyre temp erature
of the individual wheels: R
Tyre pressures will be displayed after a few
minutes of driving
R Tyre pressure monitor active: thete ach-in
process of the sy stem is not yet compl ete.
The tyre pressures are already being moni‐
to re d. #
Compare the tyre pressure with there com‐
mended tyre pressure forth e cur rent operat‐
ing condition (/ page 492). Obse rvethe
no tes on tyre temp erature (/ page 491). Wheels and tyres
493
Page 511 of 629
Make sure
toobser vethefo llowing fur ther rela‐
te d subjec t:
R Notes on tyre pressure (/ page 491)Emer
gency spare wheel Note
s onthe emer gency spare wheel &
WARNING Risk of accident caused by
incor rect wheel and tyre dimensions
The wheel or tyre size and the tyre type of
th e emer gency spa rewheel or spare wheel
and the wheel tobe replaced may dif fer.
Mounting an emer gency spa rewheel/spare
wheel may se verely impair the driving char‐
acteristics.
To prev ent hazardous situations: #
Adapt your driving style according lyand
drive carefull y. #
Neverfit more than one emer gency
spa rewheel or spare wheel that dif fers
in size. #
Only use an emer gency spa rewheel or
spare wheel of a dif fere nt size brie fly. #
Do not switch off ESP ®
. #
Have the emer gency spa rewheel or
spare wheel of a dif fere nt size replaced
at the nearest qualified specialist work‐
shop. The new wheel must ha vethe
cor rect dimensions. Check
the tyre pressure of the emer gency spa re
wheel fitted. Co rrect the pressure as necessar y.
The maximum permissible speed with an emer‐
ge ncy spa rewheel fitted is 80 km/h.
Do not fit th e emer gency spa rewheel with sn ow
ch ains.
Re place the emer gency spa rewheel af ter six
ye ars at the latest, rega rdless of wear.
% Ve
hicles with a tyre pressure monitoring
sy stem: if an emer gency spa rewheel is fit‐
te dth e tyre pressure monitoring sy stem can‐
not function reliabl y.Fo r a few minutes af ter
an emer gency spa rewheel is fitted, the sys‐
te m may still display the tyre pressure of there
mo ved wheel. Only restart the sy stem
again when the emer gency spa rewheel has
been replaced with a new wheel.
Be sure toalso obse rveth efo llowing fur ther
re lated subjects:
R Notes on tyre pressure (/ page 491)
R Tyre pressure table (/ page 492) Re
moving the eme rgency spa rewheel The eme
rgency spare wheel is secured in the
emer gency spa rewheel bag in the load compart‐
ment. #
Obser vethe information on mounting tyres
(/ page 498). #
Open theta ilgate. #
Detach the securing stra ps. #
Unhook there taining spring hooks of the
securing stra ps from the brac kets. #
Remo vethe emer gency spa rewheel bag with
th e emer gency spa rewheel. #
Open the emer gency spa rewheel bag and
re mo vethe emer gency spa rewheel. 508
Wheels and tyres
Page 523 of 629
Display messages
Int
roduction Note
s on display messages
Display messages appear on the multifunction
displa y.
Displ aymessa ges with graphic symbols are sim‐
plified in the Owner's Manual and may dif fer
from the symbols on the multifunction displa y.
The multifunction display sho wshigh-priority dis‐
play messages in red. Cer tain display messages
are accompanied byawa rning tone.
Please act in acco rdance with the display mes‐
sages and follow the additional no tes in the
Owner's Manual.
Fo r some display messa ges, a symbol is also
shown:
R Õ Further information
R ¨ Hide display message
Yo u can select the desired symbol byswiping
left or right on the left-hand Touch Control.
Press theÕ symbol toshow fur ther information on
the multifunction displa y.Press the¨
symbol tohide the display message.
Yo u can hide lo w-priority display messages by
pressing button ¤orthe left-hand Touch
Control. The displ aymessa ges will then be
st ored in the message memor y.
Re ctify the cause of a display message as
qu ickly as possible.
High-priority display messages cannot be hid‐
den. The multifunction display sho ws these dis‐
play messages continuously until the cause of
th e display message has been rectified.
Calling up stored displ aymessages
On-boa rdcompu ter:
4 Service 5
1 message
If th ere are no display messages, No mes-
sageswill appear on the multifunction displa y. #
Scroll thro ugh the display messages byswip‐
ing upwards or down wards on the left-hand
To uch Control. #
Toexitth e message memor y:press the
¤ button. 520
Display messages and warning/indicator lamps
Page 524 of 629
Saf
ety sy stems Display messages
Possible causes/consequences and M
MSolutions
!
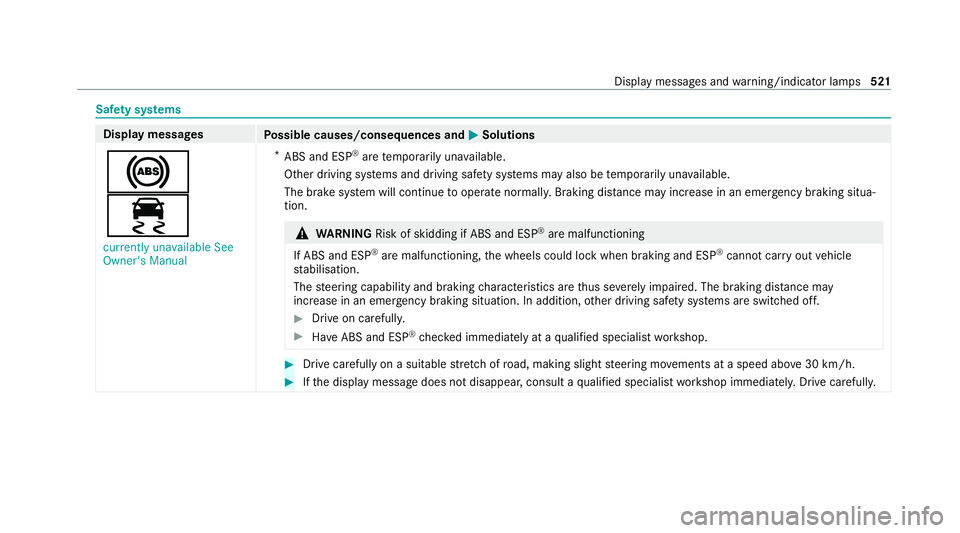
÷ currently unavailable See
Owner's Manual *
ABS and ESP ®
are temp orarily una vailable.
Other driving sy stems and driving saf ety sy stems may also be temp orarily una vailable.
The brake sy stem will continue tooperate normally. Braking dis tance may increase in an emergency braking situa‐
tion. &
WARNING Risk of skidding if ABS and ESP ®
are malfunctioning
If ABS and ESP ®
are malfunctioning, the wheels could lock when braking and ESP ®
cann otcar ryout vehicle
st abilisation.
The steering capability and braking characteristics are thus se verely impaired. The br aking distance may
increase in an emergency braking situation. In addition, other driving saf ety sy stems are switched off. #
Drive on carefull y. #
Have ABS and ESP ®
ch ecked immediately at a qualified specialist workshop. #
Drive carefully on a suitable stre tch of road, making slight steering mo vements at a speed abo ve30 km/h. #
Ifth e display message does not disappear, consult a qualified specialist workshop immediately. Drive carefully. Display messages and
warning/indicator lamps 521