2018 PEUGEOT 5008 ESP
[x] Cancel search: ESPPage 58 of 364
56
Anti-intrusion security
This system allows automatic simultaneous
locking of the doors and boot as soon as the
speed of the vehicle exceeds 6 mph (10 km/h).
Operation
If one of the doors or the boot is open, the
automatic central locking does not take place.
Carrying long or voluminous objects
If you want to drive with the boot open, you
should press the central locking button
to lock the doors. Other wise, every time
the speed of the vehicle exceeds 6
mph
(10
km/h), the locks will rebound and the
alerts mentioned above will appear.
Pressing the central locking button
unlocks the vehicle.
Above 6
mph (10 km/h), this unlocking is
te m p o r a r y.
Activation/Deactivation
Driving with the doors locked may render
access for the emergency services
difficult in an emergency.
This is signalled by the sound of
the locks rebounding, accompanied
by illumination of this symbol in the
instrument panel, an audible signal and
the display of an alert message.
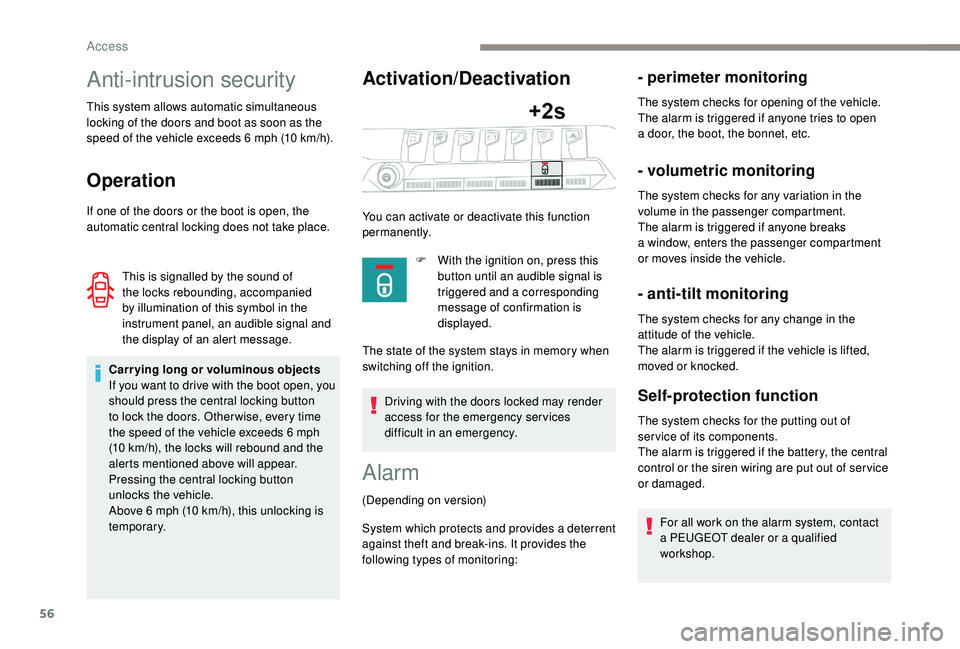
You can activate or deactivate this function
permanently.
F
W
ith the ignition on, press this
button until an audible signal is
triggered and a corresponding
message of confirmation is
displayed.
The state of the system stays in memory when
switching off the ignition.
Alarm
(Depending on version)
System which protects and provides a
deterrent
against theft and break-ins. It provides the
following types of monitoring:
- perimeter monitoring
The system checks for opening of the vehicle.
The alarm is triggered if anyone tries to open
a
door, the boot, the bonnet, etc.
- volumetric monitoring
The system checks for any variation in the
volume in the passenger compartment.
The alarm is triggered if anyone breaks
a
window, enters the passenger compartment
or moves inside the vehicle.
- anti-tilt monitoring
The system checks for any change in the
attitude of the vehicle.
The alarm is triggered if the vehicle is lifted,
moved or knocked.
Self-protection function
The system checks for the putting out of
ser vice of its components.
The alarm is triggered if the battery, the central
control or the siren wiring are put out of ser vice
or damaged.
For all work on the alarm system, contact
a
PEUGEOT dealer or a qualified
workshop.
Access
Page 66 of 364
64
Deactivating the rear
controls for the rear
windows
after the window has closed.
The safety anti-pinch function is not active
during this operation.
The red indicator lamp in the button comes
on, accompanied by a message confirming
activation of the system. It remains on for as
long as the deactivation is maintained.
Use of the rear electric windows from the
driver's controls remains possible.
Reinitialising the electric
windows
Following reconnection of the battery, the
safety anti-pinch function must be reinitialised.
The safety anti-pinch function is not active
during these operations. In the event of contact (pinching) during
operation of the windows, you must
reverse the movement of the window. To
do this, press the switch concerned.
When operating the passenger electric
window switches, the driver must ensure
that nothing is preventing correct closing
of the windows.
The driver must ensure that the
passengers use the electric windows
c o r r e c t l y.
Be particularly aware of children when
operating the windows.
Be aware of passengers or other persons
present when closing the windows using
the electronic key or the
K
eyless Entry
and Starting system.
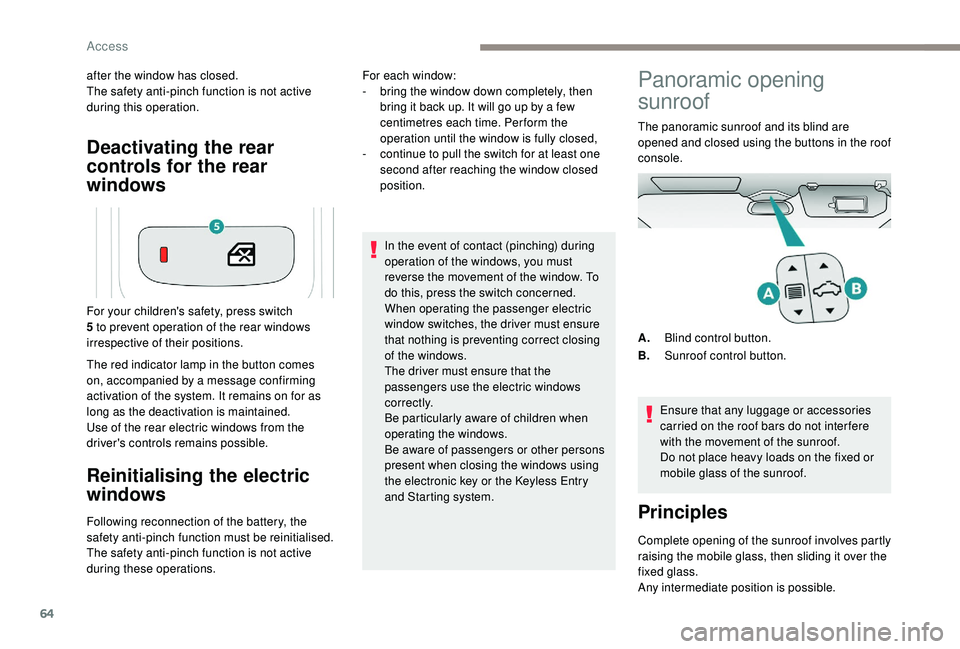
For your children's safety, press switch
5 to prevent operation of the rear windows
irrespective of their positions. For each window:
-
b
ring the window down completely, then
bring it back up. It will go up by a few
centimetres each time. Per form the
operation until the window is fully closed,
-
c
ontinue to pull the switch for at least one
second after reaching the window closed
position.
Panoramic opening
sunroof
The panoramic sunroof and its blind are
opened and closed using the buttons in the roof
console.
Ensure that any luggage or accessories
carried on the roof bars do not inter fere
with the movement of the sunroof.
Do not place heavy loads on the fixed or
mobile glass of the sunroof.
Principles
Complete opening of the sunroof involves partly
raising the mobile glass, then sliding it over the
fixed glass.
Any intermediate position is possible. A. Blind control button.
B. Sunroof control button.
Access
Page 72 of 364
70
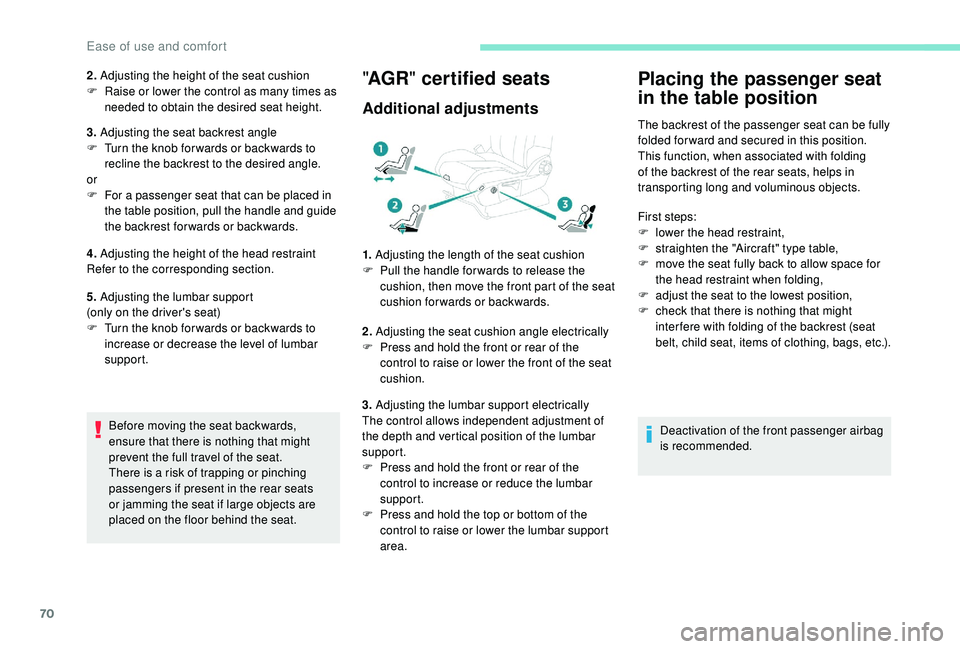
2. Adjusting the height of the seat cushion
F R aise or lower the control as many times as
needed to obtain the desired seat height.
3. Adjusting the seat backrest angle
F
T
urn the knob for wards or backwards to
recline the backrest to the desired angle.
or
F
F
or a passenger seat that can be placed in
the table position, pull the handle and guide
the backrest for wards or backwards.
4. Adjusting the height of the head restraint
Refer to the corresponding section.
5. Adjusting the lumbar support
(only on the driver's seat)
F
T
urn the knob for wards or backwards to
increase or decrease the level of lumbar
support.
Before moving the seat backwards,
ensure that there is nothing that might
prevent the full travel of the seat.
There is a
risk of trapping or pinching
passengers if present in the rear seats
or jamming the seat if large objects are
placed on the floor behind the seat." AGR " certified seats
Additional adjustments
1. Adjusting the length of the seat cushion
F P ull the handle for wards to release the
cushion, then move the front part of the seat
cushion forwards or backwards.
2. Adjusting the seat cushion angle electrically
F
P
ress and hold the front or rear of the
control to raise or lower the front of the seat
cushion.
3. Adjusting the lumbar support electrically
The control allows independent adjustment of
the depth and vertical position of the lumbar
support.
F
P
ress and hold the front or rear of the
control to increase or reduce the lumbar
support.
F
P
ress and hold the top or bottom of the
control to raise or lower the lumbar support
area.
Placing the passenger seat
in the table position
The backrest of the passenger seat can be fully
folded for ward and secured in this position.
This function, when associated with folding
of the backrest of the rear seats, helps in
transporting long and voluminous objects.
First steps:
F
l
ower the head restraint,
F
s
traighten the "Aircraft" type table,
F
m
ove the seat fully back to allow space for
the head restraint when folding,
F
a
djust the seat to the lowest position,
F
c
heck that there is nothing that might
inter fere with folding of the backrest (seat
belt, child seat, items of clothing, bags, etc.).
Deactivation of the front passenger airbag
is recommended.
Ease of use and comfort
Page 74 of 364
72
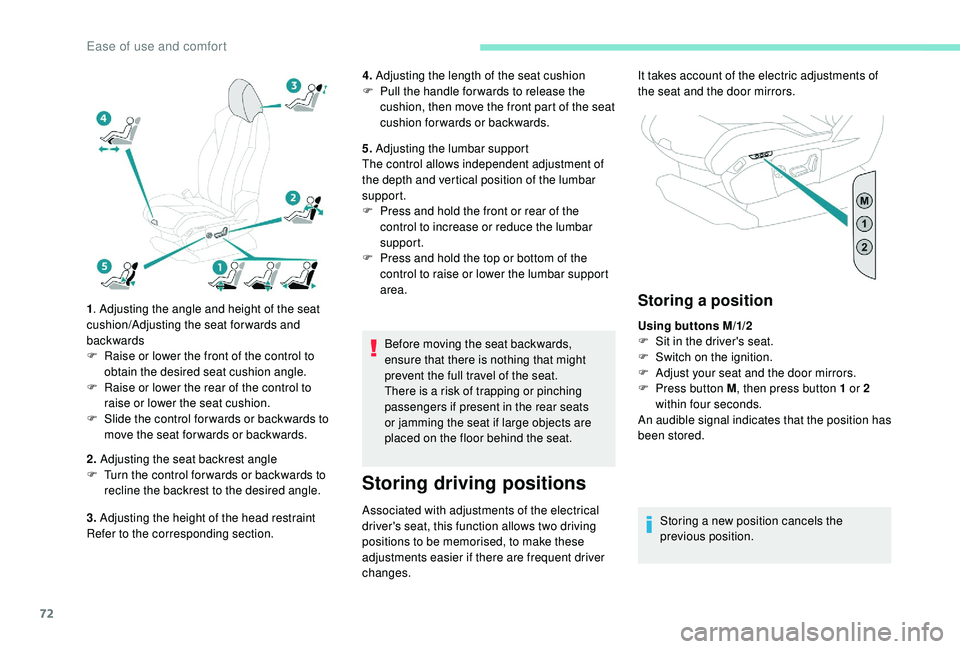
1. Adjusting the angle and height of the seat
cushion/Adjusting the seat forwards and
backwards
F
R
aise or lower the front of the control to
obtain the desired seat cushion angle.
F
R
aise or lower the rear of the control to
raise or lower the seat cushion.
F
S
lide the control for wards or backwards to
move the seat for wards or backwards.
2. Adjusting the seat backrest angle
F
T
urn the control for wards or backwards to
recline the backrest to the desired angle.
3. Adjusting the height of the head restraint
Refer to the corresponding section. 4.
Adjusting the length of the seat cushion
F
P
ull the handle for wards to release the
cushion, then move the front part of the seat
cushion forwards or backwards.
5. Adjusting the lumbar support
The control allows independent adjustment of
the depth and vertical position of the lumbar
support.
F
P
ress and hold the front or rear of the
control to increase or reduce the lumbar
support.
F
P
ress and hold the top or bottom of the
control to raise or lower the lumbar support
area.
Before moving the seat backwards,
ensure that there is nothing that might
prevent the full travel of the seat.
There is a
risk of trapping or pinching
passengers if present in the rear seats
or jamming the seat if large objects are
placed on the floor behind the seat.
Storing driving positions
Associated with adjustments of the electrical
driver's seat, this function allows two driving
positions to be memorised, to make these
adjustments easier if there are frequent driver
changes.
Storing a position
Using buttons M/1/2
F
S it in the driver's seat.
F
S
witch on the ignition.
F
A
djust your seat and the door mirrors.
F
P
ress button M , then press button 1
or 2
within four seconds.
An audible signal indicates that the position has
been stored.
Storing a
new position cancels the
previous position.
It takes account of the electric adjustments of
the seat and the door mirrors.
Ease of use and comfort
Page 75 of 364
73
Recalling a stored position
Ignition on or engine running
F
P ress button 1 or 2 to recall the
corresponding position.
An audible signal confirms that adjustment is
complete.
You can interrupt the current movement by
pressing button M , 1
or 2 or by using one
of the seat controls.
A stored position cannot be recalled while
driving.
Recalling stored positions is deactivated
45
seconds after switching off the ignition.
Heated seats
The function is active only with the engine
running.
Switching on
F Each press changes the level of heating; the corresponding number of indicator lamps
come on:
•
1
orange indicator lamp = low.
•
2
orange indicator lamps = medium.
•
3
orange indicator lamps = high.
Switching off
F Press the button again until all the indicator lamps are off.
The state of the system is not kept in memory
when the ignition is switched off.
Do not use the function when the seat is
not occupied.
Reduce the intensity of the heating as
soon as possible.
When the seat and passenger
compartment have reached an adequate
temperature, you can stop the function;
reducing the consumption of electrical
current reduces fuel consumption.
F
P
ress the button corresponding to your
seat. Prolonged use is not recommended for
persons with sensitive skin.
There is a
risk of burns for people whose
perception of heat is impaired (illness,
taking medication, etc.).
There is a risk of overheating the system if
material with insulating properties is used,
such as cushions or seat covers.
Do not use the system:
- i f wearing damp clothing,
-
i
f child seats are fitted.
To avoid breaking the heating element in
the seat:
-
d
o not place heavy objects on the seat,
-
d
o not kneel or stand on the seat,
-
d
o not place sharp objects on the seat,
-
d
o not spill liquids onto the seat.
To avoid the risk of short-circuit:
-
d
o not use liquid products for cleaning
the seat,
-
n
ever use the heating function when
the seat is damp.
3
Ease of use and comfort
Page 76 of 364
74
Multipoint massage
System with a choice of type of massage and
ad justment of its intensity.
This system operates with the engine running,
as well as in STOP mode of Stop & Start.
Activation/Settings
The massage settings are adjusted in the touch
screen.
The system is switched on, either directly using
the button on the front seat, or by activating
a
personalised ambience with the i-Cockpit
Amplify function.
Using the button on the front seat: The multipoint massages are also
managed by the i-Cockpit Amplify
function.
If you want to modify the settings:
F
s
elect another type of massage from the
five offered,
F
s
elect a massage intensity from the three
levels offered: " 1" (Low), " 2" (Normal) or " 3"
(High).
The modifications are taken into account
immediately.
Once activated, the system starts a
one hour
massage cycle, made up of sequences of
6
minutes of massage followed by 3 minutes at
rest.
The system stops automatically at the end of the
cycle; the indicator lamp in the button goes off.
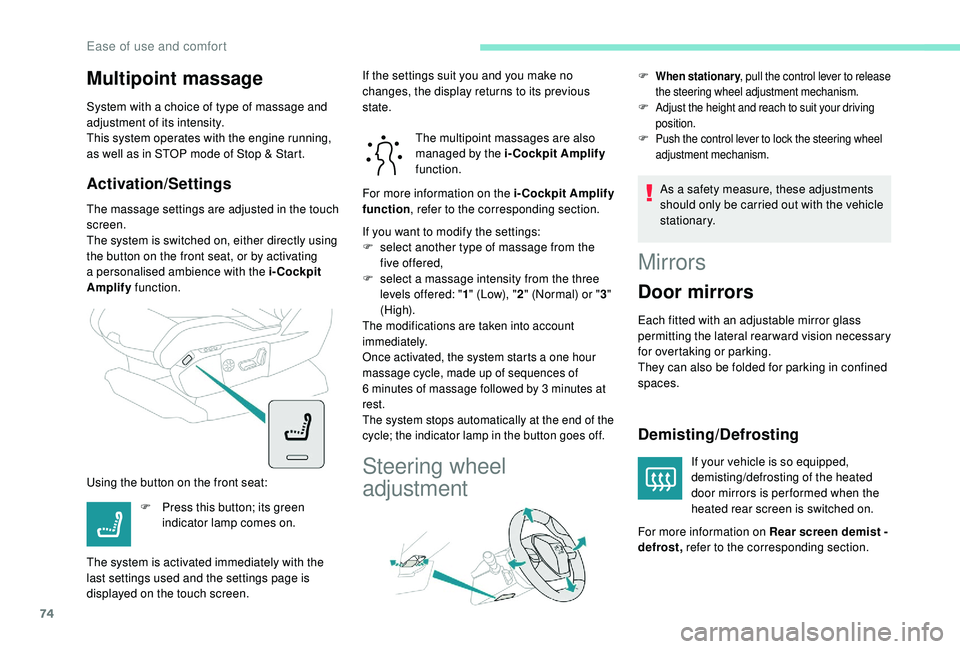
Steering wheel
adjustment
F When stationary , pull the control lever to release
the steering wheel adjustment mechanism.
F Adjust the height and reach to suit your driving position.
F Push the control lever to lock the steering wheel adjustment mechanism.
As a safety measure, these adjustments
s hould only be carried out with the vehicle
stationary.
F
P
ress this button; its green
indicator lamp comes on.
The system is activated immediately with the
last settings used and the settings page is
displayed on the touch screen. If the settings suit you and you make no
changes, the display returns to its previous
state.
For more information on the i-Cockpit Amplify
function
, refer to the corresponding section.
Mirrors
Door mirrors
Each fitted with an adjustable mirror glass
permitting the lateral rearward vision necessary
for overtaking or parking.
They can also be folded for parking in confined
spaces.
Demisting/Defrosting
If your vehicle is so equipped,
demisting/defrosting of the heated
door mirrors is per formed when the
heated rear screen is switched on.
For more information on Rear screen demist -
defrost, refer to the corresponding section.
Ease of use and comfort
Page 77 of 364
75
Adjustment
As a safety measure, the mirrors should
b e adjusted to reduce the "blind spots".
The objects obser ved are, in reality, closer
than they appear.
Take this into account in order to
correctly judge the distance of vehicles
approaching from behind.
Folding
F From outside: lock the vehicle using the remote control or the key.
F
F
rom inside: with the ignition on, pull the
control A in the central position rearwards.
If the mirrors are folded using control A ,
they will not unfold when the vehicle is
unlocked. Pull again on control A .
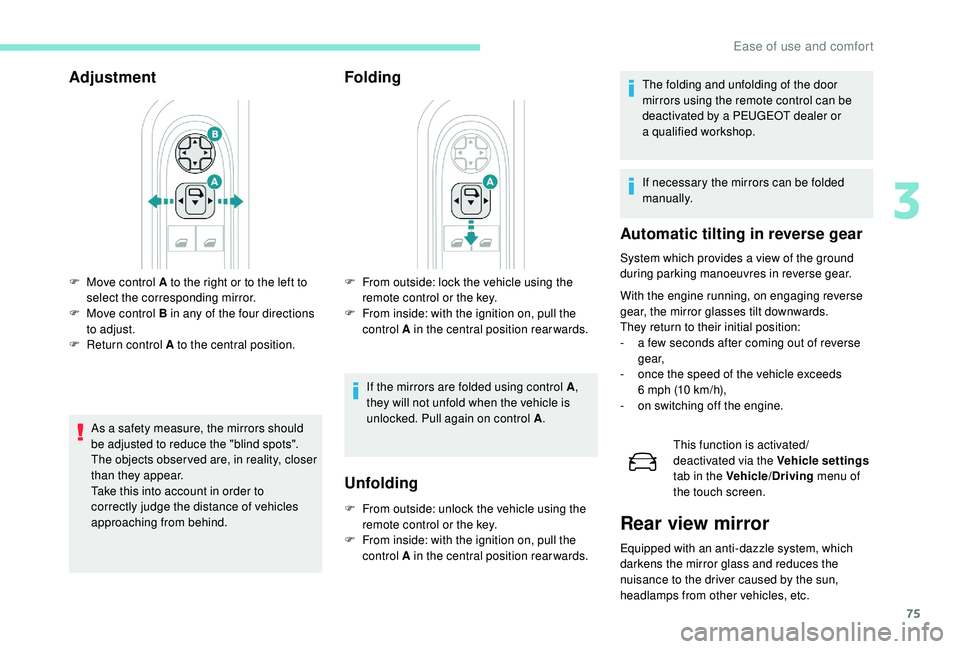
F
M
ove control A to the right or to the left to
select the corresponding mirror.
F
M
ove control B in any of the four directions
to adjust.
F
R
eturn control A to the central position.
Unfolding
F From outside: unlock the vehicle using the remote control or the key.
F
F
rom inside: with the ignition on, pull the
control A in the central position rearwards. The folding and unfolding of the door
mirrors using the remote control can be
deactivated by a
PEUGEOT dealer or
a
qualified workshop.
If necessary the mirrors can be folded
manually.
Automatic tilting in reverse gear
System which provides a view of the ground
d uring parking manoeuvres in reverse gear.
With the engine running, on engaging reverse
gear, the mirror glasses tilt downwards.
They return to their initial position:
-
a f
ew seconds after coming out of reverse
g e a r,
-
o
nce the speed of the vehicle exceeds
6
mph (10 km/h),
-
o
n switching off the engine. This function is activated/
deactivated via the Vehicle settings
tab in the Vehicle/Driving menu of
the touch screen.
Rear view mirror
Equipped with an anti-dazzle system, which
darkens the mirror glass and reduces the
nuisance to the driver caused by the sun,
headlamps from other vehicles, etc.
3
Ease of use and comfort
Page 78 of 364
76
Manual model
Adjustment
F A djust the mirror so that the glass is
directed correctly in the "day" position.
Day/night position
F
P
ull the lever to change to the "night" anti-
dazzle position.
F
P
ush the lever to change to the normal
"day" position.
Automatic "electrochrome " model
In order to ensure optimum visibility during
your manoeuvres, the mirror lightens
automatically when reverse gear is
engaged.
This system automatically and progressively
changes between day and night use by means
of a
s
ensor measuring the light coming from the
rear of the vehicle.
Second row seats
Rear head restraints
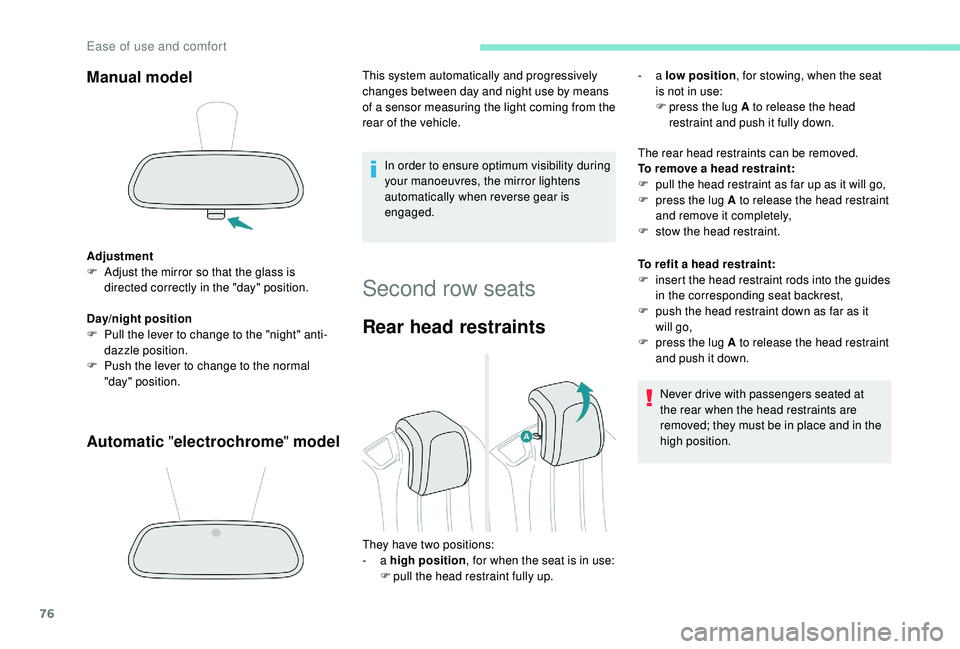
The rear head restraints can be removed.
To remove a head restraint:
F
p
ull the head restraint as far up as it will go,
F
p
ress the lug A to release the head restraint
and remove it completely,
F
s
tow the head restraint.
To refit a
head restraint:
F
i
nsert the head restraint rods into the guides
in the corresponding seat backrest,
F
p
ush the head restraint down as far as it
will go,
F
p
ress the lug A to release the head restraint
and push it down.
Never drive with passengers seated at
the rear when the head restraints are
removed; they must be in place and in the
high position.
They have two positions:
-
a high position , for when the seat is in use:
F
p
ull the head restraint fully up. -
a
low position , for stowing, when the seat
is not in use:
F
p
ress the lug A to release the head
restraint and push it fully down.
Ease of use and comfort