2018 PEUGEOT 5008 reset
[x] Cancel search: resetPage 10 of 364
8
Head-up digital screen
Customisable digital instrument panel.
Depending on the selected display mode,
some information may be hidden or shown in
a different way.
Digital screen
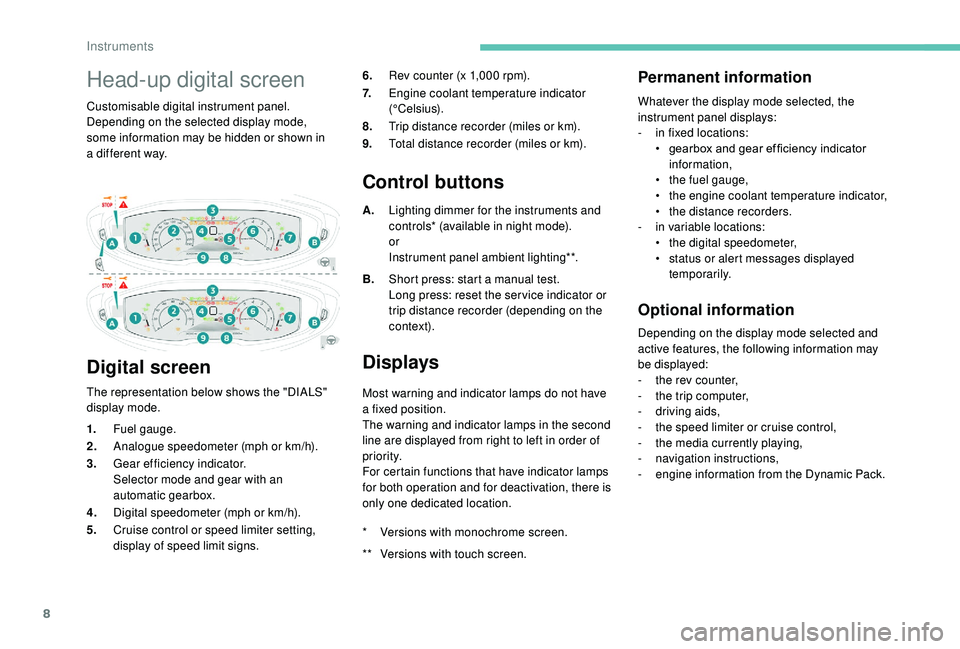
The representation below shows the "DIALS"
display mode. 6.
Rev counter (x 1,000 rpm).
7. Engine coolant temperature indicator
(°Celsius).
8. Trip distance recorder (miles or km).
9. Total distance recorder (miles or km).
Control buttons
A.Lighting dimmer for the instruments and
controls* (available in night mode).
or
Instrument panel ambient lighting**.
B. Short press: start a
manual test.
Long press: reset the ser vice indicator or
trip distance recorder (depending on the
contex t).
Displays
Most warning and indicator lamps do not have
a fixed position.
The warning and indicator lamps in the second
line are displayed from right to left in order of
priority.
For certain functions that have indicator lamps
for both operation and for deactivation, there is
only one dedicated location.
Permanent information
Whatever the display mode selected, the
instrument panel displays:
-
i
n fixed locations:
•
g
earbox and gear ef ficiency indicator
information,
•
t
he fuel gauge,
•
t
he engine coolant temperature indicator,
•
t
he distance recorders.
-
i
n variable locations:
•
t
he digital speedometer,
•
s
tatus or alert messages displayed
temporarily.
Optional information
Depending on the display mode selected and
active features, the following information may
be displayed:
-
t
he rev counter,
-
t
he trip computer,
-
d
riving aids,
-
t
he speed limiter or cruise control,
-
t
he media currently playing,
-
n
avigation instructions,
-
e
ngine information from the Dynamic Pack.
1.
Fuel gauge.
2. Analogue speedometer (mph or km/h).
3. Gear efficiency indicator.
Selector mode and gear with an
automatic gearbox.
4. Digital speedometer (mph or km/h).
5. Cruise control or speed limiter setting,
display of speed limit signs. *
V
ersions with monochrome screen.
**
V
ersions with touch screen.
Instruments
Page 33 of 364
31
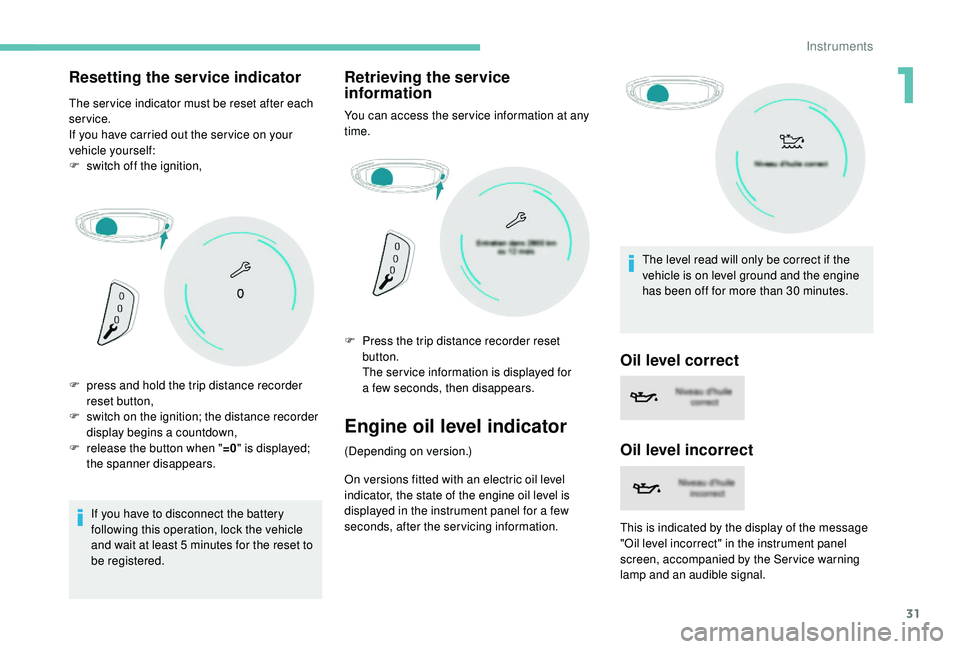
Resetting the service indicator
The ser vice indicator must be reset after each
service.
If you have carried out the ser vice on your
vehicle yourself:
F
s
witch off the ignition,
If you have to disconnect the battery
following this operation, lock the vehicle
and wait at least 5
minutes for the reset to
be registered.
Retrieving the service
information
You can access the ser vice information at any
time.
Engine oil level indicator
(Depending on version.)
On versions fitted with an electric oil level
indicator, the state of the engine oil level is
displayed in the instrument panel for a
few
seconds, after the servicing information. The level read will only be correct if the
vehicle is on level ground and the engine
has been off for more than 30
minutes.
F
p
ress and hold the trip distance recorder
reset button,
F
s
witch on the ignition; the distance recorder
display begins a
countdown,
F
r
elease the button when "
=0" is displayed;
the spanner disappears. F
P
ress the trip distance recorder reset
button.
T
he ser vice information is displayed for
a
few seconds, then disappears.
Oil level correct
Oil level incorrect
This is indicated by the display of the message
"Oil level incorrect" in the instrument panel
screen, accompanied by the Ser vice warning
lamp and an audible signal.
1
Instruments
Page 38 of 364
36
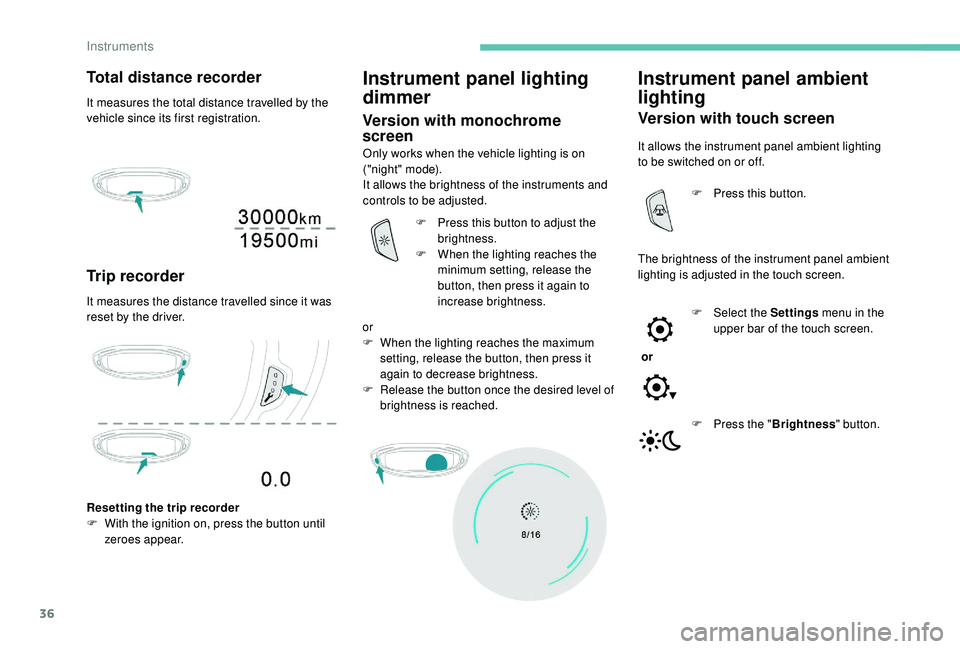
Total distance recorder
It measures the total distance travelled by the
vehicle since its first registration.
Trip recorder
It measures the distance travelled since it was
reset by the driver.
Instrument panel lighting
dimmer
Version with monochrome
screen
Only works when the vehicle lighting is on
("night" mode).
It allows the brightness of the instruments and
controls to be adjusted.
Resetting the trip recorder
F
W
ith the ignition on, press the button until
zeroes appear. F
P
ress this button to adjust the
brightness.
F
W
hen the lighting reaches the
minimum setting, release the
button, then press it again to
increase brightness.
or
F
W
hen the lighting reaches the maximum
setting, release the button, then press it
again to decrease brightness.
F
R
elease the button once the desired level of
brightness is reached.
Instrument panel ambient
lighting
Version with touch screen
It allows the instrument panel ambient lighting
to be switched on or off.
The brightness of the instrument panel ambient
lighting is adjusted in the touch screen. F
P
ress this button.
or F
Sel
ect the Settings menu in the
upper bar of the touch screen.
F
P
ress the "Brightness " button.
Instruments
Page 39 of 364
37
F Adjust the brightness by pressing the arrows or moving the cursor.
F
C
onfirm to save and quit.
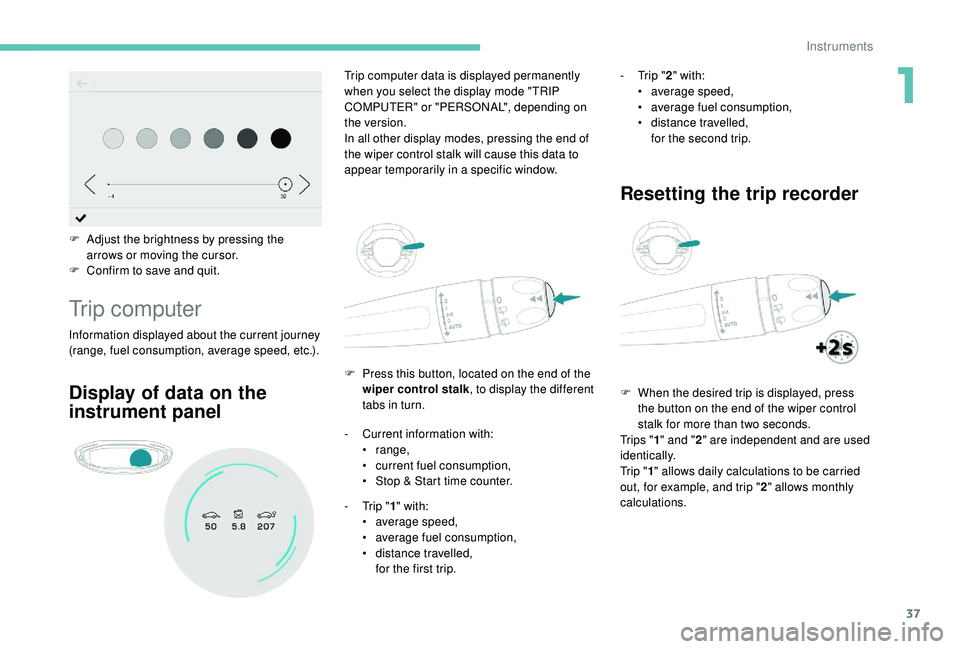
Trip computer
Information displayed about the current journey
(range, fuel consumption, average speed, etc.). F
P
ress this button, located on the end of the
wiper control stalk , to display the different
tabs in turn.
Trip computer data is displayed permanently
when you select the display mode "TRIP
COMPUTER" or "PERSONAL", depending on
the version.
In all other display modes, pressing the end of
the wiper control stalk will cause this data to
appear temporarily in a specific window.
Display of data on the
instrument panel
- Current information with:
• range,
•
c
urrent fuel consumption,
•
S
top & Start time counter.
-
T
rip "1" with:
•
a
verage speed,
•
a
verage fuel consumption,
•
d
istance travelled,
for the first trip. -
T
rip "
2" with:
•
a
verage speed,
•
a
verage fuel consumption,
•
d
istance travelled,
for the second trip.
Resetting the trip recorder
F When the desired trip is displayed, press the button on the end of the wiper control
stalk for more than two seconds.
Tr i p s " 1" and " 2" are independent and are used
identically.
Tr i p " 1" allows daily calculations to be carried
out, for example, and trip " 2" allows monthly
calculations.
1
Instruments
Page 40 of 364

38
Monochrome screen C
Displays
Depending on the context, it displays:
- time,
-
date,
-
e
xterior temperature (this flashes if there is
a
risk of ice),
-
v
isual parking sensor information,
-
a
udio source being listened to,
-
t
elephone or hands-free kit information,
-
s
ettings menus for the screen and the
vehicle equipment.
A few definitions…
Range
(miles or km)
If dashes are displayed continuously
while driving in place of the digits, contact
a
PEUGEOT dealer or a qualified workshop.
Current fuel consumption
(mpg or l/100 km or km/l) T his function is only displayed from
19 mph (30 km/h).
This value may vary following a change in
the style of driving or the terrain, resulting
in a significant change in the current fuel
consumption. The distance which can still be
travelled with the fuel remaining
in the tank (at the average fuel
consumption seen over the last few
miles (kilometres) travelled).
When the range falls below 19 miles (30 km),
dashes are displayed.
After filling with at least 5 litres of fuel, the
range is recalculated and is displayed if it
exceeds 62 miles (100 km).
Calculated over the last few
seconds.
Average fuel consumption
(mpg or l/100 km or km/l)
C alculated since the last trip
computer reset.
Average speed
(mph or km/h)
Calculated since the last trip
computer reset.
Distance travelled
(miles or km)Calculated since the last trip
computer reset.
Stop & Start time counter
(minutes/seconds or hours/minutes) If your vehicle is fitted with Stop & Start, a time
counter calculates the time spent in STOP
mode during a
journey.
It resets to zero every time the ignition is
switched on.
Instruments
Page 100 of 364
98
HTM: Heat Thermo Management
F
T
o deactivate the programming, press
button 4
until the message " OK" is
displayed.
During these operations, if the message
" FA I L " is displayed, it means that the
signal has not been received. Restart the
procedure after having changed position.
Stopping the heating
F Press button 5 .
Changing the heating level
The system has 5 heating levels: C1 ( lowest
level) to C5 (highest level).
F
A
fter having displayed the heating level
using buttons 1 , press simultaneously on
buttons 4
and 5.
The letter " C" will flash.
F
A
djust the heating level by pressing
buttons 1 .
F
S
imultaneously press buttons 4 and 5 to
save the selected level.
The letter " C" will be displayed.
The presets are replaced by the new
entries. The programmed times are
memorised until the next change.
When the start time is activated, it is not
possible to change the heating level. You
must first deactivate the start time.
Operating fault
In the event of a fault with the programmable
h eating, contact a PEUGEOT dealer or
a
qualified workshop.
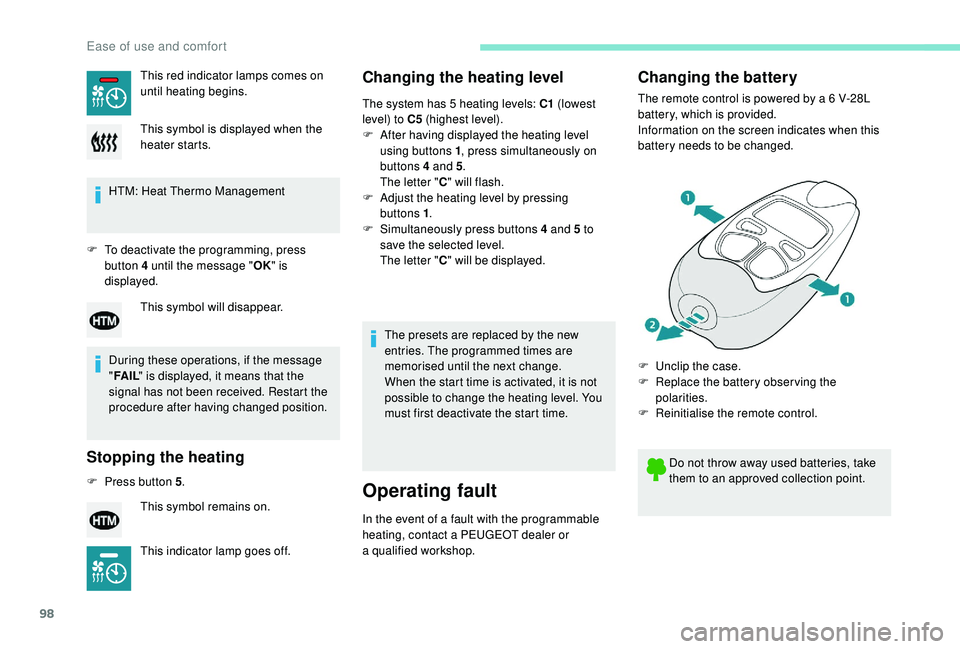
Changing the battery
The remote control is powered by a 6 V-28L
b attery, which is provided.
Information on the screen indicates when this
battery needs to be changed.
This red indicator lamps comes on
until heating begins.
This symbol is displayed when the
heater starts.
This symbol will disappear.
This symbol remains on.
This indicator lamp goes off. Do not throw away used batteries, take
them to an approved collection point.
F
U
nclip the case.
F
R
eplace the battery observing the
polarities.
F
R
einitialise the remote control.
Ease of use and comfort
Page 130 of 364
128
Advanced Grip Control
Special patented traction control system which
improves traction on snow, mud and sand.
This system, the operation of which has been
optimised for each situation, allows you to
manoeuvre in most conditions of poor grip
(encountered during touring use).
Associated with all-season M+S (Mud and
Snow) tyres, this system offers a compromise
between safety, adhesion and traction.
The accelerator pedal should be pressed
sufficiently to allow the system to use the power
of the engine. Operation at high engine speeds
is completely normal.
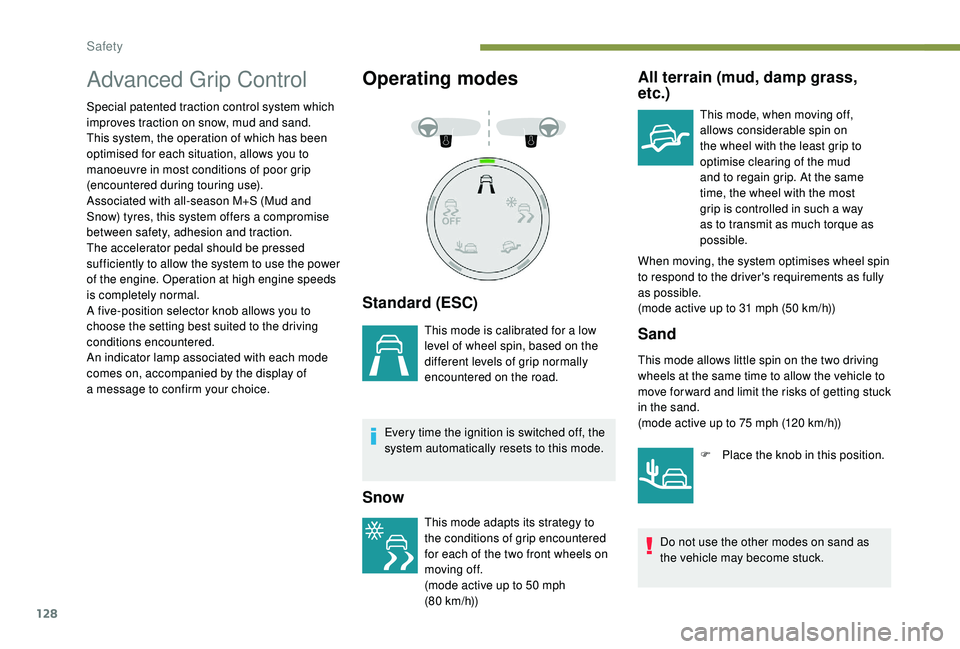
A five-position selector knob allows you to
choose the setting best suited to the driving
conditions encountered.
An indicator lamp associated with each mode
comes on, accompanied by the display of
a
message to confirm your choice.
Operating modes
Standard (ESC)
This mode is calibrated for a low
l evel of wheel spin, based on the
different levels of grip normally
encountered on the road.
Every time the ignition is switched off, the
system automatically resets to this mode.
Snow
This mode adapts its strategy to
the conditions of grip encountered
for each of the two front wheels on
moving off.
(mode active up to 50
mph
(80
km/h))
All terrain (mud, damp grass,
etc.)
This mode, when moving off,
allows considerable spin on
the wheel with the least grip to
optimise clearing of the mud
and to regain grip. At the same
time, the wheel with the most
grip is controlled in such a
way
as to transmit as much torque as
possible.
When moving, the system optimises wheel spin
to respond to the driver's requirements as fully
as possible.
(mode active up to 31
mph (50 km/h))
Sand
This mode allows little spin on the two driving
wheels at the same time to allow the vehicle to
move for ward and limit the risks of getting stuck
in the sand.
(mode active up to 75 mph (120 km/h))
Do not use the other modes on sand as
the vehicle may become stuck. F
P
lace the knob in this position.
Safety
Page 173 of 364
171
Operation
Depending on the driving situation and your
vehicle's equipment, the system may advise
you to skip one (or more) gear(s). You can
follow this instruction without engaging the
intermediate gears.
Gear efficiency recommendations are for
information only. In fact, the road layout, the
traffic density and safety remain the deciding
factors when choosing the best gear. The driver
therefore remains responsible for deciding
whether or not to follow the indications issued
by the system.
This function cannot be deactivated.With an automatic gearbox, the system is
only active in manual mode.
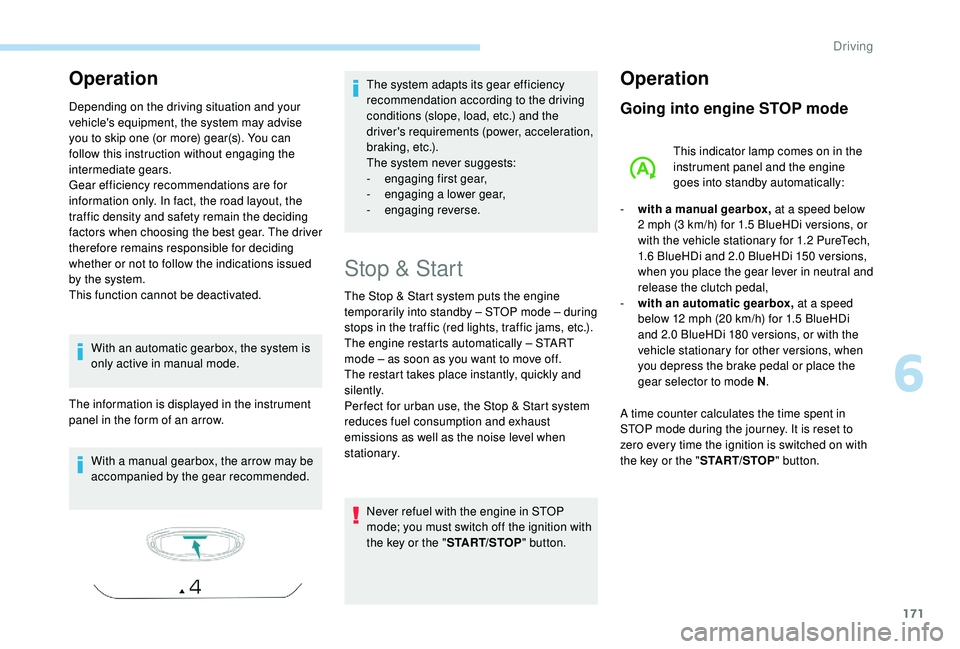
The information is displayed in the instrument
panel in the form of an arrow.
With a
manual gearbox, the arrow may be
accompanied by the gear recommended. The system adapts its gear efficiency
recommendation according to the driving
conditions (slope, load, etc.) and the
driver's requirements (power, acceleration,
b r a k i n g , e t c .) .
The system never suggests:
-
e
ngaging first gear,
-
enga
ging a
lower gear,
-
enga
ging reverse.
Stop & Start
The Stop & Start system puts the engine
temporarily into standby – STOP mode – during
stops in the traffic (red lights, traffic jams, etc.).
The engine restarts automatically – START
mode – as soon as you want to move off.
The restart takes place instantly, quickly and
silently.
Per fect for urban use, the Stop & Start system
reduces fuel consumption and exhaust
emissions as well as the noise level when
stationary.Never refuel with the engine in STOP
mode; you must switch off the ignition with
the key or the " START/STOP" button.
Operation
Going into engine STOP mode
This indicator lamp comes on in the
instrument panel and the engine
goes into standby automatically:
-
w
ith a
manual gearbox, at a
speed below
2
mph (3 km/h) for 1.5 BlueHDi versions, or
with the vehicle stationary for 1.2
PureTech,
1.6
BlueHDi and 2.0 BlueHDi 150 versions,
when you place the gear lever in neutral and
release the clutch pedal,
-
w
ith an automatic gearbox, at a speed
below 12
mph (20 km/h) for 1.5 BlueHDi
and 2.0
BlueHDi 180 versions, or with the
vehicle stationary for other versions, when
you depress the brake pedal or place the
gear selector to mode N .
A time counter calculates the time spent in
STOP mode during the journey. It is reset to
zero every time the ignition is switched on with
the key or the " START/STOP" button.
6
Driving