2018 CHEVROLET CITY EXPRESS warning
[x] Cancel search: warningPage 3 of 74
Chevrolet City Express Infotainment System (GMNA-Localizing-U.S./Canada-
11683801) - 2018 - crc - 7/12/17
2 Introduction
Introduction
Infotainment
The names, logos, emblems,
slogans, vehicle model names, and
vehicle body designs appearing in
this manual including, but not limited
to GM, the GM logo, CHEVROLET,
the CHEVROLET Emblem, City
Express, and the City Express
Emblem are registered trademarks
and/or service marks of General
Motors LLC, its subsidiaries,
affiliates, or licensors.This manual describes features that
may or may not be on your specific
vehicle either because they are
options that you did not purchase or
due to changes subsequent to the
printing of this owner's manual.
Refer to the purchase
documentation relating to your
specific vehicle to confirm each of
the features found on your vehicle.
Keep this manual with the owner's
manual in the vehicle, so it will be
there if it is needed. If the vehicle is
sold, leave this manual in the
vehicle.
Overview
Read the following pages to
become familiar with the
infotainment system features.
{Warning
Taking your eyes off the road for
too long or too often while using
any infotainment feature can
cause a crash. You or others
could be injured or killed. Do not
give extended attention to
infotainment tasks while driving.
Limit your glances at the vehicle
displays and focus your attention
on driving. Use voice commands
whenever possible.
The infotainment system has built-in
features intended to help avoid
distraction by disabling some
functions when driving. These
functions may gray out when they
are unavailable.
Litho in U.S.A.
Part No. 84323700 A First Printing©2017 General Motors LLC. All Rights Reserved.
Page 24 of 74

Chevrolet City Express Infotainment System (GMNA-Localizing-U.S./Canada-
11683801) - 2018 - crc - 7/12/17
Navigation 23
Navigation
Using the Navigation
System
This system is primarily designed to
help reach a destination, and it also
performs other functions as outlined
in this manual. The driver must use
the system safely and properly.
Information concerning road
conditions, traffic signs, and the
availability of services may not
always be up-to-date. The system is
not a substitute for safe, proper, and
legal driving.
Before using the navigation system,
read the following safety
information. Always use the system
as outlined in this manual.
{Warning
.To operate the navigation
system, first park the vehicle
in a safe location and set
the parking brake.
(Continued)
Warning (Continued)
Operating the system while
driving can distract the
driver and may result in a
serious accident.
. Do not rely on route
guidance alone. Always be
sure that all driving
maneuvers are legal and
safe in order to avoid
accidents.
. Do not disassemble or
modify this system. Doing
this may result in accidents,
fire, or electrical shock.
. If there are any foreign
objects in the system
hardware, spilled liquid on
the system, or smoke or a
smell coming from it, stop
using the system
immediately and contact
your dealer. Ignoring such
conditions may lead to
accidents, fire, or electrical
shock. Press NAV on the center stack.
Press NAV again to change
between alternative views of the
normal split and full map views.
1. Touch Settings.
2. Touch Navigation.
3. Touch Guidance & Map
Settings to access the
available map types.
Page 29 of 74

Chevrolet City Express Infotainment System (GMNA-Localizing-U.S./Canada-
11683801) - 2018 - crc - 7/12/17
28 Navigation
.2D-North/Heading Up
Touch to switch the display
between Head and North
for 2D mode. When Head is
selected, the display always
shows the map in the
driving direction. When
North is selected, the top of
the map is always oriented
north. This option can only
be selected when the Map
View is set to 2D.
. Auto Zoom
Touch to choose a setting
for automatic zooming.
Available settings are
Never, Always, and Only
with a Route.
. Show Points of Interest
on Map
Touch to switch various
map icons on or off
including gas stations,
restaurants, banks, and
parking. .
My Points of Interest Alert
Touch to control options.
Choose Off to disable the
alert. Choose Show Only to
have the alert display.
Choose Show & Beep to
have an audible beep in
addition to the alert
displaying.
. Show Presets On Map
Touch to switch on or off
the radio station preset on
the map view.
. Map Data Information
Touch to display the version
of the currently
installed map.
. Split Map for Freeway Exit
Touch to switch on or off
the split view map when
approaching a freeway exit.
. Show Lane Information
Touch to switch on or off
lane information when
available. .
Show Speed Limit
Touch to switch on or off
the display of speed limit
information when available.
. Show Estimated Time
Touch to control the display
of estimated time of arrival
or trip time remaining.
. Customize Travel Speed
Touch to customize travel
speeds on local roads and
freeways the along route.
. Speed Limit Warning
Touch to control the limit
alert that activates when
the vehicle speed is greater
then the speed limit
information for the current
location. Choose Off to
disable the alert. Choose
Show Only to have the alert
display. Choose Show &
Beep to have an audible
beep in addition to the alert
displaying.
Page 30 of 74
Chevrolet City Express Infotainment System (GMNA-Localizing-U.S./Canada-
11683801) - 2018 - crc - 7/12/17
Navigation 29
.Speed Limit Sensitivity
Touch to change the
sensitivity level for the
speed limit warning.
Choose a value between
zero and 30.
. Speed Warning for Curves
Touch to control the alert
that activates depending on
vehicle speed and a curve
in the road ahead. Choose
Off to disable the alert.
Choose Show Only to have
the alert display. Choose
Show & Beep to have an
audible beep in addition to
the alert displaying.
. Distance Units
Touch to switch between
US or Metric for the
distance units on the
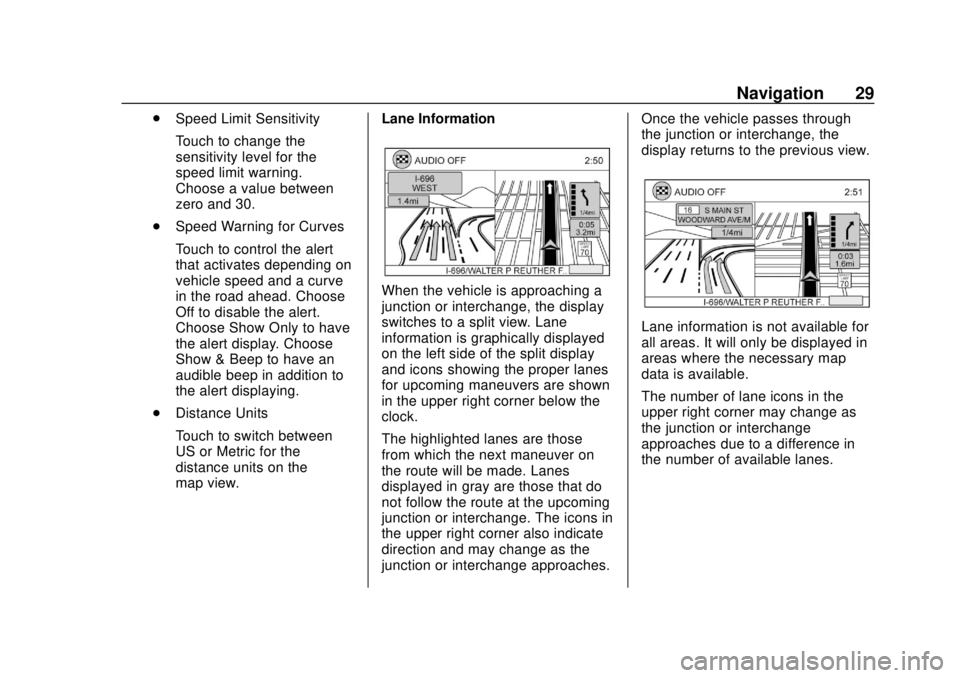
map view. Lane Information
When the vehicle is approaching a
junction or interchange, the display
switches to a split view. Lane
information is graphically displayed
on the left side of the split display
and icons showing the proper lanes
for upcoming maneuvers are shown
in the upper right corner below the
clock.
The highlighted lanes are those
from which the next maneuver on
the route will be made. Lanes
displayed in gray are those that do
not follow the route at the upcoming
junction or interchange. The icons in
the upper right corner also indicate
direction and may change as the
junction or interchange approaches. Once the vehicle passes through
the junction or interchange, the
display returns to the previous view.
Lane information is not available for
all areas. It will only be displayed in
areas where the necessary map
data is available.
The number of lane icons in the
upper right corner may change as
the junction or interchange
approaches due to a difference in
the number of available lanes.
Page 39 of 74
Chevrolet City Express Infotainment System (GMNA-Localizing-U.S./Canada-
11683801) - 2018 - crc - 7/12/17
38 Navigation
11. A detailed description of thedestination is provided.
Press BACK on the center
stack to go back and pick
another destination or touch
Start to have the system
calculate the route to the
destination.
Searching for Places Using Voice
Recognition
Places can be set as destinations
using voice recognition.
1. Press
g/Von the steering
wheel. The system provides
prompts and waits for voice
commands.
2. Say “Navigation.”
3. Say “Points of Interest”
followed by a brand name.
4. Say the number of the point of interest from the available list
on the display. 5. There are up to four options to
search for a point of interest:
.Say “Along Route” to
search for the desired
places along the current
route.
. Say “Nearby” to search for
the desired places close to
the vehicle’ s current
location.
. Say “Near Destination” to
search for the desired
places near the route’s
destination.
. Say “In Another City” to
search for the desired
places in another city.
Selecting this option will
lead to a series of other
steps.
6. The system displays a list of results fitting the search
criteria. Say the number of the
desired entry on the list.
If a route is not set, say “Replace
Destination” to replace the current
destination with the new street address or say
“Set as Waypoint” to
set the new street address as a
waypoint on the current route.
If a route is not set, say “Set as
Destination” to set the new street
address as a waypoint on the
current route.
Say “Show on Map” to display the
new street address on the map.
My Points of Interest/User-Defined
Points of Interest (POIs)
A POI in the My Points of Interest
database is a specific location of
interest such as a gas station or
bank. The POI consists of a
longitude value, a latitude value,
and a name.
Additional POIs can be added to the
system using the vehicle’s
USB port.
The POIs can be set as a
destination or can be set up to
activate POI warnings that display a
pop-up message when the vehicle
approaches certain areas such as
hazard spot warnings.
Page 40 of 74
Chevrolet City Express Infotainment System (GMNA-Localizing-U.S./Canada-
11683801) - 2018 - crc - 7/12/17
Navigation 39
.In order to save the user-defined
points of interest data, a USB
mass storage device is required.
The user-defined points of
interest data cannot be saved on
the SD card that contains the
navigation data.
. User-defined points of interest
are not shown in the map
representation.
. The system recognizes the
user-defined POI data and then
displays a pop-up message to
ask whether the data needs to
be downloaded into the system.
. If the download is confirmed, the
available user POIs in the
system internal memory will be
deleted and the new ones in the
USB mass storage device will be
downloaded into the internal
memory of the system.
. The progress of the download is
shown by a progress bar. When
the download is finished, the
system indicates that the USB
mass storage device can be
removed. Creating User-Defined Points of
Interest (POIs)
.
Longitude
. Latitude
. Name
. Location/Folder to save
. File name
POI data can be downloaded from
the Internet or created in a simple
text editor in Comma Separated
Values (CSV) file format.
There are two kinds of POI data
supported by the system:
. User POIs –user-defined points
of interest (POIs) that can later
be set as a destination and
found using route guidance.
. POI-Warnings –user-supplied
areas such as hazard spots that
the system displays in a pop-up
window when the vehicle is
approaching the
designated area. To create your own User POIs:
1. Connect a USB mass storage device to your personal
computer.
2. Use a standard software program to create a list of
POIs. Make sure the software
can support the CSV file
format.
3. In the first column, enter the longitude value of the position
of the POI.
4. In the second column, enter the latitude value of the
position of the POI.
5. In the third column, enter the name of the POI. Information
entered in the fourth column,
such as address or phone
number, will be appended to
the name of the POI.
6. Add more rows if necessary.
Page 41 of 74
Chevrolet City Express Infotainment System (GMNA-Localizing-U.S./Canada-
11683801) - 2018 - crc - 7/12/17
40 Navigation
7. Save the file with the extension.csv. For example:
myplacesfile.csv.
The name of the .csv file will
be used to create a My Points
of Interest category in the
system. Create separate .csv
files with different names to
create other My Points of
Interest categories.
8. Make sure to select the USB mass storage device as the
location to save, using the
exact folder name “/myPOIs”
for the User POIs or “/myPOIs/
myPOIwarnings.”
For POI-warnings, if the USB
mass storage device’s root
folder is represented by f:/,
save the file to the folder “f:/my
POIs” for User POIs or the
folder “f:/myPOIs/
myPOIwarnings.”
9. For POI-warnings, connect the USB mass storage device to
the vehicle’ s USB port. Adding User-Defined Points of
Interest (POIs)
To add your User POIs to the
system:
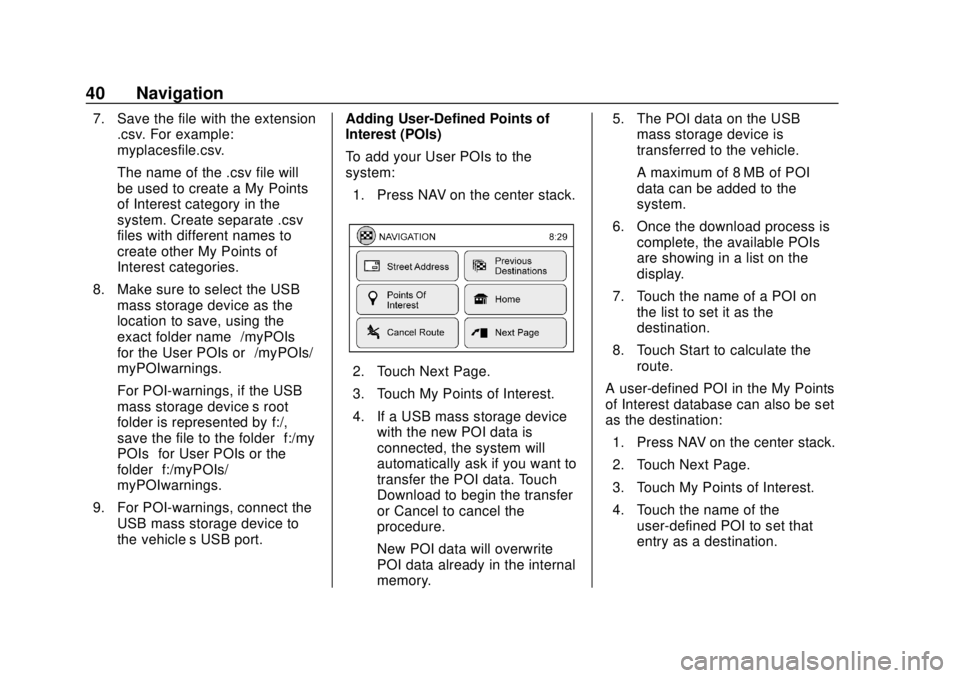
1. Press NAV on the center stack.
2. Touch Next Page.
3. Touch My Points of Interest.
4. If a USB mass storage device with the new POI data is
connected, the system will
automatically ask if you want to
transfer the POI data. Touch
Download to begin the transfer
or Cancel to cancel the
procedure.
New POI data will overwrite
POI data already in the internal
memory. 5. The POI data on the USB
mass storage device is
transferred to the vehicle.
A maximum of 8 MB of POI
data can be added to the
system.
6. Once the download process is complete, the available POIs
are showing in a list on the
display.
7. Touch the name of a POI on the list to set it as the
destination.
8. Touch Start to calculate the route.
A user-defined POI in the My Points
of Interest database can also be set
as the destination: 1. Press NAV on the center stack.
2. Touch Next Page.
3. Touch My Points of Interest.
4. Touch the name of the user-defined POI to set that
entry as a destination.
Page 47 of 74
Chevrolet City Express Infotainment System (GMNA-Localizing-U.S./Canada-
11683801) - 2018 - crc - 7/12/17
46 Navigation
{Warning
NavWeatherXM information is not
a substitute for attentive driving.
Weather conditions change
constantly and emergency
situations can arise without
warning. Relying only on
NavWeatherXM information could
result in serious personal injury.
NavWeatherXM information is
available in limited markets. To
subscribe or check if this service is
available in the area, call
1-888-601-6296 or see
www.siriusxm.com/navweather.
Displaying Weather Information 1. Press APPS
hor MENU on
the center stack.
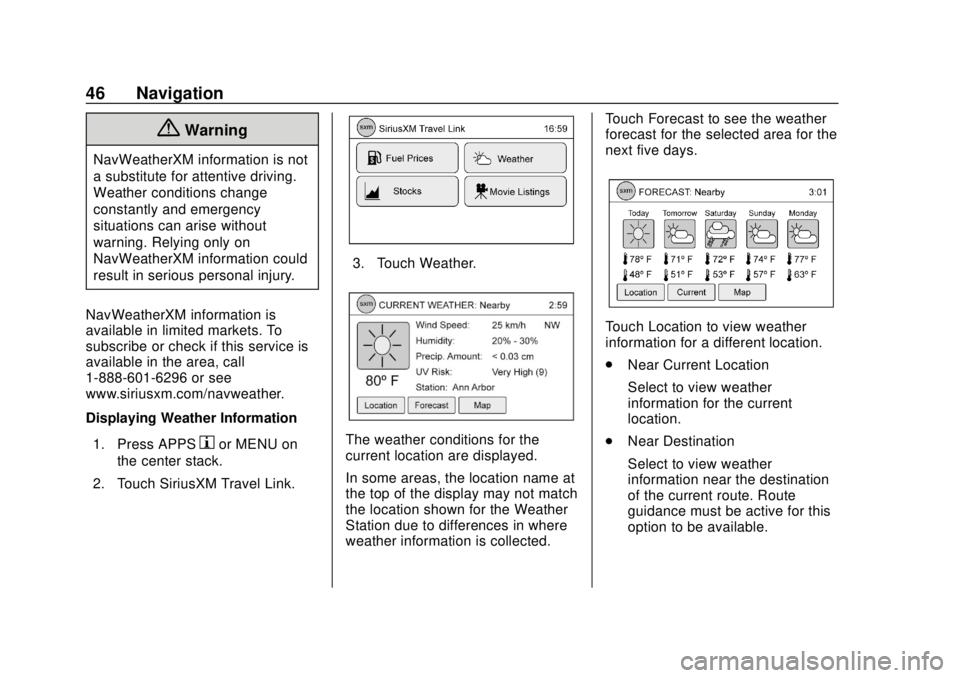
2. Touch SiriusXM Travel Link.
3. Touch Weather.
The weather conditions for the
current location are displayed.
In some areas, the location name at
the top of the display may not match
the location shown for the Weather
Station due to differences in where
weather information is collected. Touch Forecast to see the weather
forecast for the selected area for the
next five days.
Touch Location to view weather
information for a different location.
.
Near Current Location
Select to view weather
information for the current
location.
. Near Destination
Select to view weather
information near the destination
of the current route. Route
guidance must be active for this
option to be available.