Page 49 of 336

2-30
BEFORE DRIVING
74LH0-74E
Lap-Shoulder Belt
Emergency Locking Retractor (ELR)
(if equipped)
The seat belt has an emergency locking
retractor (ELR), which is designed to lock
the seat belt only during a sudden stop or
impact. It also may lock if you pull the belt
across your body very quickly. If this hap-pens, let the belt go back to unlock it, then
pull the belt across your body more slowly.
Safety reminder
60A038
60A040
To reduce the risk of sliding under the belt
during a collision, position the lap portion
of the belt across your lap as low on your
hips as possible and adjust it to a snug fit
by pulling the shoulder portion of the belt
upward through the latch plate. The length
WA R N I N G
(Continued)
• Never use the same seat belt on
more than one occupant and never
attach a seat belt over an infant or
child being held on an occupant’s
lap. Such seat belt use could cause
serious injury in the event of an
accident.
• Periodically inspect seat belt
assemblies for excessive wear and
damage. Seat belts should be
replaced if webbing becomes
frayed, contaminated, or damaged
in any way. It is essential to replace
the entire seat belt assembly after it
has been worn in a severe impact,
even if damage to the assembly is
not obvious.
• Children age 12 and under should
ride properly restrained in the rear
seat.
• Infants and small children should
never be transported unless they
are properly restrained. Restraint
systems for infants and small chil-
dren can be purchased locally and
should be used. Make sure that the
system you purchase meets appli-
cable safety standards. Read and
follow all the directions provided
by the manufacturer.
(Continued)
WA R N I N G
(Continued)
• For children, if the shoulder belt
irritates the neck or face, move the
child closer to the center of the
vehicle.
• Avoid contamination of seat belt
webbing by polishes, oils, chemi-
cals, and particularly battery acid.
Cleaning may safely be carried out
using mild soap and water.
• Do not insert any items such as
coins, clips, etc. into the seat belt
buckles, and be careful not to spill
liquids into these parts. If foreign
materials get into a seat belt
buckle, the seat belt may not work
properly.
• All seatbacks should always be in
an upright position when driving,
or seat belt effectiveness may be
reduced. Seat belts are designed to
offer maximum protection when
seatbacks are in the upright posi-
tion.
Sit up straight and
fully back
Low on hips
Low on hips
Seat Belts and Child Restraint Systems: 3
Page 50 of 336

2-31
BEFORE DRIVING
74LH0-74E
of the diagonal shoulder strap adjusts itself
to allow freedom of movement.
All Seat Belts Except Rear Center
60A036
To fasten the seat belt, sit up straight and
well back in the seat, pull the latch plate
attached to the seat belt across your body
and press it straight into the buckle until
you hear a “click”.
60A039
To unfasten the seat belt, push the red
“PRESS” button on the buckle and retract
the belt slowly while attaching a hand to
the belt or/and the latch plate.
Rear Center Seat Belt
Lap belt
80JS028
Sit up straight and well back in the seat. To
fasten the belt, pull the latch plate attached
to the seat belt across your hips and press
it straight into the buckle until you hear a
“click”. To reduce the risk of sliding under
the belt during a collision, position the belt
across your lap as low on your hips as pos-
sible and adjust it to a snug fit.
To tighten the belt, pull the free end of the
belt across alongside the lap strap.
60A046
To lengthen, release the latch plate from
the buckle, pull the latch plate (adjuster) in
the direction of the arrow, at right angles to
the belt. The latch plate should then be
refitted into the buckle and the belt tight-
ened as previously described.
63J017
Page 51 of 336

2-32
BEFORE DRIVING
74LH0-74E
NOTE:
The word “CENTER” is molded on the
buckle and latch plate of the center lap
belt. The buckles are designed so a latch
plate can not be inserted into the wrong
buckle.
Driver’s Seat Belt Reminder
(if equipped)
74LHT0214
When the driver does not buckle his or her
seat belt, the driver’s seat belt reminder
light in the instrument cluster will come on
or blink and a buzzer (if equipped) will
sound as a reminder to the driver to buckle
his or her seat belt. For more details, refer
to the explanation below.
If the driver’s seat belt remains unbuckled
when the ignition switch is turned to the
“ON” position or the engine switch is
pressed to change the ignition mode to
“ON”. The reminder works as follows:1) The driver’s seat belt reminder light will
come on.
2) After the vehicle’s speed has reached
about 15 km/h, the driver’s seat belt
reminder light will blink and a buzzer
(if equipped) will sound for about 95
seconds.
3) After step 2) has finished, the reminder
light will remain on until the driver’s seat
belt is buckled.
If the driver has buckled his or her seat belt
and later unbuckles the seat belt, the
reminder system will be activated from
step 1) or step 2) according to the vehicle’s
speed. When the vehicle’s speed is below
about 15 km/h, the reminder will start from
step 1). When the vehicle’s speed is above
about 15 km/h, the reminder will start from
step 2).
The reminder will be automatically can-
celed when the driver’s seat belt is buckled
or the ignition switch is turned off, or the
engine switch is pressed to change the
ignition mode to “LOCK” (OFF).
Shoulder Anchor Height Adjuster
(if equipped)
64J198
Adjust the shoulder anchor height so that
the shoulder belt rides on the center of the
outboard shoulder. To upward, slide the
anchor up by pushing through the Sash
guide. To downward, slide the anchor
down while pulling the lock knob out. After
adjustment, make sure that the anchor is
securely locked.
EXAMPLE
WA R N I N G
It is absolutely essential that the
driver and passengers wear their seat
belts at all times. Persons who are
not wearing seat belts have a much
greater risk of injury if an accident
occurs. Make a regular habit of buck-
ling your seat belt before putting the
key in the ignition.
WA R N I N G
Be sure that the shoulder belt is posi-
tioned on the center of the outside
shoulder. The belt should be away
from your face and neck, but not fall-
ing off your shoulder. Misadjustment
of the belt could reduce the effective-
ness of the safety belt in a crash.
EXAMPLE
Sash guide
Page 52 of 336

2-33
BEFORE DRIVING
74LH0-74E
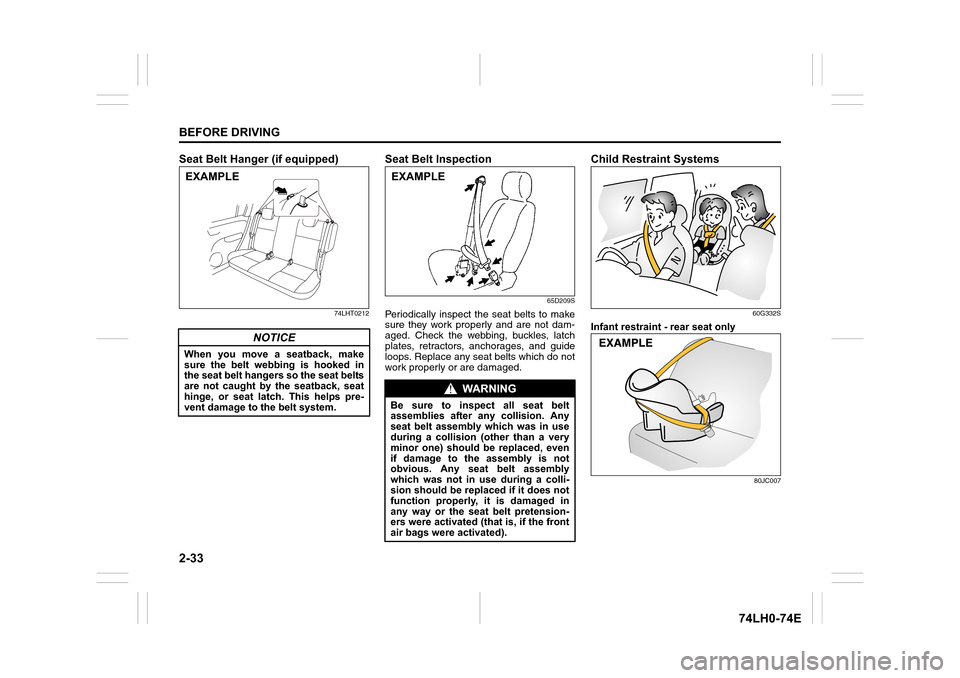
Seat Belt Hanger (if equipped)
74LHT0212
Seat Belt Inspection
65D209S
Periodically inspect the seat belts to make
sure they work properly and are not dam-
aged. Check the webbing, buckles, latch
plates, retractors, anchorages, and guide
loops. Replace any seat belts which do not
work properly or are damaged.
Child Restraint Systems
60G332S
Infant restraint - rear seat only
80JC007
NOTICE
When you move a seatback, make
sure the belt webbing is hooked in
the seat belt hangers so the seat belts
are not caught by the seatback, seat
hinge, or seat latch. This helps pre-
vent damage to the belt system.
EXAMPLE
WA R N I N G
Be sure to inspect all seat belt
assemblies after any collision. Any
seat belt assembly which was in use
during a collision (other than a very
minor one) should be replaced, even
if damage to the assembly is not
obvious. Any seat belt assembly
which was not in use during a colli-
sion should be replaced if it does not
function properly, it is damaged in
any way or the seat belt pretension-
ers were activated (that is, if the front
air bags were activated).
EXAMPLE
Page 53 of 336

2-34
BEFORE DRIVING
74LH0-74E
Child restraint
80JC016
Booster seat
80JC008
MARUTI SUZUKI highly recommends that
you use a child restraint system to restrain
infants and small children. Many different
types of child restraint systems are avail-
able; make sure that the restraint system
you select meets applicable safety stan-
dards.
All child restraint systems are designed to
be secured in vehicle seats by either seat
belts (lap belts or the lap portion of lap-
shoulder belts). Whenever possible, MAR-
UTI SUZUKI recommends that child
restraint systems be installed on the rear
seat. According to accident statistics, chil-
dren are safer when properly restrained in
rear seating positions than in front seating
positions.
If you must use a front-facing child restraint
in the front passenger’s seat, adjust the
passenger’s seat as far back as possible.
NOTE:
Observe any statutory regulation about
child restraints.
65D60765D608
WA R N I N G
If your vehicle is equipped with a
front passenger air bag, do not install
a rear-facing child restraint in the
front passenger’s seat. If the passen-
ger’s air bag inflates, a child in a rear-
facing child restraint could be killed
or seriously injured. The back of a
rear-facing child restraint would be
too close to the inflating air bag.
WA R N I N G
If you install a child restraint system
in the rear seat, slide the front seat
for enough forward so that the child’s
feet do not contact the front seat-
back. This will help avoid injury to
the child in the event of an accident.
Page 54 of 336

2-35
BEFORE DRIVING
74LH0-74E
65D609
Installation with Lap-Shoulder Seat
Belts
ELR type belt
65D233
Install your child restraint system accord-
ing to the instructions provided by the child
restraint system manufacturer.
Make sure that the seat belt is securely
latched.
Try to move the child restraint system in all
directions to make sure it is securely
installed.
Seat Belt Pretensioner System
(if equipped)
63J269
To determine if your vehicle is equipped
with a seat belt pretensioner system at the
front seating positions, check the label on
the front seat belt at the bottom part. If the
letters “p” and/or “PRE” appear as illus-
trated, your vehicle is equipped with the
seat belt pretensioner system. You can use
the pretensioner seat belts in the same
manner as ordinary seat belts.
WA R N I N G
Children could be endangered in a
crash if their child restraint systems
are not properly secured in the vehi-
cle. Be sure to secure the child in the
restraint system according to the
manufacturer’s instructions.
NOTICE
Before installing a child restraint sys-
tem in the rear seat, raise the head
restraint (if equipped) to the most
upper position.
WA R N I N G
This section of the owner’s manual
describes your MARUTI SUZUKI’s
SEAT BELT PRETENSIONER SYS-
TEM. Please read and follow ALL
these instructions carefully to mini-
mize your risk of severe injury or
death.
and/or
Label
EXAMPLE
Page 55 of 336

2-36
BEFORE DRIVING
74LH0-74E
Read this section and the “Supplemental
Restraint System (air bags)” section to
learn more about the pretensioner system.
The seat belt pretensioner system works
with the SUPPLEMENTAL RESTRAINT
SYSTEM (Air Bags). The crash sensors
and the electronic controller of the air bag
system also control the seat belt preten-
sioners. When the air bags are triggered,
the pretensioner are also triggered. For
precautions and general information
including servicing the pretensioner sys-
tem, refer to the “Supplemental Restraint
System (air bags)” section in addition to
this “Seat Belt Pretensioner System” sec-
tion, and follow all those precautions.
The pretensioner is located in each front
seat belt retractor. The pretensioner tight-
ens the seat belt so the belt fits the occu-
pant’s body more snugly in the event of a
frontal crash. The retractors will remain
locked after the pretensioners are acti-
vated. Upon activation, some noise will
occur and some smoke may be released.
These conditions are not harmful and do
not indicate a fire in the vehicle.
The driver and all passengers must be
properly restrained by wearing seat belts
at all times, whether or not a pretensioner
is equipped at their seating position, to
minimize the risk of severe injury or death
in the event of a crash. Sit fully back in the seat; sit up straight; do
not lean forward or sideways. Adjust the
belt so the lap portion of the belt is worn
low across the pelvis, not across the waist.
Please refer to the “Seat Adjustment” sec-
tion and the instructions and precautions
about the seat belts in this “Seat Belts and
Child Restraint Systems” section for details
on proper seat and seat belt adjustments.
Please note that the pretensioners along
with the air bags will activate in severe
frontal collisions. They are not designed to
activate in rear impacts, side impacts, roll-
overs, or minor frontal collisions. The pre-
tensioners can be activated only once. If
the pretensioners are activated (that is, if
the air bags are activated), have the pre-
tensioner system serviced by an autho-
rized MARUTI SUZUKI dealer as soon as
possible.
If the “AIR BAG” light on the instrument
cluster does not blink or come on briefly
when the ignition switch is turned to the
“ON” position, or the engine switch is
pressed to change the ignition mode to
“ON”, stays on for more than 10 seconds,
or comes on while driving, the pretensioner
system or the air bag system may not work
properly. Have both systems inspected by
an authorized MARUTI SUZUKI dealer as
soon as possible.
Service on or around the pretensioner sys-
tem components or wiring must be per-formed only by an authorized MARUTI
SUZUKI dealer who is specially trained.
Improper service could result in unin-
tended activation of pretensioners or could
render the pretensioner inoperative. Either
of these two conditions may result in per-
sonal injury.
To prevent damage or unintended activa-
tion of the pretensioners, be sure the bat-
tery is disconnected and the ignition switch
has been in the “LOCK” position or the
ignition mode has been “LOCK” (OFF) for
at least 90 seconds before performing any
electrical service work on your MARUTI
SUZUKI.
Do not touch pretensioner system compo-
nents or wiring. The wires are wrapped
with yellow tape or yellow tubing, and the
couplers are yellow. When scrapping your
MARUTI SUZUKI, ask your MARUTI
SUZUKI dealer, body repair shop, or scrap
yard for assistance.
Page 56 of 336
2-37
BEFORE DRIVING
74LH0-74E
Child Restraint System for India
Child Restraint
The suitability of each passenger’s seat position for carriage of children and fitting of child restraint system is shown in the table below.
Whenever you carry children up to 12 years of age, properly use the child restraints which conform to AIS 072, the standard for child
restraints, referring to the table.
MASS GROUPSeating position (or other site)
Front
PassengerRear
OutboardRear
CentreIntermediate
OutboardIntermediate
Centre
Group 0
Up to 10 kgXUXN.A.N.A.
Group 0+
Up to 13 kgXUXN.A.N.A.
Group I
9 to 18 kgXUXN.A.N.A.
Group II
15 to 25 kgXUXN.A.N.A.
Group III
22 to 36 kgXUXN.A.N.A.
Key of letters to be inserted in the above table:
U =Suitable for ‘universal’ category restraints approved for use in this mass group
X =Seat position not suitable for children in this mass group
N.A = Seat position not available for children in this mass group.
NOTE: ‘universal’ is the category in the AIS 072.