Page 193 of 336

7-2
INSPECTION AND MAINTENANCE
74LH0-74E
Maintenance ScheduleThe following table shows the times when
you should perform regular maintenance
on your vehicle. This table shows in miles,
kilometers and months when you should
perform inspections, adjustments, lubrica-
tion and other services.
Periodic Maintenance
Schedule“A” :Adjust
“C”: Clean
“R”: Replace or Change
“I”: Inspect, clean, adjust, lubricate or
replace as necessary
“L”: Lubricate
“T”: Tighten to Specified Torque
“O”: Rotate
NOTE:
This table includes services as scheduled
up to 80,000 km mileage. Beyond 80,000
km, carry out the same services at the
same intervals respectively.
WA R N I N G
MARUTI SUZUKI recommends that
maintenance on your Maruti Suzuki
vehicle should be performed by MAR-
UTI SUZUKI authorized workshop/
Service station.
NOTICE
Whenever it becomes necessary to
replace parts on your vehicle, it is
recommended that you use MARUTI
genuine replacement parts or their
equivalent.
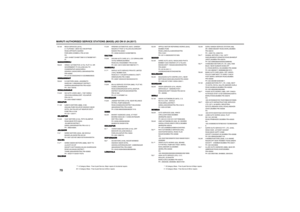
Periodic Maintenance Schedule: 1, 2, 3, 4, 5, 6, 9, 10
Page 194 of 336

7-3INSPECTION AND MAINTENANCE
74LH0-74E
Interval: This interval should be judged by odometer reading
or months, whichever comes first.
FREE INSPECTION
PERIODIC MAINTENANCE AT COST
km (x1000)
1
5
10
20
30
40
50
60
70
80
months
1
6
12
24
36
48
60
72
84
96
Engine
1-1.
Water pump drive (Tension, Wear)
Pe tro l
-
-
-
-
-
I
-
-
-
R
1-2Engine Coolant (Level, Leakage) l l lRlRlRlR
1-3
Engine oil and engine oil filter
-
-
R
R
R
R
R
R
R
R
1-4 Cooling system hoses and connections (Leakage and Damage) l l l l l lllll
1-5
Engine cylinder head bolts
Pe tro l
-
-
T
-
T
_
T
-
T
-
1-6 Engine Mounting and Manifold Fixing (Loose Damage) - - I - I - I - I -
1-7
Valve Clearance
Pe tro l
-
-
-
-
I
-
-
I
-
-
1-8
Exhaust System (Noise, Leakage etc.)
-
l
-
l
-
I
-
I
-
l
1-9
Positive Crank Case Ventilation System (Hoses, Connections and Valve)
Pe tro l
-
l
-
l
-
I
-
I
-
l
1-10 Exhaust Gas Recirculation Valve Diesel - - - - C - - C - -
Ignition2-1.
Ignition wiring (Damage, Deterioration)
Pe tro l
-
-
-
l
-
l
-
l
-
l
2-2.
Spark Plug (Clean and adjust the gap)
Pe tro l
-
-
-
-
-
R
-
-
-
R
Fuel
3-1.
Air cleaner filter element
Paved-road
Pe tro l
Clean after every 5,000 KM. Replace after every 40,000 KM.
Diesel
Replace after every 20,000 KM. Cleaning not required.
Dusty
Condition
Pe tro l
Clean after every 2,500 KM or as required. Replace after every 40,000 KM.
Diesel
Replace after every 20,000 KM. Cleaning not required.
More frequent replacement if dust condition is severe.
3-2.
Fuel tank cap, fuel lines and connections (Leakage and Damage)
-
l
-
-
-
l
-
-
-
l
3-3.
Fuel Filter (Leakage)
Pe tro l
I
I
I
I
I
R
I
I
I
R
3-4.
Fuel Filter and Water Draining
Diesel
I
I
I
R
I
R
I
R
I
R
Clutch and Transmission4-1.
Clutch Pedal (Play)
Pe tro l
I
I
I
I
I
I
I
I
I
I
4-2.
Clutch fluid (level, leakage)
Diesel
l
l
l
R
l
R
l
R
l
R
Periodic Maintenance Schedule: 1, 2, 3, 4, 5, 6, 9, 10
Page 195 of 336

7-4
INSPECTION AND MAINTENANCE
74LH0-74E
4-3.
Transmission Oil (Manual / Auto Gear Shift)
l
l
l
l
l
l
l
l
l
l
Replace at 1,60,000 km or 10 years whichever comes first
4-4. Automatic Transmission Fluid (Level, Leakage) Replace at 1,65,000 km or 11years whichever comes first
4-5.
Hose, Automatic Transmission Fluid
l
l
l
l
l
l
l
l
l
l
Drive shaft
5-1.
Drive shaft boot (boot damage)
-
l
l
l
l
l
l
l
l
l
BRAKE
6-1.
Brake Fluid (Level, Leakage)
I
I
I
R
I
R
I
R
I
R
6-2. Brake pedal (pedal - carpet clearance) I I I I I I I I I I
6-3.
Parking brake lever and cable (Play, damage)
I
I
I
I
I
I
I
I
I
I
6-4. Brake disc and pad (Wear) – I I I I I I I I I
6-5.
Brake drum and shoes (Wear)
–
–
I
I
I
I
I
I
I
I
6-6.Master cylinder, wheel cylinder, caliper piston
(Fluid leakage, boot/seal damage)IIIIIIIIII
6-7.
Brake hoses and pipes (Fluid leakage, damage)
I
I
I
I
I
I
I
I
I
I
WHEEL
7-1.
Tires (air pressure, abnormal wear, crack and rotation)
I
I&O
I&O
I&O
I&O
I&O
I&O
I&O
I&O
I&O
7-2. Wheels (Damage) I I I I I I I I I I
7-3.
Front/Rear wheel bearing (Loose, damage)
I
I
I
I
I
I
I
I
I
I
FRONT / REAR SUSPENSION
8-1.
Suspension strut (Oil leakage, damage)
I
I
I
I
I
I
I
I
I
I
8-2. Suspension arms / Knuckle support (Loose, damage) – I I I I I I I I I
8-3.
Rear spring (Damage)
I
I
I
I
I
I
I
I
I
I
8-4. Shock absorbers (Oil leakage, damage) I I I I I I I I I I
8-5.
All bolts and nuts (Loose)
–
T
T
T
T
T
T
T
T
T
8-6. Suspension arms and torsion rods – I I I I I I I I I
STEERING
9-1. Steering wheel (Play, loose) I I I I I I I I I IInterval: This interval should be judged by odometer reading
or months, whichever comes first.
FREE INSPECTION
PERIODIC MAINTENANCE AT COST
km (x1000)
1
5
10
20
30
40
50
60
70
80
months
1
6
12
24
36
48
60
72
84
96
Drive Belt: 1, 2
Engine Oil and Filter: 1, 2
Page 196 of 336

7-5INSPECTION AND MAINTENANCE
74LH0-74E
9-2.
All rods and arms (Loose, damage, wear)
I
I
I
I
I
I
I
I
I
I
10-1. Battery electrolyte (Level, leakage) I I I I I I I I I I
ELECTRICAL
10-2. Wiring harness connection (Loose, damage)
–
I I I I I I I I I10-3.
Lightening system (Operation, stains, damage)
I
I
I
I
I
I
I
I
I
I
10-4. Horn (Operation) I I I I I I I I I I
10-5.
System Voltage
I
I
I
I
I
I
I
I
I
I
BODY
11-1.
All chassis bolts and nuts (Tighten)
–
I
T
T
T
T
T
T
T
T
11-2. All latches, hinges and locks (Function)) I I&L I&L I&L I&L I&L I&L I&L I&L I&L
ROAD TEST12-1.
Operation of Brakes, gear shifting and speedometer
I
I
I
I
I
I
I
I
I
I
12-2.
Body and chassis noise
I
I
I
I
I
I
I
I
I
I
AIR CONDITIONER (If equipped)
13-1.
Check belt tension
I
I
I
I
I
I
I
I
I
I
13-2. Tighten compressor mounting bolt
–
T T T T T T T T T
13-3.
All hose joint (Check, tighten)
I
I
I
I
I
I
I
I
I
I
13-4. Check functioning of Recirc flap I I I I I I I I I I
13-5.
Clean condenser with low pressure water
–
C
C
C
C
C
C
C
C
C
13-6. Check belt for frayed edges I I I I I I I I I I
13-7.
Check all mounting bolts
I
I
I
I
I
I
I
I
I
I
13-8. Air conditioner filter element (if equipped) I I I I R I I R I I
Interval: This interval should be judged by odometer reading
or months, whichever comes first.
FREE INSPECTION
PERIODIC MAINTENANCE AT COST
km (x1000)
1
5
10
20
30
40
50
60
70
80
months
1
6
12
24
36
48
60
72
84
96
Engine Oil and Filter: 1, 2
Page 197 of 336

7-6
INSPECTION AND MAINTENANCE
74LH0-74E
Drive Belt(For Petrol Engine Model)
Make sure the drive belt tension is correct.
If the belt is too loose, insufficient battery
charging, engine overheating, poor power
steering, poor air conditioning, or exces-
sive belt wear can result. When you press
the belt with your thumb midway between
the pulleys, there should be a deflection
according to the following chart.
The belts should also be examined to
ensure that they are not damaged.
If you need to replace or adjust the belt
have it done by your MARUTI SUZUKI
dealer.
68LM70703
(For Diesel Engine Model)
The drive belts tension adjusted automati-
cally.
Engine Oil and FilterSpecified Oil (For Petrol Engine Model)
74LHT7001
(1) Preferred
Be sure that the engine oil you use comes
under the quality classification of SL.
Select the appropriate oil viscosity accord-
ing to the above chart.
SAE 0W-20 (1) is the best choice for good
fuel economy, and good starting in cold
weather. Specified Oil (For Diesel Engine)
84E010
When the engine is running, keep
hands, hair, clothing, tools, etc. away
from the moving fan and drive belts.
→ : 100 N (10 kg, 22 lbs) press
GE: Generator
DEF: Deflection DEF: 4.0 – 4.5 mm
(0.16 – 0.18 in.)
GE
L4
CFo o-30
-22 -20
-4 -10
14 32 50 68 86 104 010203040
(1)
0W-205W-30
(1)
-30
-22 -4 14
32506886 104
-20 -10 10 20
3040
0
15W-40
5W-40
Engine Oil and Filter: 1, 2
WA R N I N G
Page 198 of 336

7-7INSPECTION AND MAINTENANCE
74LH0-74E
(1) Preferred
Be sure that the engine oil you use comes
under the quality classification of ACEA
A5/B5. The recommended Engine oil is
5W30 A5/B5. Oil Level Check(For Petrol Engine Model)
80G064
52D084
(For Diesel Engine Model)
84E012
(1) MIN
(2) MAX
(3) Engine oil dipstick
It is important to keep the engine oil at the
correct level for proper lubrication of your
vehicle’s engine. Check the oil level with
the vehicle on a level surface. The oil level
indication may be inaccurate if the vehicle
is on a slope. The oil level should be
checked either before starting the engine
or at least 5 minutes after stopping the
engine.
Pull out the oil dipstick, wipe oil off with a
clean cloth, insert the dipstick all the way
into the engine, then remove it again. The
oil on the stick should be between the
upper and lower limits shown on the stick.
If the oil level indication is near the lower
limit, add enough oil to raise the level to the
upper limit.
Refilling
81A147
Remove the oil filler cap and pour oil slowly
through the filler hole to bring the oil level
to the upper limit on the dipstick. Be careful
not to overfill. Too much oil is almost as
bad as too little oil. After refilling, start the
engine and allow it to idle for about a min-
ute. Stop the engine, wait about 5 minutes
and check the oil level again.
Upper
Lower
EXAMPLE
(3)
(2) (1)
NOTICE
Failure to check the oil level regularly
could lead to serious engine trouble
due to insufficient oil.
NOTICE
(For Diesel Engine Model)
Do not top up the oil over the MAX
limit. Too much oil causes serious
engine trouble.
Close Open
EXAMPLE
Engine Oil and Filter: 1, 2
Page 199 of 336

7-8
INSPECTION AND MAINTENANCE
74LH0-74E
Changing Engine Oil and FilterDrain the engine oil while the engine is still
warm.
56KN054
1) Remove the oil filler cap.
2) Place a drain pan under the drain plug.
3) Using a wrench, remove the drain plug
and drain out the engine oil.
60G306
Tightening torque for drain plug
Petrol engine:
35 Nm (3.5 kg-m, 25.3 lb-ft)
For Diesel Engine
60G306
For Diesel Engine
20 Nm (2.0 kg-m, 14.5 Ib-ft)4) Reinstall the drain plug and new gasket
(1). Tighten the plug with a wrench to
the specified torque.
CAUTION
The engine oil temperature may be
high enough to burn your fingers
when the drain plug is loosened. Wait
until the drain plug is cool enough to
touch with your bare hands.
Open Close
EXAMPLE
EXAMPLEEXAMPLE
WA R N I N G
New and used oil can be hazardous.
Children and pets may be harmed by
swallowing new or used oil. Keep
new and used oil and used oil filters
away from children and pets.
Continuous contact with used engine
oil may cause skin cancer laboratory
animals
Brief contact with used oil may irri-
tate skin.
To minimize your exposure to used
oil, wear a long-sleeve shirt and
moisture-proof gloves (such as
diswashing gloves) when changing
oil. If oil contacts your skin, wash
thoroughly with soap and water.
Launder any clothing or rags if wet
with oil.
Recycle or properly dispose of used
oil and filters.
Gear Oil: 10
Page 200 of 336

7-9INSPECTION AND MAINTENANCE
74LH0-74E
Replace the Oil Filter(For Petrol Engine Model)
1) Using an oil filter wrench, turn the oil fil-
ter counterclockwise and remove it.
2) Using a clean rag, wipe off the mount-
ing surface on the engine where the
new filter will be seated.
3) Smear a little engine oil around the rub-
ber gasket of the new oil filter.
4) Screw on the new filter by hand until the
filter gasket contacts the mounting sur-
face.
54G092
(1) Loosen
(2) Tighten
Tightening (viewed from filter top)
54G093
(1) Oil filter
(2) 3/4 turn(For Diesel Engine Model)
NOTE:
Since special procedures and tools are
required, it is recommended that you trust
this job to your authorized MARUTI
SUZUKI dealer.
1) Using a socket or a ring spanner
remove oil filter housing cover (3).
61M7001
(1) Loosen
(2) Tighten
2) Remove the old oil filter element and
replace it with a new oil filter element.
3) Clean the surface of oil filter cap and
replace the O-ring.
4) Tighten the oil filter housing cover on
the oil filter housing using a socket or
ring spanner to the specified torque.Tightening torque for oil filter
Diesel engine :
25 Nm (2.5 kg-m, 18.5 lb-ft)
Refill with Oil and Check for Leaks1) Pour oil through the filler hole and
install the filler cap.
For the approximate capacity of the oil,
refer to the “Capacities” item in the
“SPECIFICATIONS” section.
2) Start the engine and look carefully for
leaks at the oil filter and drain plug. Run
the engine at various speeds for at least
5 minutes.
3) Stop the engine and wait about 5 min-
utes. Check the oil level again and add
oil if necessary. Check for leaks again.
(1)
(3)
(2)
NOTICE
To prevent oil leakage, make sure
that the oil filter is tight, but do not
over-tighten it.
NOTICE
When replacing the oil filter, it is
recommended that you use a MAR-
UTI genuine replacement filter.
Oil leaks from around the oil filter
or drain plug indicate incorrect
installation or gasket damage. If
you find any leaks or are not sure
that the filter has been properly
tightened, have the vehicle
inspected by your MARUTI SUZUKI
dealer.
Gear Oil: 10
Automatic Transaxle (AT) Fluid: 10