2017 SUBARU FORESTER automatic transmission
[x] Cancel search: automatic transmissionPage 8 of 634

&Abbreviation list
You may find several abbreviations in this
manual. The meanings of the abbrevia-
tions are shown in the following list.
Abbreviation Meaning
A/C Air conditioner
ALR/ELR Automatic locking retractor/
Emergency locking retractor
ABS Anti-lock brake system
AKI Anti knock index
ALR Automatic locking retractor
AWD All-wheel drive
BSD/RCTA Blind Spot Detection/Rear
Cross Traffic Alert
CVT Continuously variable trans-
mission
DRL Daytime running light
EBD Electronic brake force distri-
bution
ELR Emergency locking retractor
GAW Gross axle weight
GAWR Gross axle weight rating
GPS Global positioning system
GVW Gross vehicle weight
GVWR Gross vehicle weight rating
INT Intermittent Abbreviation
Meaning
LATCH Lower anchors and tethers for
children
LED Light emitting diode
MIL Malfunction indicator light
MMT Methylcyclopentadienyl man-
ganese tricarbonyl
MT Manual transmission
OBD On-board diagnostics
RAB Reverse Automatic Braking
RON Research octane number
SI-DRIVE SUBARU Intelligent Drive
SRF Steering responsive fog lights
system
SRH Steering Responsive Head-
light
SRS Supplemental restraint sys-
tem
TIN Tire identification number
TPMS Tire pressure monitoring sys-
tem
Vehicle symbols
There are some of the symbols you may
see on your vehicle.
For warning and indicator lights, refer to
“
Warning and indicator lights ”F 23.
Mark Name
WARNING
CAUTION
3
Page 183 of 634

Instruments and controls/Warning and indicator lights
Select lever/gear position indicator (type
B)
1) Upshift indicator
2) Downshift indicator
3) Select lever/gear position indicator
This indicator shows the position of the
select lever.
For models with manual mode, when the
manual mode is selected, the gear posi-
tion indicator (which shows the current
gear selection) and the upshift/downshift
indicator light up. Refer to“Continuously
variable transmission ”F 7-24.
For models with SI-DRIVE, the upshift/
downshift indicators are switched off while
the Sport Sharp (S#) mode is selected.
&Turn signal indicator
lights
These lights show the operation of the turn
signal or lane change signal.
If the indicator lights do not blink or blink
rapidly, the turn signal bulb may be burned
out. Replace the bulb as soon as possible.
Refer to “Replacing bulbs ”F 11-39.
&High beam indicator
light
This light shows that the headlights are in
the high beam mode.
This indicator light also illuminates when
the headlight flasher is operated.
&High beam assist indi-
cator light (if equipped)
This light illuminates when the high beam
assist function is activated. For details
about the high beam assist function, refer
to “High beam assist function ”F 3-95.
&Cruise control indica-
tor light (if equipped)
This light illuminates when the cruise
control main button is pressed to activate
the cruise control function. For details,
refer to “To set cruise control ”F 7-53.
CAUTION
If the CHECK ENGINE warning light/
malfunction indicator light illumi-
nates, the cruise control indicator
light flashes at the same time. At
this time, avoid driving at high
speed and have your vehicle in-
spected at a SUBARU dealer as
soon as possible.
&Cruise control set in-
dicator light (if
equipped)
This light illuminates when vehicle speed
has been set to use the cruise control
function. Refer to “To set cruise control ”
F 7-53.
&Automatic headlight
beam leveler warning
light (if equipped)
This light illuminates when the automatic
headlight beam leveler does not operate
normally.
If this light illuminates while driving or does
not turn off approximately 3 seconds after
turning the ignition switch to the “ON”
position, have your vehicle inspected at
your SUBARU dealer.
3-32
Page 428 of 634
.Never move the vehicle rearward
by inertia with the select lever set
in a forward driving position or
move the vehicle forward by
inertia with the select lever set
in the “R ” position. Doing so may
result in an unexpected accident
or malfunction.
. Avoid shifting from one of the
forward driving positions into the
“ R ” position or vice versa until
the vehicle has completely
stopped. Such shifting may
cause damage to the transmis-
sion.
. When parking the vehicle, first
securely apply the parking brake
and then place the select lever in
the “P ” position. Avoid parking
for a long time with the select
lever in any other position as
doing so could result in a dead
battery.
NOTE
. When the engine coolant tempera-
ture is still low, the transmission will
upshift or downshift at higher engine
speeds than when the coolant tempera-
ture is sufficiently high in order to
shorten the warm-up time and improve driveability. The gearshift timing will
automatically shift to the normal timing
after the engine has warmed up.
.
Immediately after transmission fluid
is replaced, you may feel that the
transmission operation is somewhat
unusual. This results from invalidation
of data which the on-board computer
has collected and stored in memory to
allow the transmission to shift at the
most appropriate times for the current
condition of your vehicle. Optimized
shifting will be restored as the vehicle
continues to be driven for a while.
. When driving a CVT model under
continuous heavy load conditions such
as when towing a camper or climbing a
long, steep hill, the engine speed or the
vehicle speed may automatically be
reduced. This is not a malfunction. This
phenomenon results from the engine
control function maintaining the cool-
ing performance of the vehicle. The
engine and vehicle speed will return to
a normal speed when the engine is able
to maintain the optimum cooling per-
formance after the heavy load de-
creases. Driving under a heavy load
must be performed with extreme care.
Do not try to pass a vehicle in front
when driving on an uphill slope while
towing. .
The continuously variable transmis-
sion is a chain type system that
provides superior transmission effi-
ciency for maximum fuel economy. At
times, depending on varying driving
conditions, a chain operating noise
may be heard that is characteristic of
this type of system.
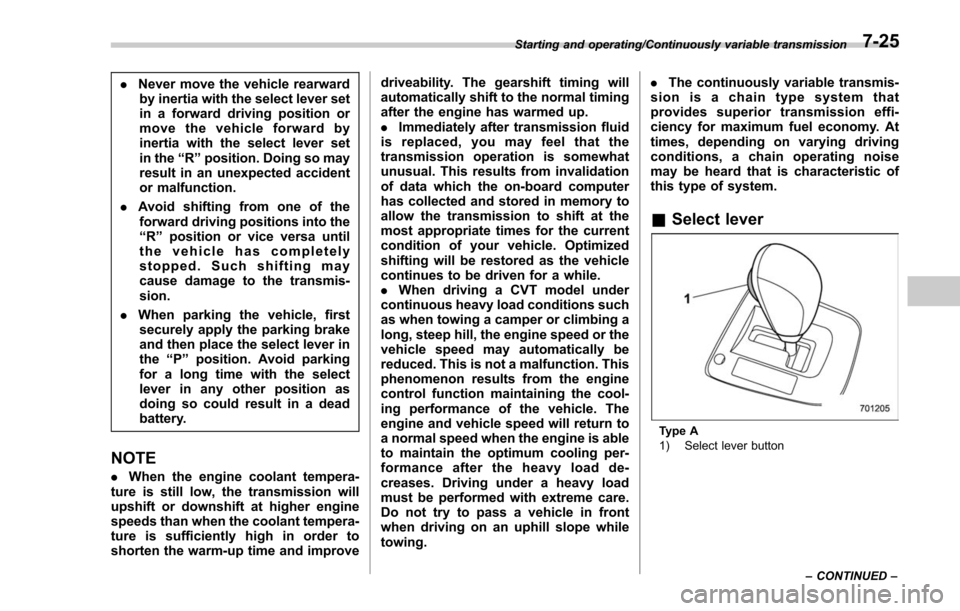
& Select lever
Type A
1) Select lever button
Starting and operating/Continuously variable transmission
–CONTINUED –
7-25
Page 430 of 634
or foot brake is applied.
Avoid coasting with the transmission in
neutral. Engine braking has no effect in
this condition.
WARNING
Do not drive the vehicle with the
select lever in the“N ” (neutral)
position. Engine braking has no
effect in this condition and the risk
of an accident is consequently in-
creased.
NOTE
If the select lever is in the “N ” position
when you stop the engine for parking,
you may not subsequently be able to
move it to the “R ” and “P ” positions. If
this happens, turn the ignition switch to
the “ON ”position. You will then be able
to move the select lever to the “P ”
position.
! D (Drive)
This position is for normal driving. The
transmission shifts automatically and con-
tinuously into a suitable gear according to
the vehicle speed and the acceleration
you require. Also, while driving up and
down a hill, the transmission assists and controls the driving performance and
engine braking while corresponding to
the road grade.
When more acceleration is required in the
“
D ” position, depress the accelerator
pedal fully to the floor and hold that
position. The transmission will automati-
cally downshift. In this case, the transmis-
sion will operate lik e a conventional
automatic transmission. When you re-
lease the pedal, the transmission will
return to the original gear position.
For models with manual mode, if one of
the shift paddles behind the steering
wheel is operated while driving in the “D”
position, the transmission will temporarily
switch to the manual mode. In this mode,
you can shift into any gear position using
the shift paddles. For details about the
manual mode, refer to “Selection of
manual mode” F7-27. Once the vehicle
speed stabilizes, the transmission will
switch from the manual mode back to
the “D”position for normal driving.
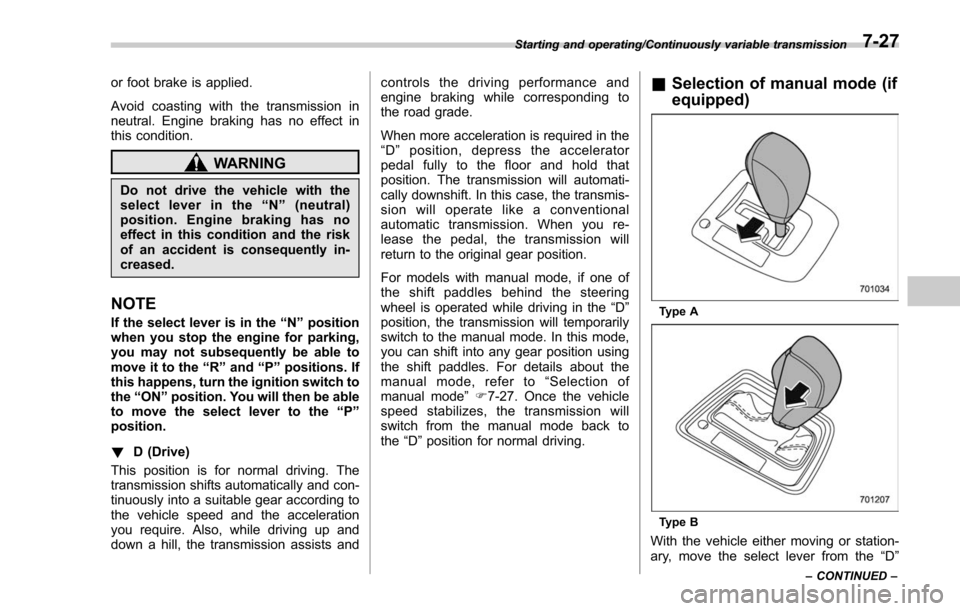
& Selection of manual mode (if
equipped)
Type A
Type B
With the vehicle either moving or station-
ary, move the select lever from the “D”
Starting and operating/Continuously variable transmission
–CONTINUED –7-27
Page 432 of 634
CAUTION
Do not place or hang anything on
the shift paddles. Doing so may
result in accidental gear shifting.
NOTE
Please read the following points care-
fully and bear them in mind when using
the manual mode.
.If you attempt to shift down when
the engine speed is too high, i.e., when
a downshift would push the tachometer
needle beyond the red zone, beeps will
be emitted to warn you that the down-
shift is not possible.
. If you attempt to shift up when the
vehicle speed is too low, the transmis-
sion will not respond.
. You can perform a skip-shift (for
example, from 4th to 2nd) by operating
the shift paddle twice in rapid succes-
sion.
. The transmission automatically se-
lects 1st gear when the vehicle stops
moving.
. If the temperature of the transmis-
sion fluid becomes too high, the “AT
OIL TEMP ”warning light on the combi-
nation meter will illuminate. Immedi-
ately stop the vehicle in a safe location and let the engine idle until the warning
light turns off.
.
For models with SI-DRIVE, by select-
ing Sport Sharp (S#) mode, upshifting
will not occur automatically. According
to the road conditions, shift change
manually so that the tachometer needle
does not enter the red zone. Also, if the
engine revolutions reach the specified
number, the fuel supply will be cut. In
this case, perform shift up operation.
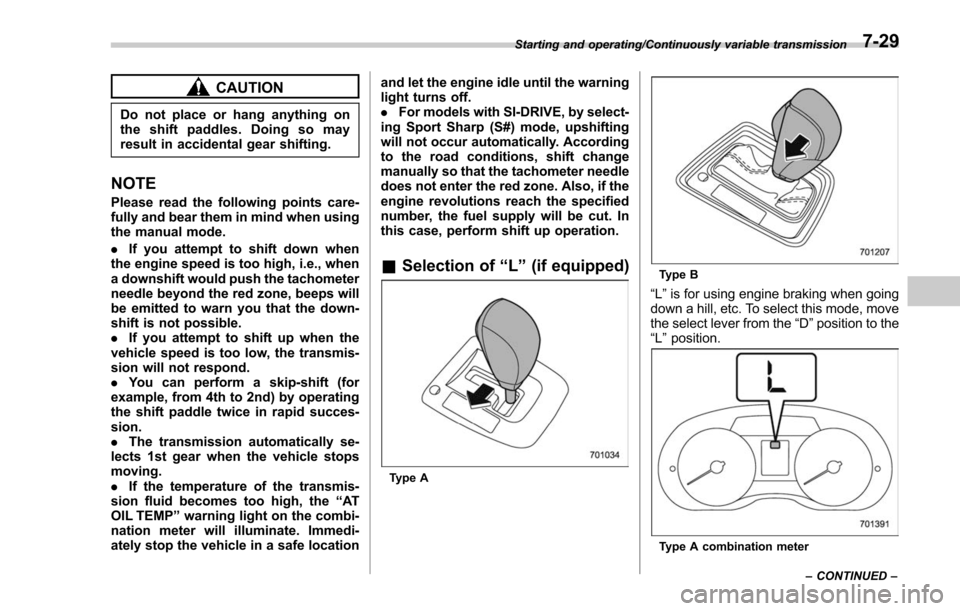
& Selection of “L ” (if equipped)
Type A
Type B
“L ” is for using engine braking when going
down a hill, etc. To select this mode, move
the select lever from the “D”position to the
“L ”position.
Type A combination meter
Starting and operating/Continuously variable transmission
–CONTINUED –
7-29
Page 436 of 634
power desired by those who want to make
the driving experience their own personal
adventure.
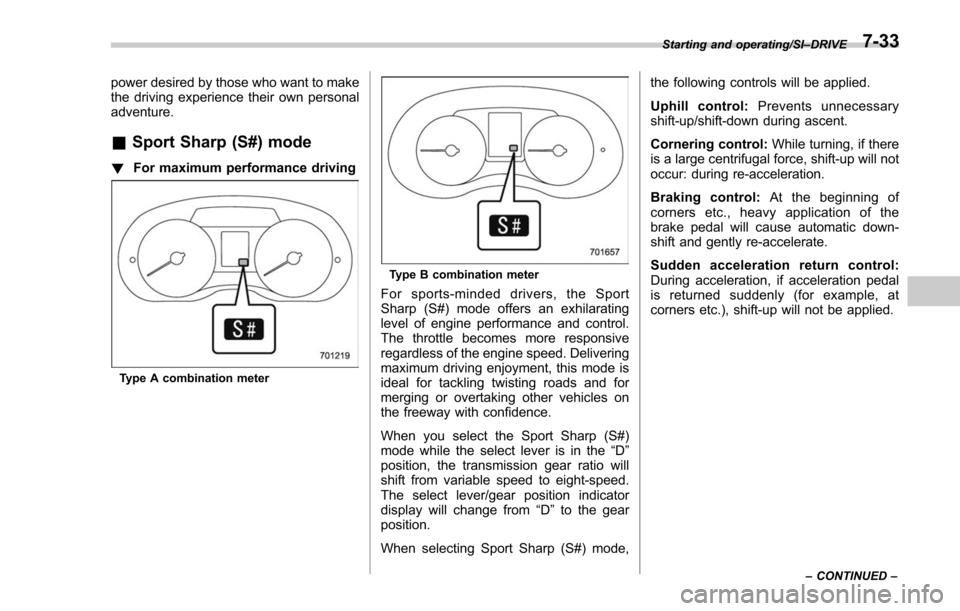
&Sport Sharp (S#) mode
! For maximum performance driving
Type A combination meter
Type B combination meter
For sports-minded drivers, the Sport
Sharp (S#) mode offers an exhilarating
level of engine performance and control.
The throttle becomes more responsive
regardless of the engine speed. Delivering
maximum driving enjoyment, this mode is
ideal for tackling twisting roads and for
merging or overtaking other vehicles on
the freeway with confidence.
When you select the Sport Sharp (S#)
mode while the select lever is in the “D”
position, the transmission gear ratio will
shift from variable speed to eight-speed.
The select lever/gear position indicator
display will change from “D”to the gear
position.
When selecting Sport Sharp (S#) mode, the following controls will be applied.
Uphill control:
Prevents unnecessary
shift-up/shift-down during ascent.
Cornering control: While turning, if there
is a large centrifugal force, shift-up will not
occur: during re-acceleration.
Braking control: At the beginning of
corners etc., heavy application of the
brake pedal will cause automatic down-
shift and gently re-accelerate.
Sudden acceleration return control:
During acceleration, if acceleration pedal
is returned suddenly (for example, at
corners etc.), shift-up will not be applied.
Starting and operating/SI– DRIVE
– CONTINUED –7-33
Page 501 of 634

Driving tips/Trailer towing
refer to“BSD/RCTA OFF switch ”
F 7-64.
. For models equipped with RAB
(Reverse Automatic Braking)
system, consult your SUBARU
dealer for additional information
about towing a trailer.
. Never exceed 45 mph (72 km/h)
when towing a trailer in hilly
country on hot days.
. When towing a trailer, steering,
stability, stopping distance and
braking performance will be dif-
ferent when compared to normal
operation. You should never
drive at excessive speeds but
always employ extra caution
when towing a trailer. You should
also keep the following tips in
mind.
! Before starting out on a trip
. Check that the vehicle and vehicle-to-
hitch mounting are in good condition. If
any problems are apparent, do not tow the
trailer.
. Check that the vehicle rests horizon-
tally with the trailer attached. If the vehicle
is tipped sharply up at the front and down
at the rear, check the total trailer weight,
GVW, GAWs and tongue load again, then confirm that the load and its distribution
are acceptable.
.
Check that the tire rating and pressures
are correct.
. Check that the vehicle and trailer are
connected properly. Confirm that:
–the trailer tongue is connected
properly to the hitch ball.
– the trailer lights connector is con-
nected properly and trailer ’sbrake
lights illuminate when the vehicle ’s
brake pedal is pressed, and that the
trailer ’s turn signal lights flash when
the vehicle’ s turn signal lever is oper-
ated.
– the safety chains are connected
properly.
– all cargo in the trailer is secured
safety in position.
– the side mirrors provide a good
rearward field of view without a sig-
nificant blind spot.
. Sufficient time should be taken to learn
the “feel ”of the vehicle/trailer combination
before starting out on a trip. In an area free
of traffic, practice turning, stopping and
backing up.
! Driving with a trailer
. You should allow for considerably more
stopping distance when towing a trailer.
Avoid sudden braking because it may result in skidding or jackknifing and loss of
control.
.
Avoid abrupt starts and sudden accel-
erations. If your vehicle has a manual
transmission, always start out in first gear
and release the clutch at moderate engine
revolution.
. Avoid uneven steering, sharp turns and
rapid lane changes.
. Slow down before turning. Make a
longer than normal turning radius because
the trailer wheels will be closer than the
vehicle wheels to the inside of the turn. In
a tight turn, the trailer could hit your
vehicle.
. Crosswinds will adversely affect the
handling of your vehicle and trailer, caus-
ing sway. Crosswinds can be due to
weather conditions or the passing of large
trucks or buses. If swaying occurs, firmly
grip the steering wheel and promptly begin
decelerating your vehicle at a gradual
pace.
. When passing other vehicles, consid-
erable distance is required because of the
added weight and length caused by
attaching the trailer to your vehicle.
8-24
Page 502 of 634
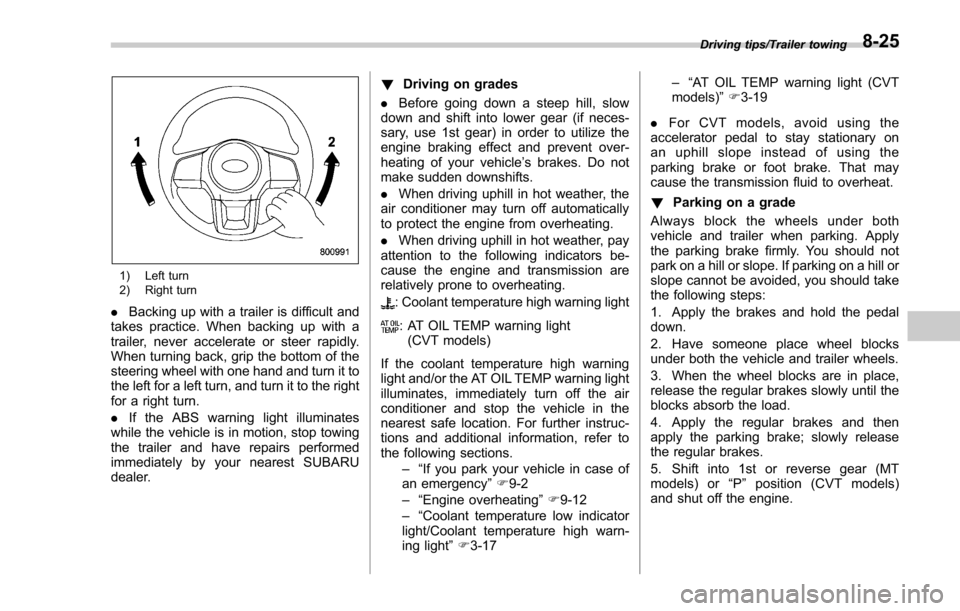
1) Left turn
2) Right turn
.Backing up with a trailer is difficult and
takes practice. When backing up with a
trailer, never accelerate or steer rapidly.
When turning back, grip the bottom of the
steering wheel with one hand and turn it to
the left for a left turn, and turn it to the right
for a right turn.
. If the ABS warning light illuminates
while the vehicle is in motion, stop towing
the trailer and have repairs performed
immediately by your nearest SUBARU
dealer. !
Driving on grades
. Before going down a steep hill, slow
down and shift into lower gear (if neces-
sary, use 1st gear) in order to utilize the
engine braking effect and prevent over-
heating of your vehicle’ s brakes. Do not
make sudden downshifts.
. When driving uphill in hot weather, the
air conditioner may turn off automatically
to protect the engine from overheating.
. When driving uphill in hot weather, pay
attention to the following indicators be-
cause the engine and transmission are
relatively prone to overheating.: Coolant temperature high warning light
: AT OIL TEMP warning light (CVT models)
If the coolant temperature high warning
light and/or the AT OIL TEMP warning light
illuminates, immediately turn off the air
conditioner and stop the vehicle in the
nearest safe location. For further instruc-
tions and additional information, refer to
the following sections. –“If you park your vehicle in case of
an emergency ”F 9-2
–“ Engine overheating ”F 9-12
–“ Coolant temperature low indicator
light/Coolant temperature high warn-
ing light ”F 3-17 –“
AT OIL TEMP warning light (CVT
models) ”F 3-19
. For CVT models, avoid using the
accelerator pedal to stay stationary on
an uphill slope instead of using the
parking brake or foot brake. That may
cause the transmission fluid to overheat.
! Parking on a grade
Always block the wheels under both
vehicle and trailer when parking. Apply
the parking brake firmly. You should not
park on a hill or slope. If parking on a hill or
slope cannot be avoided, you should take
the following steps:
1. Apply the brakes and hold the pedal
down.
2. Have someone place wheel blocks
under both the vehicle and trailer wheels.
3. When the wheel blocks are in place,
release the regular brakes slowly until the
blocks absorb the load.
4. Apply the regular brakes and then
apply the parking brake; slowly release
the regular brakes.
5. Shift into 1st or reverse gear (MT
models) or “P ” position (CVT models)
and shut off the engine.
Driving tips/Trailer towing8-25