Page 70 of 268

INFO:
Depending on the map scale, traffic information
icons cannot be displayed on the map screen.
“Traffic information on map” (page 3-49)
CHANGING MAP
Changing map view and map orienta-
tion
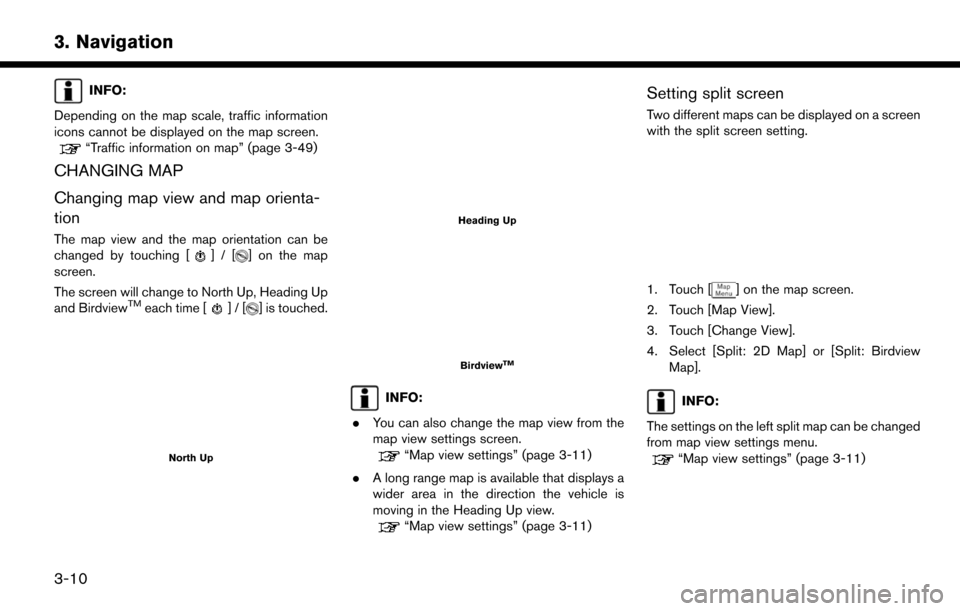
The map view and the map orientation can be
changed by touching []/[] on the map
screen.
The screen will change to North Up, Heading Up
and Birdview
TMeach time []/[] is touched.
North Up
Heading Up
BirdviewTM
INFO:
. You can also change the map view from the
map view settings screen.
“Map view settings” (page 3-11)
. A long range map is available that displays a
wider area in the direction the vehicle is
moving in the Heading Up view.
“Map view settings” (page 3-11)
Setting split screen
Two different maps can be displayed on a screen
with the split screen setting.
1. Touch [] on the map screen.
2. Touch [Map View].
3. Touch [Change View].
4. Select [Split: 2D Map] or [Split: Birdview Map].
INFO:
The settings on the left split map can be changed
from map view settings menu.
“Map view settings” (page 3-11)
3-10
3. Navigation
Page 71 of 268
![NISSAN LEAF 2017 1.G Navigation Manual MAP VIEW SETTINGS
The setup for the map view is performed from the
Settings menu on the touch screen display.
1. Touch [
] on the map screen.
2. Touch [Map View].
INFO:
[Map View] can also be accessed NISSAN LEAF 2017 1.G Navigation Manual MAP VIEW SETTINGS
The setup for the map view is performed from the
Settings menu on the touch screen display.
1. Touch [
] on the map screen.
2. Touch [Map View].
INFO:
[Map View] can also be accessed](/manual-img/5/531/w960_531-70.png)
MAP VIEW SETTINGS
The setup for the map view is performed from the
Settings menu on the touch screen display.
1. Touch [
] on the map screen.
2. Touch [Map View].
INFO:
[Map View] can also be accessed from [Settings]
on the Launch Bar.
“Navigation settings” (page 3-59)
The following settings are available.
Menu item Action
[Change View] [2D Map] Display 2D map.
[Split: 2D Map] Display 2D map on both left and right side of the split screen.
[Birdview (3D)] Display 3D map.
[Split: Birdview Map] Display 2D map on the left side and 3D map on the right side of the screen.
[View Settings] [Intersection] Display the enlarged view of intersection on the left side of the screen during
route guidance.
“Route guidance screens” (page 3-34)
[Turn List] Display the turn list on the left screen when a route is set.
“Route guidance screens” (page 3-34)
[Full Map] Display full map screen.
[Map Settings] [Map Orientation] [North Up] Select a map view to be applied to the map screen. [Map Orientation] is
available only when 2D map is displayed.
[Heading Up]
3-11
3. Navigation
Page 72 of 268
![NISSAN LEAF 2017 1.G Navigation Manual Menu itemAction
[Long Range] The position of the vehicle icon can be changed to view a wider area in the
traveling direction. The vehicle icon is located slightly lower than the center of
the screen. NISSAN LEAF 2017 1.G Navigation Manual Menu itemAction
[Long Range] The position of the vehicle icon can be changed to view a wider area in the
traveling direction. The vehicle icon is located slightly lower than the center of
the screen.](/manual-img/5/531/w960_531-71.png)
Menu itemAction
[Long Range] The position of the vehicle icon can be changed to view a wider area in the
traveling direction. The vehicle icon is located slightly lower than the center of
the screen. Long Range Map View is available only when the map view is
“Heading Up”.
[Map Color] Sets map color from color 1 - 4.
[Map Text Size] [Large] Sets the font size of text displayed on the map screen.
[Medium]
[Small]
[Birdview Angle] Adjusts the Birdview
TMangle using the adjust bar displayed on the left side of
the screen. [Birdview Angle] is available only when 3D map is displayed.
[North Up when Zoomed Out] When this setting is ON, the orientation of the map is automatically changed to North Up when the widest map scale is selected.
[Select Text to Display on
Map] [Place Names] Allows place names to be displayed on the map screen.
[Facility Names] Allows facilities names to be displayed on the map screen.
[Road Names] Allows road names to be displayed on the map screen.
3-12
3. Navigation
Page 73 of 268
Menu itemAction
[Left Split Map Settings] [Map Orientation] The map orientation for the left side of split screen can be selected from
North Up or Heading Up.
[Long Range] Long Range Map View is available only when the left side of split screen is in
Heading Up mode.
With this item turned on, the vehicle position icon on the left screen will be
located slightly lower than the center of the screen so that a wider area in the
traveling direction can be viewed.
[Map Scale] Allows to change the scale of the map displayed on the left side of the split
screen.
[Show all Freeway Exits on Route] Turns on/off the freeway exit information display.
[Auto. Show Turn List on Freeway] The turn list can be set to on or off to be displayed automatically while driving
on a freeway.
[Back to Map] Back to the current location map.
3-13
3. Navigation
Page 74 of 268

SETTING INFORMATION ON MAP
Some information on the map can be displayed
or hidden.
Displaying map icons
Displays map icons of certain points of interest
(such as restaurants and charging stations, etc.)
on the map around the current vehicle location.
1. Touch [Settings] on the Launch Bar.
2. Touch [Navigation].
3. Touch [Map Icons].
4. Touch the preferred icon. The indicator of theselected icon illuminates.
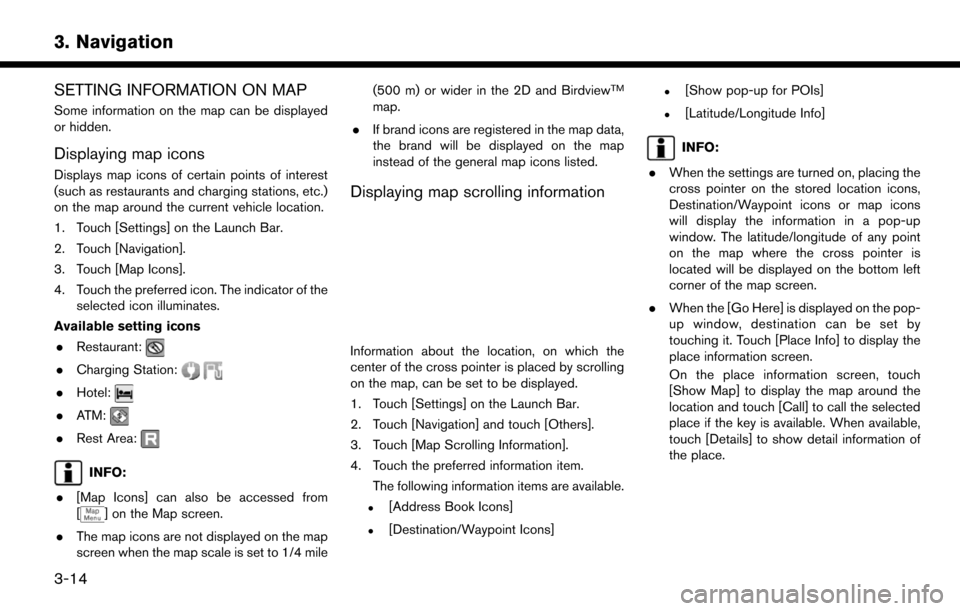
Available setting icons . Restaurant:
.Charging Station:
.Hotel:
.ATM:
.Rest Area:
INFO:
. [Map Icons] can also be accessed from
[
] on the Map screen.
. The map icons are not displayed on the map
screen when the map scale is set to 1/4 mile (500 m) or wider in the 2D and Birdview
TM
map.
. If brand icons are registered in the map data,
the brand will be displayed on the map
instead of the general map icons listed.
Displaying map scrolling information
Information about the location, on which the
center of the cross pointer is placed by scrolling
on the map, can be set to be displayed.
1. Touch [Settings] on the Launch Bar.
2. Touch [Navigation] and touch [Others].
3. Touch [Map Scrolling Information].
4. Touch the preferred information item.
The following information items are available.
.[Address Book Icons]
.[Destination/Waypoint Icons]
.[Show pop-up for POIs]
.[Latitude/Longitude Info]
INFO:
. When the settings are turned on, placing the
cross pointer on the stored location icons,
Destination/Waypoint icons or map icons
will display the information in a pop-up
window. The latitude/longitude of any point
on the map where the cross pointer is
located will be displayed on the bottom left
corner of the map screen.
. When the [Go Here] is displayed on the pop-
up window, destination can be set by
touching it. Touch [Place Info] to display the
place information screen.
On the place information screen, touch
[Show Map] to display the map around the
location and touch [Call] to call the selected
place if the key is available. When available,
touch [Details] to show detail information of
the place.
3-14
3. Navigation
Page 75 of 268

TRAFFIC INFORMATION ON MAP
With a subscription to SiriusXM Traffic, traffic
information is displayed.
“Traffic information on map” (page 3-49)
Free Flow: Green arrow
Moderate traffic: Yellow arrow
Heavy traffic: Red
Section affected by serious traffic event: Purple
The following traffic information icons may be
displayed.
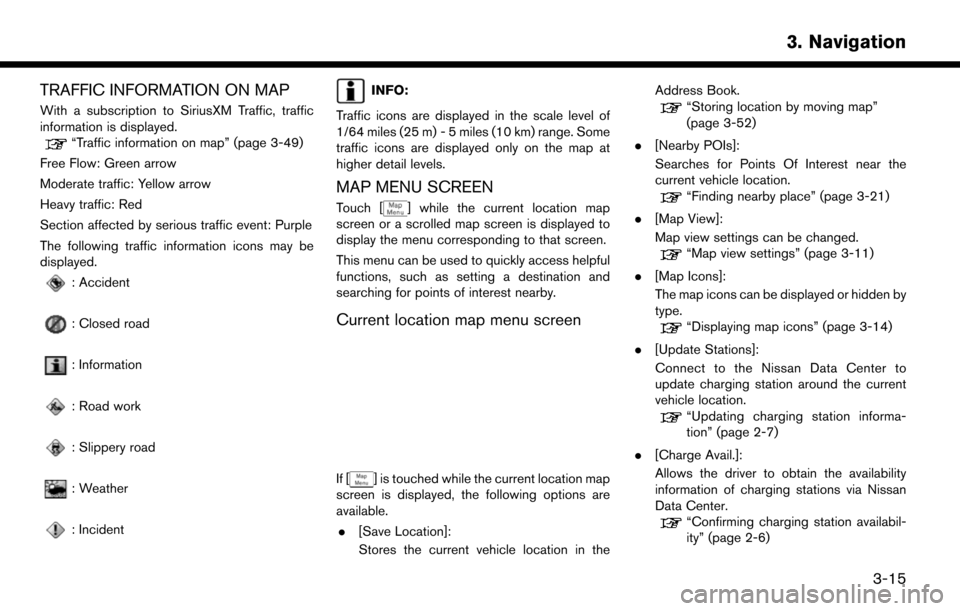
: Accident
: Closed road
: Information
: Road work
: Slippery road
: Weather
: Incident
INFO:
Traffic icons are displayed in the scale level of
1/64 miles (25 m) - 5 miles (10 km) range. Some
traffic icons are displayed only on the map at
higher detail levels.
MAP MENU SCREEN
Touch [] while the current location map
screen or a scrolled map screen is displayed to
display the menu corresponding to that screen.
This menu can be used to quickly access helpful
functions, such as setting a destination and
searching for points of interest nearby.
Current location map menu screen
If [] is touched while the current location map
screen is displayed, the following options are
available.
. [Save Location]:
Stores the current vehicle location in the Address Book.
“Storing location by moving map”
(page 3-52)
. [Nearby POIs]:
Searches for Points Of Interest near the
current vehicle location.
“Finding nearby place” (page 3-21)
. [Map View]:
Map view settings can be changed.
“Map view settings” (page 3-11)
. [Map Icons]:
The map icons can be displayed or hidden by
type.
“Displaying map icons” (page 3-14)
. [Update Stations]:
Connect to the Nissan Data Center to
update charging station around the current
vehicle location.
“Updating charging station informa-
tion” (page 2-7)
. [Charge Avail.]:
Allows the driver to obtain the availability
information of charging stations via Nissan
Data Center.
“Confirming charging station availabil-
ity” (page 2-6)
3-15
3. Navigation
Page 76 of 268
![NISSAN LEAF 2017 1.G Navigation Manual Scrolled location map screen
If [] is touched while a scrolled map screen is
displayed, the following options are available.
. [New Destination]:
Sets the map location pointed at by the cross
pointer NISSAN LEAF 2017 1.G Navigation Manual Scrolled location map screen
If [] is touched while a scrolled map screen is
displayed, the following options are available.
. [New Destination]:
Sets the map location pointed at by the cross
pointer](/manual-img/5/531/w960_531-75.png)
Scrolled location map screen
If [] is touched while a scrolled map screen is
displayed, the following options are available.
. [New Destination]:
Sets the map location pointed at by the cross
pointer as a new destination.
“Setting point on map” (page 3-27)
. [Add to Route]:
Adds the map location pointed at by the
cross pointer as a destination or a waypoint
to the route already set.
“Setting destination or waypoint”
(page 3-40)
. [Nearby POIs]:
Searches for Points Of Interest near the map
location.
“Finding nearby place” (page 3-21) .
[Save Location]:
Stores the map location pointed at by the
cross pointer in the Address Book.
“Storing location by moving map”
(page 3-52)
. [Update Stations]:
Connect to the Nissan Data Center to
update charging station around the point of
the cursor.
“Updating charging station informa-
tion” (page 2-7)
. [Charge Avail.]:
Allows the driver to obtain the availability
information of charging stations via Nissan
Data Center.
“Confirming charging station availabil-
ity” (page 2-6)
SETTING DESTINATION
The destination you wish to drive to can be set
for route guidance.
BASIC OPERATIONS
Displaying destination setting menu
There are several methods that can be used to
set a destination. Select a preferred method for
finding and setting a destination.
Touch [Navi] on the Launch Bar.
The destination screen will be displayed when a
route is not set.
3-16
3. Navigation
Page 77 of 268
![NISSAN LEAF 2017 1.G Navigation Manual INFO:
If a route is set, the route menu screen will be
displayed when [Navi] on the Launch Bar is
touched. Touch [New Destination] to set a
destination.
“Route menu” (page 3-36)
Available destinat NISSAN LEAF 2017 1.G Navigation Manual INFO:
If a route is set, the route menu screen will be
displayed when [Navi] on the Launch Bar is
touched. Touch [New Destination] to set a
destination.
“Route menu” (page 3-36)
Available destinat](/manual-img/5/531/w960_531-76.png)
INFO:
If a route is set, the route menu screen will be
displayed when [Navi] on the Launch Bar is
touched. Touch [New Destination] to set a
destination.
“Route menu” (page 3-36)
Available destination setting methods:
Setting item Action
[Street Address] Searches for a destination by address.
“Finding address” (page 3-19)
[Charging Stations] Searches for charging stations located near the current vehicle location, destination, pointed place on map and city center. Nearby station availability can also be checked from this menu.
“Finding charging station” (page 3-19)
[Nearby Points of Interest] Searches for points of interest near the current vehicle location, such as restaurants and charging stations, etc.
“Finding nearby place” (page 3-21)
[Points of Interest] Searches for a destination from various categories of businesses or locations.
“Finding points of interest” (page 3-21)
[Home] Searches for a route from the current location to the previously stored home location.
“Setting home as destination” (page 3-23)
[Address Book] Searches for a destination from Address Book.
“Searching from address book” (page 3-23)
[Previous Destinations] Searches for the destination from the previous destinations and a previous start point.
“Searching from previous destinations” (page 3-24)
[Intersection] Sets an intersection as a destination.
“Setting intersection” (page 3-24)
[Phone Number] Searches for a point of interest by a telephone number.
“Setting by phone number” (page 3-25)
3-17
3. Navigation