2017 NISSAN LEAF steering
[x] Cancel search: steeringPage 83 of 268
![NISSAN LEAF 2017 1.G Navigation Manual .[Near Current Location]:Facilities near the current vehicle location
are displayed in a list.
.[Near Destination]:When the destination is set, this indicates
a list of facilities around the destinati NISSAN LEAF 2017 1.G Navigation Manual .[Near Current Location]:Facilities near the current vehicle location
are displayed in a list.
.[Near Destination]:When the destination is set, this indicates
a list of facilities around the destinati](/manual-img/5/531/w960_531-82.png)
.[Near Current Location]:Facilities near the current vehicle location
are displayed in a list.
.[Near Destination]:When the destination is set, this indicates
a list of facilities around the destination.
6. Touch the preferred destination facility from the list.
Touch [Start] to start route guidance.
INFO:
. Subcategories may not be displayed de-
pending on the selected main category.
. If there is no nearby POI, a message asking
whether to search from an extended area will
be displayed. When [Yes] is selected, the
system starts to search for POI in a wider
area. .
Touch [ i ] on the list screen to display the
detailed information about the POI that is
selected on the touch screen display.
. Touch [By Distance] to sort the list by the
distance. Touch [New Category] to select a
different POI category.
Voice command
1. Push <
>located on the steering wheel.
2. After the tone sounds, speak a command.
Use the following voice command to search for
Points of Interest from category:
“POI Category”
SETTING HOME AS DESTINATION
The home location can be set as the destination
if the home location is stored in advance. This
function is especially useful when searching for a
route to return to the home location.
1. Touch [Navi] on the Launch Bar.
2. Touch [Home].
INFO:
If the home location is not stored yet, the
system will display a message asking if you
wish to store a home location. Touch [Yes] to
store the home location.
“Storing home location” (page 3-51)
3. An entire route to the destination is dis- played. Touch [Start] to start route guidance.
Voice command
1. Push <
>located on the steering wheel.
2. After the tone sounds, speak a command.
Use the following voice command to set home as
the destination:
“Go Home”
SEARCHING FROM ADDRESS
BOOK
Locations frequently visited can be stored in the
Address Book and reused to set destinations.
“Storing location” (page 3-51)
1. Touch [Navi] on the Launch Bar.
2. Touch [Address Book].
3-23
3. Navigation
Page 84 of 268
![NISSAN LEAF 2017 1.G Navigation Manual 3. Touch the preferred location from the list.
INFO:
.Selecting [Sort] displays a list of varioussort functions.
— [Sorted By Number]: The Address Book entries are displayed
in ascending numerical o NISSAN LEAF 2017 1.G Navigation Manual 3. Touch the preferred location from the list.
INFO:
.Selecting [Sort] displays a list of varioussort functions.
— [Sorted By Number]: The Address Book entries are displayed
in ascending numerical o](/manual-img/5/531/w960_531-83.png)
3. Touch the preferred location from the list.
INFO:
.Selecting [Sort] displays a list of varioussort functions.
— [Sorted By Number]: The Address Book entries are displayed
in ascending numerical order.
— [Sorted By Name]: The Address Book entries are displayed
in alphabetic order.
— [Sorted By Icon]: By selecting a particular icon, a list that
contains only the Address Book entries
associated with that icon is displayed.
— [Sorted By Group]: By selecting a particular group (family,
friends, leisure, etc.) , the selected group
is displayed at the top of the list.
.Touch [Add New] to add a new location.
4. The selected destination is displayed. Touch [Start] to start route guidance.
Voice command
1. Push <
>located on the steering wheel.
2. After the tone sounds, speak a command.
Use the following voice command to set a
destination from the Address Book:
“Address Book”
SEARCHING FROM PREVIOUS
DESTINATIONS
A previous destination and a previous start point
can be set as the destination.
Up to 100 previous destinations will be auto-
matically stored. If the number of previous
destinations exceeds 100, the oldest one is
automatically deleted and the new destination is
added.
1. Touch [Navi] on the Launch Bar.
2. Touch [Previous Destinations]. A list screen is displayed.
3. Touch the previous destination or a previous start point from the list. 4. Touch [Start] to start route guidance.
Voice command
1. Push <
>located on the steering wheel.
2. After the tone sounds, speak a command.
Use the following voice commands to display the
previous destinations/start point list:
“Previous Destinations”
“Previous Start Point”
SETTING INTERSECTION
It is possible to set an intersection of any two
streets as the destination and have the system
calculate a route.
1. Touch [Navi] on the Launch Bar.
2. Touch [Intersection]. Intersection screen is displayed.
3-24
3. Navigation
Page 85 of 268
![NISSAN LEAF 2017 1.G Navigation Manual 3. Input the Intersection.
.Touch [State/Province] to enter the stateor province name if necessary.
.Touch [City] to enter the city name.
.Touch [1st Street] to enter the first streetname. After finis NISSAN LEAF 2017 1.G Navigation Manual 3. Input the Intersection.
.Touch [State/Province] to enter the stateor province name if necessary.
.Touch [City] to enter the city name.
.Touch [1st Street] to enter the first streetname. After finis](/manual-img/5/531/w960_531-84.png)
3. Input the Intersection.
.Touch [State/Province] to enter the stateor province name if necessary.
.Touch [City] to enter the city name.
.Touch [1st Street] to enter the first streetname. After finishing the entry, touch
[List]. A list screen is displayed.
.After 1st street information is entered,touch [2nd Street] to enter the second
street name. After finishing the entry,
touch [List]. A list screen is displayed.
4. Enter the state/province, city, and street of the destination and then touch [OK]. The
route is displayed.
5. The selected destination is displayed at the center of the map. Touch [Start] to start route
guidance.
Voice command
1. Push <
>located on the steering wheel.
2. After the tone sounds, speak a command.
Use the following voice command to set an
intersection as destination:
“Intersection”*
*: This voice command operation is available only
when the language setting is set to English.
SETTING BY PHONE NUMBER
If the phone number of a facility is known, it is
possible to search for a facility by entering the
phone number.
INFO:
. If the area code of the specified telephone
number does not exist in the map data, the
system cannot search for the location.
. Only the locations included in the database
in the map data can be searched for by
phone number. Residential phone numbers
cannot be used to search for a location.
1. Touch [Navi] on the Launch Bar.
2. Touch [Phone Number]. The telephone number input screen is displayed.
3. Enter the telephone number including the area code. After finishing entry, touch [OK].
4. The selected destination is displayed. Touch [Start] after confirming the location of the
displayed destination.
INFO:
If there are more than one location registered for
the phone number, a list screen is displayed.
Touch an item on the list to select a preferred
location.
SETTING CITY CENTER
It is possible to set the center of a specified city
as a destination.
1. Touch [Navi] on the Launch Bar.
2. Touch [City Center]. A character input screen is displayed.
3. Enter the name of the city and touch [List]. A list screen is displayed.
INFO:
Touch [Last 5 Cities] to display the last 5
cities recently set as destinations.
4. Touch the preferred destination from the list.
INFO:
Touch [By Distance] to sort the list by the
nearest distance. Touch [Sorted By Name] to
sort the list by the alphabetic order.
5. The selected destination is displayed on the map. Touch [Start] after confirming the
location of the displayed destination.
3-25
3. Navigation
Page 86 of 268
Voice command
1. Push <
>located on the steering wheel.
2. After the tone sounds, speak a command.
Use the following voice command to set city
center as a destination:
“City Center”*
*: This voice command operation is available only
when the language setting is in English.
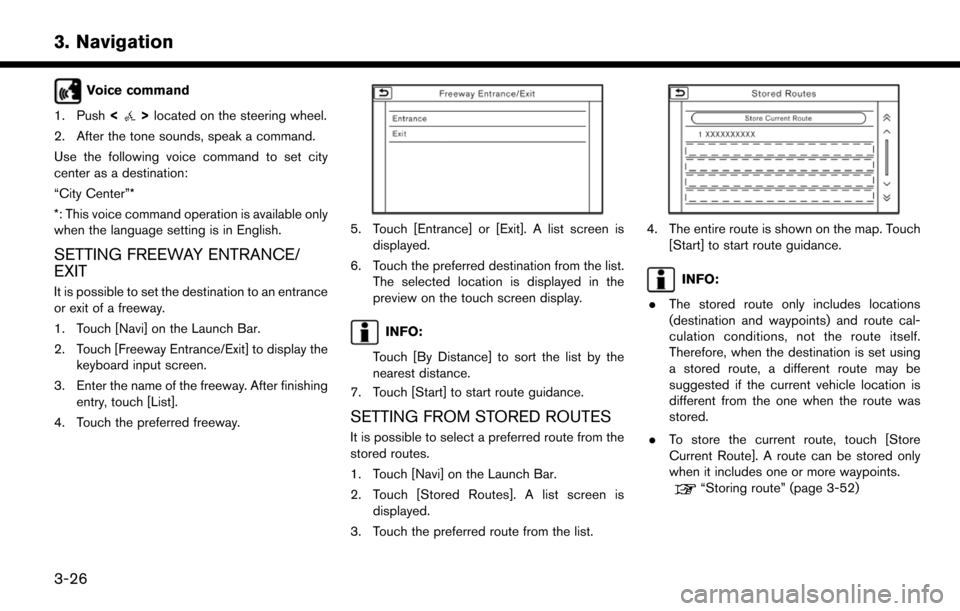
SETTING FREEWAY ENTRANCE/
EXIT
It is possible to set the destination to an entrance
or exit of a freeway.
1. Touch [Navi] on the Launch Bar.
2. Touch [Freeway Entrance/Exit] to display the keyboard input screen.
3. Enter the name of the freeway. After finishing entry, touch [List].
4. Touch the preferred freeway.
5. Touch [Entrance] or [Exit]. A list screen is displayed.
6. Touch the preferred destination from the list. The selected location is displayed in the
preview on the touch screen display.
INFO:
Touch [By Distance] to sort the list by the
nearest distance.
7. Touch [Start] to start route guidance.
SETTING FROM STORED ROUTES
It is possible to select a preferred route from the
stored routes.
1. Touch [Navi] on the Launch Bar.
2. Touch [Stored Routes]. A list screen is displayed.
3. Touch the preferred route from the list.
4. The entire route is shown on the map. Touch [Start] to start route guidance.
INFO:
. The stored route only includes locations
(destination and waypoints) and route cal-
culation conditions, not the route itself.
Therefore, when the destination is set using
a stored route, a different route may be
suggested if the current vehicle location is
different from the one when the route was
stored.
. To store the current route, touch [Store
Current Route]. A route can be stored only
when it includes one or more waypoints.
“Storing route” (page 3-52)
3-26
3. Navigation
Page 105 of 268
INFO:
. The guidance volume can also be adjusted by pushing
+>on the steering wheel while voice guidance is being announced.
. A SiriusXM Traffic subscription is necessary to use Traffic Announcement function.
3-45
3. Navigation
Page 110 of 268
*4Remaining distance and estimated time to
the destination calculated with considera-
tion of traffic information on route.
INFO:
Traffic icons are displayed in the scale level of
1/64 miles (25 m) - 5 miles (10 km) range. Some
traffic icons are displayed only on the map at
higher detail levels.
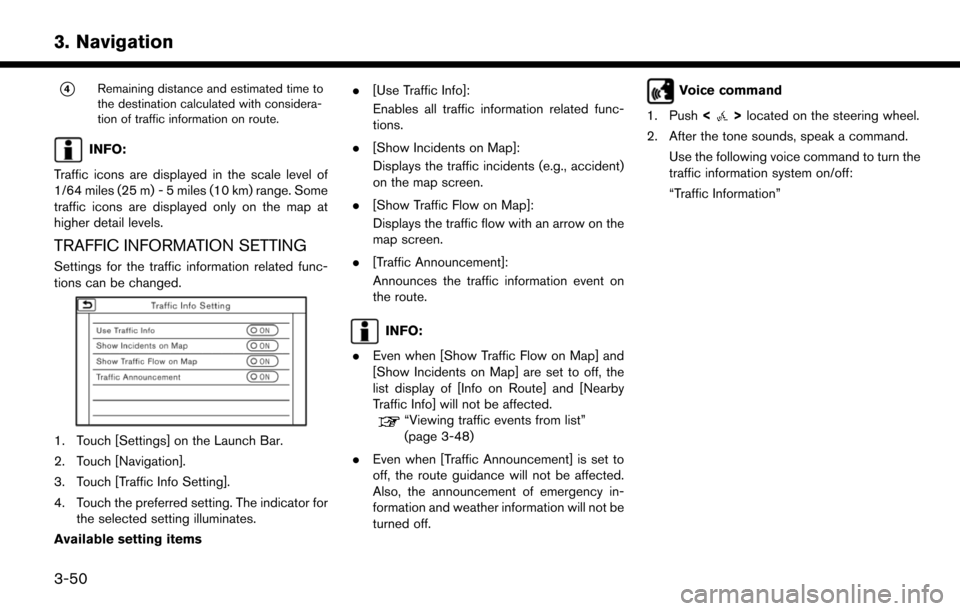
TRAFFIC INFORMATION SETTING
Settings for the traffic information related func-
tions can be changed.
1. Touch [Settings] on the Launch Bar.
2. Touch [Navigation].
3. Touch [Traffic Info Setting].
4. Touch the preferred setting. The indicator for the selected setting illuminates.
Available setting items .
[Use Traffic Info]:
Enables all traffic information related func-
tions.
. [Show Incidents on Map]:
Displays the traffic incidents (e.g., accident)
on the map screen.
. [Show Traffic Flow on Map]:
Displays the traffic flow with an arrow on the
map screen.
. [Traffic Announcement]:
Announces the traffic information event on
the route.
INFO:
. Even when [Show Traffic Flow on Map] and
[Show Incidents on Map] are set to off, the
list display of [Info on Route] and [Nearby
Traffic Info] will not be affected.
“Viewing traffic events from list”
(page 3-48)
. Even when [Traffic Announcement] is set to
off, the route guidance will not be affected.
Also, the announcement of emergency in-
formation and weather information will not be
turned off.
Voice command
1. Push <
>located on the steering wheel.
2. After the tone sounds, speak a command. Use the following voice command to turn the
traffic information system on/off:
“Traffic Information”
3-50
3. Navigation
Page 123 of 268
4 Audio system
Audio operation precautions .................................................. 4-2Radio ........................................................................\
.............. 4-2
Compact Disc (CD) player ............................................... 4-4
USB (Universal Serial Bus) connection port ................ 4-5
Compressed Audio Files (MP3/WMA/AAC) ............... 4-7
Bluetooth
�Šstreaming audio .............................................. 4-9
Names and functions of audio control buttons ............... 4-10
Audio main buttons .......................................................... 4-10
Steering wheel mounted audio control buttons ........ 4-11 Audio operations ................................................................... 4-11
Audio main operation .................................................... 4-11
Radio ........................................................................\
......... 4-12
Compact Disc (CD) player .......................................... 4-18
USB memory device player ......................................... 4-21
iPod�Šplayer ..................................................................... 4-24
Bluetooth�Šaudio ............................................................ 4-28
Auxiliary (AUX) devices ................................................. 4-31
Audio settings ........................................................................\
4-32
Page 133 of 268
*8
Push to open the monitor to access the CD
slot.
*9CD slot:
Insert a CD with the label side facing up.
*10<>:
Push to eject a CD.
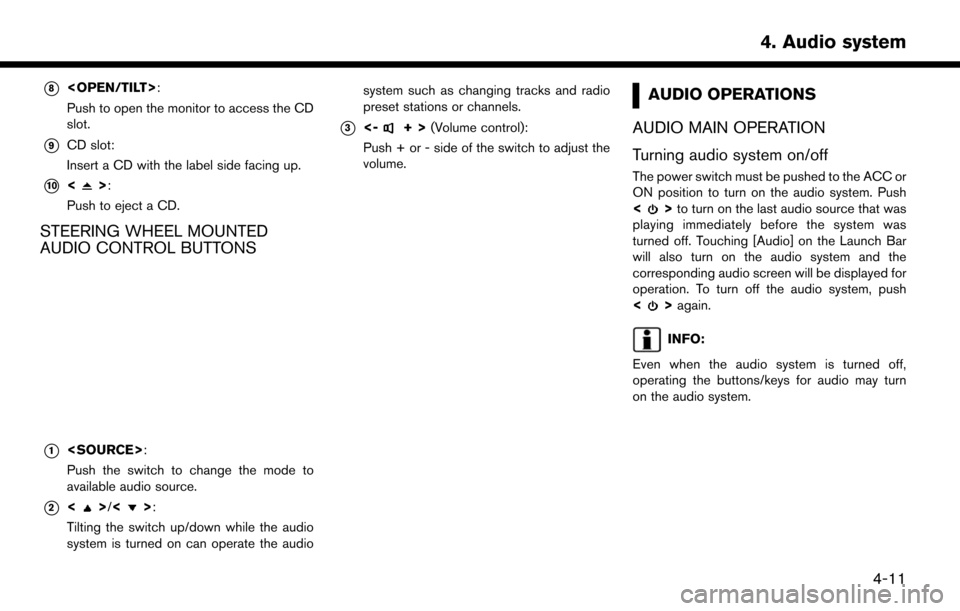
STEERING WHEEL MOUNTED
AUDIO CONTROL BUTTONS
*1
Push the switch to change the mode to
available audio source.
*2<>/<>:
Tilting the switch up/down while the audio
system is turned on can operate the audio system such as changing tracks and radio
preset stations or channels.
*3<-+>
(Volume control):
Push + or - side of the switch to adjust the
volume.
AUDIO OPERATIONS
AUDIO MAIN OPERATION
Turning audio system on/off
The power switch must be pushed to the ACC or
ON position to turn on the audio system. Push
<
> to turn on the last audio source that was
playing immediately before the system was
turned off. Touching [Audio] on the Launch Bar
will also turn on the audio system and the
corresponding audio screen will be displayed for
operation. To turn off the audio system, push
<
> again.
INFO:
Even when the audio system is turned off,
operating the buttons/keys for audio may turn
on the audio system.
4-11
4. Audio system