2017 NISSAN ARMADA ECO mode
[x] Cancel search: ECO modePage 292 of 614
How to use headphones:
Control buttons for the headphones are located
on the back of the right headphone speaker.
.Turning power on/off:
Push the power ON/OFF button to turn the
headphones on or off. The POWER indica-
tor will illuminate when the headphones are
on.
. Selecting display (L/R):
When the rear displays are playing different
sources, sliding the DISPLAY SELECT
switch selects which of the audio sources
to listen to.
— L: the headphone will play audio from the
source playing on the left display.
— R: the headphone will play audio from the source playing on the right display.
JVH0360X
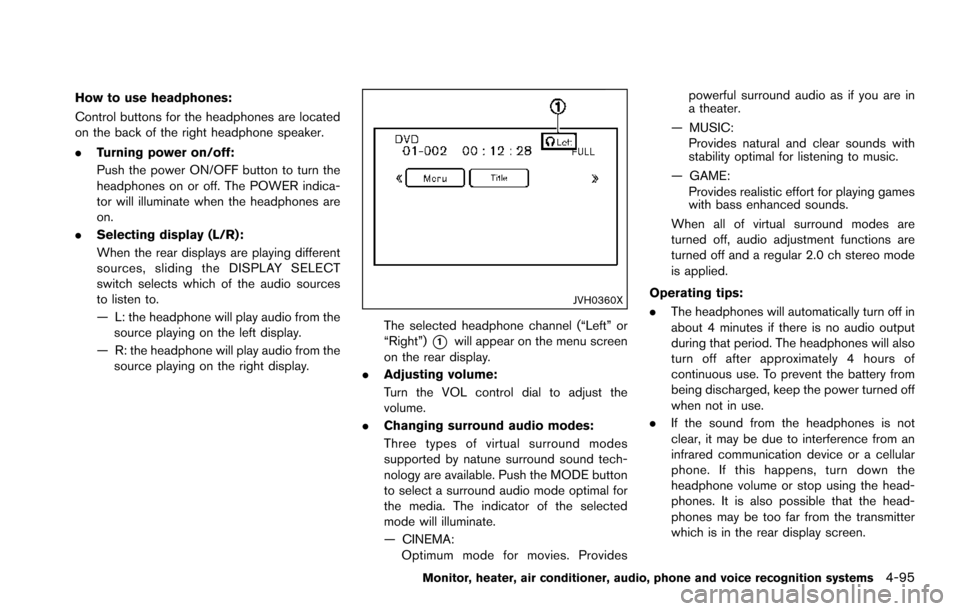
The selected headphone channel (“Left” or
“Right”)
*1will appear on the menu screen
on the rear display.
. Adjusting volume:
Turn the VOL control dial to adjust the
volume.
. Changing surround audio modes:
Three types of virtual surround modes
supported by natune surround sound tech-
nology are available. Push the MODE button
to select a surround audio mode optimal for
the media. The indicator of the selected
mode will illuminate.
— CINEMA:
Optimum mode for movies. Provides powerful surround audio as if you are in
a theater.
— MUSIC: Provides natural and clear sounds with
stability optimal for listening to music.
— GAME: Provides realistic effort for playing games
with bass enhanced sounds.
When all of virtual surround modes are
turned off, audio adjustment functions are
turned off and a regular 2.0 ch stereo mode
is applied.
Operating tips:
. The headphones will automatically turn off in
about 4 minutes if there is no audio output
during that period. The headphones will also
turn off after approximately 4 hours of
continuous use. To prevent the battery from
being discharged, keep the power turned off
when not in use.
. If the sound from the headphones is not
clear, it may be due to interference from an
infrared communication device or a cellular
phone. If this happens, turn down the
headphone volume or stop using the head-
phones. It is also possible that the head-
phones may be too far from the transmitter
which is in the rear display screen.
Monitor, heater, air conditioner, audio, phone and voice recognition systems4-95
Page 297 of 614
4-100Monitor, heater, air conditioner, audio, phone and voice recognition systems
Available sources
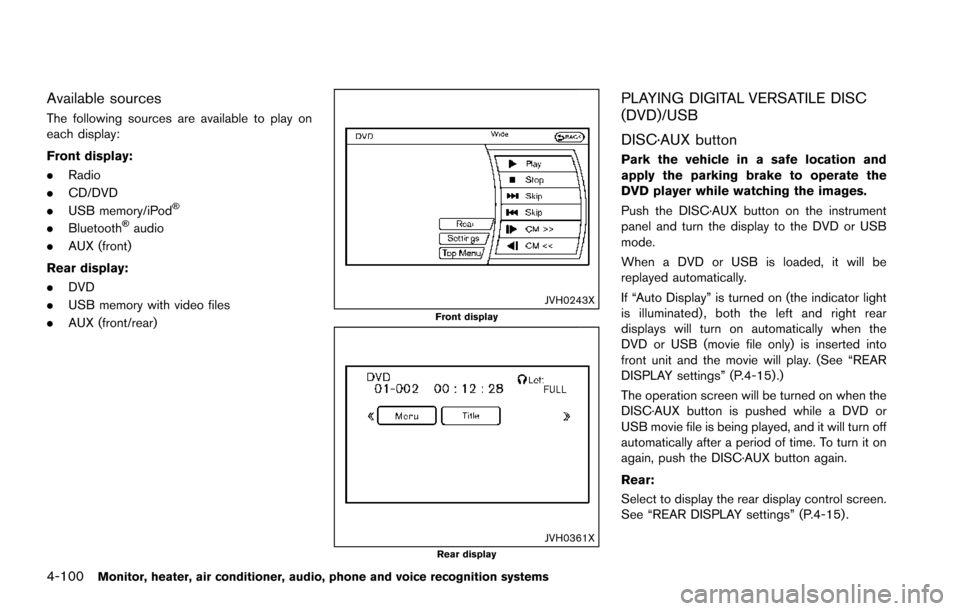
The following sources are available to play on
each display:
Front display:
.Radio
. CD/DVD
. USB memory/iPod
�Š
.Bluetooth�Šaudio
. AUX (front)
Rear display:
. DVD
. USB memory with video files
. AUX (front/rear)
JVH0243XFront display
JVH0361XRear display
PLAYING DIGITAL VERSATILE DISC
(DVD)/USB
DISC·AUX button
Park the vehicle in a safe location and
apply the parking brake to operate the
DVD player while watching the images.
Push the DISC·AUX button on the instrument
panel and turn the display to the DVD or USB
mode.
When a DVD or USB is loaded, it will be
replayed automatically.
If “Auto Display” is turned on (the indicator light
is illuminated) , both the left and right rear
displays will turn on automatically when the
DVD or USB (movie file only) is inserted into
front unit and the movie will play. (See “REAR
DISPLAY settings” (P.4-15) .)
The operation screen will be turned on when the
DISC·AUX button is pushed while a DVD or
USB movie file is being played, and it will turn off
automatically after a period of time. To turn it on
again, push the DISC·AUX button again.
Rear:
Select to display the rear display control screen.
See “REAR DISPLAY settings” (P.4-15) .
Page 300 of 614
“Menu Skip” key is turned on. Note that some
discs may not be played directly even if this item
is turned on.
CM Skip (DVD-VIDEO):
The amount of seconds for CM Skip can be set
to 15, 30 or 60 seconds.
DRC (DVD-VIDEO) :
DRC (Dynamic Range Compression) allows
tuning of the dynamic range of sound recorded
in the Dolby Digital format.
DVD Language (DVD-VIDEO, VIDEO-CD):
Select the “DVD Language” key and push the
ENTER button to open the number entry screen.
Input the number corresponding to the preferred
language and select the “OK” key with the multi-
function controller. Then push the ENTER
button. The DVD top menu language will be
changed to the one selected.
Display:
Adjust the image quality of the screen, select the
preferred adjustment items and push the ENTER
button.
Audio*:
Choose the preferred language using the multi-
function controller and push the ENTER button.Subtitle* (DVD-VIDEO):
Choose the preferred language using the multi-
function controller and push the ENTER button.
To turn off the subtitles, push and hold the
ENTER button until a beep sounds.
Display Mode (DVD-VIDEO, VIDEO-CD):
Choose from the “Full”, “Wide”, “Normal” or
“Cinema” mode using the multi-function con-
troller and push the ENTER button again.
Title List:
Select the preferred title from the list.
Play Mode:
Choose the preferred play mode using the multi-
function controller and push the ENTER button.
PG/PL Mode:
Select the “PG” or “PL” mode.Remote controller operation
Use the remote controller to adjust the following
items.
Rear display select switch:
To activate the left screen or right screen, move
the rear display select switch on the remote
controller to the side corresponding to the
screen you want to activate (L or R) .
POWER button:
The rear displays can be activated or deacti-
vated individually.
To activate or deactivate the rear displays, push
the
button on the remote controller.
SOURCE button:
The media available for playback will be
displayed when the SOURCE button is pushed.
MENU button:
Push the MENU button to display the operation
screen for the source that is being played.
Select button:
Push the select button
,to
select the items displayed on the rear screen.
ENTER button:
Push the ENTER button to confirm the setting
for the selected item.
Monitor, heater, air conditioner, audio, phone and voice recognition systems4-103
Page 301 of 614
4-104Monitor, heater, air conditioner, audio, phone and voice recognition systems
SETUP button:
Push the SETUP button to display the rear seat
display settings. (See “Rear display settings”
(P.4-104) .)
BACK button:
Push to go back to the previous screen or
cancel the selection.
Volume:
To adjust the speaker volume push
oron the volume control button.
This button is used to control the volume from
the vehicle speakers. To adjust the volume of the
headphones, use the volume knob that is
attached to the headphones.
Keypad:
: PLAY/PAUSE button
: STOP button
: FORWARD button
: REWIND button
: FORWARD button for commercial skip (forDVD-VIDEO and DVD-VR)
: REWIND button for commercial skip (forDVD-VIDEO and DVD-VR)
Key illumination button:
If the key illumination button is pushed, the
buttons on the remote controller will be lit up.
Rear display settings
Display mode adjustment of the rear seat
displays can be performed while a DVD or
USB movie is being played. Set the rear display
select switch on the remote controller to either L
or R according to the display you want to set,
and then push the SETUP button. It is not
possible to make display mode adjustments to
the left and right displays at the same time.
Aspect:
Select the display size from “FULL”, “NORMAL”,
“CINEMA” or “WIDE”.
Picture Mode:
Select the Picture Mode from “NORMAL”,
“DYNAMIC”, “CINEMA”, “GAME” .
To adjust the display brightness automatically,
select the “Brightness” key and then select from
“DARKER”, “NORMAL” or “BRIGHTER”. When
adjusting manually, select “OFF” and push
ENTER button on the remote controller.
To adjust tint, color or contrast, select a key
using the select button (
or) , push
ENTER on the remote controller.
Push the BACK button on the remote controller
to apply the settings and return to the previous
display.
To return the adjustment levels to the default
value, select “Execute” next to “Initialization” push the select button (
,) on the remote
controller and push the ENTER button. The
“Execute” key is deactivated when the picture
mode settings are already in the default value.
Color System:
To choose the color system, select from
“NTSC”, “PAL”, “PAL-60”, “PAL-M”, “PAL-N” or
“AUTO” .
3D Y/C filter:
Set to ON/OFF push the select button (
or) and push ENTER button on the remote
controller. When turned on, small characters
and an outline of the shapes will be displayed
more clearly than when turned off.
AUX Volume Setting:
This is only active when in the Rear AUX mode.
To set the AUX volume, select from “HIGH”,
“LOW” or “MIDDLE” .
Page 302 of 614
OPERATING TIPS
.The images from a device that is connected
to the rear auxiliary input jacks cannot be
viewed on the front displays.
. It is not possible to display different video
files, such as DVD or video files in the USB
memory, on the front and rear displays at the
same time.
. It is not possible to play an audio file and a
video file in the same USB memory at the
same time.
Multiple source display
It is possible to play different sources on each
display. The following example shows how to
operate multiple sources.
It is also possible to set in the front display. For
more details, see “REAR DISPLAY settings”
(P.4-15) .
1. Display a video file in the front display by
selecting the DVD mode.
2. Set the rear display select switch on the remote controller to the L side and push the
POWER button. The left rear display will
turn on and the DVD screen will be
displayed.
(If “Auto Display” is set to ON, the display
will turn on automatically.) 3. Set the rear display select switch on the
remote controller to the R side and push the
POWER button. The right rear display will
turn on and the DVD screen will be
displayed.
(If “Auto Display” is set to ON, the display
will turn on automatically.)
4. Switch the source on the front display to an audio source. The sound from the speakers
switches according to the front display. The
rear display continues to display the DVD.
5. Turn on a pair of headphones and listen to the DVD on the rear displays using the
headphones.
6. Connect an auxiliary device to the AUX jack, set the rear display select switch to the L or
R side and push the SOURCE button to
select “Rear AUX”. The selected side of the
rear display will switch to the AUX mode.
The other rear display will continue to
display the DVD.
7. Turn on the other pair of headphones. If the sound from the headphones is not from the
AUX jacks, switch the channel with the
channel select switch on the headphones.
CARE AND MAINTENANCE
Use a lightly dampened, lint free cloth to clean
the surfaces of your DVD Entertainment System
(DVD player face, screen, remote controller,
etc.) .
CAUTION
.Do not use any solvents or cleaning
solutions when cleaning the video
system.
. Do not use excessive force on the
monitor screen.
. Avoid touching or scratching the
monitor screen as it may become
dirty or damaged.
. Do not attempt to operate the
system in extreme temperature con-
ditions [below �í48F( �í208 C) and
above 1588F (708C)].
. Do not attempt to operate the
system in extreme humidity condi-
tions (less than 10% or more than
75%) .
Monitor, heater, air conditioner, audio, phone and voice recognition systems4-105
Page 303 of 614
4-106Monitor, heater, air conditioner, audio, phone and voice recognition systems
When installing a car phone or a CB radio in
your vehicle, be sure to observe the following
cautions, otherwise the new equipment may
adversely affect the electronic control modules
and electronic control system harness.
WARNING
.A cellular phone should not be used
for any purpose while driving so full
attention may be given to vehicle
operation. Some jurisdictions prohi-
bit the use of cellular phones while
driving.
. If you must make a call while your
vehicle is in motion, the hands-free
cellular phone operational mode (if
so equipped) is highly recom-
mended. Exercise extreme caution
at all times so full attention may be
given to vehicle operation.
. If a conversation in a moving vehicle
requires you to take notes, pull off
the road to a safe location and stop
your vehicle before doing so.
CAUTION
.Keep the antenna as far away as
possible from the electronic control
modules.
. Keep the antenna wire more than 8
in (20 cm) away from the electronic
control system harness. Do not
route the antenna wire next to any
harness.
. Adjust the antenna standing-wave
ratio as recommended by the man-
ufacturer.
. Connect the ground wire from the
CB radio chassis to the body.
. For details, it is recommended you
visit a NISSAN dealer.
WARNING
.Use a phone after stopping your
vehicle in a safe location. If you
have to use a phone while driving,
exercise extreme caution at all
times so full attention may be given
to vehicle operation.
. If you find yourself unable to devote
full attention to vehicle operation
while talking on the phone, pull off
the road to a safe location and stop
your vehicle before doing so.
CAUTION
To avoid draining the vehicle battery,
use a phone after starting the engine.
Your vehicle is equipped with Bluetooth
�Š
Hands-Free Phone System. If you are an owner
of a compatible Bluetooth�Šenabled cellular
phone, you can set up the wireless connection
between your cellular phone and the in-vehicle
phone module. With Bluetooth
�Šwireless tech-
nology, you can make or receive a telephone call
with your cellular phone in your pocket.
CAR PHONE OR CB RADIO Bluetooth�ŠHANDS-FREE PHONE
SYSTEM
Page 310 of 614
SAA2525
RECEIVING A CALL
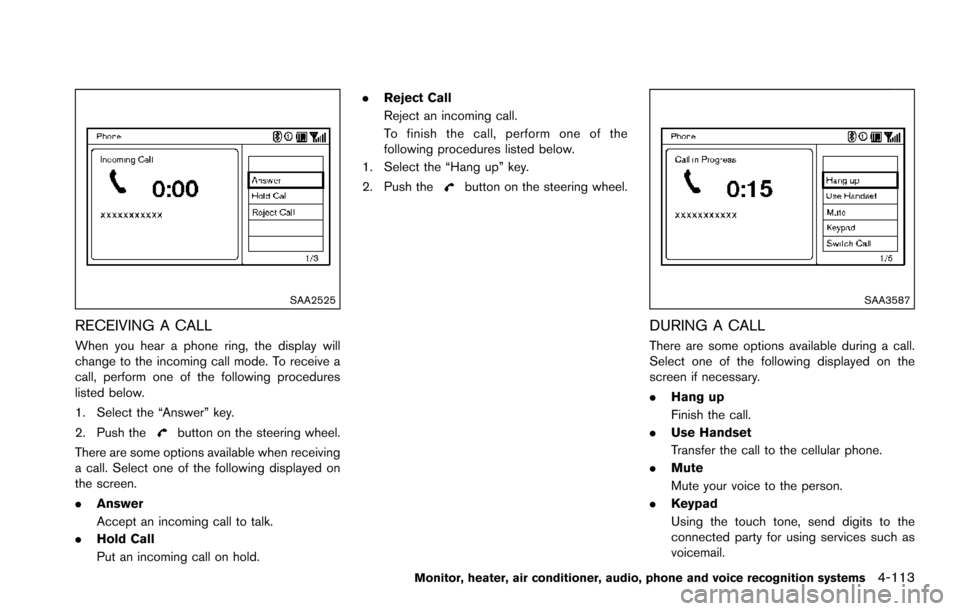
When you hear a phone ring, the display will
change to the incoming call mode. To receive a
call, perform one of the following procedures
listed below.
1. Select the “Answer” key.
2. Push the
button on the steering wheel.
There are some options available when receiving
a call. Select one of the following displayed on
the screen.
. Answer
Accept an incoming call to talk.
. Hold Call
Put an incoming call on hold. .
Reject Call
Reject an incoming call.
To finish the call, perform one of the
following procedures listed below.
1. Select the “Hang up” key.
2. Push the
button on the steering wheel.
SAA3587
DURING A CALL
There are some options available during a call.
Select one of the following displayed on the
screen if necessary.
. Hang up
Finish the call.
. Use Handset
Transfer the call to the cellular phone.
. Mute
Mute your voice to the person.
. Keypad
Using the touch tone, send digits to the
connected party for using services such as
voicemail.
Monitor, heater, air conditioner, audio, phone and voice recognition systems4-113
Page 311 of 614
4-114Monitor, heater, air conditioner, audio, phone and voice recognition systems
.Cancel Mute
This will appear after “Mute” is selected.
Mute will be canceled.
. Switch Call*
Select “Switch Call” to answer another
incoming call. By selecting “Hang up”, you
can end a call and can speak to a caller who
is on hold again.
* This function may not be usable, depend-
ing on the model of phone.
To adjust the person’s voice to be louder or
quieter, push the volume control switch (+ or �í)
on the steering wheel or turn the volume control
knob on the instrument panel while talking on
the phone. This adjustment is also available in
the SETTING mode.
JVH0480X
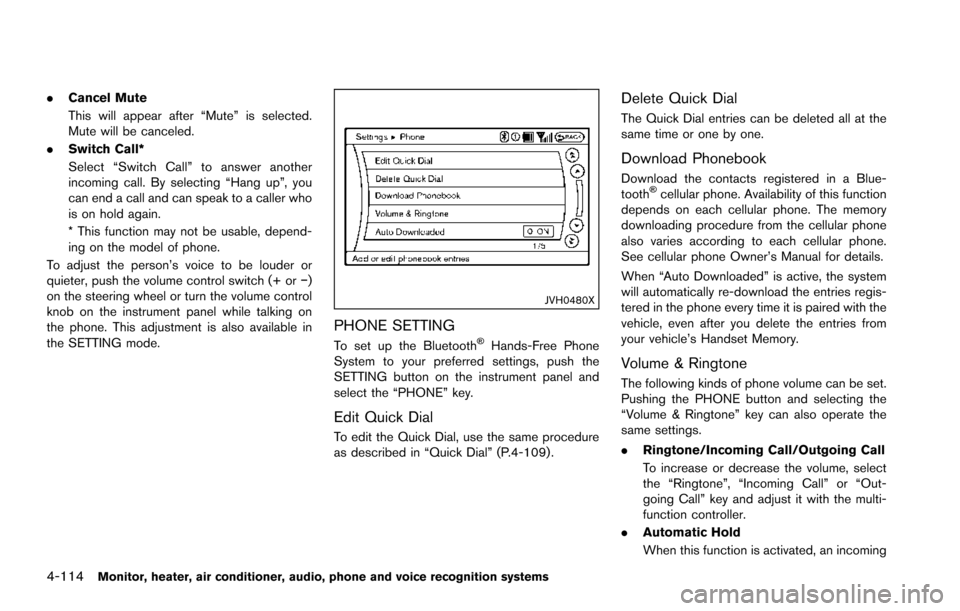
PHONE SETTING
To set up the Bluetooth�ŠHands-Free Phone
System to your preferred settings, push the
SETTING button on the instrument panel and
select the “PHONE” key.
Edit Quick Dial
To edit the Quick Dial, use the same procedure
as described in “Quick Dial” (P.4-109) .
Delete Quick Dial
The Quick Dial entries can be deleted all at the
same time or one by one.
Download Phonebook
Download the contacts registered in a Blue-
tooth�Šcellular phone. Availability of this function
depends on each cellular phone. The memory
downloading procedure from the cellular phone
also varies according to each cellular phone.
See cellular phone Owner’s Manual for details.
When “Auto Downloaded” is active, the system
will automatically re-download the entries regis-
tered in the phone every time it is paired with the
vehicle, even after you delete the entries from
your vehicle’s Handset Memory.
Volume & Ringtone
The following kinds of phone volume can be set.
Pushing the PHONE button and selecting the
“Volume & Ringtone” key can also operate the
same settings.
. Ringtone/Incoming Call/Outgoing Call
To increase or decrease the volume, select
the “Ringtone”, “Incoming Call” or “Out-
going Call” key and adjust it with the multi-
function controller.
. Automatic Hold
When this function is activated, an incoming