2017 NISSAN ARMADA ECO mode
[x] Cancel search: ECO modePage 199 of 614
Linking Intelligent Key (if so equipped) ...................... 4-58
In-cabin microfilter ........................................................... 4-58
Servicing air conditioner ................................................. 4-58
Audio system ........................................................................\
... 4-59
Audio operation precautions ......................................... 4-59
FM-AM-SAT radio with Compact Disc
(CD) player ........................................................................\
4-70
DVD (Digital Versatile Disc) player operation ........... 4-74
USB (Universal Serial Bus) connection port ............ 4-77
Bluetooth
�Šstreaming audio .......................................... 4-81
iPod�Šplayer operation .................................................... 4-86
Front auxiliary input jacks (if so equipped) ................ 4-88
CD/DVD/USB memory care and cleaning ................ 4-90
Steering-wheel-mounted controls for audio .............. 4-91
Antenna ........................................................................\
....... 4-92
DVD Entertainment System (if so equipped) ................. 4-92 Licenses ........................................................................\
...... 4-93
System components ........................................................ 4-93
Before operating DVD Entertainment System .......... 4-99
Playing Digital Versatile Disc (DVD)/USB .............. 4-100
Operating tips ................................................................ 4-105
Care and maintenance ................................................. 4-105 Car phone or CB radio ..................................................... 4-106
Bluetooth
�ŠHands-Free Phone System ........................ 4-106
Regulatory information ............................................... 4-108
Voice commands ......................................................... 4-108
Control buttons ............................................................ 4-108
Connecting procedure ............................................... 4-109
Phone selection ........................................................... 4-109
Quick Dial ..................................................................... 4-109
Making a call ................................................................ 4-112
Receiving a call ........................................................... 4-113
During a call ................................................................. 4-113
Phone setting ............................................................... 4-114
Troubleshooting guide ............................................... 4-116
NISSAN Voice Recognition system .............................. 4-117
NISSAN Voice Recognition Standard Mode ....... 4-117
Using the system ........................................................ 4-120
NISSAN Voice Recognition Alternate
Command Mode ......................................................... 4-130
Using the system ........................................................ 4-138
Troubleshooting guide ............................................... 4-143
Page 205 of 614
4-8Monitor, heater, air conditioner, audio, phone and voice recognition systems
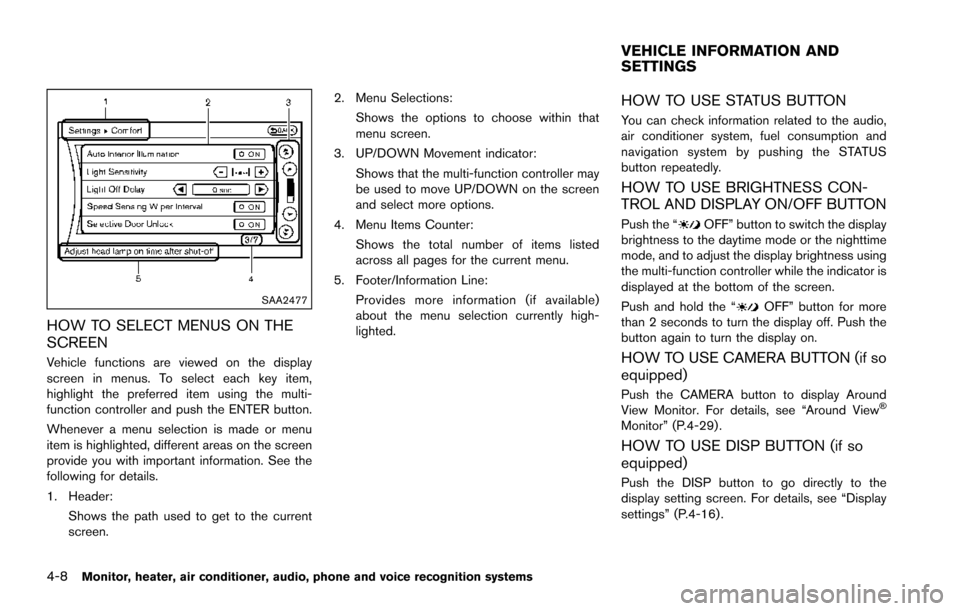
SAA2477
HOW TO SELECT MENUS ON THE
SCREEN
Vehicle functions are viewed on the display
screen in menus. To select each key item,
highlight the preferred item using the multi-
function controller and push the ENTER button.
Whenever a menu selection is made or menu
item is highlighted, different areas on the screen
provide you with important information. See the
following for details.
1. Header:Shows the path used to get to the current
screen. 2. Menu Selections:
Shows the options to choose within that
menu screen.
3. UP/DOWN Movement indicator: Shows that the multi-function controller may
be used to move UP/DOWN on the screen
and select more options.
4. Menu Items Counter: Shows the total number of items listed
across all pages for the current menu.
5. Footer/Information Line: Provides more information (if available)
about the menu selection currently high-
lighted.
HOW TO USE STATUS BUTTON
You can check information related to the audio,
air conditioner system, fuel consumption and
navigation system by pushing the STATUS
button repeatedly.
HOW TO USE BRIGHTNESS CON-
TROL AND DISPLAY ON/OFF BUTTON
Push the “OFF” button to switch the display
brightness to the daytime mode or the nighttime
mode, and to adjust the display brightness using
the multi-function controller while the indicator is
displayed at the bottom of the screen.
Push and hold the “
OFF” button for more
than 2 seconds to turn the display off. Push the
button again to turn the display on.
HOW TO USE CAMERA BUTTON (if so
equipped)
Push the CAMERA button to display Around
View Monitor. For details, see “Around View�Š
Monitor” (P.4-29) .
HOW TO USE DISP BUTTON (if so
equipped)
Push the DISP button to go directly to the
display setting screen. For details, see “Display
settings” (P.4-16) .
VEHICLE INFORMATION AND
SETTINGS
Page 213 of 614
4-16Monitor, heater, air conditioner, audio, phone and voice recognition systems
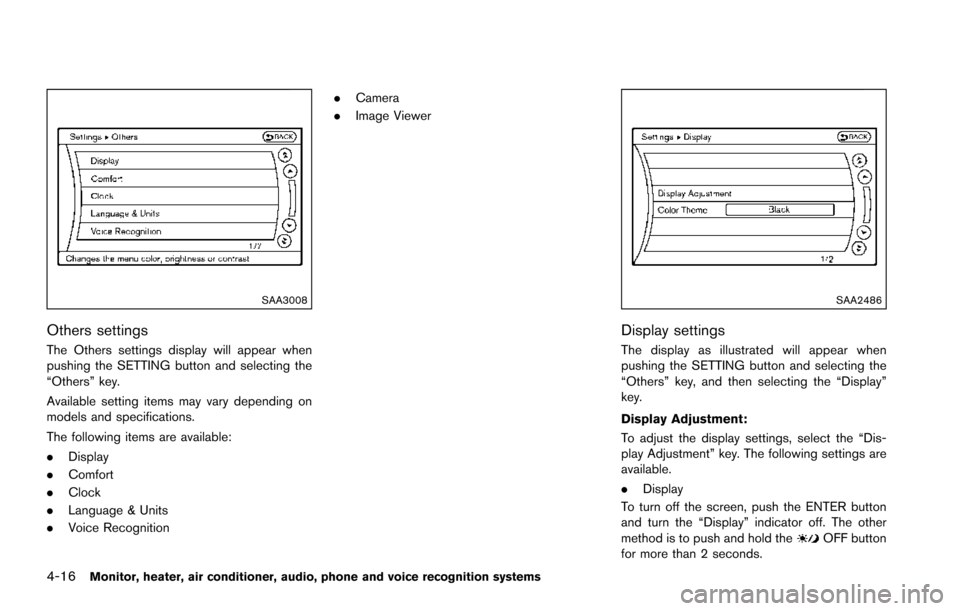
SAA3008
Others settings
The Others settings display will appear when
pushing the SETTING button and selecting the
“Others” key.
Available setting items may vary depending on
models and specifications.
The following items are available:
.Display
. Comfort
. Clock
. Language & Units
. Voice Recognition .
Camera
. Image Viewer
SAA2486
Display settings
The display as illustrated will appear when
pushing the SETTING button and selecting the
“Others” key, and then selecting the “Display”
key.
Display Adjustment:
To adjust the display settings, select the “Dis-
play Adjustment” key. The following settings are
available.
.Display
To turn off the screen, push the ENTER button
and turn the “Display” indicator off. The other
method is to push and hold the
OFF button
for more than 2 seconds.
Page 214 of 614

When any mode button is pushed with the
screen off, the screen turns on for further
operation. The screen will turn off automatically
5 seconds after the operation is finished.
To turn on the screen, set this item to the ON
position, or push the
OFF button.
. Brightness/Contrast/Background Color
To adjust the brightness and contrast of the
screen, select the “Brightness” or “Contrast”
key.
Then, you can adjust the brightness and the
contrast using the multi-function controller.
For information on the “Background Color” key,
refer to the separate Navigation System Own-
er’s Manual.
Color Theme:
Choose the theme color of the menu screen.
SAA3151
Comfort settings (if so equipped)
The display as illustrated will appear when
pushing the SETTING button and selecting the
“Others” key, and then selecting the “Comfort”
key. This key does not appear on the display until
the ignition switch is pushed to the ON position.
Auto Interior Illumination:
When this item is turned to ON, the interior
lights will illuminate if any door is unlocked.
Light Sensitivity:
Adjust the sensitivity of the automatic headlights
higher (right) or lower (left) . Light Off Delay:
Choose the duration of the automatic headlight
off timer from 0, 30, 45, 60, 90, 120, 150 and
180 second periods.
Speed Sensing Wiper Interval (if so
equipped):
When this item is turned to ON, the wiper
interval is adjusted automatically according to
the vehicle speed.
Selective Door Unlock:
When this item is turned to ON, only the driver’s
door is unlocked first after the door unlock
operation. When the door handle request switch
on the driver’s or front passenger’s side door is
pushed to be unlocked, only the corresponding
door is unlocked first. All the doors can be
unlocked if the door unlock operation is per-
formed again within 60 seconds.
When this item is turned to OFF, all the doors
will be unlocked after the door unlock operation
is performed once.
Intelligent Key Lock/Unlock:
When this item is turned to ON, door lock/
unlock function by pushing the door handle
request switch will be activated.
Monitor, heater, air conditioner, audio, phone and voice recognition systems4-17
Page 216 of 614
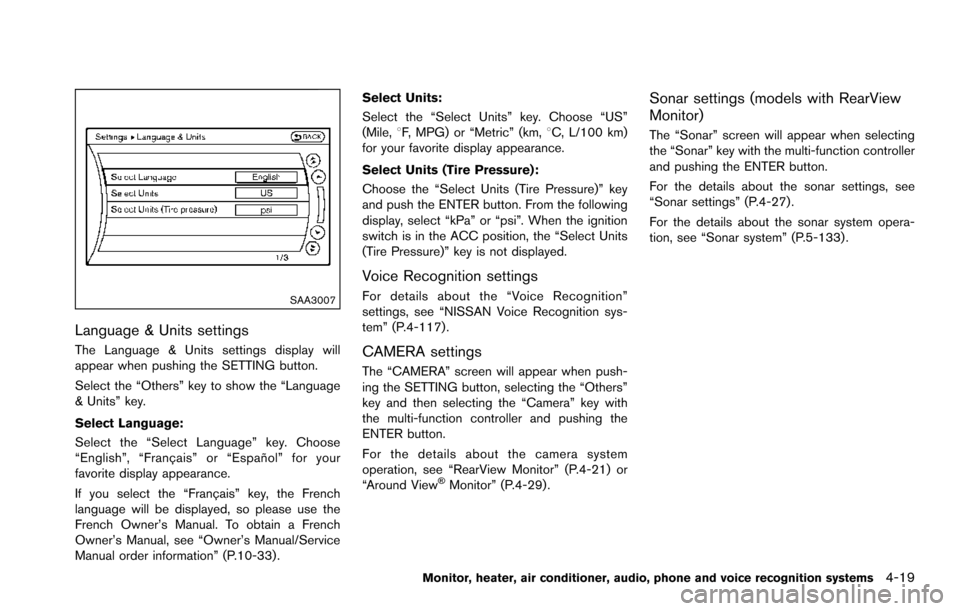
SAA3007
Language & Units settings
The Language & Units settings display will
appear when pushing the SETTING button.
Select the “Others” key to show the “Language
& Units” key.
Select Language:
Select the “Select Language” key. Choose
“English”, “Franc¸ ais” or “Espan˜
ol” for your
favorite display appearance.
If you select the “Franc¸ ais” key, the French
language will be displayed, so please use the
French Owner’s Manual. To obtain a French
Owner’s Manual, see “Owner’s Manual/Service
Manual order information” (P.10-33) . Select Units:
Select the “Select Units” key. Choose “US”
(Mile,
8F, MPG) or “Metric” (km, 8C, L/100 km)
for your favorite display appearance.
Select Units (Tire Pressure):
Choose the “Select Units (Tire Pressure)” key
and push the ENTER button. From the following
display, select “kPa” or “psi”. When the ignition
switch is in the ACC position, the “Select Units
(Tire Pressure)” key is not displayed.
Voice Recognition settings
For details about the “Voice Recognition”
settings, see “NISSAN Voice Recognition sys-
tem” (P.4-117).
CAMERA settings
The “CAMERA” screen will appear when push-
ing the SETTING button, selecting the “Others”
key and then selecting the “Camera” key with
the multi-function controller and pushing the
ENTER button.
For the details about the camera system
operation, see “RearView Monitor” (P.4-21) or
“Around View
�ŠMonitor” (P.4-29).
Sonar settings (models with RearView
Monitor)
The “Sonar” screen will appear when selecting
the “Sonar” key with the multi-function controller
and pushing the ENTER button.
For the details about the sonar settings, see
“Sonar settings” (P.4-27).
For the details about the sonar system opera-
tion, see “Sonar system” (P.5-133) .
Monitor, heater, air conditioner, audio, phone and voice recognition systems4-19
Page 235 of 614
4-38Monitor, heater, air conditioner, audio, phone and voice recognition systems
2. Select the “Display” key.
3. Select an item you wish to adjust.
4. Adjust the level of the setting item using themulti-function controller.
NOTE:
Do not adjust any of the display settings of
the Around View
�ŠMonitor while the vehi-
cle is moving. Make sure the parking brake
is firmly applied.
JVH1303X
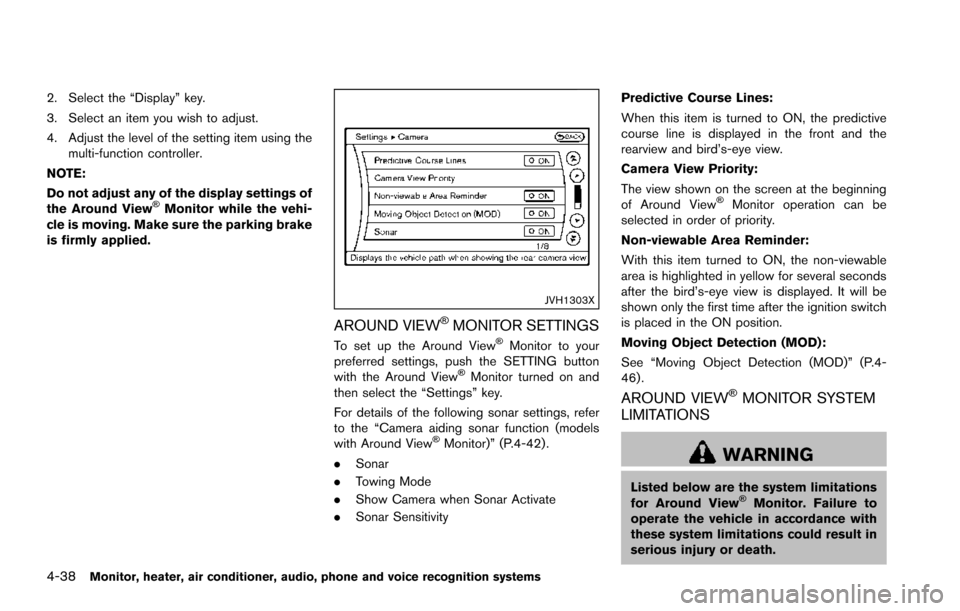
AROUND VIEW�ŠMONITOR SETTINGS
To set up the Around View�ŠMonitor to your
preferred settings, push the SETTING button
with the Around View
�ŠMonitor turned on and
then select the “Settings” key.
For details of the following sonar settings, refer
to the “Camera aiding sonar function (models
with Around View
�ŠMonitor)” (P.4-42) .
. Sonar
. Towing Mode
. Show Camera when Sonar Activate
. Sonar Sensitivity Predictive Course Lines:
When this item is turned to ON, the predictive
course line is displayed in the front and the
rearview and bird’s-eye view.
Camera View Priority:
The view shown on the screen at the beginning
of Around View
�ŠMonitor operation can be
selected in order of priority.
Non-viewable Area Reminder:
With this item turned to ON, the non-viewable
area is highlighted in yellow for several seconds
after the bird’s-eye view is displayed. It will be
shown only the first time after the ignition switch
is placed in the ON position.
Moving Object Detection (MOD):
See “Moving Object Detection (MOD)” (P.4-
46) .
AROUND VIEW�ŠMONITOR SYSTEM
LIMITATIONS
WARNING
Listed below are the system limitations
for Around View�ŠMonitor. Failure to
operate the vehicle in accordance with
these system limitations could result in
serious injury or death.
Page 239 of 614
4-42Monitor, heater, air conditioner, audio, phone and voice recognition systems
WARNING
Failure to follow the warnings and
instructions for proper use of the sonar
function as outlined in this section
could result in serious injury or death.
.The sonar is a convenience feature.
It is not a substitute for proper
parking.
. This function is designed as an aid
to the driver in detecting large
stationary objects to help avoid
damaging the vehicle.
. The driver is always responsible for
safety during parking and other
maneuvers.
. Always look around and check that
it is safe to move before parking.
. Read and understand the limita-
tions of the sonar as contained in
this section.
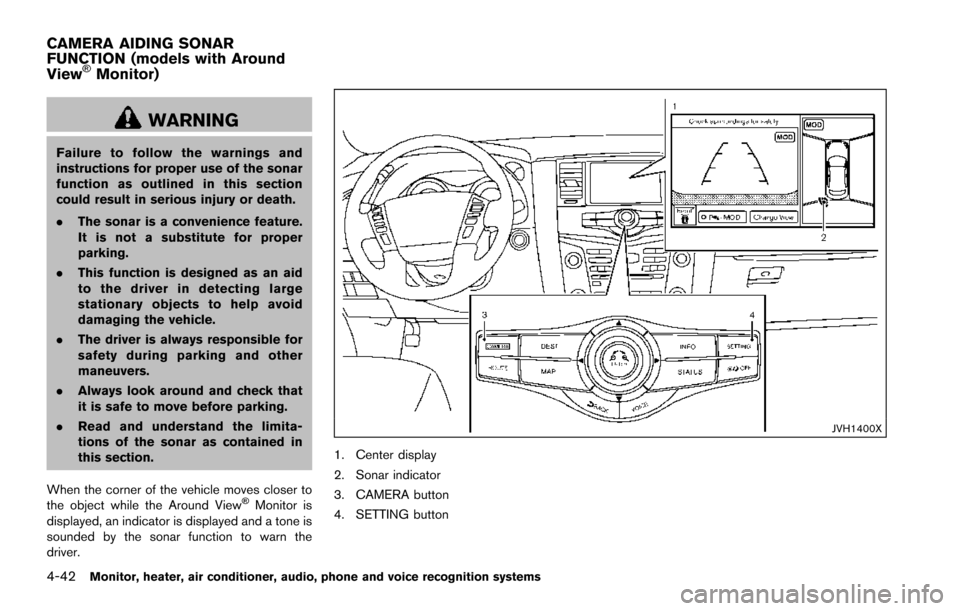
When the corner of the vehicle moves closer to
the object while the Around View
�ŠMonitor is
displayed, an indicator is displayed and a tone is
sounded by the sonar function to warn the
driver.
JVH1400X
1. Center display
2. Sonar indicator
3. CAMERA button
4. SETTING button
CAMERA AIDING SONAR
FUNCTION (models with Around
View
�ŠMonitor)
Page 241 of 614
4-44Monitor, heater, air conditioner, audio, phone and voice recognition systems
JVH1402X
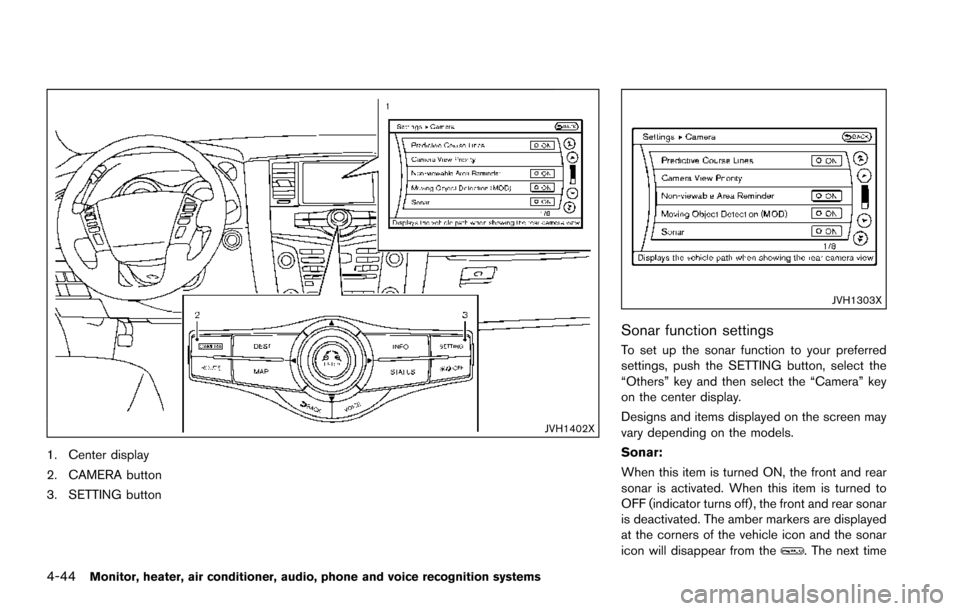
1. Center display
2. CAMERA button
3. SETTING button
JVH1303X
Sonar function settings
To set up the sonar function to your preferred
settings, push the SETTING button, select the
“Others” key and then select the “Camera” key
on the center display.
Designs and items displayed on the screen may
vary depending on the models.
Sonar:
When this item is turned ON, the front and rear
sonar is activated. When this item is turned to
OFF (indicator turns off) , the front and rear sonar
is deactivated. The amber markers are displayed
at the corners of the vehicle icon and the sonar
icon will disappear from the
. The next time