2017 NISSAN ARMADA ECO mode
[x] Cancel search: ECO modePage 165 of 614
3-4Pre-driving checks and adjustments
CAUTION
Always carry the mechanical key in-
stalled in the Intelligent Key.
VALET HAND-OFF
When you have to leave a key with a valet, give
them the Intelligent Key itself and keep the
mechanical key with you to protect your
belongings.
To prevent the glove box from being opened
during valet hand-off, follow the procedures
below.
1. Remove the mechanical key from the In-telligent Key.
2. Lock the glove box with the mechanical key.
3. Hand the Intelligent Key to the valet, keeping the mechanical key in your pocket or bag for
insertion into the Intelligent Key when you
retrieve your vehicle.
See “Storage” (P.2-50) .
WARNING
. Always have the doors locked while
driving. Along with the use of seat
belts, this provides greater safety in
the event of an accident by helping
to prevent persons from being
thrown from the vehicle. This also
helps keep children and others from
unintentionally opening the doors,
and will help keep out intruders.
. Before opening any door, always
look for and avoid oncoming traffic.
. To help avoid risk of injury or death
through unintended operation of
the vehicle and or its systems,
including entrapment in windows
or inadvertent door lock activation,
do not leave children, people who
require the assistance of others or
pets unattended in your vehicle.
Additionally, the temperature inside
a closed vehicle on a warm day can
quickly become high enough to
cause a significant risk of injury or
death to people and pets.
SPA2457B
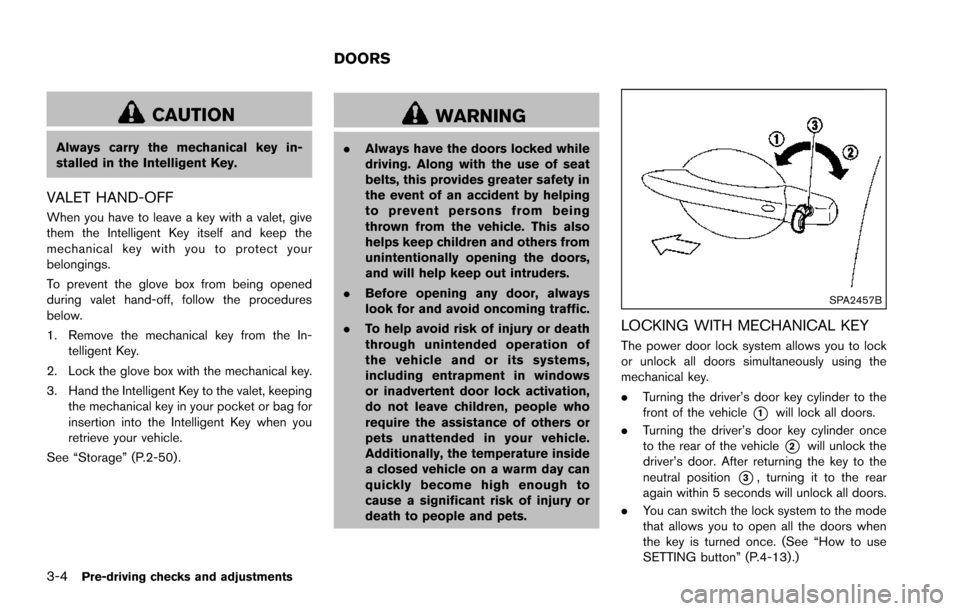
LOCKING WITH MECHANICAL KEY
The power door lock system allows you to lock
or unlock all doors simultaneously using the
mechanical key.
.Turning the driver’s door key cylinder to the
front of the vehicle
*1will lock all doors.
. Turning the driver’s door key cylinder once
to the rear of the vehicle
*2will unlock the
driver’s door. After returning the key to the
neutral position
*3, turning it to the rear
again within 5 seconds will unlock all doors.
. You can switch the lock system to the mode
that allows you to open all the doors when
the key is turned once. (See “How to use
SETTING button” (P.4-13).)
DOORS
Page 172 of 614
When you carry the Intelligent Key with you, you
can lock or unlock all doors by pushing the door
handle request switch (driver’s or front passen-
ger’s)
*Aor the liftgate request switch*Bwithin the range of operation.
When you lock or unlock the doors or the
liftgate, the hazard indicator will flash and the
horn (or the outside chime) will sound as a
confirmation. For details, see “Setting hazard
indicator and horn mode” (P.3-17) .
Welcome light and farewell light function
When you lock or unlock the doors including the
liftgate, the parking lights, tail lights, side marker
light and the license plate light will illuminate for
a period of time. The welcome light and farewell
light function can be disabled. For information
about disabling the welcome light and farewell
light function, it is recommended you see a
NISSAN dealer.
Locking doors and fuel-filler door
1. Move the shift lever to the P (Park) position,push the ignition switch to the OFF position
and make sure you carry the Intelligent Key
with you.*1
2. Close all the doors.*2
3. Push the door handle request switch (dri- ver’s or front passenger’s)
*Aor the liftgate
request switch
*Bwhile carrying the Intelligent Key with you.*3
4. All the doors and fuel-filler door will lock.
5. The hazard indicator flashes twice and the outside chime sounds twice.
*1: Doors will lock with the Intelligent Key while
the ignition switch is in the ACC or ON position.
*2: Doors will not lock with the Intelligent Key
while any door is open.
*3: Doors will not lock by pushing the door
handle request switch with the Intelligent Key
inside the vehicle.
However, when an Intelligent Key is inside the
vehicle, doors can be locked with another
registered Intelligent Key.
CAUTION
. After locking the doors using the
request switch, make sure that the
doors have been securely locked by
operating the door handles.
. When locking the doors using the
request switch, make sure to have
the Intelligent Key in your posses-
sion before operating the request
switch to prevent the Intelligent Key
from being left in the vehicle. .
The request switch is operational
only when the Intelligent Key has
been detected by the Intelligent Key
system.
Lockout protection:
To prevent the Intelligent Key from being
accidentally locked in the vehicle, lockout
protection is equipped with the Intelligent Key
system.
When the driver’s side door is open, the doors
are locked, and then the Intelligent Key is put
inside the vehicle and all the doors are closed;
the lock will automatically unlock and the door
buzzer sounds.
NOTE:
The doors may not lock when the Intelli-
gent Key is in the same hand that is
operating the request switch to lock the
door. Put the Intelligent Key in a purse,
pocket or your other hand.
CAUTION
The lockout protection may not function
under the following conditions:
. When the Intelligent Key is placed
on top of the instrument panel.
Pre-driving checks and adjustments3-11
Page 177 of 614
3-16Pre-driving checks and adjustments
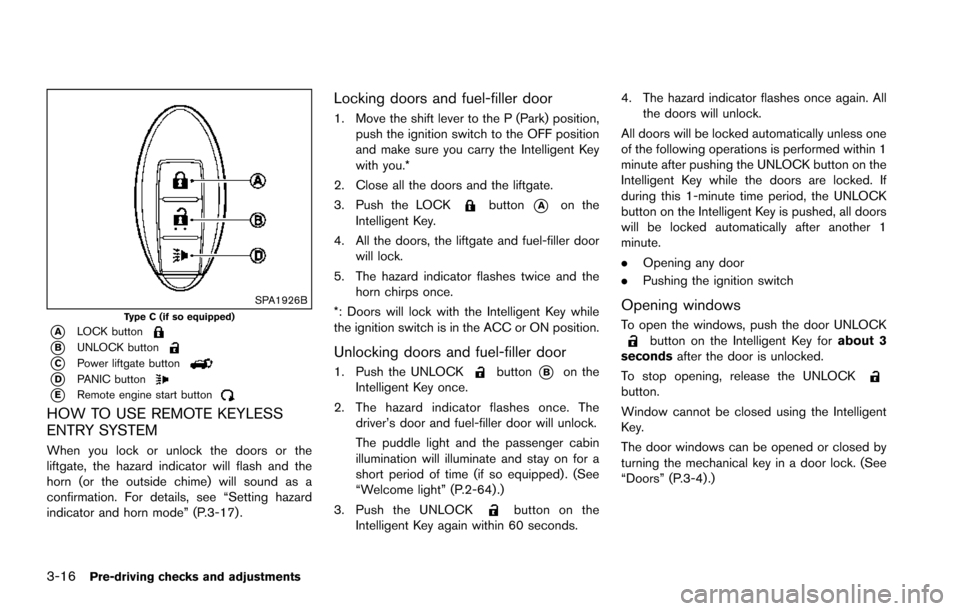
SPA1926BType C (if so equipped)
*ALOCK button
*BUNLOCK button
*CPower liftgate button
*DPANIC button
*ERemote engine start button
HOW TO USE REMOTE KEYLESS
ENTRY SYSTEM
When you lock or unlock the doors or the
liftgate, the hazard indicator will flash and the
horn (or the outside chime) will sound as a
confirmation. For details, see “Setting hazard
indicator and horn mode” (P.3-17) .
Locking doors and fuel-filler door
1. Move the shift lever to the P (Park) position,push the ignition switch to the OFF position
and make sure you carry the Intelligent Key
with you.*
2. Close all the doors and the liftgate.
3. Push the LOCK
button*Aon the
Intelligent Key.
4. All the doors, the liftgate and fuel-filler door will lock.
5. The hazard indicator flashes twice and the horn chirps once.
*: Doors will lock with the Intelligent Key while
the ignition switch is in the ACC or ON position.
Unlocking doors and fuel-filler door
1. Push the UNLOCKbutton*Bon the
Intelligent Key once.
2. The hazard indicator flashes once. The driver’s door and fuel-filler door will unlock.
The puddle light and the passenger cabin
illumination will illuminate and stay on for a
short period of time (if so equipped) . (See
“Welcome light” (P.2-64) .)
3. Push the UNLOCK
button on the
Intelligent Key again within 60 seconds. 4. The hazard indicator flashes once again. All
the doors will unlock.
All doors will be locked automatically unless one
of the following operations is performed within 1
minute after pushing the UNLOCK button on the
Intelligent Key while the doors are locked. If
during this 1-minute time period, the UNLOCK
button on the Intelligent Key is pushed, all doors
will be locked automatically after another 1
minute.
. Opening any door
. Pushing the ignition switch
Opening windows
To open the windows, push the door UNLOCKbutton on the Intelligent Key for about 3
seconds after the door is unlocked.
To stop opening, release the UNLOCK
button.
Window cannot be closed using the Intelligent
Key.
The door windows can be opened or closed by
turning the mechanical key in a door lock. (See
“Doors” (P.3-4).)
Page 178 of 614
Opening/closing liftgate (if so equipped)
1. Push the power liftgate button*Cfor more than 1 second.
2. The liftgate will automatically open.
The hazard indicator flashes 4 times and the
outside chime sounds for approximately 3
seconds.
To close the liftgate, push the power liftgate
button
for more than 1 second.
The liftgate will automatically close.
If the button
is pushed while the liftgate is
being opened or closed, the liftgate will reverse.
Using panic alarm
If you are near your vehicle and feel threatened,
you may activate the alarm to call attention as
follows:
1. Push the PANIC
button*Don the
Intelligent Key for more than 1 second.
2. The theft warning alarm and headlights will stay on for 25 seconds.
3. The panic alarm stops when:
.It has run for 25 seconds, or.Any of the buttons on the Intelligent Key are pushed. (Note: Panic button or power
liftgate button should be pushed for more
than 1 second.)
Remote engine start (if so equipped)
The remote engine startbutton*Eis on
the Intelligent Key if the vehicle has remote
engine start function. This function allows the
engine to start from outside the vehicle. See
“Remote engine start” (P.3-19) for more details.
Setting hazard indicator and horn mode
This vehicle is set in hazard indicator and horn
mode when you first receive the vehicle.
In hazard indicator and horn mode, when the
LOCK
button is pushed, the hazard
indicator flashes twice and the horn chirps
once. When the UNLOCK
button is
pushed, the hazard indicator flashes once.
If horns are not necessary, the system can be
switched to the hazard indicator mode.
In hazard indicator mode, when the LOCK
button is pushed, the hazard indicator flashes
twice. When the UNLOCKbutton is
pushed, neither the hazard indicator nor the
horn operates.
Pre-driving checks and adjustments3-17
Page 179 of 614
3-18Pre-driving checks and adjustments
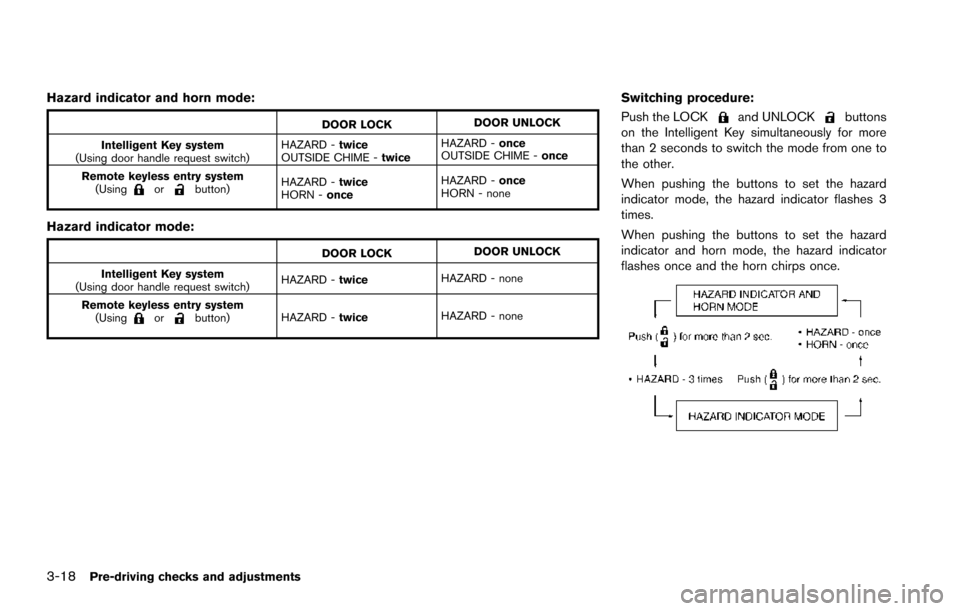
Hazard indicator and horn mode:
DOOR LOCKDOOR UNLOCK
Intelligent Key system
(Using door handle request switch) HAZARD -
twice
OUTSIDE CHIME - twiceHAZARD -
once
OUTSIDE CHIME - once
Remote keyless entry system (Using
orbutton) HAZARD -
twice
HORN - once HAZARD -
once
HORN - none
Hazard indicator mode:
DOOR LOCK DOOR UNLOCK
Intelligent Key system
(Using door handle request switch) HAZARD -
twice HAZARD - none
Remote keyless entry system (Using
orbutton) HAZARD -
twice HAZARD - none
Switching procedure:
Push the LOCK
and UNLOCKbuttons
on the Intelligent Key simultaneously for more
than 2 seconds to switch the mode from one to
the other.
When pushing the buttons to set the hazard
indicator mode, the hazard indicator flashes 3
times.
When pushing the buttons to set the hazard
indicator and horn mode, the hazard indicator
flashes once and the horn chirps once.
Page 185 of 614
3-24Pre-driving checks and adjustments
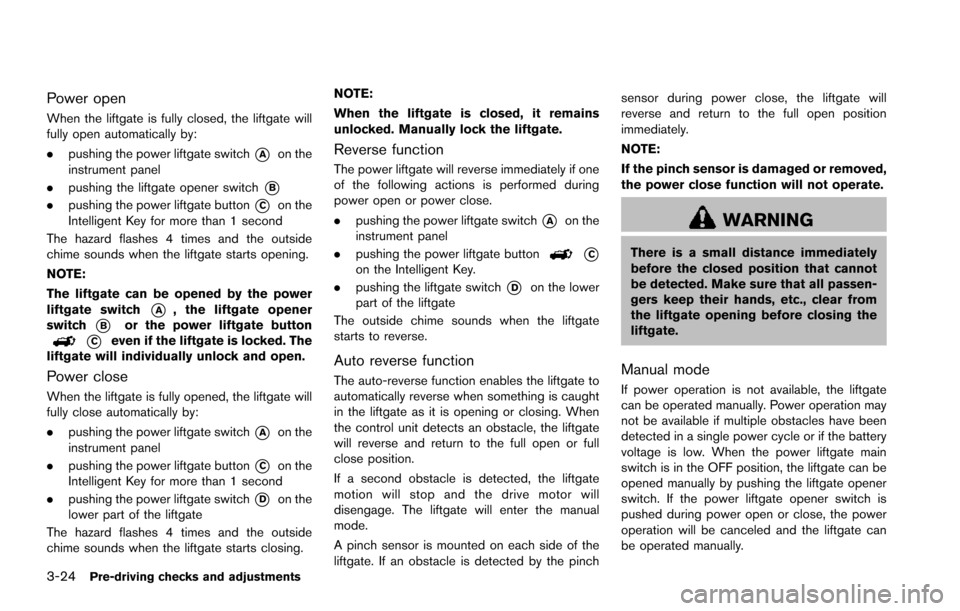
Power open
When the liftgate is fully closed, the liftgate will
fully open automatically by:
.pushing the power liftgate switch
*Aon the
instrument panel
. pushing the liftgate opener switch
*B
.pushing the power liftgate button*Con the
Intelligent Key for more than 1 second
The hazard flashes 4 times and the outside
chime sounds when the liftgate starts opening.
NOTE:
The liftgate can be opened by the power
liftgate switch
*A, the liftgate opener
switch
*Bor the power liftgate button
*Ceven if the liftgate is locked. The
liftgate will individually unlock and open.
Power close
When the liftgate is fully opened, the liftgate will
fully close automatically by:
. pushing the power liftgate switch
*Aon the
instrument panel
. pushing the power liftgate button
*Con the
Intelligent Key for more than 1 second
. pushing the power liftgate switch
*Don the
lower part of the liftgate
The hazard flashes 4 times and the outside
chime sounds when the liftgate starts closing. NOTE:
When the liftgate is closed, it remains
unlocked. Manually lock the liftgate.
Reverse function
The power liftgate will reverse immediately if one
of the following actions is performed during
power open or power close.
.
pushing the power liftgate switch
*Aon the
instrument panel
. pushing the power liftgate button
*Con the Intelligent Key.
. pushing the liftgate switch
*Don the lower
part of the liftgate
The outside chime sounds when the liftgate
starts to reverse.
Auto reverse function
The auto-reverse function enables the liftgate to
automatically reverse when something is caught
in the liftgate as it is opening or closing. When
the control unit detects an obstacle, the liftgate
will reverse and return to the full open or full
close position.
If a second obstacle is detected, the liftgate
motion will stop and the drive motor will
disengage. The liftgate will enter the manual
mode.
A pinch sensor is mounted on each side of the
liftgate. If an obstacle is detected by the pinch sensor during power close, the liftgate will
reverse and return to the full open position
immediately.
NOTE:
If the pinch sensor is damaged or removed,
the power close function will not operate.
WARNING
There is a small distance immediately
before the closed position that cannot
be detected. Make sure that all passen-
gers keep their hands, etc., clear from
the liftgate opening before closing the
liftgate.
Manual mode
If power operation is not available, the liftgate
can be operated manually. Power operation may
not be available if multiple obstacles have been
detected in a single power cycle or if the battery
voltage is low. When the power liftgate main
switch is in the OFF position, the liftgate can be
opened manually by pushing the liftgate opener
switch. If the power liftgate opener switch is
pushed during power open or close, the power
operation will be canceled and the liftgate can
be operated manually.
Page 186 of 614
JVP0466X
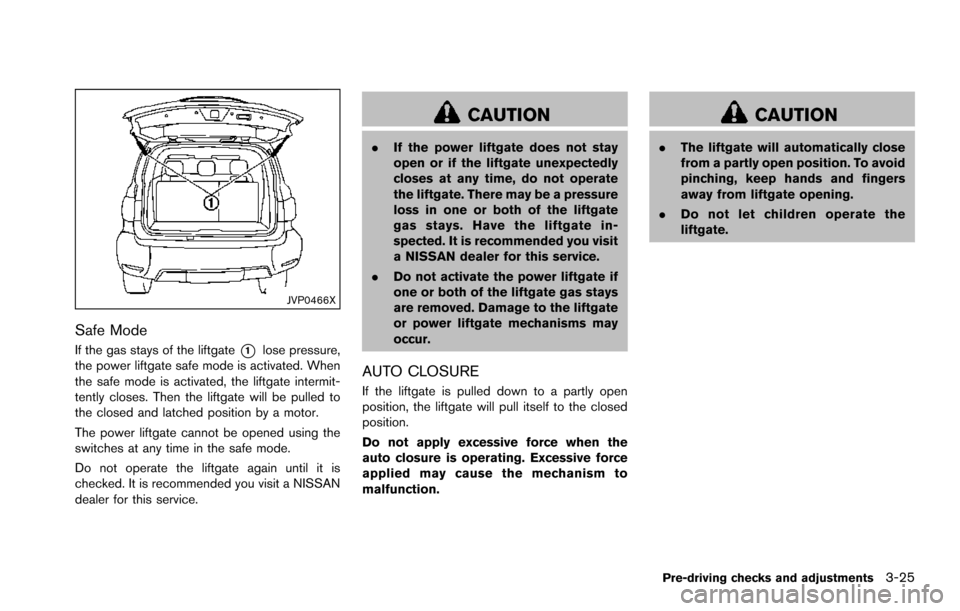
Safe Mode
If the gas stays of the liftgate*1lose pressure,
the power liftgate safe mode is activated. When
the safe mode is activated, the liftgate intermit-
tently closes. Then the liftgate will be pulled to
the closed and latched position by a motor.
The power liftgate cannot be opened using the
switches at any time in the safe mode.
Do not operate the liftgate again until it is
checked. It is recommended you visit a NISSAN
dealer for this service.
CAUTION
. If the power liftgate does not stay
open or if the liftgate unexpectedly
closes at any time, do not operate
the liftgate. There may be a pressure
loss in one or both of the liftgate
gas stays. Have the liftgate in-
spected. It is recommended you visit
a NISSAN dealer for this service.
. Do not activate the power liftgate if
one or both of the liftgate gas stays
are removed. Damage to the liftgate
or power liftgate mechanisms may
occur.
AUTO CLOSURE
If the liftgate is pulled down to a partly open
position, the liftgate will pull itself to the closed
position.
Do not apply excessive force when the
auto closure is operating. Excessive force
applied may cause the mechanism to
malfunction.
CAUTION
. The liftgate will automatically close
from a partly open position. To avoid
pinching, keep hands and fingers
away from liftgate opening.
. Do not let children operate the
liftgate.
Pre-driving checks and adjustments3-25
Page 198 of 614
4 Monitor, heater, air conditioner, audio, phoneand voice recognition systems
Safety note ........................................................................\
.......... 4-3
Center multi-function control panel ...................................... 4-4
How to use multi-function controller .............................. 4-5
How to use touch screen ................................................. 4-5
Menu options ........................................................................\
4-7
How to select menus on the screen .............................. 4-8
Vehicle information and settings ........................................... 4-8 How to use STATUS button ............................................. 4-8
How to use brightness control and display
ON/OFF button ................................................................... 4-8
How to use CAMERA button (if so equipped) ........... 4-8
How to use DISP button (if so equipped) ................... 4-8
How to use INFO button .................................................. 4-9
How to use SETTING button ....................................... 4-13
RearView Monitor (if so equipped) ................................... 4-21 RearView Monitor system operation ........................... 4-22
How to read the displayed lines .................................. 4-22
How to park with predictive course lines .................. 4-23
Adjusting the screen ....................................................... 4-25
Predictive course line settings ...................................... 4-26
RearView Monitor system limitations .......................... 4-26
Sonar settings ................................................................... 4-27
Sonar indicator .................................................................. 4-27
System maintenance ....................................................... 4-28 Around View�ŠMonitor (if so equipped) .......................... 4-29
Around View�ŠMonitor system operation ................. 4-30
How to adjust the screen view ................................... 4-37
Around View
�ŠMonitor settings .................................. 4-38
Around View�ŠMonitor system limitations ................ 4-38
System maintenance ..................................................... 4-41
Camera aiding sonar function (models with Around
View
�ŠMonitor) ....................................................................... 4-42
Sonar system operation ............................................... 4-43
Turning on and off the sonar function ...................... 4-43
Sonar system limitations .............................................. 4-45
System temporarily unavailable .................................. 4-45
System maintenance ..................................................... 4-45
Moving Object Detection (MOD) ..................................... 4-46 MOD system operation ................................................ 4-47
Turning on and off the MOD system ........................ 4-48
MOD system limitations ............................................... 4-49
System maintenance ..................................................... 4-50
Ventilators ........................................................................\
........ 4-51
Center ventilators ........................................................... 4-51
Side ventilators ............................................................... 4-51
Rear ventilators ............................................................... 4-52
Heater and air conditioner .................................................. 4-52
Automatic air conditioner ............................................. 4-54
Operating tips ................................................................. 4-58