2017 NISSAN ARMADA door lock
[x] Cancel search: door lockPage 10 of 614
JVC0953X
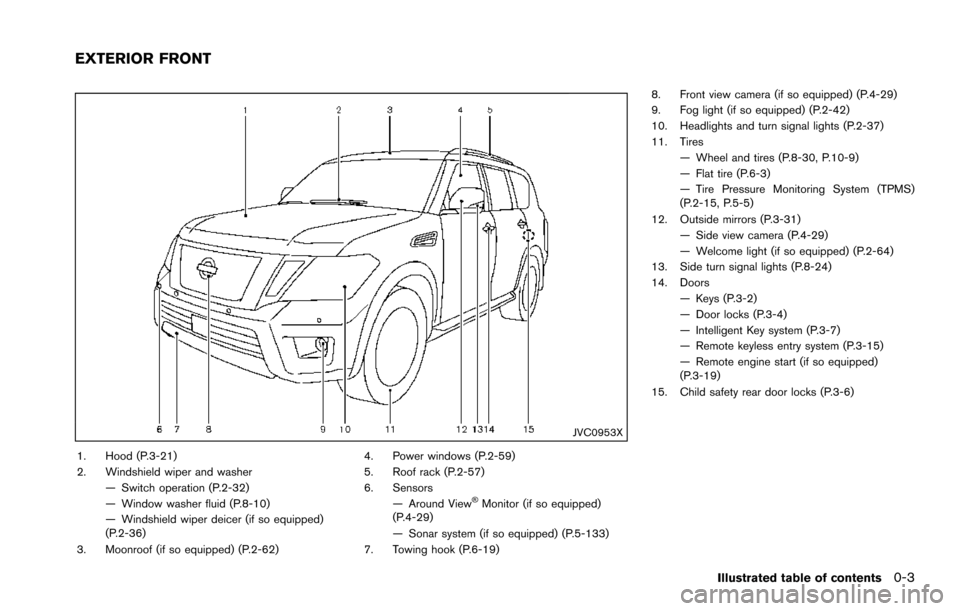
1. Hood (P.3-21)
2. Windshield wiper and washer— Switch operation (P.2-32)
— Window washer fluid (P.8-10)
— Windshield wiper deicer (if so equipped)
(P.2-36)
3. Moonroof (if so equipped) (P.2-62) 4. Power windows (P.2-59)
5. Roof rack (P.2-57)
6. Sensors
— Around View
�ŠMonitor (if so equipped)
(P.4-29)
— Sonar system (if so equipped) (P.5-133)
7. Towing hook (P.6-19) 8. Front view camera (if so equipped) (P.4-29)
9. Fog light (if so equipped) (P.2-42)
10. Headlights and turn signal lights (P.2-37)
11. Tires
— Wheel and tires (P.8-30, P.10-9)
— Flat tire (P.6-3)
— Tire Pressure Monitoring System (TPMS)
(P.2-15, P.5-5)
12. Outside mirrors (P.3-31) — Side view camera (P.4-29)
— Welcome light (if so equipped) (P.2-64)
13. Side turn signal lights (P.8-24)
14. Doors
— Keys (P.3-2)
— Door locks (P.3-4)
— Intelligent Key system (P.3-7)
— Remote keyless entry system (P.3-15)
— Remote engine start (if so equipped)
(P.3-19)
15. Child safety rear door locks (P.3-6)
Illustrated table of contents0-3
EXTERIOR FRONT
Page 12 of 614
JVC0955X
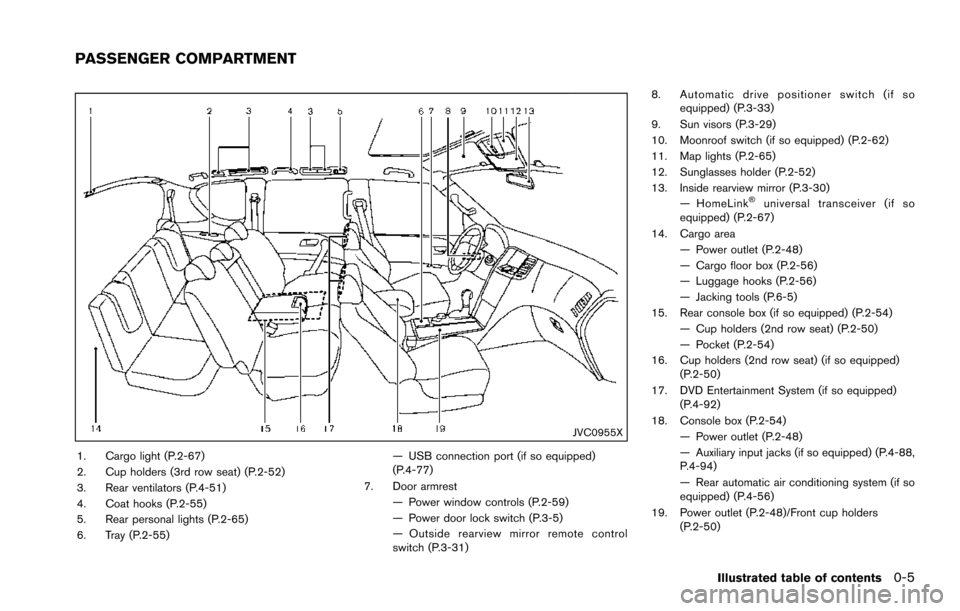
1. Cargo light (P.2-67)
2. Cup holders (3rd row seat) (P.2-52)
3. Rear ventilators (P.4-51)
4. Coat hooks (P.2-55)
5. Rear personal lights (P.2-65)
6. Tray (P.2-55)— USB connection port (if so equipped)
(P.4-77)
7. Door armrest — Power window controls (P.2-59)
— Power door lock switch (P.3-5)
— Outside rearview mirror remote control
switch (P.3-31) 8. Automatic drive positioner switch (if so
equipped) (P.3-33)
9. Sun visors (P.3-29)
10. Moonroof switch (if so equipped) (P.2-62)
11. Map lights (P.2-65)
12. Sunglasses holder (P.2-52)
13. Inside rearview mirror (P.3-30) — HomeLink
�Šuniversal transceiver (if so
equipped) (P.2-67)
14. Cargo area — Power outlet (P.2-48)
— Cargo floor box (P.2-56)
— Luggage hooks (P.2-56)
— Jacking tools (P.6-5)
15. Rear console box (if so equipped) (P.2-54) — Cup holders (2nd row seat) (P.2-50)
— Pocket (P.2-54)
16. Cup holders (2nd row seat) (if so equipped) (P.2-50)
17. DVD Entertainment System (if so equipped) (P.4-92)
18. Console box (P.2-54) — Power outlet (P.2-48)
— Auxiliary input jacks (if so equipped) (P.4-88,
P.4-94)
— Rear automatic air conditioning system (if so
equipped) (P.4-56)
19. Power outlet (P.2-48)/Front cup holders (P.2-50)
Illustrated table of contents0-5
PASSENGER COMPARTMENT
Page 100 of 614
CHECKING LIGHTS
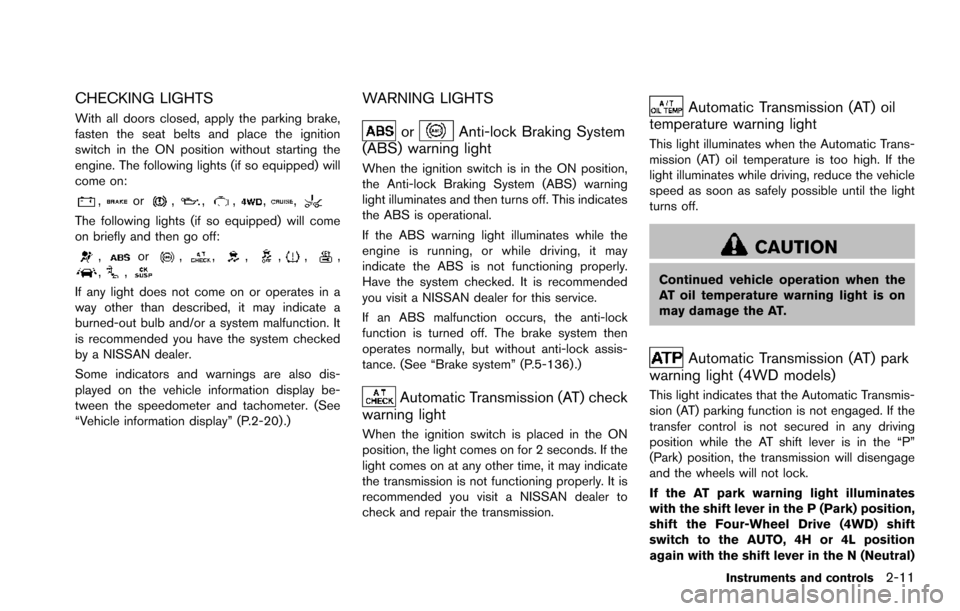
With all doors closed, apply the parking brake,
fasten the seat belts and place the ignition
switch in the ON position without starting the
engine. The following lights (if so equipped) will
come on:
,or,,,,,
The following lights (if so equipped) will come
on briefly and then go off:
,or,,,,,,,,
If any light does not come on or operates in a
way other than described, it may indicate a
burned-out bulb and/or a system malfunction. It
is recommended you have the system checked
by a NISSAN dealer.
Some indicators and warnings are also dis-
played on the vehicle information display be-
tween the speedometer and tachometer. (See
“Vehicle information display” (P.2-20) .)
WARNING LIGHTS
orAnti-lock Braking System
(ABS) warning light
When the ignition switch is in the ON position,
the Anti-lock Braking System (ABS) warning
light illuminates and then turns off. This indicates
the ABS is operational.
If the ABS warning light illuminates while the
engine is running, or while driving, it may
indicate the ABS is not functioning properly.
Have the system checked. It is recommended
you visit a NISSAN dealer for this service.
If an ABS malfunction occurs, the anti-lock
function is turned off. The brake system then
operates normally, but without anti-lock assis-
tance. (See “Brake system” (P.5-136) .)
Automatic Transmission (AT) check
warning light
When the ignition switch is placed in the ON
position, the light comes on for 2 seconds. If the
light comes on at any other time, it may indicate
the transmission is not functioning properly. It is
recommended you visit a NISSAN dealer to
check and repair the transmission.
Automatic Transmission (AT) oil
temperature warning light
This light illuminates when the Automatic Trans-
mission (AT) oil temperature is too high. If the
light illuminates while driving, reduce the vehicle
speed as soon as safely possible until the light
turns off.
CAUTION
Continued vehicle operation when the
AT oil temperature warning light is on
may damage the AT.
Automatic Transmission (AT) park
warning light (4WD models)
This light indicates that the Automatic Transmis-
sion (AT) parking function is not engaged. If the
transfer control is not secured in any driving
position while the AT shift lever is in the “P”
(Park) position, the transmission will disengage
and the wheels will not lock.
If the AT park warning light illuminates
with the shift lever in the P (Park) position,
shift the Four-Wheel Drive (4WD) shift
switch to the AUTO, 4H or 4L position
again with the shift lever in the N (Neutral)
Instruments and controls2-11
Page 109 of 614
2-20Instruments and controls
Vehicle Dynamic Control (VDC) off
indicator light
When the ignition switch is in the ON position,
the Vehicle Dynamic Control (VDC) off indicator
light illuminates and then turns off.
The light comes on when the VDC off switch is
pushed to OFF. This indicates that the VDC
system is not operating.
When the 4L position is selected with the Four-
Wheel Drive (4WD) shift switch, the VDC
system is disabled and the VDC off indicator
light illuminates. (4WD models)
For additional information, see “Vehicle Dynamic
Control (VDC) system” (P.5-138) .
AUDIBLE REMINDERS
Key reminder chime
A chime will sound if the driver side door is
opened while the ignition switch is placed in the
ACC position. Make sure the ignition switch is
placed in the OFF position, and take the
Intelligent Key with you when leaving the vehicle.
Light reminder chime
A chime will sound when the driver side door is
opened with the light switch in theorposition and the ignition switch in the ACC, OFF
or LOCK position.
Turn the light switch off when you leave the
vehicle.
Parking brake reminder chime
The chime will sound if the vehicle is driven at
more than 4 MPH (7 km/h) with the parking
brake applied. Stop the vehicle and release the
parking brake.
Brake pad wear warning
The disc brake pads have audible wear warn-
ings. When a brake pad requires replacement, it
will make a high pitched scraping sound when
the vehicle is in motion. This scraping sound will
first occur only when the brake pedal is
depressed. After more wear of the brake pad,
the sound will always be heard even if the brake
pedal is not depressed. Have the brakes
checked as soon as possible if the warning
sound is heard.
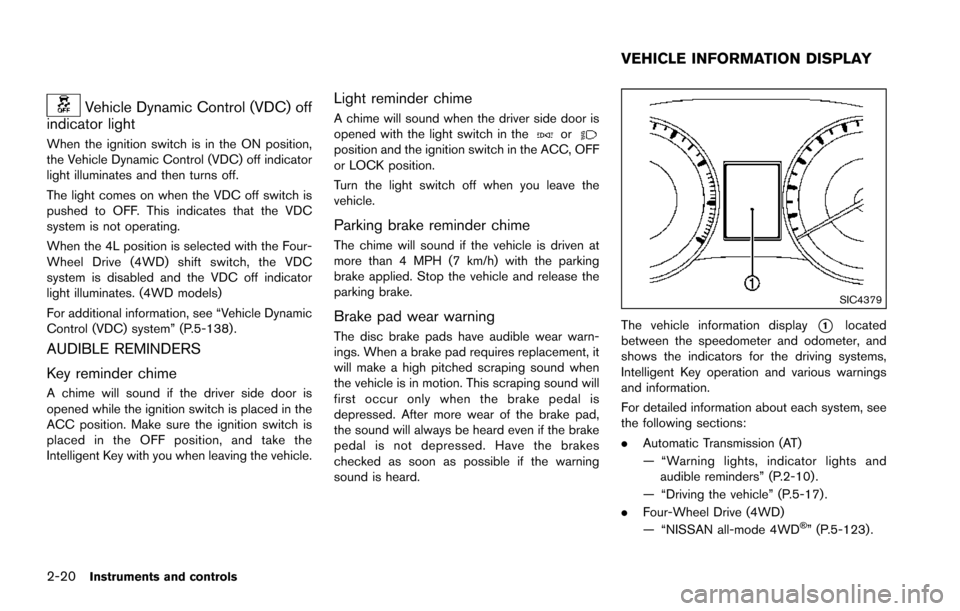
SIC4379
The vehicle information display*1located
between the speedometer and odometer, and
shows the indicators for the driving systems,
Intelligent Key operation and various warnings
and information.
For detailed information about each system, see
the following sections:
. Automatic Transmission (AT)
— “Warning lights, indicator lights and
audible reminders” (P.2-10) .
— “Driving the vehicle” (P.5-17) .
. Four-Wheel Drive (4WD)
— “NISSAN all-mode 4WD
�Š” (P.5-123).
VEHICLE INFORMATION DISPLAY
Page 112 of 614
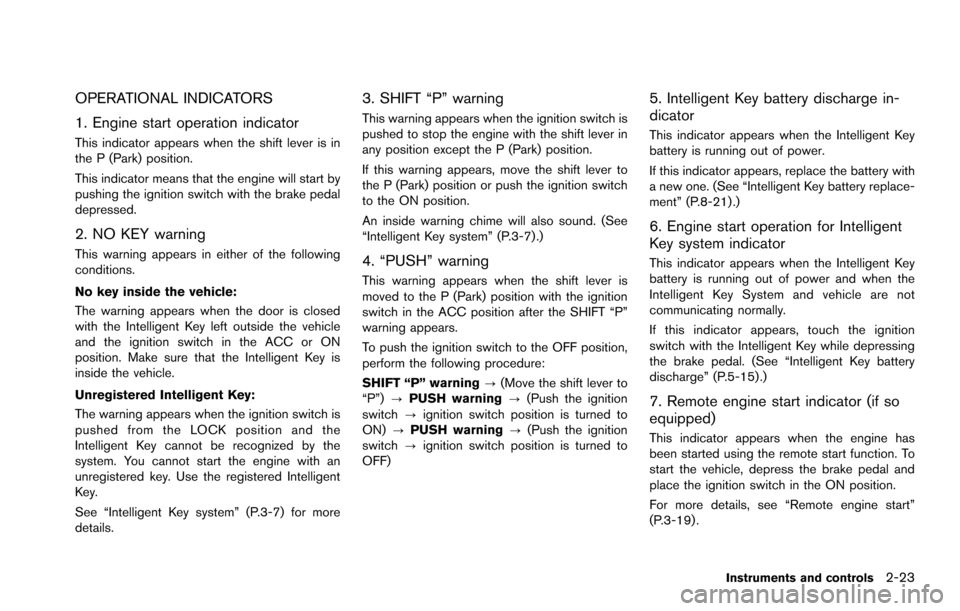
OPERATIONAL INDICATORS
1. Engine start operation indicator
This indicator appears when the shift lever is in
the P (Park) position.
This indicator means that the engine will start by
pushing the ignition switch with the brake pedal
depressed.
2. NO KEY warning
This warning appears in either of the following
conditions.
No key inside the vehicle:
The warning appears when the door is closed
with the Intelligent Key left outside the vehicle
and the ignition switch in the ACC or ON
position. Make sure that the Intelligent Key is
inside the vehicle.
Unregistered Intelligent Key:
The warning appears when the ignition switch is
pushed from the LOCK position and the
Intelligent Key cannot be recognized by the
system. You cannot start the engine with an
unregistered key. Use the registered Intelligent
Key.
See “Intelligent Key system” (P.3-7) for more
details.
3. SHIFT “P” warning
This warning appears when the ignition switch is
pushed to stop the engine with the shift lever in
any position except the P (Park) position.
If this warning appears, move the shift lever to
the P (Park) position or push the ignition switch
to the ON position.
An inside warning chime will also sound. (See
“Intelligent Key system” (P.3-7) .)
4. “PUSH” warning
This warning appears when the shift lever is
moved to the P (Park) position with the ignition
switch in the ACC position after the SHIFT “P”
warning appears.
To push the ignition switch to the OFF position,
perform the following procedure:
SHIFT “P” warning?(Move the shift lever to
“P”) ?PUSH warning ?(Push the ignition
switch ?ignition switch position is turned to
ON) ?PUSH warning ?(Push the ignition
switch ?ignition switch position is turned to
OFF)
5. Intelligent Key battery discharge in-
dicator
This indicator appears when the Intelligent Key
battery is running out of power.
If this indicator appears, replace the battery with
a new one. (See “Intelligent Key battery replace-
ment” (P.8-21) .)
6. Engine start operation for Intelligent
Key system indicator
This indicator appears when the Intelligent Key
battery is running out of power and when the
Intelligent Key System and vehicle are not
communicating normally.
If this indicator appears, touch the ignition
switch with the Intelligent Key while depressing
the brake pedal. (See “Intelligent Key battery
discharge” (P.5-15).)
7. Remote engine start indicator (if so
equipped)
This indicator appears when the engine has
been started using the remote start function. To
start the vehicle, depress the brake pedal and
place the ignition switch in the ON position.
For more details, see “Remote engine start”
(P.3-19) .
Instruments and controls2-23
Page 119 of 614
2-30Instruments and controls
SIC2133
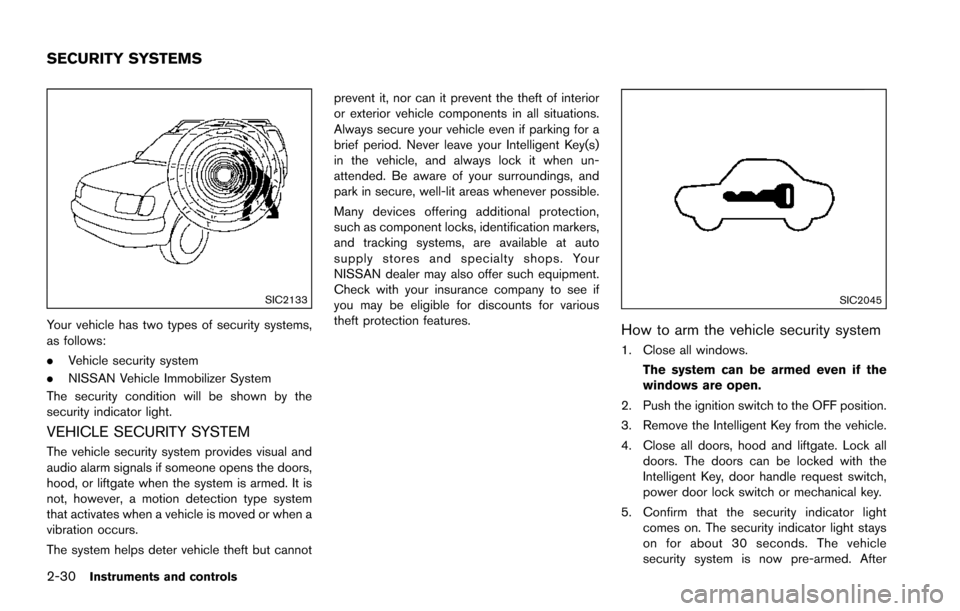
Your vehicle has two types of security systems,
as follows:
.Vehicle security system
. NISSAN Vehicle Immobilizer System
The security condition will be shown by the
security indicator light.
VEHICLE SECURITY SYSTEM
The vehicle security system provides visual and
audio alarm signals if someone opens the doors,
hood, or liftgate when the system is armed. It is
not, however, a motion detection type system
that activates when a vehicle is moved or when a
vibration occurs.
The system helps deter vehicle theft but cannot prevent it, nor can it prevent the theft of interior
or exterior vehicle components in all situations.
Always secure your vehicle even if parking for a
brief period. Never leave your Intelligent Key(s)
in the vehicle, and always lock it when un-
attended. Be aware of your surroundings, and
park in secure, well-lit areas whenever possible.
Many devices offering additional protection,
such as component locks, identification markers,
and tracking systems, are available at auto
supply stores and specialty shops. Your
NISSAN dealer may also offer such equipment.
Check with your insurance company to see if
you may be eligible for discounts for various
theft protection features.
SIC2045
How to arm the vehicle security system
1. Close all windows.
The system can be armed even if the
windows are open.
2. Push the ignition switch to the OFF position.
3. Remove the Intelligent Key from the vehicle.
4. Close all doors, hood and liftgate. Lock all doors. The doors can be locked with the
Intelligent Key, door handle request switch,
power door lock switch or mechanical key.
5. Confirm that the security indicator light comes on. The security indicator light stays
on for about 30 seconds. The vehicle
security system is now pre-armed. After
SECURITY SYSTEMS
Page 120 of 614
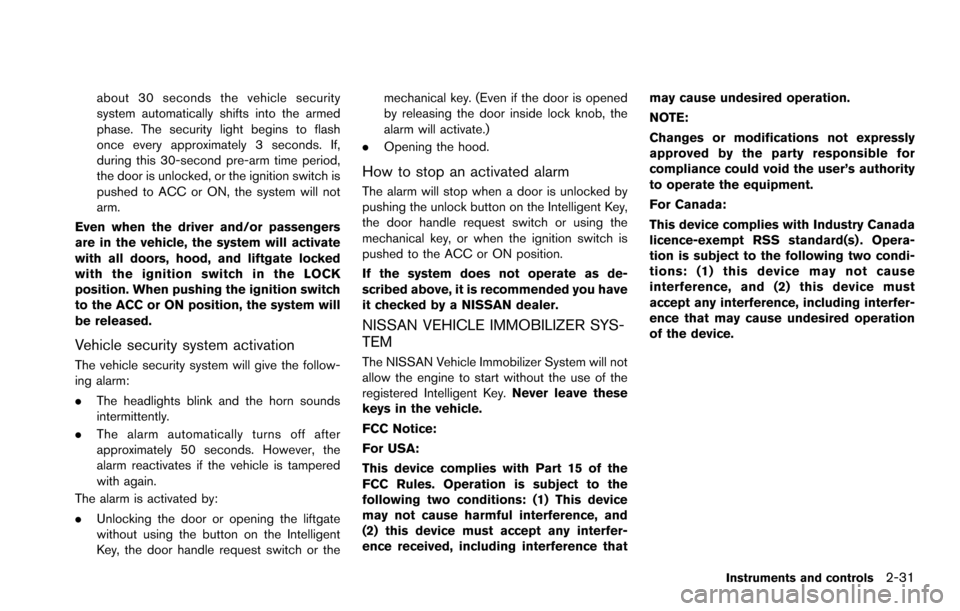
about 30 seconds the vehicle security
system automatically shifts into the armed
phase. The security light begins to flash
once every approximately 3 seconds. If,
during this 30-second pre-arm time period,
the door is unlocked, or the ignition switch is
pushed to ACC or ON, the system will not
arm.
Even when the driver and/or passengers
are in the vehicle, the system will activate
with all doors, hood, and liftgate locked
with the ignition switch in the LOCK
position. When pushing the ignition switch
to the ACC or ON position, the system will
be released.
Vehicle security system activation
The vehicle security system will give the follow-
ing alarm:
. The headlights blink and the horn sounds
intermittently.
. The alarm automatically turns off after
approximately 50 seconds. However, the
alarm reactivates if the vehicle is tampered
with again.
The alarm is activated by:
. Unlocking the door or opening the liftgate
without using the button on the Intelligent
Key, the door handle request switch or the mechanical key. (Even if the door is opened
by releasing the door inside lock knob, the
alarm will activate.)
. Opening the hood.
How to stop an activated alarm
The alarm will stop when a door is unlocked by
pushing the unlock button on the Intelligent Key,
the door handle request switch or using the
mechanical key, or when the ignition switch is
pushed to the ACC or ON position.
If the system does not operate as de-
scribed above, it is recommended you have
it checked by a NISSAN dealer.
NISSAN VEHICLE IMMOBILIZER SYS-
TEM
The NISSAN Vehicle Immobilizer System will not
allow the engine to start without the use of the
registered Intelligent Key. Never leave these
keys in the vehicle.
FCC Notice:
For USA:
This device complies with Part 15 of the
FCC Rules. Operation is subject to the
following two conditions: (1) This device
may not cause harmful interference, and
(2) this device must accept any interfer-
ence received, including interference that may cause undesired operation.
NOTE:
Changes or modifications not expressly
approved by the party responsible for
compliance could void the user’s authority
to operate the equipment.
For Canada:
This device complies with Industry Canada
licence-exempt RSS standard(s) . Opera-
tion is subject to the following two condi-
tions: (1) this device may not cause
interference, and (2) this device must
accept any interference, including interfer-
ence that may cause undesired operation
of the device.
Instruments and controls2-31
Page 128 of 614
Battery saver system
A chime will sound when the driver side door is
opened with the light switch in theorposition and the ignition switch in the OFF or
LOCK position.
When the headlight switch is in the
orposition while the ignition switch is in the ON
position, the lights will automatically turn off after
a period of time when the ignition switch has
been pushed to the OFF position.
When the headlight switch remains in the
orposition after the lights automatically turn
off, the lights will turn on when the ignition
switch is pushed to the ON position.
CAUTION
. When you turn on the headlight
switch again after the lights auto-
matically turn off, the lights will not
turn off automatically. Be sure to
turn the light switch to the OFF
position when you leave the vehicle
for extended periods of time, other-
wise the battery will be discharged.
. Never leave the light switch on
when the engine is not running for
extended periods of time even if the headlights turn off automatically.
SIC2275
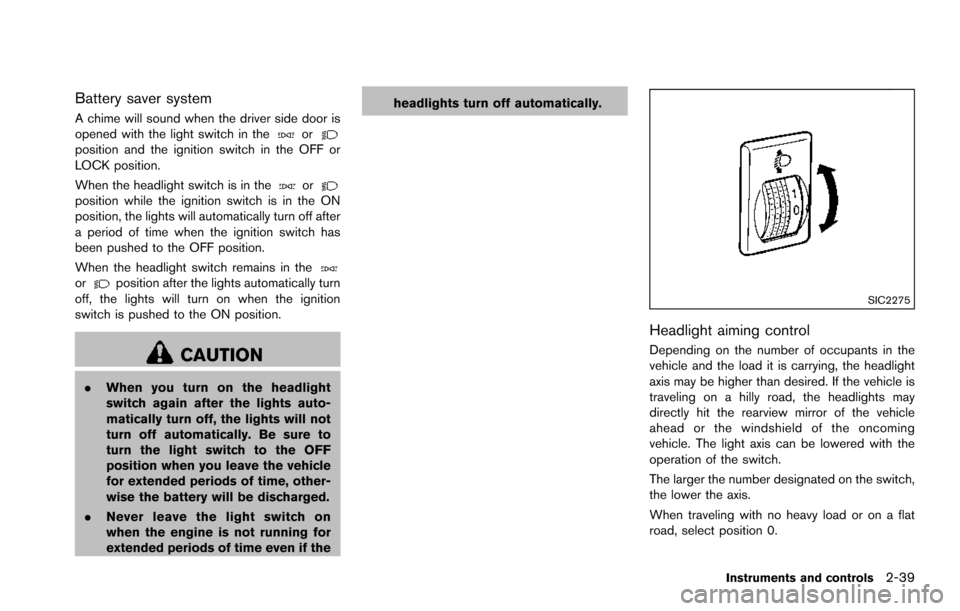
Headlight aiming control
Depending on the number of occupants in the
vehicle and the load it is carrying, the headlight
axis may be higher than desired. If the vehicle is
traveling on a hilly road, the headlights may
directly hit the rearview mirror of the vehicle
ahead or the windshield of the oncoming
vehicle. The light axis can be lowered with the
operation of the switch.
The larger the number designated on the switch,
the lower the axis.
When traveling with no heavy load or on a flat
road, select position 0.
Instruments and controls2-39