2017 NISSAN ARMADA maintenance reset
[x] Cancel search: maintenance resetPage 115 of 614

2-26Instruments and controls
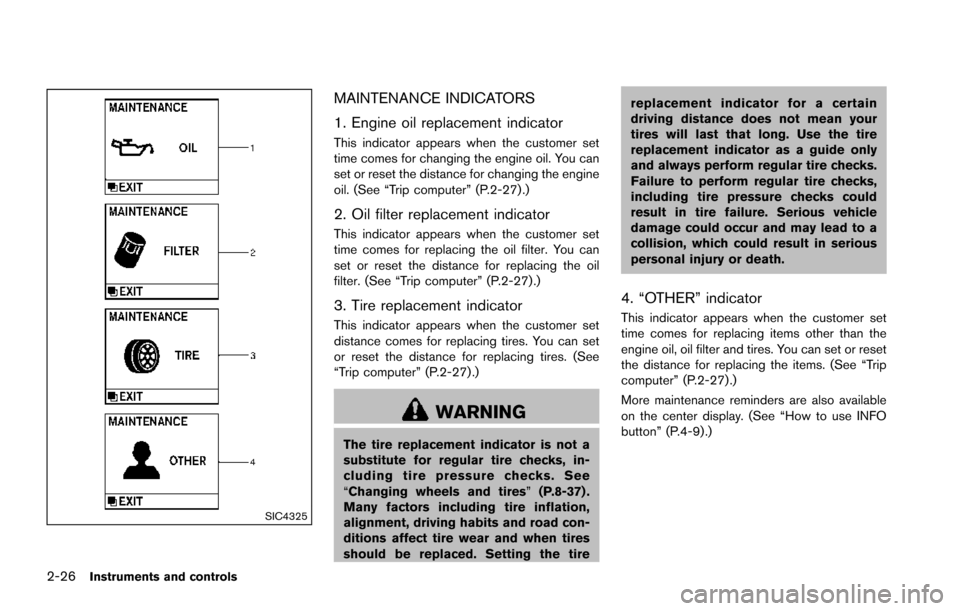
SIC4325
MAINTENANCE INDICATORS
1. Engine oil replacement indicator
This indicator appears when the customer set
time comes for changing the engine oil. You can
set or reset the distance for changing the engine
oil. (See “Trip computer” (P.2-27) .)
2. Oil filter replacement indicator
This indicator appears when the customer set
time comes for replacing the oil filter. You can
set or reset the distance for replacing the oil
filter. (See “Trip computer” (P.2-27).)
3. Tire replacement indicator
This indicator appears when the customer set
distance comes for replacing tires. You can set
or reset the distance for replacing tires. (See
“Trip computer” (P.2-27) .)
WARNING
The tire replacement indicator is not a
substitute for regular tire checks, in-
cluding tire pressure checks. See
“Changing wheels and tires”(P.8-37) .
Many factors including tire inflation,
alignment, driving habits and road con-
ditions affect tire wear and when tires
should be replaced. Setting the tire replacement indicator for a certain
driving distance does not mean your
tires will last that long. Use the tire
replacement indicator as a guide only
and always perform regular tire checks.
Failure to perform regular tire checks,
including tire pressure checks could
result in tire failure. Serious vehicle
damage could occur and may lead to a
collision, which could result in serious
personal injury or death.
4. “OTHER” indicator
This indicator appears when the customer set
time comes for replacing items other than the
engine oil, oil filter and tires. You can set or reset
the distance for replacing the items. (See “Trip
computer” (P.2-27).)
More maintenance reminders are also available
on the center display. (See “How to use INFO
button” (P.4-9).)
Page 118 of 614

6. Setting
Setting is available while the engine is
running.
Setting cannot be made while driving. A
message “SETTING CAN ONLY BE OPER-
ATED WHEN STOPPED” is also displayed
on the vehicle information display.
The
switch*Aandswitch*Bare
used in the setting mode to select and decide a
menu.
SKIP:
Push the
switch*Ato move to the warning
check mode.
Push the
switch*Bto select other menus.
ALERT:
There are 3 submenus under the alert menu.
. BACK
Select this submenu to return to the top
page of the setting mode.
. TIMER
Select this submenu to specify when the
“TIMER” indicator activates.
. ICY
Select this submenu to display the low
outside temperature warning. MAINTENANCE:
There are 5 submenus under the maintenance
menu.
.
BACK
Select this submenu to return to the top
page of the setting mode.
. TIRE
Select this submenu to set or reset the
distance for replacing tires.
. FILTER
Select this submenu to set or reset the
distance for replacing the oil filter.
. OIL
Select this submenu to set or reset the
distance for changing the engine oil.
. OTHER
Select this submenu and set or reset the
distance for replacing items other than the
engine oil, oil filter and tires.
OPTIONS:
There are 4 submenus under the display menu.
. BACK
Select this submenu to return to the top
page of the setting mode.
. LANGUAGE
Select this submenu to choose English,
French or Spanish for display. .
UNIT
Select this submenu to choose the unit.
. EFFECTS
Select this submenu to turn on and off the
needle sweep function when starting the
engine.
7. Warning check
SKIP:
Push the
switch*Ato move to the warning
check mode.
Push the
switch*Bto select other menus.
DETAIL:
This item is available only when a warning is
displayed.
Select this menu to see the details of warnings.
Instruments and controls2-29
Page 209 of 614

4-12Monitor, heater, air conditioner, audio, phone and voice recognition systems
Maintenance information
The maintenance intervals can be displayed for
the engine oil, oil filter, tire and other reminders.
To set a maintenance interval, select a preferred
item from the list.
You can also set to display a message to remind
you that the maintenance needs to be per-
formed.
The following example shows how to set the
engine oil maintenance information. Use the
same steps to set the other maintenance
information.
1. Set the interval (mileage) of the maintenanceschedule. To determine the recommended
maintenance interval, refer to the "9. Main-
tenance and schedules" section.
2. To display the reminder automatically when the desired distance is reached, select the
“Reminder” key.
3. Reset the driving distance to the new maintenance schedule.
4. To return to the previous screen, push the BACK button.
The unit can be converted between “US” and
“Metric”. (See “Language & Units settings” (P.4-
19) .)
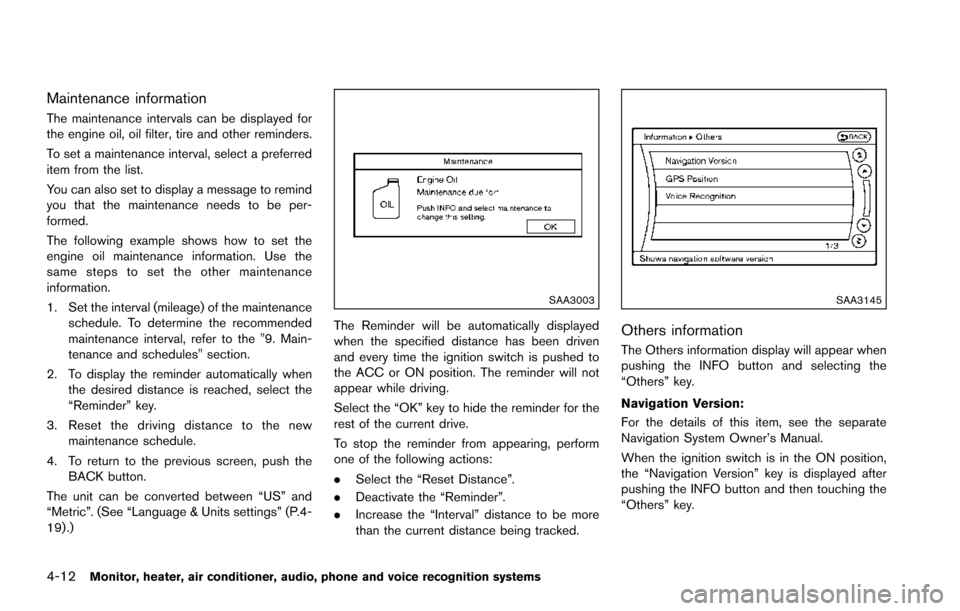
SAA3003
The Reminder will be automatically displayed
when the specified distance has been driven
and every time the ignition switch is pushed to
the ACC or ON position. The reminder will not
appear while driving.
Select the “OK” key to hide the reminder for the
rest of the current drive.
To stop the reminder from appearing, perform
one of the following actions:
. Select the “Reset Distance”.
. Deactivate the “Reminder”.
. Increase the “Interval” distance to be more
than the current distance being tracked.
SAA3145
Others information
The Others information display will appear when
pushing the INFO button and selecting the
“Others” key.
Navigation Version:
For the details of this item, see the separate
Navigation System Owner’s Manual.
When the ignition switch is in the ON position,
the “Navigation Version” key is displayed after
pushing the INFO button and then touching the
“Others” key.
Page 603 of 614

10-32Technical and consumer information
Transport Canada’s Road Safety Infor-
mation Centre at 1-800-333-0371 or
online at www.tc.gc.ca/roadsafety (Eng-
lish speakers) or www.tc.gc.ca/securiter-
outiere (French speakers) .
To notify NISSAN of any safety concerns
please contact our Consumer Informa-
tion Centre toll free at 1-800-387-0122.
WARNING
A vehicle equipped with Four-Wheel
Drive (4WD) should never be tested
using a two wheel dynamometer (such
as the dynamometers used by some
states for emissions testing) , or similar
equipment. Make sure you inform test
facility personnel that your vehicle is
equipped with 4WD before it is placed
on a dynamometer. Using the wrong
test equipment may result in transmis-
sion damage or unexpected vehicle
movement which could result in serious
vehicle damage or personal injury.
Due to legal requirements in some states and
Canadian Provinces, your vehicle may be
required to be in what is called the “ready
condition” for an Inspection/Maintenance (I/M)
test of the emission control system.
The vehicle is set to the “ready condition” when
it is driven through certain driving patterns.
Usually, the “ready condition” can be obtained
by ordinary usage of the vehicle.
If a powertrain system component is repaired or
the battery is disconnected, the vehicle may be
reset to a “not ready condition”. Before taking the I/M test, check the vehicle’s inspection/
maintenance test readiness condition. Place the
ignition switch in the ON position without
starting the engine. If the Malfunction Indicator
Light (MIL) comes on steady for 20 seconds and
then blinks for 10 seconds, the I/M test
condition is “not ready”. If the MIL does not
blink after 20 seconds, the I/M test condition is
“ready”.
It is recommended you visit a NISSAN dealer to
set “ready condition” or to prepare the vehicle
for testing.
READINESS FOR INSPECTION/
MAINTENANCE (I/M) TEST