Page 281 of 458

Listening to Bluetooth
Audio* E00736701306
This product can play back tracks on com-
mercially-available Bluetooth-capable audio devices.CAUTIONl Never hold these devices in your hand to op-
erate while driving, as this is dangerous.
l Do not leave the Bluetooth audio device un-
attended in the vehicle.
l Depending on how the devices are handled,
audio files being damaged or lost, therefore it is recommended that data be backed up.NOTEl Depending on the type of Bluetooth-capable
audio devices, usage may not be possible, or
functions that can be used may be restricted.
l Confirm together with the user manuals for
the commercially- available Bluetooth-capa-
ble audio devices.
l Depending on the type of Bluetooth-capable
audio devices, volume levels may differ. There is the danger of loud volumes, so prior
to use, it is recommended that you turn the volume down.
→ “Adjust Volume” on page 7-21
l Depending on the status of the Bluetooth au-
dio device, it may take some time until the device is recognized, or playback starts.NOTEl Bluetooth audio device specifications and
settings may mean that connection is not
possible, or result in differences in operation or display.
l Depending on audio data in the Bluetooth
audio device, track information may not be
displayed correctly.
l Depending on the status of the vehicle and
device, the iPod/iPhone may not play back after starting the engine.
Connect a Bluetooth-capable
Audio Device
Regarding how to connect your Bluetooth de-
vice, refer to “Connecting the Bluetooth ®
2.0
interface and Bluetooth device” on page 7-53.
Operation methods below describe situations
once connection has been completed.
NOTEl If the iPod/iPhone is connected via Blue-
tooth as a Bluetooth- capable audio device, then do not connect the iPod/iPhone using
an iPod cable. Connection using both meth- ods will result in erroneous operation.Play Bluetooth Audio
1. Press the MEDIA key to set Bluetooth
Audio as the source.
The selected source is indicated on the display.
2. Press the 5
key. Bluetooth Audio
playback starts.
NOTEl Hold down the 5 key to pause.
l Press the 6
key to stop.
Select the Track (File)
Press the key or key to select the
track.
This enables selection of the next or previous
track.
Fast Forward or Rewind
Hold down the 3 key or the 4 key.
Fast forward/rewind is possible.
Listening to Bluetooth Audio*
7-37OGAE17E2For pleasant driving7
Page 282 of 458

Switching Playback Mode
Repeat playback, random playback, and scanplayback are possible.
Repeat Playback (RPT)
Press the 1RPT key.
Repeat playback of the track currently being played.
NOTEl Each time the 1RPT key is pressed, this
switches in the order Repeat OFF, 1 track re-
peat, All track repeat, and Repeat OFF.
Random Playback (RDM)
Press the 2RDM key.
Play the tracks in the Bluetooth Audio device in a random order.
NOTEl Pressing again will cancel.
Scan Playback (SCAN)
Press the PTY/SCAN key.
Play the first 10 seconds of each of the tracks
on the whole Bluetooth Audio device in or-
der.NOTEl Press this button again during playback if
you wish to hear that track, and that trackwill play normally.Use AUX*
E00736900079
By connecting external input cables andAUX devices to this product, you can play
back tracks on these devices through the
product.
Hold down the MEDIA key.
Switch to the AUX mode, and “AUX” is dis- played.
Auxiliary Audio connecter (RCA)Auxiliary Audio connector (RCA)
A- Left audio input connector (white)
B- Right audio input connector (red)CAUTIONl Connect an audio device with external sound
input mode cancelled, or with the soundturned down.
l Even if not inserted, the product will switch
to AUX, therefore take care with volume
levels when not inserted.NOTEl Depending on the audio device to be con-
nected, noise may be emitted.
l For power, use the battery power source in-
cluded in the audio device to be connected.
Using the connected audio device while charging through the cigarette lighter socket
in the vehicle may lead to noise being emit- ted through the speakers.
l If no audio devices are connected, then do
not select the external sound input mode. If external sound input mode is selected while
no audio devices are connected, then sound
may be emitted through the speakers.
Use AUX*
7-38OGAE17E2For pleasant driving7
Page 283 of 458
Display IndicatorE00738100059
This explains content of the display indicator.
Change the Display Mode
E00738500040
You can change the content of the display in-
dicator.
Press the DISP key to switch the display con- tent.
Each time the DISP key is pressed, the dis- play content changes.
CAUTIONl The operation of changing display contents
may impede safe driving, therefore check safety before operation.NOTEl Up to 11 characters may be displayed at one
time. To display 12 or more characters, pressthe PAGE key, and subsequent characters will be displayed.
During DAB Reception*
This switches in the order “Service name”,
“Ensemble name”, and “CH no. (CH ID)”.
Display Indicator
7-39OGAE17E2For pleasant driving7
Page 284 of 458

NOTElIf the text information for the service name
and ensemble name cannot be obtained, then
nothing is displayed.
During CD-DA playback
This switches in the order “Disc title”,
“Track title”, and “Operating status”.
NOTEl If there is no text information to display,
then “NO TITLE” is displayed.
During MP3/WMA/AAC Play-
back
This switches in the order “Folder title”,
“File title”, and “Operating status”.
NOTEl If there is no text information to display,
then “NO TITLE” is displayed.
Display the ID3tag
Hold down the DISP key.
This switches the ID3tag display.
[DISP] Each time the key is pressed, this
switches in the order “Album name”, “Track name”, “Artist name”, “Genre name”*, and “Operating status”.
*: Displayed when playing back audio files
on a USB device (vehicles with a Bluetooth ®
2.0 interface).NOTEl During display of the ID3tag, hold down the
DISP key to switch to the folder title dis- play.
l The genre name display may not be possible.During iPod Playback
E00738900015
This switches in the order “Albums”, “Track
name”, “Artist name”, “Genre name”*, and
“Operating status”.
NOTEl If there is no text information to display,
then “NO TITLE” is displayed.
l Displayed genre name in equipment by type
(vehicles with a Bluetooth ®
2.0 interface).
l The genre name display may not be possible.During Bluetooth ®
2.0 Audio
Playback*
E00739000013
Operating details are the same as in “During
iPod Playback” on page 7-40.
Audio Quality and Volume
Balance Adjustment E00738201233
Change audio quality settings.
Adjust Audio Quality and Vol-ume Balance
1. Press the /SEL key to select settings
items.
Each time the
/SEL key is pressed,
this switches in the order BASS, TRE-
BLE, FADER, BALANCE, SCV, and
Cancel.
2. Turn the
/SEL key to adjust.
Ad-
just-
ment
items
Turn counter-
clockwiseTurn clockwise
BASS-6 to 0
(low low-pass
volume)0 to +6
(high low-pass
volume)
Audio Quality and Volume Balance Adjustment
7-40OGAE17E2For pleasant driving7
Page 285 of 458

Ad-
just-
ment
items
Turn counter-
clockwiseTurn clockwise
TRE-
BLE-6 to 0
(Low high-pass
volume)0 to +6
(High high-pass
volume)FAD-
ERCENTER to REAR 11
(emphasise
REAR)FRONT 11 to
CENTER
(emphasise
FRONT)BAL-
ANC
ELEFT 11 to CENTER
(emphasise
LEFT)CENTER to
RIGHT 11
(emphasise
RIGHT)SCVOFF, LOW
(Low speed com- pensated volume
effect)MID, HIGH
(High speed com- pensated volume
effect)System settings
E00738301319
Change system settings such as product time.1. Press the MENU key.
2. Press the /SEL key to select settings
items.
Each time the
/SEL key is pressed,
this switches in the order DAB settings,
Gracenote DB, AF, REG, TP-S, PI-S,
PTY language setting, PHONE settings, CT, Adjust time and cancel.
3. Turn the
/SEL key to set.
4. Press the
/SEL key to determine
This completes settings, and displays the
next settings item.
*:Displayed when playing back audio
files (vehicles with Bluetooth ®
2.0 in-
terface.)
DAB Setting*
Change DAB setting
(“Set value” bold typeface indicated factory
settings.)
Set-
tings
nameSettings ValueSettings contentDAB -
DAB
Link
settingsOFFIf low reception
sensitivity, switch
to another serviceONDAB
Band
SettingsBAND IIISet used broad-
cast ban to 174
to 239 MHz.Set-
tings
nameSettings ValueSettings contentL-BANDSet used broad-
cast band to
1452 to 1490
MHz.BOTHSet used broad-
cast band to
Band III and
Band.
RDS Setting
Change RDS settings.
(“Set value” bold typeface indicated factory
settings.)
Set-
tings
nameSettings ValueSettings contentAFAF ONAutomatyically
track the same
station as the
program being
received.
System settings
7-41OGAE17E2For pleasant driving7
Page 286 of 458

Set-
tings
nameSettings ValueSettings contentAF OFFDo not automati-
cally track the
same station as
the program be-
ing received.REGREG ONDo not automati-
cally track the
local station for
the program be-
ing received.REG OFFAutomatically
track the local
station for the
program being
received.TP-STP-S ONAutomatically
search for traffic
messages (TP
stations).TP-S OFFDo not automati-
cally search for
traffic messages
(TP stations).Set-
tings
nameSettings ValueSettings contentPI-SPI-S ONSearch for the
same station or
local station in
that registered in
the preset chan-
nel.PI-S OFFDo not search
for the same sta-
tion or local sta-
tion for that reg-
istered in the
preset channelPTYENGLISHSet the display
language for the
program content
search (PTY
search) to Eng-
lish.FRANÇAISSet the display
language for the
program content
search (PTY
search) to
French.Set-
tings
nameSettings ValueSettings contentDEUTSCHSet the display
language for the
program content
search (PTY
search) to Ger-
man.SVENSKSet the display
language for the
program content
search (PTY
search) to Swed-
ish.ESPAÑOLSet the display
language for the
program content
search (PTY
search) to Span-
ish.ITALIANOSet the display
language for the
program content
search (PTY
search) to Ital-
ian.CTCT ONUpdate the time
if time data is re-
ceived.
System settings
7-42OGAE17E2For pleasant driving7
Page 287 of 458
![MITSUBISHI ASX 2017 Owners Manual (in English) Set-
tings
nameSettings ValueSettings contentCT OFFDo not update
the time even if
time data is re-
ceived.
*: It is necessary to press the [TP] key and
turn traffic message standby mode “ON MITSUBISHI ASX 2017 Owners Manual (in English) Set-
tings
nameSettings ValueSettings contentCT OFFDo not update
the time even if
time data is re-
ceived.
*: It is necessary to press the [TP] key and
turn traffic message standby mode “ON](/manual-img/19/34865/w960_34865-286.png)
Set-
tings
nameSettings ValueSettings contentCT OFFDo not update
the time even if
time data is re-
ceived.
*: It is necessary to press the [TP] key and
turn traffic message standby mode “ON”.
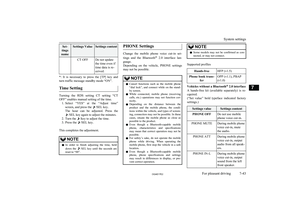
Time Setting
Turning the RDS setting CT setting “CT
OFF” enables manual setting of the time. 1. Select “YES” at the “Adjust time”
screen, and press the
/SEL key.
The hour can be adjusted. Press the
/SEL key again to adjust the minutes.
2. Turn the
/key to adjust the time.
3. Press the
/SEL key.
This completes the adjustment.
NOTEl In order to finish adjusting the time, hold
down the /SEL key until the seconds are
reset to “00”.PHONE Settings
Change the mobile phone voice cut-in set-
tings and the Bluetooth ®
2.0 interface lan-
guage.
Depending on the vehicle, PHONE settings
may not be possible.
NOTEl Cancel functions such as the mobile phone
“dial lock”, and connect while on the stand- by screen.
l While connected, mobile phone (receiving
calls, etc.) operations may not function cor- rectly.
l Depending on the distance between the
product and the mobile phone, the condi- tions within the vehicle, and types of screen-ing, connection may not be possible. In thesecases, situate the mobile phone as close as
possible to the product.
l Even though a Bluetooth-capable mobile
phone, characteristics and specifications
may mean that correct operation may not be possible.
l For safety’s sake, do not operate the mobile
phone while driving. When operating the mobile phone, first stop the vehicle in a safe
location.
l Even though a Bluetooth-capable mobile
phone, phone specifications and settings
may result in differences in display, or pre- vent correct operation.NOTEl Some models may not be confirmed as con-
nected, or may not connect.
Supported profiles
Hands-freeHFP (v1.5)Phone book trans-
ferOPP (v1.1), PBAP
(v1.0)
Vehicles without a Bluetooth ®
2.0 interface
A hands-free kit (available separately) is re- cquired.
(“Set value” bold typeface indicated factory
settings.)
Settings valueSettings contentPHONE OFFDo not use mobile
phone voice cut-in.PHONE MUTEDuring mobile phone
voice cut-in, mute
the audio.PHONE ATTDuring mobile phone
voice cut-in, output
audio from all speak-
ers.PHONE IN-LDuring mobile phone
voice cut-in, output
sound from the left
front speaker.
System settings
7-43OGAE17E2For pleasant driving7
Page 288 of 458

Settings valueSettings contentPHONE IN-RDuring mobile phone
voice cut-in, output
sound from the right
front speaker.PHONE IN-LRDuring mobile phone
voice cut-in, output
sound from the left
and right front speak-
ers.
Vehicles with a Bluetooth ®
2.0 interface
(“Set value” bold typeface indicated factory
settings.)
Set-
tings
nameSettings valueSettings contentPHONE IN set- tingsPHONE IN-RDuring mobile
phone voice cut- in, output sound from the right
front speaker.PHONE IN-LDuring mobile
phone voice cut- in, output sound from the leftfront speaker.HFM voice lan-ENGLISHChange the handsfree module voice
language.FRENCHSet-
tings
nameSettings valueSettings contentguage
settingsGERMANSPANISHITALIANDUTCHPORTUGUESERUSSIANNOTEl Depending on the vehicle model, this may
not display.
Gracenote DB (Vehicles with a
Bluetooth ®
2.0 interface)
The version number can be confirmed.
1. Select “Gracenote DB” and press the
/SEL key.
2. Turn the
/SEL key and selct the “DB
Version”.
3. Press the
/SEL key.
The DB Version is displayed.
System settings
7-44OGAE17E2For pleasant driving7