2017 MERCEDES-BENZ GLA SUV change time
[x] Cancel search: change timePage 214 of 369
the road and can warn you before you leave your
lane unintentionally.
This function is available in a speed range
between 60 km/h and 200 km/h.
A warning may be given if a front wheel passes
over a lane marking. It will warn you by means of intermittent vibration through the steering
wheel for up to 1.5 second s.
Im portant safety notes G
WARNING
Lane Keeping Assist cannot always clearly
detect lane markings.
In such cases, Lane Keeping Assist can:
R issue an unnecessary warning
R not issue a warning
There is a risk of an accident.
Always pay particular attention to the traffic
situation and keep within the lane, especially
if Lane Keeping Assist alerts you. G
WARNING
The Lane Keeping Assist warning does not
return the vehicle to the original lane. There is a risk of an accident.
Always steer, apply the brakes or accelerate
the vehicle yourself, especially if Lane Keep-
ing Assist alerts you.
If you fail to adapt your driving style, Lane Keep-
ing Assist can neither reduce the risk of an acci-
dent nor override the laws of physics. Lane
Keeping Assist cannot take into account road,
weather or traffic conditions. Lane Keeping
Assist is only an aid. You are responsible for the distance to the vehicle in front, for vehicle
speed, for braking in good time and for staying in
lane.
Lane Keeping Assist does not keep your vehicle
in its lane.
The system may be impaired or may not function in the following situations:
R poor visibility, e.g. due to insufficient illumi-
nation of the road, or due to snow, rain, fog or
spray
R glare, e.g. from oncoming traffic, the sun or
reflection from other vehicles (e.g. if the road
surface is wet) R
the windscreen is dirty, misted up, damaged
or covered, for instance by a sticker, in the
vicinity of the camera
R there are no lane markings, or several unclear
lane markings for one lane are present, e.g.
around construction sites
R the lane markings are worn away, dark or cov-
ered up, e.g. by dirt or snow
R the distance to the vehicle in front is too short
and thus the lane markings cannot be detec-
ted
R the lane markings change quickly, e.g. lanes
branch off, cross one another or merge
R the road is very narrow and winding
R there are highly variable shade conditions on
the roadway
Activating Lane Keeping Assist X Activate Lane Keeping Assist using the on-
board computer; to do so, select Standard
Standard or
Adaptive Adaptive (Ypage 210).
If you drive at speeds above 60 km/h and lane
markings are detected, the lane markings are
shown in green in the assistance graphic
(Y page 226).
If Standard Standard is selected, no warning vibration
occurs if:
R you have switched on the turn signal. In this
event, the warnings are suppressed for a cer-
tain period of time.
R a driving safety system such as ABS, BAS or
ESP ®
intervenes.
When Adaptive Adaptive is selected, no warning vibra-
tion occurs if:
R you have switched on the turn signal. In this
case, the warnings are suppressed for a cer-
tain period of time.
R a driving safety system such as ABS, BAS or
ESP ®
intervenes.
R you accelerate hard, e.g. kickdown.
R you brake hard.
R you steer actively, e.g. swerve to avoid an
obstacle or change lane quickly.
R You cut the corner on a sharp bend.
To ensure that you are warned only when nec-
essary and in good time if you cross the lane
marking, the system detects certain conditions
and warns you accordingly. Driving systems
211Driving and parking Z
Page 216 of 369
Only release the ball coupling if the pivoting
range is unobstructed. Always make sure that the ball coupling engages when folding in.
When reversing the towing vehicle, make sure
there is nobody between the trailer and the vehi- cle.
Couple and uncouple the trailer carefully. If youdo not couple the trailer to the towing vehicle
correctly, the trailer could become detached.
When towing a trailer, your vehicle's handling
characteristics will be different to when driving
without a trailer.
The vehicle/trailer combination:
R is heavier
R is restricted in its acceleration and gradient-
climbing capability
R has an increased braking distance
R is affected more by strong crosswinds
R demands more sensitive steering
R has a larger turning circle
This can impair the vehicle's handling charac-
teristics. Adapt your driving style accordingly.
Maintain a safe distance. Drive carefully.
When towing a trailer, always adjust your speed to the current road and weather conditions. Do
not exceed the maximum permissible speed for
your vehicle/trailer combination. Notes on towing a trailer
General notes Trailer towing is not possible on the following
models:
R Mercedes‑AMG GLA 45 4MATIC
Items of optional equipment may influence the
effective trailer loads for the vehicle. Please find the applicable trailer loads for your vehicle on
the registration certificate.
When towing a trailer, set the tyre pressure on
the rear axle of the towing vehicle for a maxi-
mum load. Further information on the tyre pres-
sure table in the fuel filler flap (Y page 337).
Please note that when towing a trailer, the fol-
lowing driving systems have limited availability
or are not available at all:
R Parking Assist PARKTRONIC (Y page 193)
R Blind Spot Assist (Y page 209) The height of the ball coupling changes with the
load of the vehicle. If necessary, use a trailer
with a height-adjustable drawbar.
You will find fitting dimensions and loads under"Technical data" (Y page 359).
Driving tips Observe the information on ESP
®
trailer stabili-
sation (Y page 75).
The maximum permissible speed for vehicle/
trailer combinations depends on the type of
trailer. Before beginning the journey, check the
trailer's documents to see what the maximum
permitted speed is. Observe the legally prescri-
bed maximum speed in the relevant country.
For certain Mercedes-Benz vehicles, the maxi-
mum permissible rear axle load is increased
when towing a trailer. See the "Technical data"
section to find out whether this applies to your
vehicle. If when towing, the rear axle load is
increased even partly, the vehicle/trailer com-
bination may not exceed a maximum speed of
100 km/h for reasons concerning the operating
permit. This also applies in countries in which
the permissible maximum speed for vehicle/
trailer combinations is above 100 km/h.
When towing a trailer, your vehicle's handling
characteristics will be different to when driving
without a trailer and the vehicle will consume
more fuel.
Shift to a lower gear in good time on long and
steep downhill gradients. For vehicles with auto-
matic transmission, you need to have selected
manual drive program M(Y page 161).
This also applies if you have activated cruise
control, the speed limiter or Distance Pilot
DISTRONIC.
This will use the braking effect of the engine, so less braking will be required to maintain the
vehicle speed. This relieves the load on the
brake system and prevents the brakes from
overheating and wearing too quickly. If you need
additional braking, depress the brake pedal
repeatedly rather than continuously.
Briefly depressing the accelerator pedal on
downhill gradients while the manual drive pro-
gram Mis temporarily activated (vehicles with
automatic transmission): the automatic trans-
mission may switch back to the last active auto-
matic drive program Eor S. The automatic trans-
mission may shift to a higher gear. This can
reduce the engine's braking effect. Towing a trailer
213Driving and parking Z
Page 225 of 369
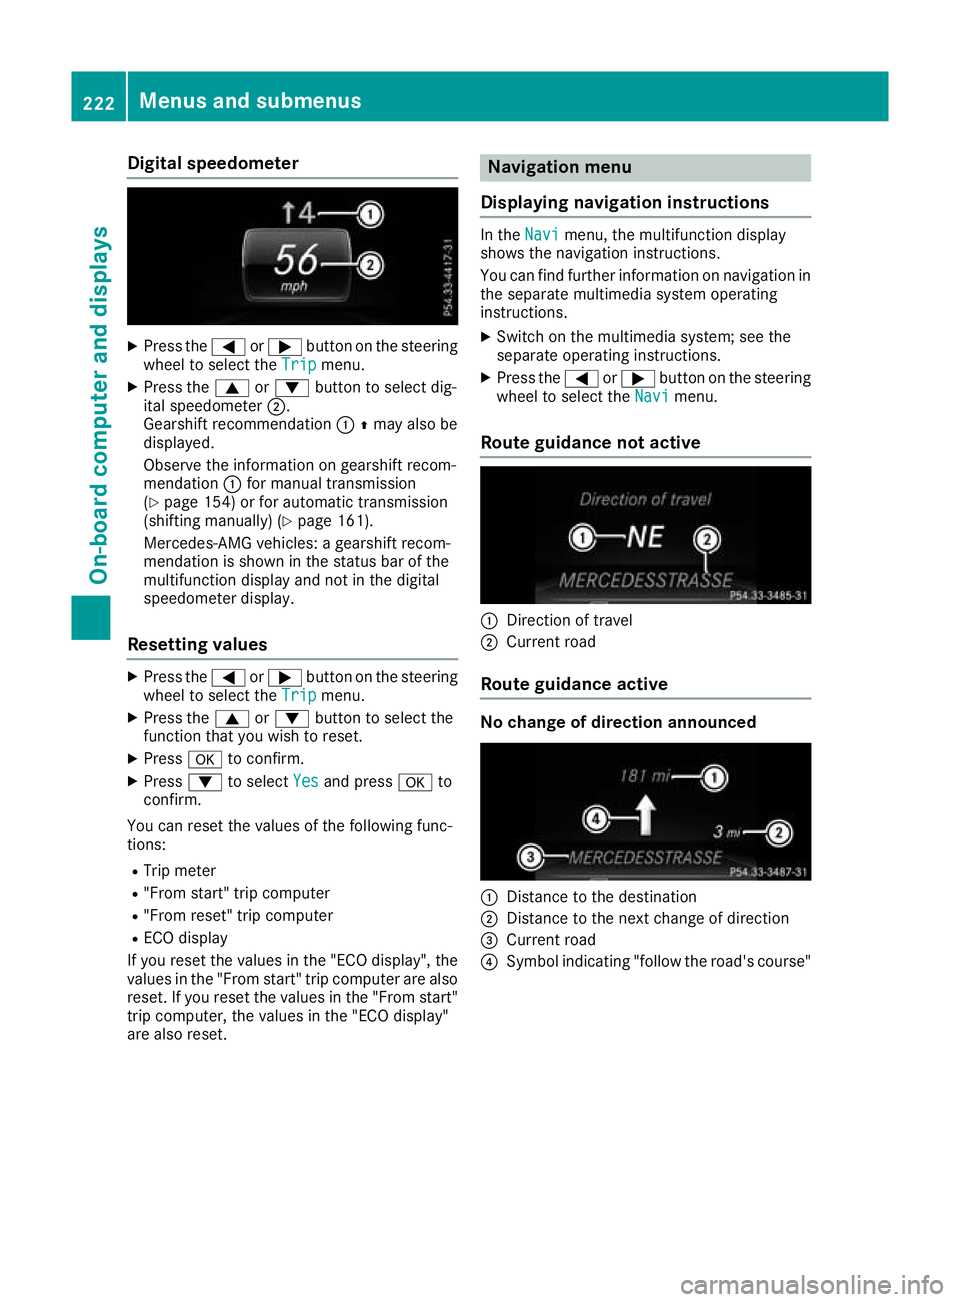
Digital speedometer
X
Press the =or; button on the steering
wheel to select the Trip
Trip menu.
X Press the 9or: button to select dig-
ital speedometer ;.
Gearshift recommendation :Zmay also be
displayed.
Observe the information on gearshift recom-
mendation :for manual transmission
(Y page 154) or for automatic transmission
(shifting manually) (Y page 161).
Mercedes-AMG vehicles: a gearshift recom-
mendation is shown in the status bar of the
multifunction display and not in the digital
speedometer display.
Resetting values X
Press the =or; button on the steering
wheel to select the Trip Tripmenu.
X Press the 9or: button to select the
function that you wish to reset.
X Press ato confirm.
X Press :to select Yes
Yes and press ato
confirm.
You can reset the values of the following func-
tions:
R Trip meter
R "From start" trip computer
R "From reset" trip computer
R ECO display
If you reset the values in the "ECO display", the
values in the "From start" trip computer are also
reset. If you reset the values in the "From start" trip computer, the values in the "ECO display"
are also reset. Navigation menu
Displaying navigation instructions In the
Navi
Navimenu, the multifunction display
shows the navigation instructions.
You can find further information on navigation in the separate multimedia system operating
instructions.
X Switch on the multimedia system; see the
separate operating instructions.
X Press the =or; button on the steering
wheel to select the Navi Navimenu.
Route guidance not active :
Direction of travel
; Current road
Route guidance active No change of direction announced
:
Distance to the destination
; Distance to the next change of direction
= Current road
? Symbol indicating "follow the road's course" 222
Menus and submenusOn-boa
rdcompu ter and displays
Page 226 of 369
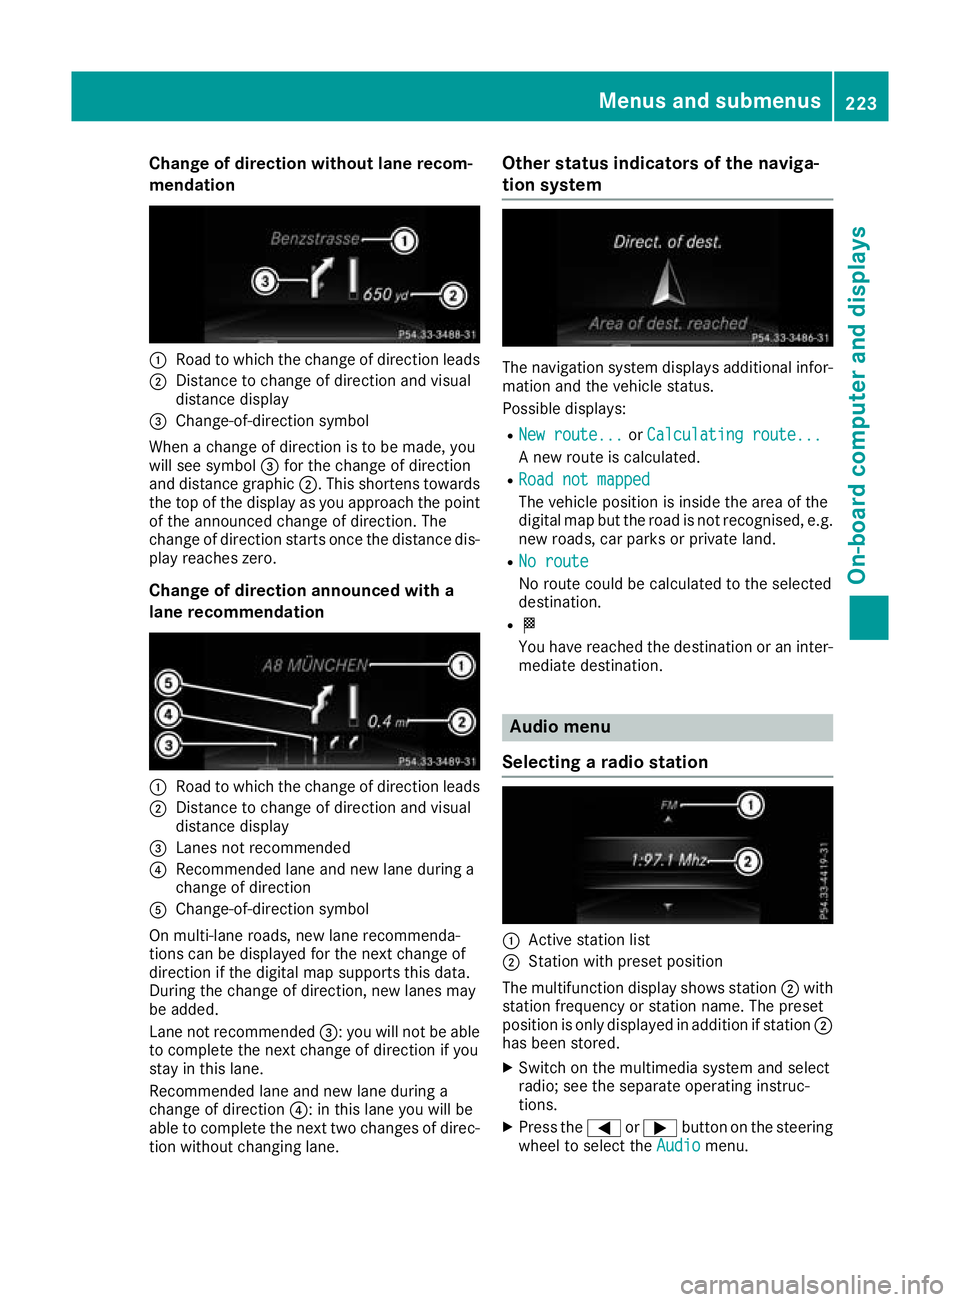
Change of direction without lane recom-
mendation :
Road to which the change of direction leads
; Distance to change of direction and visual
distance display
= Change-of-direction symbol
When a change of direction is to be made, you
will see symbol =for the change of direction
and distance graphic ;. This shortens towards
the top of the display as you approach the point of the announced change of direction. The
change of direction starts once the distance dis-
play reaches zero.
Change of direction announced with a
lane recommendation :
Road to which the change of direction leads
; Distance to change of direction and visual
distance display
= Lanes not recommended
? Recommended lane and new lane during a
change of direction
A Change-of-direction symbol
On multi-lane roads, new lane recommenda-
tions can be displayed for the next change of
direction if the digital map supports this data.
During the change of direction, new lanes may
be added.
Lane not recommended =: you will not be able
to complete the next change of direction if you
stay in this lane.
Recommended lane and new lane during a
change of direction ?: in this lane you will be
able to complete the next two changes of direc-
tion without changing lane. Other status indicators of the naviga-
tion system
The navigation system displays additional infor-
mation and the vehicle status.
Possible displays:
R New route... New route... orCalculating route...
Calculating route...
A new route is calculated.
R Road not mapped
Road not mapped
The vehicle position is inside the area of the
digital map but the road is not recognised, e.g.
new roads, car parks or private land.
R No route No route
No route could be calculated to the selected
destination.
R O
You have reached the destination or an inter-
mediate destination. Audio menu
Selecting a radio station :
Active station list
; Station with preset position
The multifunction display shows station ;with
station frequency or station name. The preset
position is only displayed in addition if station ;
has been stored.
X Switch on the multimedia system and select
radio; see the separate operating instruc-
tions.
X Press the =or; button on the steering
wheel to select the Audio Audiomenu. Menus and submenus
223On-board computer and displays Z
Page 233 of 369
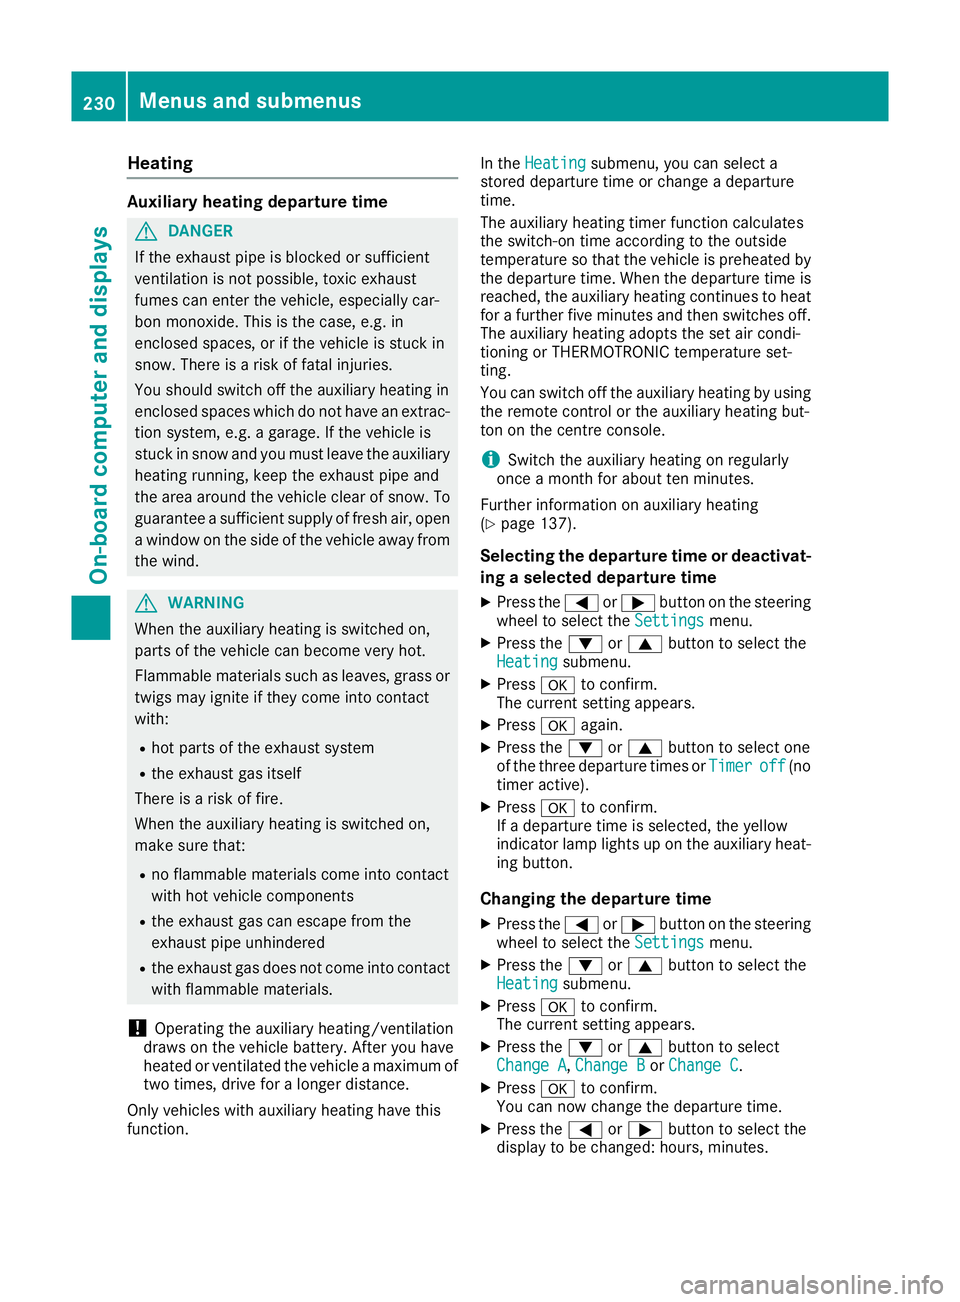
Heating
Auxiliary heating departure time
G
DANGER
If the exhaust pipe is blocked or sufficient
ventilation is not possible, toxic exhaust
fumes can enter the vehicle, especially car-
bon monoxide. This is the case, e.g. in
enclosed spaces, or if the vehicle is stuck in
snow. There is a risk of fatal injuries.
You should switch off the auxiliary heating in
enclosed spaces which do not have an extrac- tion system, e.g. a garage. If the vehicle is
stuck in snow and you must leave the auxiliary
heating running, keep the exhaust pipe and
the area around the vehicle clear of snow. To guarantee a sufficient supply of fresh air, open
a window on the side of the vehicle away from the wind. G
WARNING
When the auxiliary heating is switched on,
parts of the vehicle can become very hot.
Flammable materials such as leaves, grass or twigs may ignite if they come into contact
with:
R hot parts of the exhaust system
R the exhaust gas itself
There is a risk of fire.
When the auxiliary heating is switched on,
make sure that:
R no flammable materials come into contact
with hot vehicle components
R the exhaust gas can escape from the
exhaust pipe unhindered
R the exhaust gas does not come into contact
with flammable materials.
! Operating the auxiliary heating/ventilation
draws on the vehicle battery. After you have
heated or ventilated the vehicle a maximum of two times, drive for a longer distance.
Only vehicles with auxiliary heating have this
function. In the
Heating Heating submenu, you can select a
stored departure time or change a departure
time.
The auxiliary heating timer function calculates
the switch-on time according to the outside
temperature so that the vehicle is preheated by the departure time. When the departure time isreached, the auxiliary heating continues to heat
for a further five minutes and then switches off. The auxiliary heating adopts the set air condi-
tioning or THERMOTRONIC temperature set-
ting.
You can switch off the auxiliary heating by using
the remote control or the auxiliary heating but-
ton on the centre console.
i Switch the auxiliary heating on regularly
once a month for about ten minutes.
Further information on auxiliary heating
(Y page 137).
Selecting the departure time or deactivat-
ing a selected departure time
X Press the =or; button on the steering
wheel to select the Settings
Settings menu.
X Press the :or9 button to select the
Heating Heating submenu.
X Press ato confirm.
The current setting appears.
X Press aagain.
X Press the :or9 button to select one
of the three departure times or Timer
Timeroff
off(no
timer active).
X Press ato confirm.
If a departure time is selected, the yellow
indicator lamp lights up on the auxiliary heat- ing button.
Changing the departure time
X Press the =or; button on the steering
wheel to select the Settings Settingsmenu.
X Press the :or9 button to select the
Heating
Heating submenu.
X Press ato confirm.
The current setting appears.
X Press the :or9 button to select
Change A
Change A, Change B
Change BorChange C
Change C.
X Press ato confirm.
You can now change the departure time.
X Press the =or; button to select the
display to be changed: hours, minutes. 230
Menus and submenusOn-board computer and displays
Page 280 of 369
General notes
The section on the multimedia system in this
manual describes the basic principles for oper-
ation. More information can be found in the Dig-
ital Owner's Manual. Important safety notes
G
WARNING
If you operate information and communica-
tion equipment integrated in the vehicle when driving, you could be distracted from the traf-
fic situation. This could also cause you to lose control of the vehicle. There is a risk of an
accident.
Only operate this equipment when the traffic
situation permits. If you cannot be sure of this,
stop the vehicle paying attention to road and
traffic conditions and operate the equipment
with the vehicle stationary.
You must observe the legal requirements for the
country in which you are currently driving when operating the multimedia system.
The multimedia system calculates the route to
the destination without taking the following into
account, for example:
R traffic lights
R stop and give way signs
R parking or stopping restrictions
R road narrowing
R other road and traffic rules and regulations
The multimedia system may give incorrect driv-
ing recommendations if the actual road/traffic
situation does not correspond with the digital
map data.
For example:
R a diverted route
R the road layout or the direction of a one-way
street has been changed
For this reason, you must always observe road
and traffic rules and regulations during your
journey. Road and traffic rules and regulations
always have priority over multimedia system
driving recommendations. G
WARNING
Modifications to electronic components, their software as well as wiring could affect their
function and/or the operation of other net-
worked components. This could in particular
also be the case for systems relevant to
safety. They might not function properly any-
more and/or jeopardise the operational
safety of the vehicle. There is an increased
risk of an accident and injury.
Do not attempt to modify the wiring as well as
electronic components or their software.
Always have work on electrical and electronic components carried out at a qualified special-
ist workshop.
If you make any changes to the vehicle elec-
tronics, the general operating permit is ren-
dered invalid. Function restrictions
For safety reasons, some functions are restric-
ted or unavailable while the vehicle is in motion.
You will notice this, for example, because either you will not be able to select certain menu items
or a message will appear to this effect. Operating system
Overview
General notes !
Do not use the space in front of the display
for storage. Objects placed here could dam-
age the display or impair its function. Avoid
any direct contact with the display surface.
Pressure on the display surface may result in
impairments to the display, which could be
irreversible.
Wearing polarised sunglasses may impair your
ability to read the display.
The display has an automatic temperature-con- trolled switch-off feature. The brightness is
automatically reduced if the temperature is too
high. If necessary, the display may temporarily
switch off completely. Operating system
277Multimedia system Z
Page 281 of 369
Cleaning instructions
!
Do not touch the display. The display has a
very sensitive high-gloss surface; there is a
risk of scratching. If you have to clean the
screen, however, use a mild cleaning agent
and a soft, lint-free cloth.
The display must be switched off and have
cooled down before you start cleaning. Do not
apply pressure to the display surface when
cleaning it, as this could cause irreversible dam- age to the display.
Switching the multimedia system
on/off X
Press the qcontrol knob.
Adjusting the volume X
Turn the qcontrol knob.
The volume changes:
R for the currently set media source
R during a traffic announcement or navigation
message
R in hands-free mode during an active call
Switching the sound on/off X
Press the 8button on the control panel.
If the audio output is switched off, the status
line will show the 8symbol. If you switch
the media source or change the volume, the
sound is automatically switched on.
i You will hear navigation messages even
when the sound is muted.
Functions The multimedia system has the following func-
tions:
R Radio mode
R Media mode with media search
R Sound systems
R Navigation system
COMAND Online: navigation using hard drive
Audio 20: navigation using SD memory card
R Communication functions
R Vehicle functions with system settings
R Favourites functions Controller The controller in the centre console lets you:
R select menu items on the display
R enter characters
R select a destination on the map
R save entries
The controller can be:
R turned 3
R slid left or right 1
R slid forwards or back 4
R slid diagonally 2
R pressed briefly or pressed and held 7
Back button You can use the
%button to exit a menu or to
call up the main menu of the current operating
mode.
X To exit the menu: briefly press the%
button.
The multimedia system changes to the next
higher menu level in the current operating
mode.
X To call up the main menu: press the%
button for longer than two seconds.
The multimedia system changes to the main
menu of the current operating mode.
Favourites button You can store predefined functions using the
g favourites button and call them up at the
press of a button (Y page 278). Favourites
Calling up and exiting favourites X
To call up: press thegbutton on the con-
troller.
X Select a favourite, e.g. Vehicle
Vehicle.
The favourites are displayed.
X To exit: press the gbutton again. 278
Operating systemMulti
media system
Page 284 of 369
phone, change the device name (see the man-
ufacturer's operating instructions).
If the mobile phone supports the PBAP (Phone
Book Access Profile) and MAP (M essage
Access Profile) Bluetooth ®
profiles, the follow-
ing information will be transmitted after you
connect:
R Telephone book
R Call lists
R Text messages and e-mails
i Further information on suitable mobile
phones can be found at: http://
www.mercedes-benz.com/connect
Searching for and authorising (connect- ing) a mobile phone Before using your mobile phone with the multi-
media system for the first time, you will need to
search for the phone and then authorise (con-
nect) it. Depending on the mobile phone, author- isation takes place by means of Secure Simple
Pairing or by entering a passkey. The multimedia
system automatically makes the procedure that is relevant for your mobile phone available. The
mobile phone is always connected automati-
cally after authorisation. Further information on
using a mobile phone with the multimedia sys-
tem (see the Digital Owner's Manual).
If the multimedia system does not detect your
mobile phone, this may be due to particular
security settings on your mobile phone (see the manufacturer's operating instructions).
Only one mobile phone can be connected to the
multimedia system at any one time.
Searching for a mobile phone
Multimedia system:
X Select Tel/
Tel/®Q Connect Connect
device
device QSearch for phonesSearch for phones QStartStart
search
search .
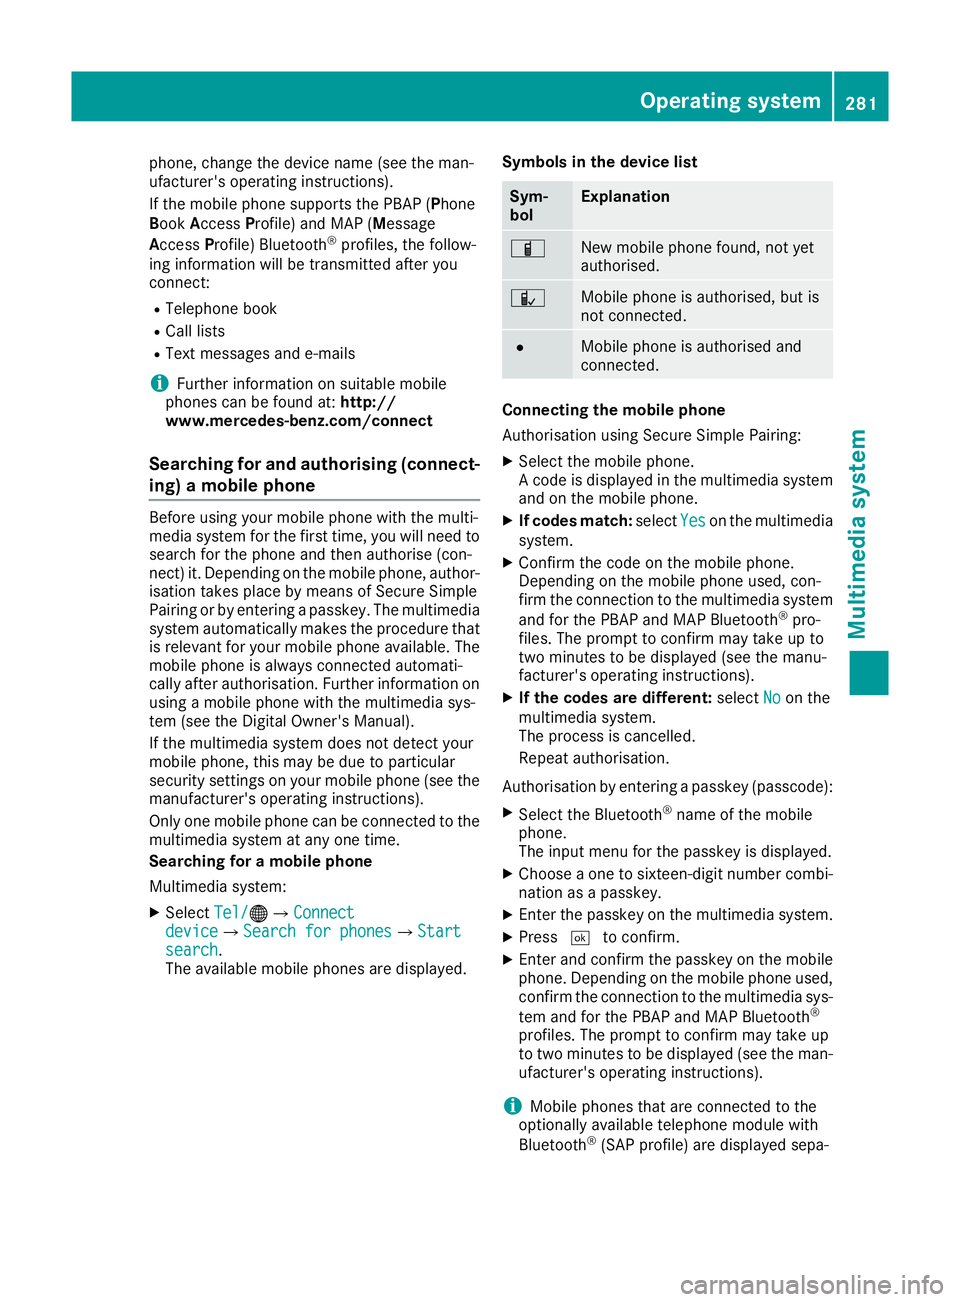
The available mobile phones are displayed. Symbols in the device list Sym-
bol Explanation
Ï
New mobile phone found, not yet
authorised.
Ñ
Mobile phone is authorised, but is
not connected.
#
Mobile phone is authorised and
connected.
Connecting the mobile phone
Authorisation using Secure Simple Pairing:
X Select the mobile phone.
A code is displayed in the multimedia system
and on the mobile phone.
X If codes match: selectYes Yeson the multimedia
system.
X Confirm the code on the mobile phone.
Depending on the mobile phone used, con-
firm the connection to the multimedia system
and for the PBAP and MAP Bluetooth ®
pro-
files. The prompt to confirm may take up to
two minutes to be displayed (see the manu-
facturer's operating instructions).
X If the codes are different: selectNo Noon the
multimedia system.
The process is cancelled.
Repeat authorisation.
Authorisation by entering a passkey (passcode): X Select the Bluetooth ®
name of the mobile
phone.
The input menu for the passkey is displayed.
X Choose a one to sixteen-digit number combi-
nation as a passkey.
X Enter the passkey on the multimedia system.
X Press ¬to confirm.
X Enter and confirm the passkey on the mobile
phone. Depending on the mobile phone used,
confirm the connection to the multimedia sys-
tem and for the PBAP and MAP Bluetooth ®
profiles. The prompt to confirm may take up
to two minutes to be displayed (see the man- ufacturer's operating instructions).
i Mobile phones that are connected to the
optionally available telephone module with
Bluetooth ®
(SAP profile) are displayed sepa- Operating system
281Multimedia system Z