2017 MERCEDES-BENZ GLA SUV ESP
[x] Cancel search: ESPPage 205 of 369
:
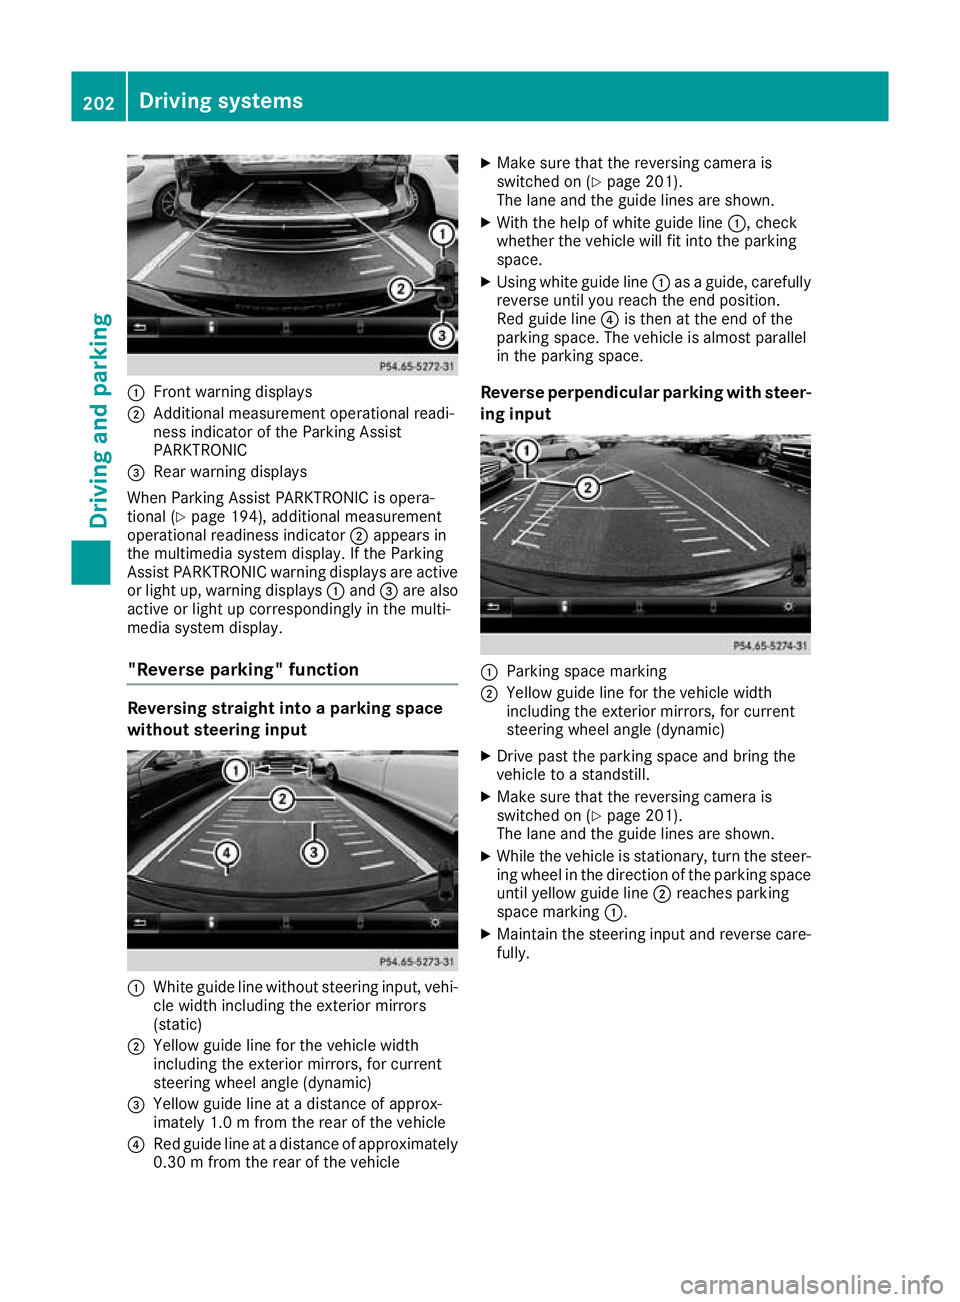
Front warning displays
; Additional measurement operational readi-
ness indicator of the Parking Assist
PARKTRONIC
= Rear warning displays
When Parking Assist PARKTRONIC is opera-
tional (Y page 194), additional measurement
operational readiness indicator ;appears in
the multimedia system display. If the Parking
Assist PARKTRONIC warning displays are active
or light up, warning displays :and =are also
active or light up correspondingly in the multi-
media system display.
"Reverse parking" function Reversing straight into a parking space
without steering input :
White guide line without steering input, vehi-
cle width including the exterior mirrors
(static)
; Yellow guide line for the vehicle width
including the exterior mirrors, for current
steering wheel angle (dynamic)
= Yellow guide line at a distance of approx-
imately 1.0 m fromthe rear of the vehicle
? Red guide line at a distance of approximately
0.30 m from the rear of the vehicle X
Make sure that the reversing camera is
switched on (Y page 201).
The lane and the guide lines are shown.
X With the help of white guide line :, check
whether the vehicle will fit into the parking
space.
X Using white guide line :as a guide, carefully
reverse until you reach the end position.
Red guide line ?is then at the end of the
parking space. The vehicle is almost parallel
in the parking space.
Reverse perpendicular parking with steer- ing input :
Parking space marking
; Yellow guide line for the vehicle width
including the exterior mirrors, for current
steering wheel angle (dynamic)
X Drive past the parking space and bring the
vehicle to a standstill.
X Make sure that the reversing camera is
switched on (Y page 201).
The lane and the guide lines are shown.
X While the vehicle is stationary, turn the steer-
ing wheel in the direction of the parking spaceuntil yellow guide line ;reaches parking
space marking :.
X Maintain the steering input and reverse care-
fully. 202
Driving systemsDriving an
d parking
Page 207 of 369
X
Select symbol ?using the controller.
The "Coupling up a trailer" function is selec-
ted. The distance specifications now apply
only to objects that are at the same level as
the ball coupling.
X Reverse carefully, making sure that trailer
drawbar locating aid ;points approximately
in the direction of trailer drawbar =.
X Reverse carefully until trailer drawbar =rea-
ches the red guide line.
The distance between the trailer drawbar and
the red guide line is now approximately
0.30 m.
X Couple up the trailer (Y page 213).
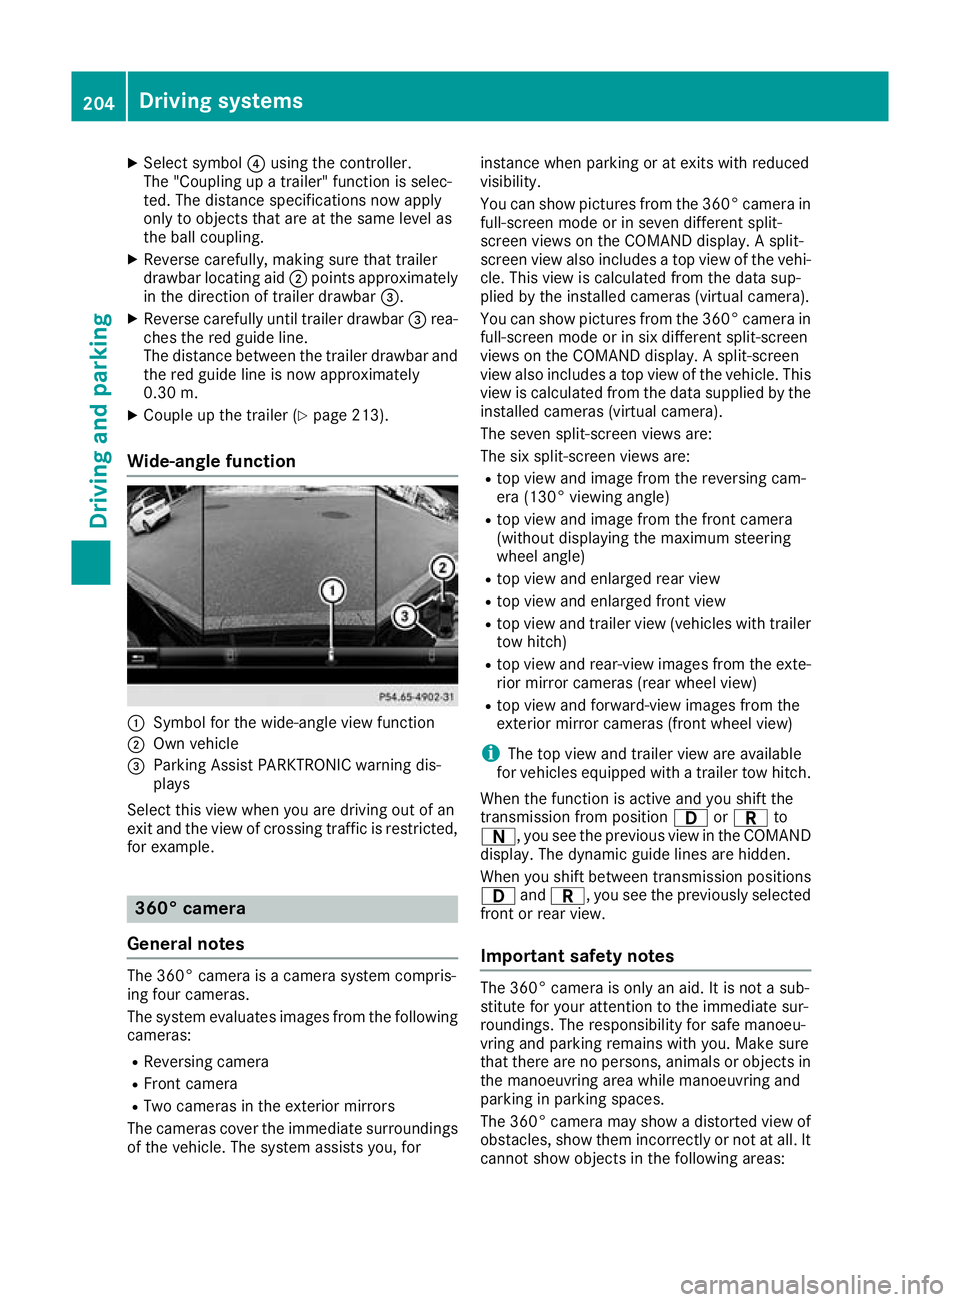
Wide-angle function :
Symbol for the wide-angle view function
; Own vehicle
= Parking Assist PARKTRONIC warning dis-
plays
Select this view when you are driving out of an
exit and the view of crossing traffic is restricted, for example. 360° camera
General notes The 360° camera is a camera system compris-
ing four cameras.
The system evaluates images from the following
cameras:
R Reversing camera
R Front camera
R Two cameras in the exterior mirrors
The cameras cover the immediate surroundings
of the vehicle. The system assists you, for instance when parking or at exits with reduced
visibility.
You can show pictures from the 360° camera in
full-screen mode or in seven different split-
screen views on the COMAND display. A split-
screen view also includes a top view of the vehi-
cle. This view is calculated from the data sup-
plied by the installed cameras (virtual camera).
You can show pictures from the 360° camera in
full-screen mode or in six different split-screen
views on the COMAND display. A split-screen
view also includes a top view of the vehicle. This
view is calculated from the data supplied by the installed cameras (virtual camera).
The seven split-screen views are:
The six split-screen views are:
R top view and image from the reversing cam-
era (130° viewing angle)
R top view and image from the front camera
(without displaying the maximum steering
wheel angle)
R top view and enlarged rear view
R top view and enlarged front view
R top view and trailer view (vehicles with trailer
tow hitch)
R top view and rear-view images from the exte-
rior mirror cameras (rear wheel view)
R top view and forward-view images from the
exterior mirror cameras (front wheel view)
i The top view and trailer view are available
for vehicles equipped with a trailer tow hitch.
When the function is active and you shift the
transmission from position 7orC to
A, you see the previous view in the COMAND
display. The dynamic guide lines are hidden.
When you shift between transmission positions 7 andC, you see the previously selected
front or rear view.
Important safety notes The 360° camera is only an aid. It is not a sub-
stitute for your attention to the immediate sur-
roundings. The responsibility for safe manoeu-
vring and parking remains with you. Make sure
that there are no persons, animals or objects in
the manoeuvring area while manoeuvring and
parking in parking spaces.
The 360° camera may show a distorted view of
obstacles, show them incorrectly or not at all. It
cannot show objects in the following areas: 204
Driving systemsDriving an
d parking
Page 208 of 369
R
under the front bumper
R very close to the front bumper
R very close to the rear bumper
R under the rear bumper
R in the area immediately above the recessed
handle on the boot lid
R very close to the exterior mirrors
You are responsible for safety at all times and
must always pay attention to your immediate
surroundings when parking and manoeuvring.
This applies to the areas behind, in front of and
beside the vehicle. You could otherwise endan-
ger yourself and others.
The 360° camera will not function or will func-
tion only to a limited extent:
R if the doors are open
R if the exterior mirrors are folded in
R if the tailgate is open
R in heavy rain, snow or fog
R at night or in very dark places
R if the cameras are exposed to very bright light
R if the area is lit by fluorescent lamps or LED
lighting (the display may flicker)
R if there is a sudden change in temperature,
e.g. when driving into a heated garage in win- ter
R if the camera lenses are dirty or covered
R if the vehicle components in which the cam-
eras are fitted are damaged: In this event,
have the camera position and setting checked at a qualified specialist workshop
Do not use the 360° camera under such cir-
cumstances. You could otherwise injure others
or damage objects when parking the vehicle.
Activation conditions The 360° camera image can be displayed if:
R your vehicle is equipped with a 360° camera
R COMAND Online is switched on; see the sep-
arate COMAND Online operating instructions
R the 360° camera 360° camera function is activated Activating the 360° camera using the
SYS button X
Press the Wbutton for longer than 2 sec-
onds; see the separate COMAND Online oper-
ating instructions.
The following appears depending on whether
gear hork is selected:
R full-screen view with image from the front
camera
R full-screen view with image from the revers-
ing camera
Activating the 360° camera using
COMAND Online X
Press the Wbutton, see the separate
COMAND Online operating Instructions.
X Select System System by turning cVdthe COMAND
controller and press Wto confirm.
X Select 360°
360°camera
camera and press Wto confirm.
The following appears depending on whether
gear hork is selected:
R a split screen with top view and the image
from the front camera or
R a split screen with top view and the image
from the rear view camera
For further information on the COMAND con-
troller; see the separate COMAND Online oper-
ating instructions.
Switching on the 360° camera using
reverse gear You can show images from the 360° camera
automatically by engaging reverse gear.
X Make sure that the key is in position 2in the
ignition lock.
X Make sure that the Activation by R gear Activation by R gear
setting is active in COMAND Online, see the
separate COMAND Online operating instruc-
tions.
X To show the 360° camera image: engage
reverse gear.
The area behind the vehicle is shown in the
COMAND display in split-screen mode:
R vehicle with guide lines
R top view of the vehicle Driving systems
205Driving and parking Z
Page 210 of 369
Sensitive
Sensitive
selected: the sensitivity is set
higher. The attention level detected by ATTEN-
TION ASSIST is adapted accordingly and the
driver is warned earlier.
When ATTENTION ASSIST is deactivated, the
é symbol appears in the multifunction dis-
play in the assistance graphic display.
When ATTENTION ASSIST has been deactivated, it is automatically reactivated after the engine
has been switched off. The sensitivity selected
corresponds to the last selection activated
(standard/sensitive).
Warning on the multifunction display If fatigue or increasing lapses in concentration
are detected, a warning appears in the multi-
function display: ATTENTION ASSIST
ATTENTION ASSIST Take a Take a
break! break!
In addition to the message shown on the multi-
function display, you will then hear a warning
tone.
X If necessary, take a break.
X Confirm the message by pressing the a
button on the steering wheel.
On long journeys, take regular breaks that allow for adequate refreshment. If you do not take a
break and ATTENTION ASSIST still detects
increasing lapses in concentration, you will be
warned again after 15 minutes at the earliest.
This will happen only if ATTENTION ASSIST still
detects typical indicators of fatigue or increas-
ing lapses in concentration.
Vehicles with multimedia system COMAND
Online: if a warning is output in the multifunc-
tion display, a service station search is per-
formed in the multimedia system. You can
select a service station and you will then be
navigated to this service station. This function
can be activated or deactivated in the multime- dia system; see Digital Owner's Manual. Traffic Sign Assist
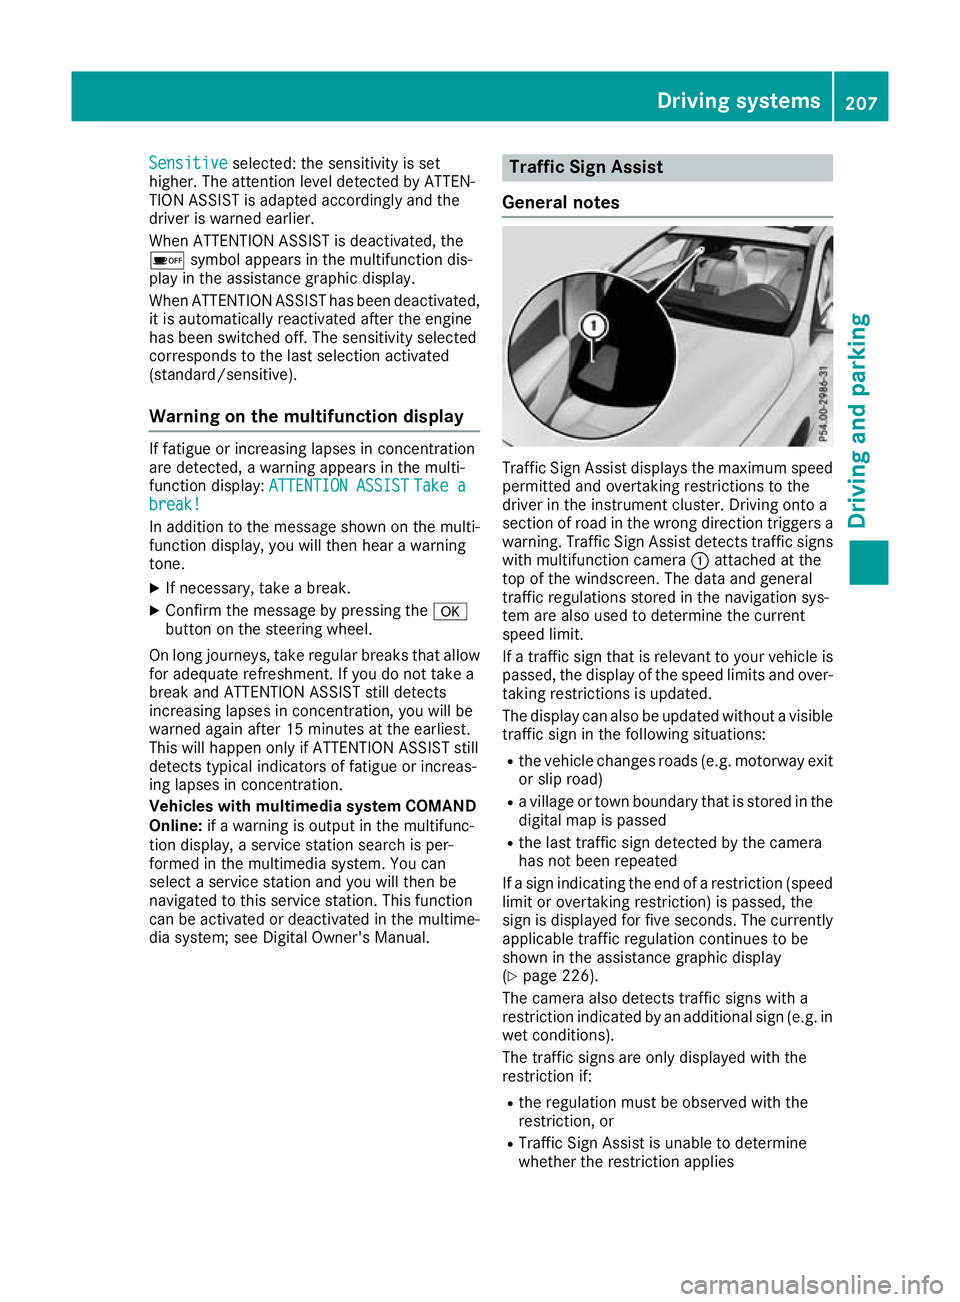
General notes Traffic Sign Assist displays the maximum speed
permitted and overtaking restrictions to the
driver in the instrument cluster. Driving onto a
section of road in the wrong direction triggers a
warning. Traffic Sign Assist detects traffic signs with multifunction camera :attached at the
top of the windscreen. The data and general
traffic regulations stored in the navigation sys-
tem are also used to determine the current
speed limit.
If a traffic sign that is relevant to your vehicle is passed, the display of the speed limits and over-
taking restrictions is updated.
The display can also be updated without a visible traffic sign in the following situations:
R the vehicle changes roads (e.g. motorway exit
or slip road)
R a village or town boundary that is stored in the
digital map is passed
R the last traffic sign detected by the camera
has not been repeated
If a sign indicating the end of a restriction (speed limit or overtaking restriction) is passed, the
sign is displayed for five seconds. The currently
applicable traffic regulation continues to be
shown in the assistance graphic display
(Y page 226).
The camera also detects traffic signs with a
restriction indicated by an additional sign (e.g. in
wet conditions).
The traffic signs are only displayed with the
restriction if:
R the regulation must be observed with the
restriction, or
R Traffic Sign Assist is unable to determine
whether the restriction applies Driving systems
207Driving and parking Z
Page 212 of 369
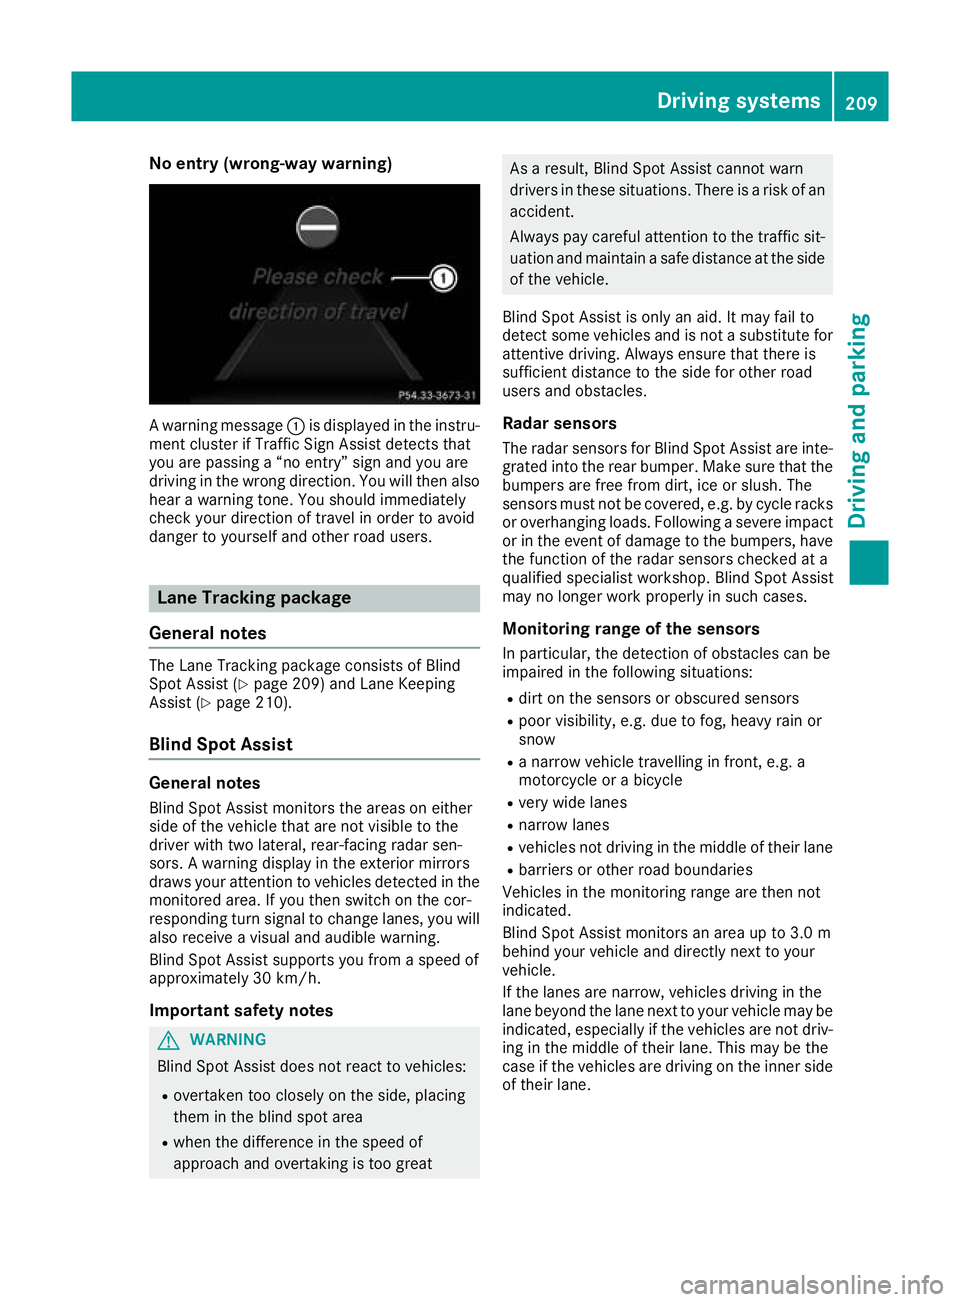
No entry (wrong-way warning)
A warning message
:is displayed in the instru-
ment cluster if Traffic Sign Assist detects that
you are passing a “no entry” sign and you are
driving in the wrong direction. You will then also hear a warning tone. You should immediately
check your direction of travel in order to avoid
danger to yourself and other road users. Lane Tracking package
General notes The Lane Tracking package consists of Blind
Spot Assist (Y
page 209) and Lane Keeping
Assist (Y page 210).
Blind Spot Assist General notes
Blind Spot Assist monitors the areas on either
side of the vehicle that are not visible to the
driver with two lateral, rear-facing radar sen-
sors. A warning display in the exterior mirrors
draws your attention to vehicles detected in the
monitored area. If you then switch on the cor-
responding turn signal to change lanes, you will also receive a visual and audible warning.
Blind Spot Assist supports you from a speed of
approximately 30 km/h.
Important safety notes G
WARNING
Blind Spot Assist does not react to vehicles:
R overtaken too closely on the side, placing
them in the blind spot area
R when the difference in the speed of
approach and overtaking is too great As a result, Blind Spot Assist cannot warn
drivers in these situations. There is a risk of an
accident.
Always pay careful attention to the traffic sit- uation and maintain a safe distance at the side
of the vehicle.
Blind Spot Assist is only an aid. It may fail to
detect some vehicles and is not a substitute for attentive driving. Always ensure that there is
sufficient distance to the side for other road
users and obstacles.
Radar sensors The radar sensors for Blind Spot Assist are inte-
grated into the rear bumper. Make sure that the bumpers are free from dirt, ice or slush. The
sensors must not be covered, e.g. by cycle racks
or overhanging loads. Following a severe impact
or in the event of damage to the bumpers, have the function of the radar sensors checked at a
qualified specialist workshop. Blind Spot Assist
may no longer work properly in such cases.
Monitoring range of the sensors
In particular, the detection of obstacles can be
impaired in the following situations:
R dirt on the sensors or obscured sensors
R poor visibility, e.g. due to fog, heavy rain or
snow
R a narrow vehicle travelling in front, e.g. a
motorcycle or a bicycle
R very wide lanes
R narrow lanes
R vehicles not driving in the middle of their lane
R barriers or other road boundaries
Vehicles in the monitoring range are then not
indicated.
Blind Spot Assist monitors an area up to 3.0 m
behind your vehicle and directly next to your
vehicle.
If the lanes are narrow, vehicles driving in the
lane beyond the lane next to your vehicle may be
indicated, especially if the vehicles are not driv-
ing in the middle of their lane. This may be the
case if the vehicles are driving on the inner side of their lane. Driving systems
209Driving and parking Z
Page 213 of 369
Due to the nature of the system:
R warnings may be issued in error when driving
close to crash barriers or similar solid boun-
daries
R warnings may be interrupted when you are
driving alongside particularly long vehicles,
such as lorries, for a prolonged time
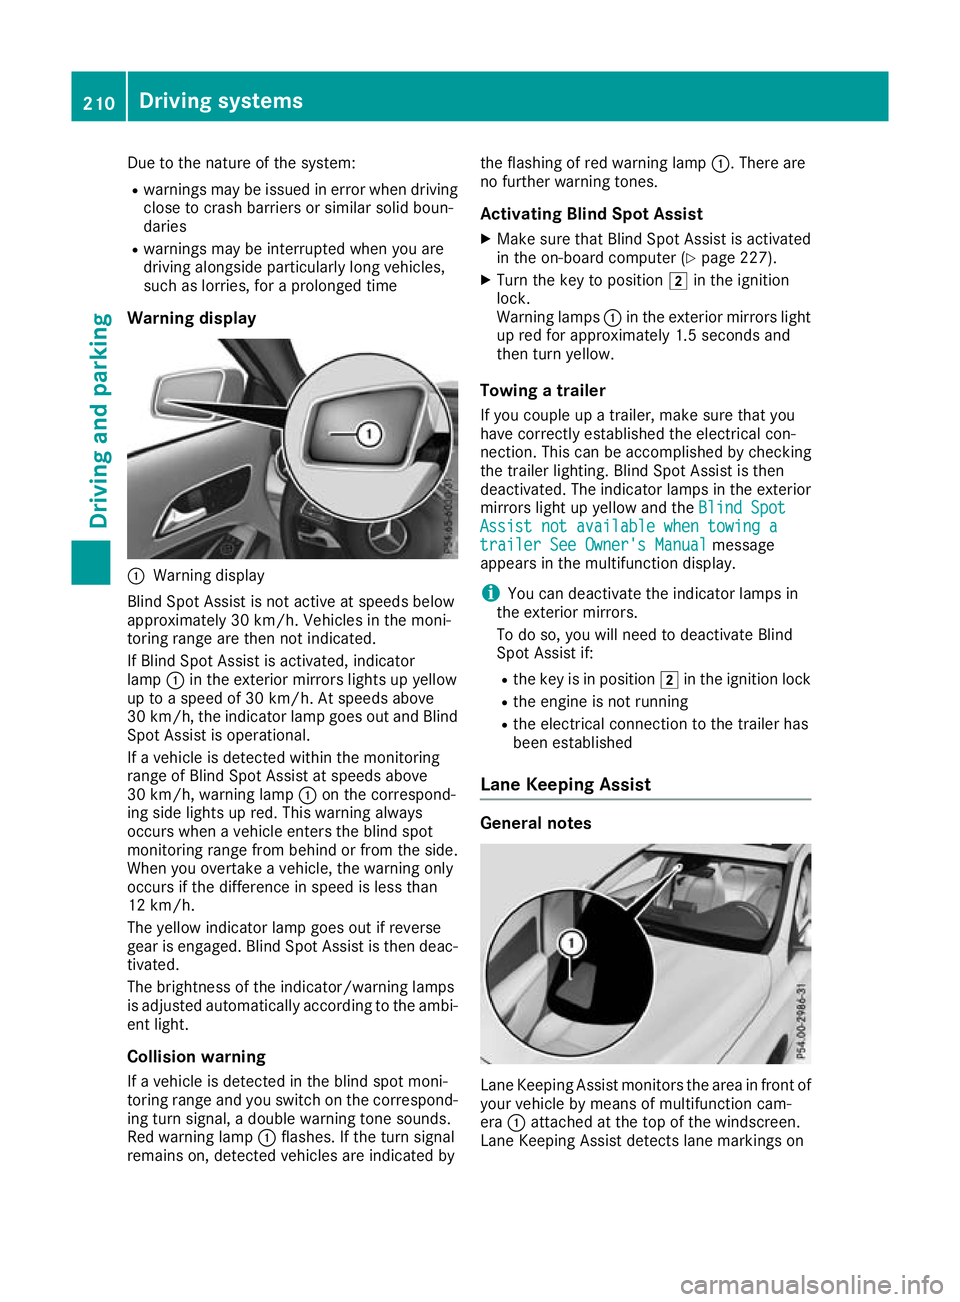
Warning display :
Warning display
Blind Spot Assist is not active at speeds below
approximately 30 km/h. Vehicles in the moni-
toring range are then not indicated.
If Blind Spot Assist is activated, indicator
lamp :in the exterior mirrors lights up yellow
up to a speed of 30 km/h. At speeds above
30 km/h, the indicator lamp goes out and Blind
Spot Assist is operational.
If a vehicle is detected within the monitoring
range of Blind Spot Assist at speeds above
30 km/h, warning lamp :on the correspond-
ing side lights up red. This warning always
occurs when a vehicle enters the blind spot
monitoring range from behind or from the side.
When you overtake a vehicle, the warning only
occurs if the difference in speed is less than
12 km/h.
The yellow indicator lamp goes out if reverse
gear is engaged. Blind Spot Assist is then deac- tivated.
The brightness of the indicator/warning lamps
is adjusted automatically according to the ambi-
ent light.
Collision warning
If a vehicle is detected in the blind spot moni-
toring range and you switch on the correspond-
ing turn signal, a double warning tone sounds.
Red warning lamp :flashes. If the turn signal
remains on, detected vehicles are indicated by the flashing of red warning lamp
:. There are
no further warning tones.
Activating Blind Spot Assist X Make sure that Blind Spot Assist is activated
in the on-board computer (Y page 227).
X Turn the key to position 2in the ignition
lock.
Warning lamps :in the exterior mirrors light
up red for approximately 1.5 second s and
then turn yellow.
Towing a trailer
If you couple up a trailer, make sure that you
have correctly established the electrical con-
nection. This can be accomplished by checking
the trailer lighting. Blind Spot Assist is then
deactivated. The indicator lamps in the exterior
mirrors light up yellow and the Blind Spot
Blind Spot
Assist not available when towing a Assist not available when towing a
trailer See Owner's Manual trailer See Owner's Manual message
appears in the multifunction display.
i You can deactivate the indicator lamps in
the exterior mirrors.
To do so, you will need to deactivate Blind
Spot Assist if:
R the key is in position 2in the ignition lock
R the engine is not running
R the electrical connection to the trailer has
been established
Lane Keeping Assist General notes
Lane Keeping Assist monitors the area in front of
your vehicle by means of multifunction cam-
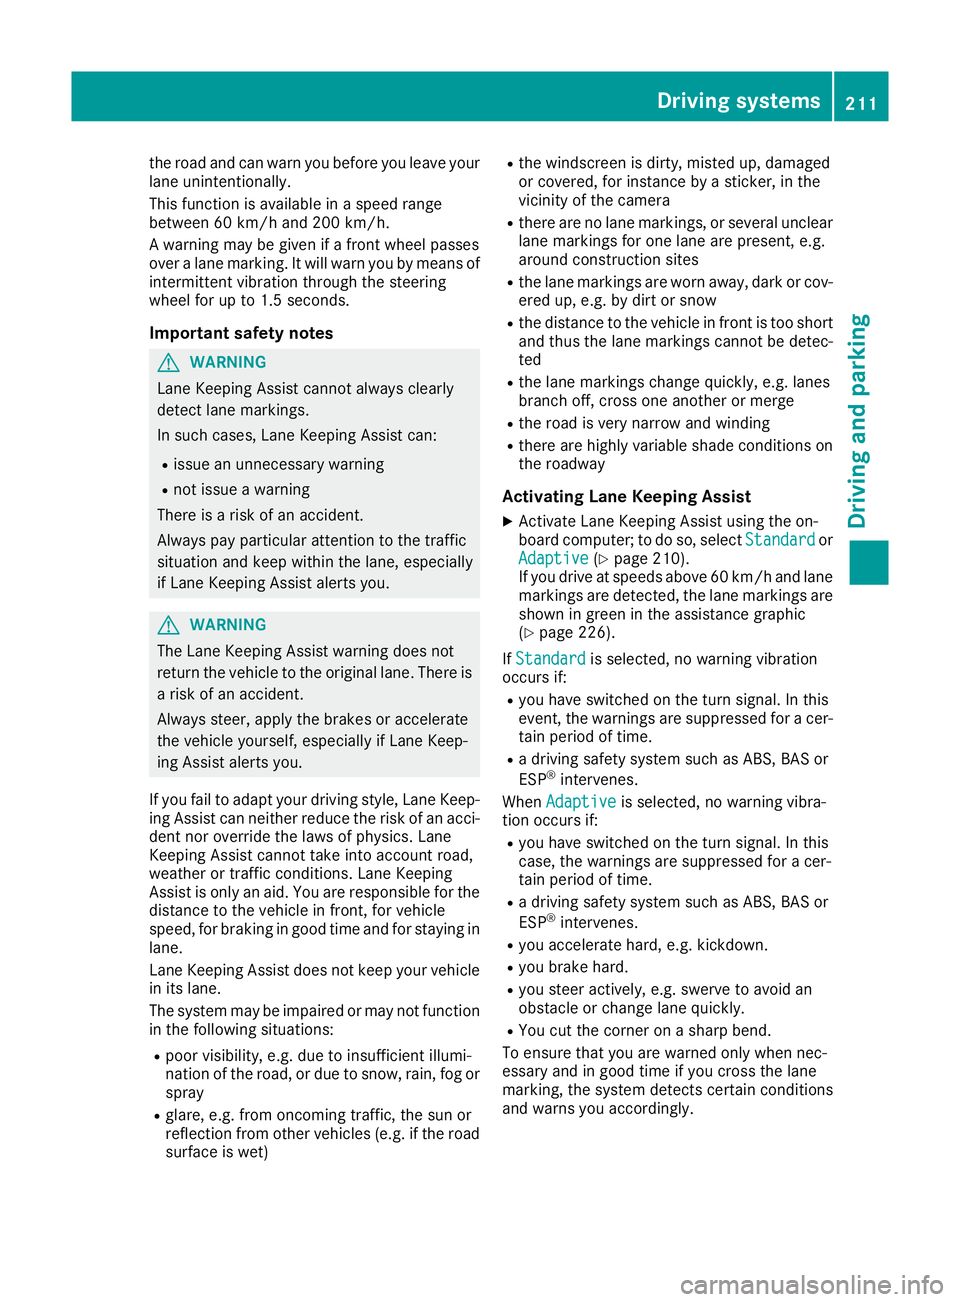
era :attached at the top of the windscreen.
Lane Keeping Assist detects lane markings on 210
Driving systemsDriving an
d parking
Page 214 of 369
the road and can warn you before you leave your
lane unintentionally.
This function is available in a speed range
between 60 km/h and 200 km/h.
A warning may be given if a front wheel passes
over a lane marking. It will warn you by means of intermittent vibration through the steering
wheel for up to 1.5 second s.
Im portant safety notes G
WARNING
Lane Keeping Assist cannot always clearly
detect lane markings.
In such cases, Lane Keeping Assist can:
R issue an unnecessary warning
R not issue a warning
There is a risk of an accident.
Always pay particular attention to the traffic
situation and keep within the lane, especially
if Lane Keeping Assist alerts you. G
WARNING
The Lane Keeping Assist warning does not
return the vehicle to the original lane. There is a risk of an accident.
Always steer, apply the brakes or accelerate
the vehicle yourself, especially if Lane Keep-
ing Assist alerts you.
If you fail to adapt your driving style, Lane Keep-
ing Assist can neither reduce the risk of an acci-
dent nor override the laws of physics. Lane
Keeping Assist cannot take into account road,
weather or traffic conditions. Lane Keeping
Assist is only an aid. You are responsible for the distance to the vehicle in front, for vehicle
speed, for braking in good time and for staying in
lane.
Lane Keeping Assist does not keep your vehicle
in its lane.
The system may be impaired or may not function in the following situations:
R poor visibility, e.g. due to insufficient illumi-
nation of the road, or due to snow, rain, fog or
spray
R glare, e.g. from oncoming traffic, the sun or
reflection from other vehicles (e.g. if the road
surface is wet) R
the windscreen is dirty, misted up, damaged
or covered, for instance by a sticker, in the
vicinity of the camera
R there are no lane markings, or several unclear
lane markings for one lane are present, e.g.
around construction sites
R the lane markings are worn away, dark or cov-
ered up, e.g. by dirt or snow
R the distance to the vehicle in front is too short
and thus the lane markings cannot be detec-
ted
R the lane markings change quickly, e.g. lanes
branch off, cross one another or merge
R the road is very narrow and winding
R there are highly variable shade conditions on
the roadway
Activating Lane Keeping Assist X Activate Lane Keeping Assist using the on-
board computer; to do so, select Standard
Standard or
Adaptive Adaptive (Ypage 210).
If you drive at speeds above 60 km/h and lane
markings are detected, the lane markings are
shown in green in the assistance graphic
(Y page 226).
If Standard Standard is selected, no warning vibration
occurs if:
R you have switched on the turn signal. In this
event, the warnings are suppressed for a cer-
tain period of time.
R a driving safety system such as ABS, BAS or
ESP ®
intervenes.
When Adaptive Adaptive is selected, no warning vibra-
tion occurs if:
R you have switched on the turn signal. In this
case, the warnings are suppressed for a cer-
tain period of time.
R a driving safety system such as ABS, BAS or
ESP ®
intervenes.
R you accelerate hard, e.g. kickdown.
R you brake hard.
R you steer actively, e.g. swerve to avoid an
obstacle or change lane quickly.
R You cut the corner on a sharp bend.
To ensure that you are warned only when nec-
essary and in good time if you cross the lane
marking, the system detects certain conditions
and warns you accordingly. Driving systems
211Driving and parking Z
Page 216 of 369
Only release the ball coupling if the pivoting
range is unobstructed. Always make sure that the ball coupling engages when folding in.
When reversing the towing vehicle, make sure
there is nobody between the trailer and the vehi- cle.
Couple and uncouple the trailer carefully. If youdo not couple the trailer to the towing vehicle
correctly, the trailer could become detached.
When towing a trailer, your vehicle's handling
characteristics will be different to when driving
without a trailer.
The vehicle/trailer combination:
R is heavier
R is restricted in its acceleration and gradient-
climbing capability
R has an increased braking distance
R is affected more by strong crosswinds
R demands more sensitive steering
R has a larger turning circle
This can impair the vehicle's handling charac-
teristics. Adapt your driving style accordingly.
Maintain a safe distance. Drive carefully.
When towing a trailer, always adjust your speed to the current road and weather conditions. Do
not exceed the maximum permissible speed for
your vehicle/trailer combination. Notes on towing a trailer
General notes Trailer towing is not possible on the following
models:
R Mercedes‑AMG GLA 45 4MATIC
Items of optional equipment may influence the
effective trailer loads for the vehicle. Please find the applicable trailer loads for your vehicle on
the registration certificate.
When towing a trailer, set the tyre pressure on
the rear axle of the towing vehicle for a maxi-
mum load. Further information on the tyre pres-
sure table in the fuel filler flap (Y page 337).
Please note that when towing a trailer, the fol-
lowing driving systems have limited availability
or are not available at all:
R Parking Assist PARKTRONIC (Y page 193)
R Blind Spot Assist (Y page 209) The height of the ball coupling changes with the
load of the vehicle. If necessary, use a trailer
with a height-adjustable drawbar.
You will find fitting dimensions and loads under"Technical data" (Y page 359).
Driving tips Observe the information on ESP
®
trailer stabili-
sation (Y page 75).
The maximum permissible speed for vehicle/
trailer combinations depends on the type of
trailer. Before beginning the journey, check the
trailer's documents to see what the maximum
permitted speed is. Observe the legally prescri-
bed maximum speed in the relevant country.
For certain Mercedes-Benz vehicles, the maxi-
mum permissible rear axle load is increased
when towing a trailer. See the "Technical data"
section to find out whether this applies to your
vehicle. If when towing, the rear axle load is
increased even partly, the vehicle/trailer com-
bination may not exceed a maximum speed of
100 km/h for reasons concerning the operating
permit. This also applies in countries in which
the permissible maximum speed for vehicle/
trailer combinations is above 100 km/h.
When towing a trailer, your vehicle's handling
characteristics will be different to when driving
without a trailer and the vehicle will consume
more fuel.
Shift to a lower gear in good time on long and
steep downhill gradients. For vehicles with auto-
matic transmission, you need to have selected
manual drive program M(Y page 161).
This also applies if you have activated cruise
control, the speed limiter or Distance Pilot
DISTRONIC.
This will use the braking effect of the engine, so less braking will be required to maintain the
vehicle speed. This relieves the load on the
brake system and prevents the brakes from
overheating and wearing too quickly. If you need
additional braking, depress the brake pedal
repeatedly rather than continuously.
Briefly depressing the accelerator pedal on
downhill gradients while the manual drive pro-
gram Mis temporarily activated (vehicles with
automatic transmission): the automatic trans-
mission may switch back to the last active auto-
matic drive program Eor S. The automatic trans-
mission may shift to a higher gear. This can
reduce the engine's braking effect. Towing a trailer
213Driving and parking Z