2017 MERCEDES-BENZ GLA SUV service indicator
[x] Cancel search: service indicatorPage 18 of 369
Switching on/of
f........................... 118
Manual transmission
Drive program ................................ 154
DYNAMIC SELECT button .............. 151
Engaging reverse gear ................... 153
Gear lever ...................................... 153
Pulling away ................................... 146
Shift recommendation ................... 154
Shifting to neutral .......................... 153
Starting the engine ........................ 146
Matt finish (cleaning instructions) .. 309
Memory card (audio) ......................... 224
Memory function ............................... 115
Mercedes-Benz emergency call
system
Switch in the overhead control
panel .............................................. 299
Mercedes-Benz Intelligent Drive
Traffic Sign Assist .......................... 207
Mercedes-Benz Service Centre
see Qualified specialist workshop
Message memory (on-board com-
puter) .................................................. 234
Messages
see Display messages
Mirror turn signal
Cleaning ......................................... 311
Mirrors
see Exterior mirrors
see Rear-view mirror
see Vanity mirror (in sun visor)
Mobile phone
Connecting (Bluetooth ®
inter-
face) .............................................. 280
Connecting (device manager) ........ 282
Connecting the telephone module
with Bluetooth ®
(SAP profile) ......... 284
Frequencies ................................... 350
Installation ..................................... 350
Menu (on-board computer) ............ 225
Notes/placing in the bracket ......... 300
Transmission output (maximum) .... 350
Mobile telephone
Pre-installed bracket ...................... 301
Model type
see Vehicle identification plate
Modifying the programming (key) ..... 81MOExtended tyres
............................. 318
MP3
Operating ....................................... 224
See also Digital Owner's Manua l... 277
Multifunction display
Function/note s............................. 220
Permanent display ......................... 229
Multifunction steering wheel
Operating the on-board compute r..2 18
Overview .......................................... 35
Multimedia system
Switching on and off ..................... .278
Music files
See also Digital Owner's Manual ... 277 N
Navigation Entering a destination .................... 279
Menu (on-board computer) ............ 222
See also Digital Owner's Manual ... 277
Notes on running in a new vehicle .. 143 O
Occupant safety Airbags ............................................ 46
Automatic front-passenger front
airbag deactivatio n.......................... 49
Automatic measures after an acci-
dent ................................................. 56
Belt warning ..................................... 46
Children in the vehicle ..................... 56
Important safety notes .................... 41
PASSENGER AIRBAG indicator
lamp ................................................. 42
Pets in the vehicle ........................... 67
PRE-SAFE ®
(anticipatory occu-
pant protection) ............................... 55
Restraint system introduction .......... 41
Restraint system warning lamp ........ 42
Seat belts ........................................ 43
Odometer ........................................... 221
Off-road driving
Approach/departure angle ............ 359
Checklist after driving off-road ...... 174
Checklist before driving off-road .... 174
General information ....................... 173 Index
15
Page 22 of 369
Folding the backrest (rear com-
partment) forwards/back .............. 292
Seat belt
Correct usage .................................. 44
Switching belt adjustment on/off
(on-board computer) ...................... 231
Seat belts
Adjusting the driver's and front-
passenger seat bel t......................... 45
Adjusting the height ......................... 45
Cleaning ......................................... 313
Display message ............................ 242
Fastening ......................................... 45
Important safety guidelines ............. 43
Introduction ..................................... 43
Rear seat belt status indicator ......... 46
Releasing ......................................... 45
Warning lamp ................................. 265
Warning lamp (function) ................... 46
Seats
Adjusting (electrically) ................... 108
Adjusting (manually) ...................... 107
Adjusting the 4-way lumbar sup-
port ................................................ 110
Adjusting the head restraint .......... 108
Cleaning the cover ......................... 313
Important safety notes .................. 106
Seat heating problem .................... 111
Storing settings (memory func-
tion) ............................................... 115
Switching seat heating on/of f....... 110
Securing a load .................................. 293
Securing luggage ............................... 293
Selecting a gear
see Automatic transmission
Selector lever
Cleaning ......................................... 313
Sensors (cleaning instructions) ....... 311
Service Centre
see Qualified specialist workshop
Service menu (on-board com-
puter) .................................................. 228
Service message
see ASSYST PLUS
Service products
Brake fluid ..................................... 356
Coolant (engine) ............................ 356
Engine oil ....................................... 355 Fuel ................................................ 352
Important safety notes .................. 352
Washer fluid ................................... 357
Setting a speed
see Cruise control
Setting the air distribution ............... 133
Setting the airflow ............................ 134
Setting the date/time format
See also Digital Owner's Manua l... 277
Setting the language
See also Digital Owner's Manua l... 277
Setting the time
See also Digital Owner's Manua l... 277
Settings
Factory (on-board computer) ......... 231
On-board computer ....................... 228
SETUP (on-board computer,
Mercedes-AMG vehicles) .................. 232
Shifting to neutral (manual trans-
mission) ............................................. 153
Side lamps
Switching on/of f........................... 117
Side windows
Convenience closing ........................ 99
Convenience opening ...................... 98
Important safety notes .................... 97
Opening/closing .............................. 98
Problem (malfunction) ................... 100
Resetting ....................................... 100
Reversing feature ............................. 98
Sidebag ................................................ 48
SIM card
Inserting ........................................ 284
Sliding sunroof
see Panorama sliding sunroof
SMS
See also Digital Owner's Manua l... 277
Snow chains ...................................... 337
Socket
Luggage compartment ................... 299
Sockets
Centre console .............................. 299
General notes ................................ 299
Rear compartment ......................... 299
Sound
Switching on/of f........................... 278 Index
19
Page 55 of 369
you use a Mercedes-Benz Service Centre for this
purpose.
If the front-passenger seat, the seat cover or the
seat cushion are damaged, have the necessary
repair work carried out at a qualified specialist
workshop. Mercedes-Benz recommends that
you use a Mercedes-Benz Service Centre for this purpose.
For safety reasons, Mercedes-Benz recom-
mends that you use only a child restraint system
that has been tested and approved by
Mercedes-Benz in combination with the auto-
matic front-passenger front airbag deactivation
system.
System self-test G
DANGER
If both the PASSENGER AIR BAG OFF and
PASSENGER AIR BAG ON indicator lamps do
not light up during the system self-test, the
system is malfunctioning. The front-
passenger front airbag might be triggered
unintentionally or might not be triggered at all in the event of an accident with high deceler-
ation. This poses an increased risk of injury or even fatal injury.
In this case the front-passenger seat may notbe used. Do not install a child restraint system
on the front-passenger seat. Have the auto-
matic front-passenger front airbag deactiva-
tion system checked and repaired immedi-
ately at a qualified specialist workshop. G
WARNING
If the PASSENGER AIRBAG OFF indicator lamp remains lit after the system self-test, the
front-passenger front airbag is disabled. It will not be deployed in the event of an accident. In
this case, the front-passenger front airbag
cannot perform its intended protective func-
tion, e.g. when a person is seated in the front- passenger seat.
That person could, for example, come into
contact with the vehicle's interior, especially
if the person is sitting too close to the dash-
board. This poses an increased risk of injury or even fatal injury. When the front-passenger seat is occupied,
always ensure that:
R the classification of the person in the front-
passenger seat is correct and the front-
passenger front airbag is enabled or disa-
bled in accordance with the person in the
front-passenger seat.
R the person is seated properly with a cor-
rectly fastened seat belt.
R the front-passenger seat has been moved
as far back as possible.
If the PASSENGER AIR BAG OFF indicator
lamp remains lit when it should not, the front-
passenger seat may not be used. Do not
install a child restraint system on the front-
passenger seat. Have the automatic front-
passenger front airbag deactivation system
checked and repaired immediately at a quali-
fied specialist workshop. G
WARNING
Objects between the seat surface and the
child restraint system could affect the func-
tion of the automatic front-passenger front
airbag deactivation system. This could result
in the front-passenger front airbag not func-
tioning as intended during an accident. This
poses an increased risk of injury or even fatal injury.
Do not place any objects between the seat
surface and the child restraint system. The
entire base of the child restraint system must always rest on the seat cushion of the front-
passenger seat. The backrest of the forwards-
facing child restraint system must, as far as
possible, be resting on the backrest of the
rear reclining seat. Always comply with the
child restraint system manufacturer's instal-
lation instructions.
After the system self-test, the PASSENGER AIR
BAG OFF or PASSENGER AIR BAG ON indicator
lamp displays the status of the front-passenger
front airbag (Y page 49). If the front-passenger
front airbag is enabled, the PASSENGER AIR
BAG ON indicator lamp lights up for 60 seconds and then goes out. 52
Occupant safetySafety
Page 129 of 369
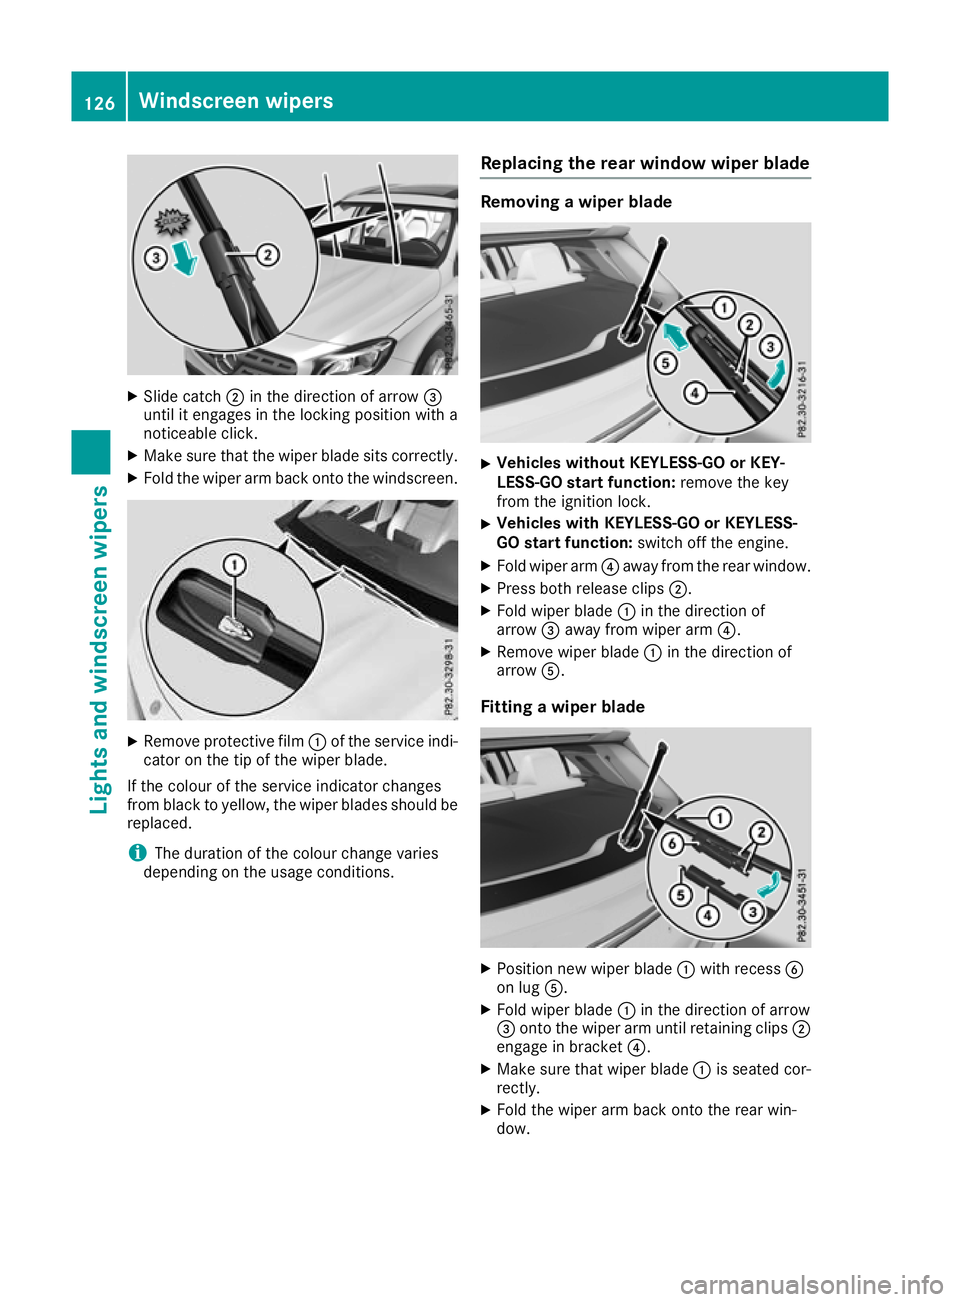
X
Slide catch ;in the direction of arrow =
until it engages in the locking position with a
noticeable click.
X Make sure that the wiper blade sits correctly.
X Fold the wiper arm back onto the windscreen. X
Remove protective film :of the service indi-
cator on the tip of the wiper blade.
If the colour of the service indicator changes
from black to yellow, the wiper blades should be replaced.
i The duration of the colour change varies
depending on the usage conditions. Replacing the rear window wiper blade Removing a wiper blade
X
Vehicles without KEYLESS-GO or KEY-
LESS-GO start function: remove the key
from the ignition lock.
X Vehicles with KEYLESS-GO or KEYLESS-
GO start function: switch off the engine.
X Fold wiper arm ?away from the rear window.
X Press both release clips ;.
X Fold wiper blade :in the direction of
arrow =away from wiper arm ?.
X Remove wiper blade :in the direction of
arrow A.
Fitting a wiper blade X
Position new wiper blade :with recess B
on lug A.
X Fold wiper blade :in the direction of arrow
= onto the wiper arm until retaining clips ;
engage in bracket ?.
X Make sure that wiper blade :is seated cor-
rectly.
X Fold the wiper arm back onto the rear win-
dow. 126
Windscreen wipersLights and windscreen wipers
Page 172 of 369
If your seat belt is not fastened, the following
conditions must be fulfilled for the electric park- ing brake to be released automatically:
R the driver's door is closed
R you are shifting from transmission position
j or have previously driven at speeds
greater than 3 km/h
Ensure that you do not depress the accelerator
pedal unintentionally. Otherwise, the parking
brake will be released and the vehicle will start
to move.
Emergency braking The vehicle can also be braked during an emer-
gency by using the electric parking brake.
X While the vehicle is in motion, push handle :
of the electric parking brake (Y page 168).
The vehicle is braked as long as you keep
handle :of the electric parking brake
pressed. The longer the electric parking brake
handle :is depressed, the greater the brak-
ing force.
During braking:
R a warning tone sounds
R the Release parking brake
Release parking brake message
appears
R the red !indicator lamp in the instrument
cluster flashes
When the vehicle has been braked to a stand-
still, the electric parking brake is applied. Parking up the vehicle
If you leave the vehicle parked up for longer than
four weeks, the battery may be damaged by
exhaustive discharging.
If you leave the vehicle parked up for longer than
six weeks, it may suffer from lack of use.
X Contact a qualified specialist workshop and
seek advice.
i You can obtain information on trickle charg-
ers from a qualified specialist workshop. Driving tips
General notes
Important safety notes G
WARNING
If you switch off the ignition while driving,
safety-relevant functions are only available
with limitations, or not at all. This could affect, for example, the power steering and the brake
boosting effect. You will require considerably
more effort to steer and brake. There is a risk of an accident.
Do not switch off the ignition while driving.
Drive sensibly – save fuel Observe the following tips to save fuel:
R The tyres should always be inflated to the rec-
ommended tyre pressure.
R Remove unnecessary loads.
R Remove roof racks when they are not needed.
R Warm up the engine at low engine speeds.
R Avoid frequent acceleration or braking.
R Have all maintenance work carried out as
indicated by the service intervals in the Ser-
vice Booklet or by the service interval display.
Fuel consumption also increases when driving in cold weather, in stop-start traffic, on short jour-
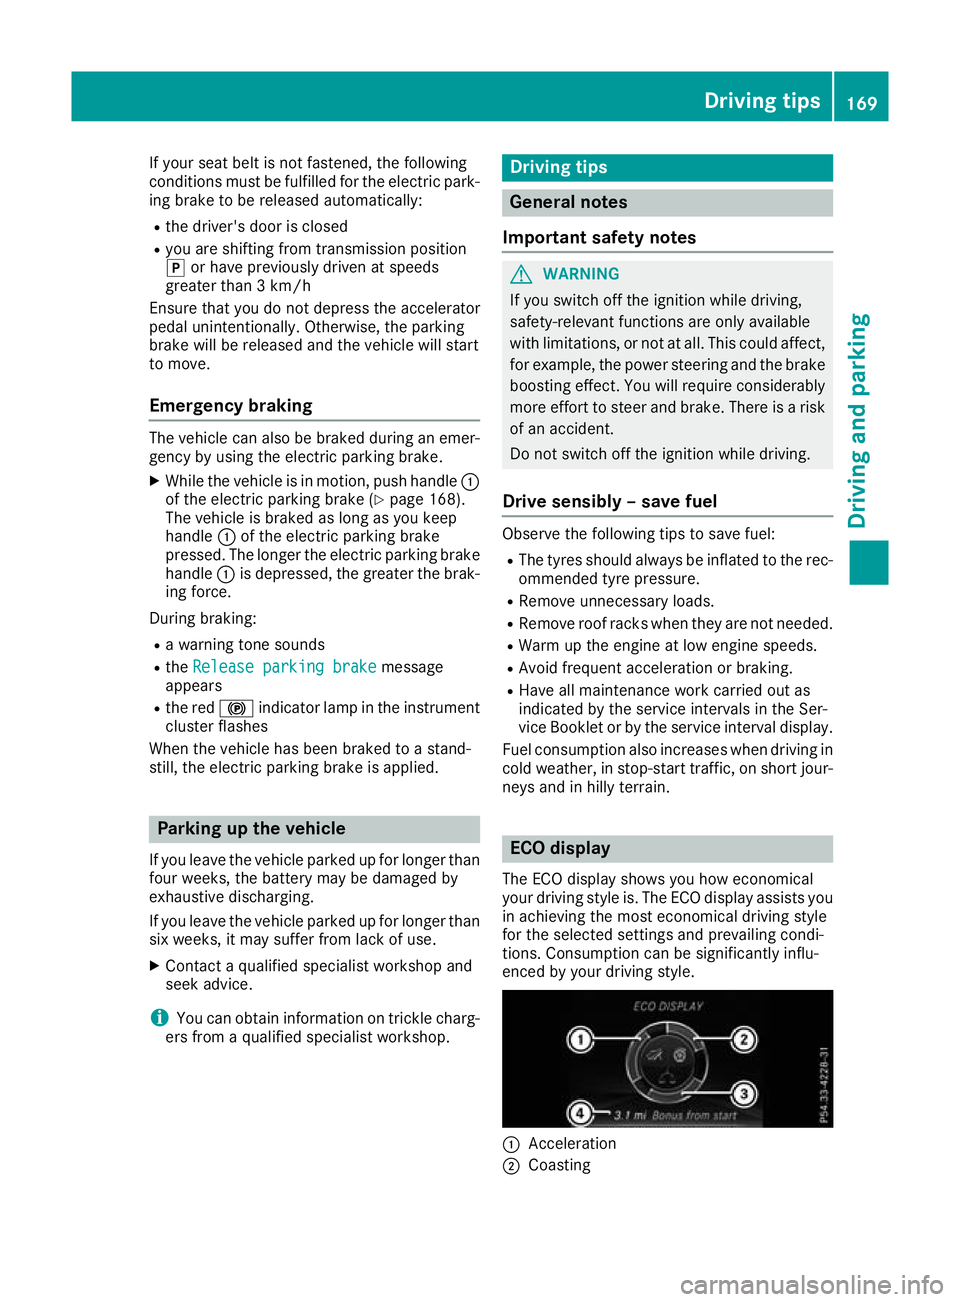
neys and in hilly terrain. ECO display
The ECO display shows you how economical
your driving style is. The ECO display assists you in achieving the most economical driving style
for the selected settings and prevailing condi-
tions. Consumption can be significantly influ-
enced by your driving style. :
Acceleration
; Coasting Driving tips
169Driving and parking Z
Page 210 of 369
Sensitive
Sensitive
selected: the sensitivity is set
higher. The attention level detected by ATTEN-
TION ASSIST is adapted accordingly and the
driver is warned earlier.
When ATTENTION ASSIST is deactivated, the
é symbol appears in the multifunction dis-
play in the assistance graphic display.
When ATTENTION ASSIST has been deactivated, it is automatically reactivated after the engine
has been switched off. The sensitivity selected
corresponds to the last selection activated
(standard/sensitive).
Warning on the multifunction display If fatigue or increasing lapses in concentration
are detected, a warning appears in the multi-
function display: ATTENTION ASSIST
ATTENTION ASSIST Take a Take a
break! break!
In addition to the message shown on the multi-
function display, you will then hear a warning
tone.
X If necessary, take a break.
X Confirm the message by pressing the a
button on the steering wheel.
On long journeys, take regular breaks that allow for adequate refreshment. If you do not take a
break and ATTENTION ASSIST still detects
increasing lapses in concentration, you will be
warned again after 15 minutes at the earliest.
This will happen only if ATTENTION ASSIST still
detects typical indicators of fatigue or increas-
ing lapses in concentration.
Vehicles with multimedia system COMAND
Online: if a warning is output in the multifunc-
tion display, a service station search is per-
formed in the multimedia system. You can
select a service station and you will then be
navigated to this service station. This function
can be activated or deactivated in the multime- dia system; see Digital Owner's Manual. Traffic Sign Assist
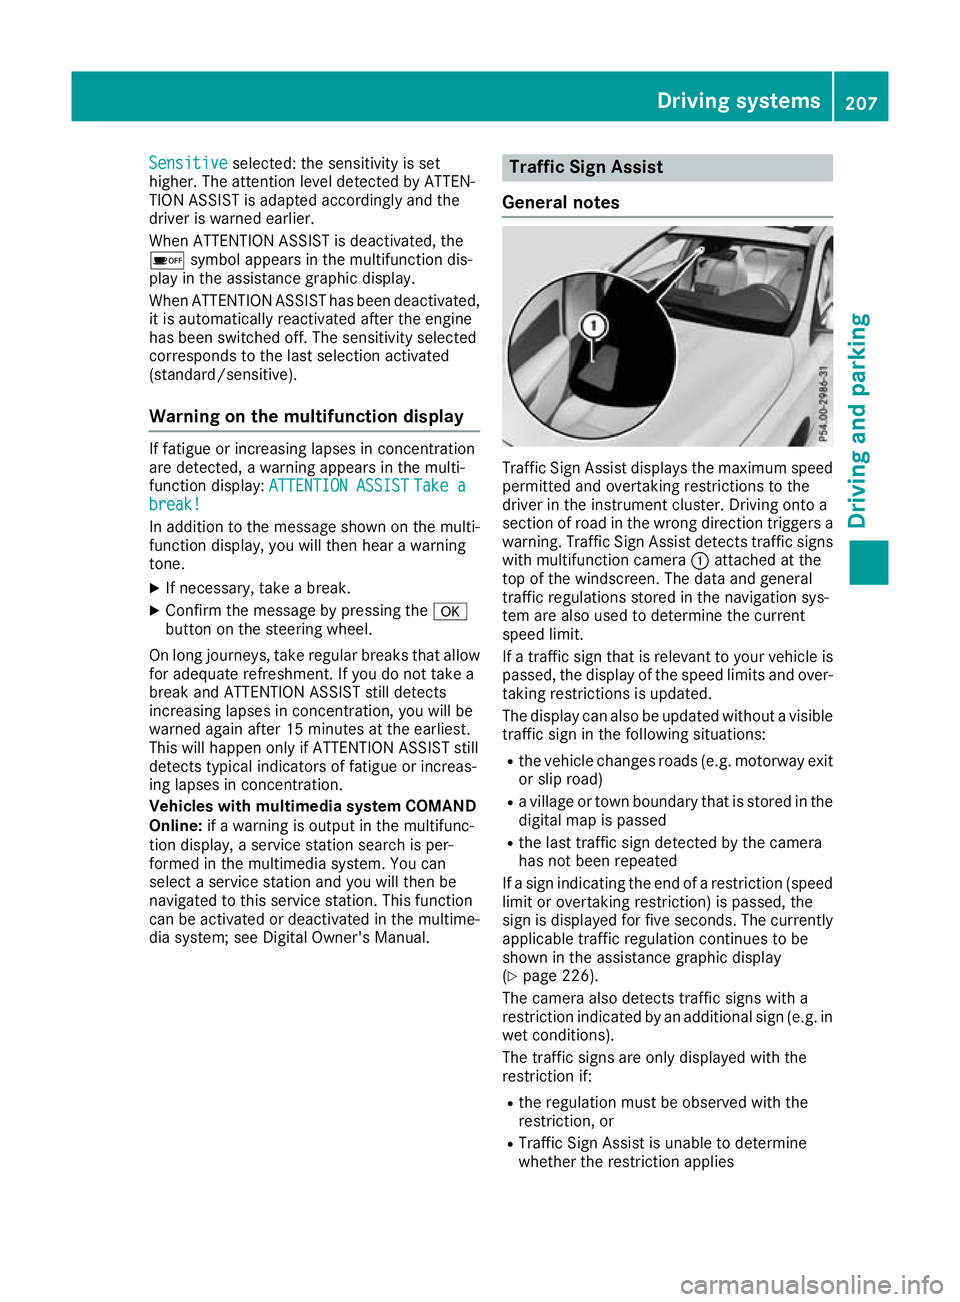
General notes Traffic Sign Assist displays the maximum speed
permitted and overtaking restrictions to the
driver in the instrument cluster. Driving onto a
section of road in the wrong direction triggers a
warning. Traffic Sign Assist detects traffic signs with multifunction camera :attached at the
top of the windscreen. The data and general
traffic regulations stored in the navigation sys-
tem are also used to determine the current
speed limit.
If a traffic sign that is relevant to your vehicle is passed, the display of the speed limits and over-
taking restrictions is updated.
The display can also be updated without a visible traffic sign in the following situations:
R the vehicle changes roads (e.g. motorway exit
or slip road)
R a village or town boundary that is stored in the
digital map is passed
R the last traffic sign detected by the camera
has not been repeated
If a sign indicating the end of a restriction (speed limit or overtaking restriction) is passed, the
sign is displayed for five seconds. The currently
applicable traffic regulation continues to be
shown in the assistance graphic display
(Y page 226).
The camera also detects traffic signs with a
restriction indicated by an additional sign (e.g. in
wet conditions).
The traffic signs are only displayed with the
restriction if:
R the regulation must be observed with the
restriction, or
R Traffic Sign Assist is unable to determine
whether the restriction applies Driving systems
207Driving and parking Z
Page 326 of 369
R
It is particularly important to observe the
described order when connecting and dis-
connecting the jump leads.
R Never connect or disconnect the battery
terminals while the engine is running. G
WARNING
Battery acid is caustic. There is a risk of injury. Avoid contact with the skin, eyes or clothing.
Do not breathe in any battery gases. Do not
lean over the battery. Keep the batteries out
of the reach of children. Immediately rinse off
battery acid thoroughly with plenty of clean
water and seek medical attention at once. H
Environmental note Batteries contain pollutants.
It is illegal to dispose of them with the household rubbish.
They must be collected sep-
arately and disposed of in anenvironmentally responsible
recycling system. Dispose of batteries in an
environmentally responsible
manner. Take discharged
batteries to a qualified spe-
cialist workshop or to a col-
lection point for used batter-
ies.
! Have the battery checked regularly at a
qualified specialist workshop.
Observe the service intervals in the Service
Booklet or contact a qualified specialist work- shop for more information.
! You should have all work involving the bat-
tery carried out at a qualified specialist work-
shop. In the exceptional case that it is neces-
sary for you to disconnect the battery your-
self, make sure that:
R you switch off the engine and remove the
key. On vehicles with KEYLESS-GO, ensure
that the ignition is switched off. Check that all the indicator lamps in the instrument
cluster are off. Otherwise, electronic com- ponents, such as the alternator, may be
damaged.
R you first remove the negative terminal
clamp and then the positive terminal
clamp. Never swap the terminal clamps.
Otherwise, the vehicle's electronic system
may be damaged.
R in vehicles with automatic transmission,
the transmission is locked in position P
after disconnecting the battery. The vehicle
is secured against rolling away. You can
then no longer move the vehicle.
The battery and the cover of the positive ter-
minal clamp must be fitted securely during
operation.
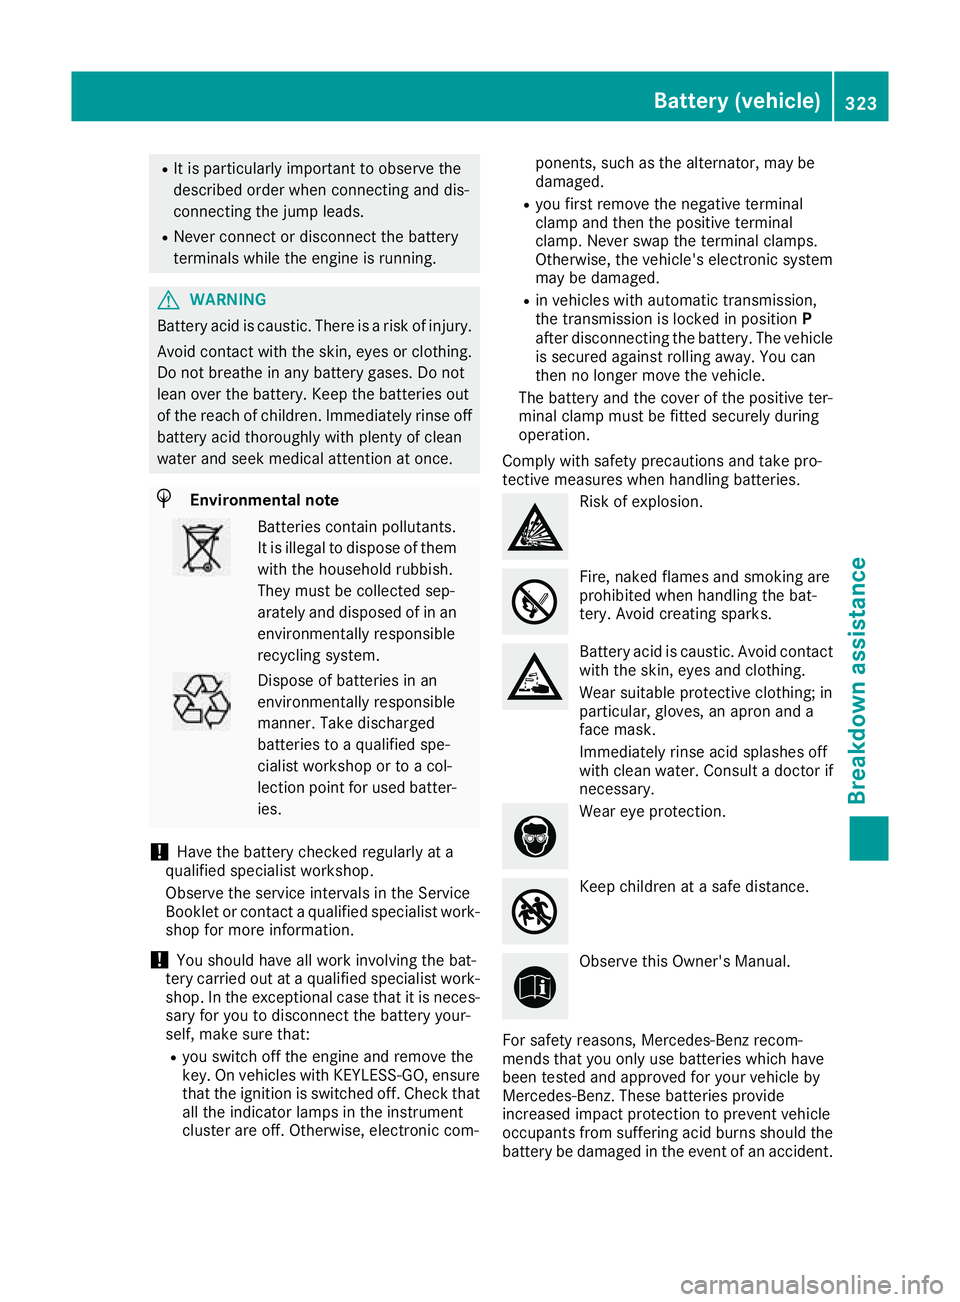
Comply with safety precautions and take pro-
tective measures when handling batteries. Risk of explosion.
Fire, naked flames and smoking are
prohibited when handling the bat-
tery. Avoid creating sparks. Battery acid is caustic. Avoid contact
with the skin, eyes and clothing.
Wear suitable protective clothing; in
particular, gloves, an apron and a
face mask.
Immediately rinse acid splashes off
with clean water. Consult a doctor if
necessary. Wear eye protection.
Keep children at a safe distance.
Observe this Owner's Manual.
For safety reasons, Mercedes-Benz recom-
mends that you only use batteries which have
been tested and approved for your vehicle by
Mercedes-Benz. These batteries provide
increased impact protection to prevent vehicle
occupants from suffering acid burns should the battery be damaged in the event of an accident. Battery (vehicle)
323Breakdown assistance Z
Page 327 of 369
In order for the battery to achieve the maximum
possible service life, it should always be suffi-
ciently charged.
Like other batteries, the vehicle battery may
discharge over time if you do not use the vehicle. In such cases, have the battery disconnected at
a qualified specialist workshop. However, you
can also charge the battery with a charger rec-
ommended by Mercedes-Benz. For more infor-
mation, please contact a qualified specialist
workshop.
Have the battery charge checked more fre-
quently if you use the vehicle mainly for short
trips or if you leave it standing idle for an exten- ded period. Consult a qualified specialist work-
shop if you wish to leave your vehicle parked up
for a long period of time.
When you park the vehicle, remove the key if you do not require any electrical consumers. The
vehicle will then use very little energy, thus con- serving battery power.
If the power supply has been interrupted, e.g. if
the battery was discharged, you will have to:
R set the clock using the multimedia system;
see the separate operating instructions
R reset the function for folding the exterior mir-
rors in/out automatically, by folding the mir-
rors out once (Y page 113) Charging the battery
G
WARNING
During charging and jump-starting, explosive
gases can escape from the battery. There is a risk of an explosion.
Particularly avoid fire, naked flames, creating
sparks and smoking. Ensure there is sufficient
ventilation while charging and jump-starting.
Do not lean over a battery. G
WARNING
Battery acid is caustic. There is a risk of injury. Avoid contact with the skin, eyes or clothing.
Do not breathe in any battery gases. Do not
lean over the battery. Keep the batteries out of the reach of children. Immediately rinse off
battery acid thoroughly with plenty of clean
water and seek medical attention at once. G
WARNING
A discharged battery can freeze at tempera-
tures below freezing point. When jump-start-
ing the vehicle or charging the battery, gases can escape from the battery. There is a risk of
an explosion.
Allow the frozen battery to thaw out before
charging it or jump-starting.
! Only use battery chargers with a maximum
charging voltage of 14.8 V.
! Only charge the battery using the jump-start
connection point.
The jump-starting connection point is in the
engine compartment (Y page 325).
X Open the bonnet.
X Connect the battery charger to the positive
terminal and earth point in the same order as
when connecting the donor battery in the
jump-starting procedure (Y page 325).
If the indicator/warning lamps do not light up in
the instrument cluster at low temperatures, it is very likely that the discharged battery has fro-
zen. In this case, you may neither jump-start the vehicle nor charge the battery. The service life of
a battery that has been thawed may be reduced. The starting characteristics may be impaired,
especially at low temperatures. Have the
thawed battery checked at a qualified specialistworkshop.
Only charge the installed battery with a battery
charger which has been tested and approved by Mercedes-Benz. A battery charger unit specially
adapted for Mercedes-Benz vehicles and tested and approved by Mercedes-Benz is available as
an accessory. This device permits charging of
the battery while it is installed. Contact a
Mercedes-Benz Service Centre for information
and availability. Read the battery charger's
operating instructions before charging the bat-
tery. 324
Battery (vehicle)Breakdown assistance