Page 249 of 286

Towingeyes
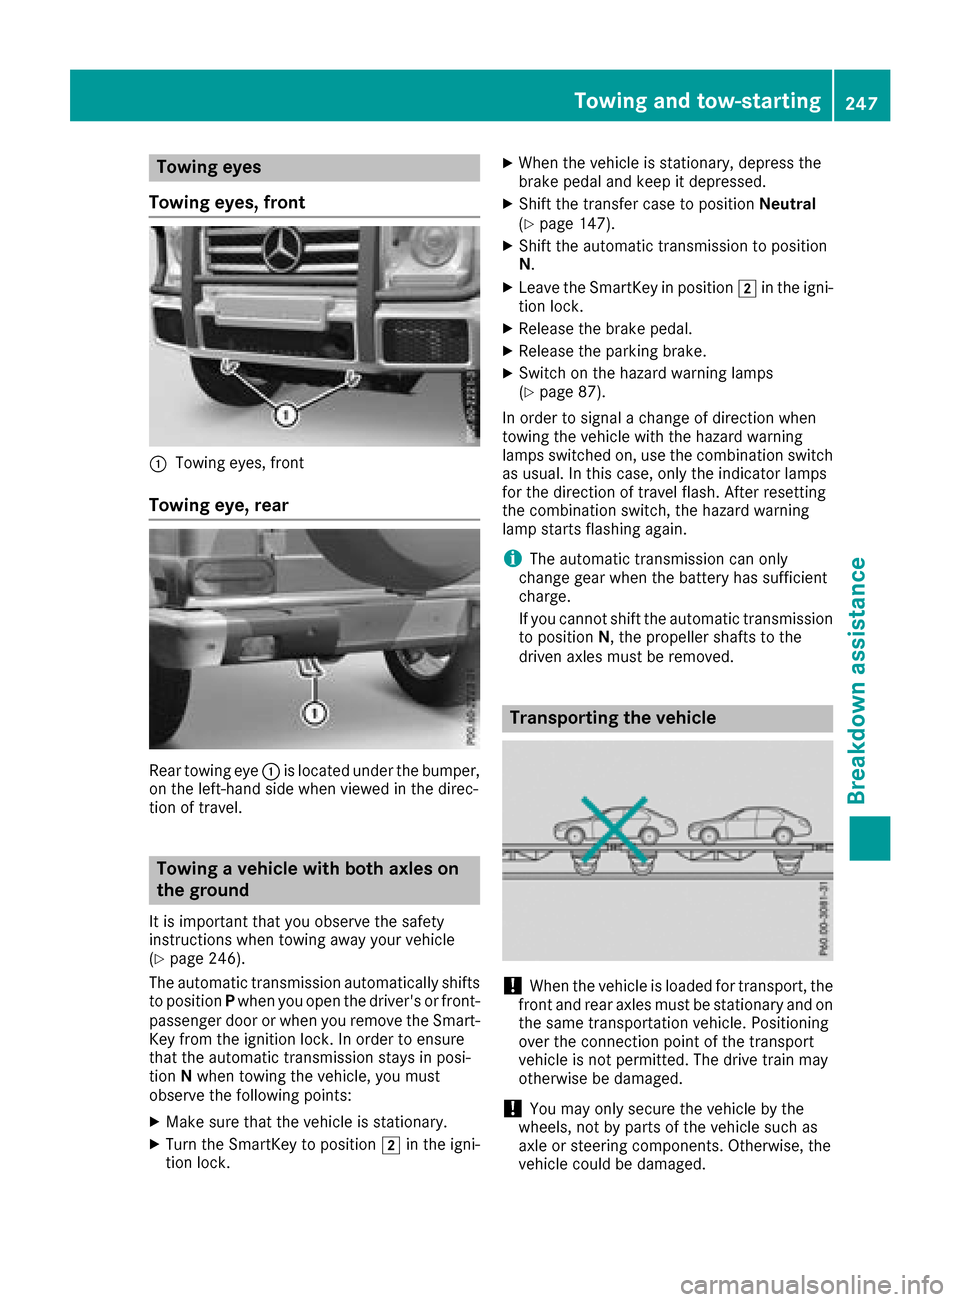
Towin geyes, front
:Towing eyes, front
Towin geye,rear
Rear towing eye :is locate dunder the bumper,
on the left-hand side when viewe dinthe direc-
tio noft ravel.
Towin gavehicle with both axles on
the ground
It is important thaty ouobserve the safety
instructions when towing away your vehicle
(
Ypage 246).
The automatic transmission automaticall yshifts
to position Pwhen yo uopenthe driver's or front-
passenge rdoororw heny ou remove the Smart-
Key fromt he ignition lock. In order to ensure
thatt he automatic transmission stays in posi-
tion Nwhen towing the vehicle, yo umust
observe the following points:
XMake sure thatt he vehicleisstationary.
XTurn the SmartKeytop osition 2in the igni-
tio nlock.
XWhen the vehicl eisstationary, depress the
brake peda land kee pitdepressed.
XShift the transferc asetop osition Neutral
(Ypage 147).
XShift the automatic transmission to position
N.
XLeave the SmartKeyinp osition2in the igni-
tio nlock.
XReleas ethe brake pedal.
XReleas ethe parkin gbrake.
XSwitch on the hazar dwarning lamps
(Ypage 87).
In order to signa lachange of direction when
towing the vehicl ewitht he hazar dwarning
lamps switched on, us ethe combinatio nswitch
as usual. In thisc ase, onlythe indicator lamps
for the direction of travel flash. After res etting
th
e combinatio nswitch ,the hazar dwarning
lamp starts flashing again.
iThe automatic transmission can only
change gear when the battery hass ufficient
charge.
If yo ucanno tshift the automatic transmission
to position N,the propeller shafts to the
driven axles must be removed.
Transporting the vehicle
!When the vehicl eisloade dfor transport, the
front and rea raxles must be stationar yand on
the same transportatio nvehicle. Positioning
ove rthe connectio npoint of the transport
vehicl eisnot permitted .The drive train may
otherwis ebedamaged .
!Youm ayonl ysecur ethe vehicl ebythe
wheels ,not by parts of the vehicl esucha s
axl eors teerin gcomponents. Otherwise, the
vehicl ecould be damaged.
Towin gand tow-starting247
Breakdow nassistance
Z
Page 251 of 286

The fuses in your vehicle serve to close down
faulty circuits.Ifafuse blows, all the compo-
nentsont he circuit and their functions stop
operating.
Blown fuses must be replaced with fuses of the
same rating, which you can recognize by the
color and value. The fuse ratings are listed in the fuse allocation chart (
Ypage 249).
If an ewly inserted fuse also blows, have the
cause traced and rectified at aqualified special-
ist workshop, e.g. an authorized Mercedes-Benz
Center.
!Only use fuses that have been approved for
Mercedes-Benz vehicles and which have the
correctf use rating for the system concerned.
Otherwise, components or systems could be
damaged.
!Make sure that no moisture can enter the
fuse box when the cover is open.
!When closing the cover, make sure that it is
lying correctly on the fuse box. Moisture seep-
ing in or dirt could otherwise impair the oper-
ation of the fuses.
Before changing afuse
Pay attention to the important safety notes
(Ypage 248).
XSwitch off the engine.
XSwitch off all electrical consumers.
XRemove the SmartKey from the ignition lock.
All indicator lamps in the instrument cluster
must be off.
XSecure the vehicle against rolling away
(Ypage 120).
The fuses are located in various fuse boxes:
RMain fuse box on the driver's side of the dash-
board
RFuse box in the front-passenger footwell
RFuse box in the transmission tunnel
RFuse box in the cargo compartment
The fuse allocation chart and the spare fuses are
in the fuse box on the dashboard on the front-
passenger side (
Ypage 249).
The fuse extractor is in the vehicle tool kit
(
Ypage 120).
Dashboard fuse box
!
Do not use apointed object such as ascrew-
driver to open the cover in the dashboard. You
could damage the dashboard or the cover.
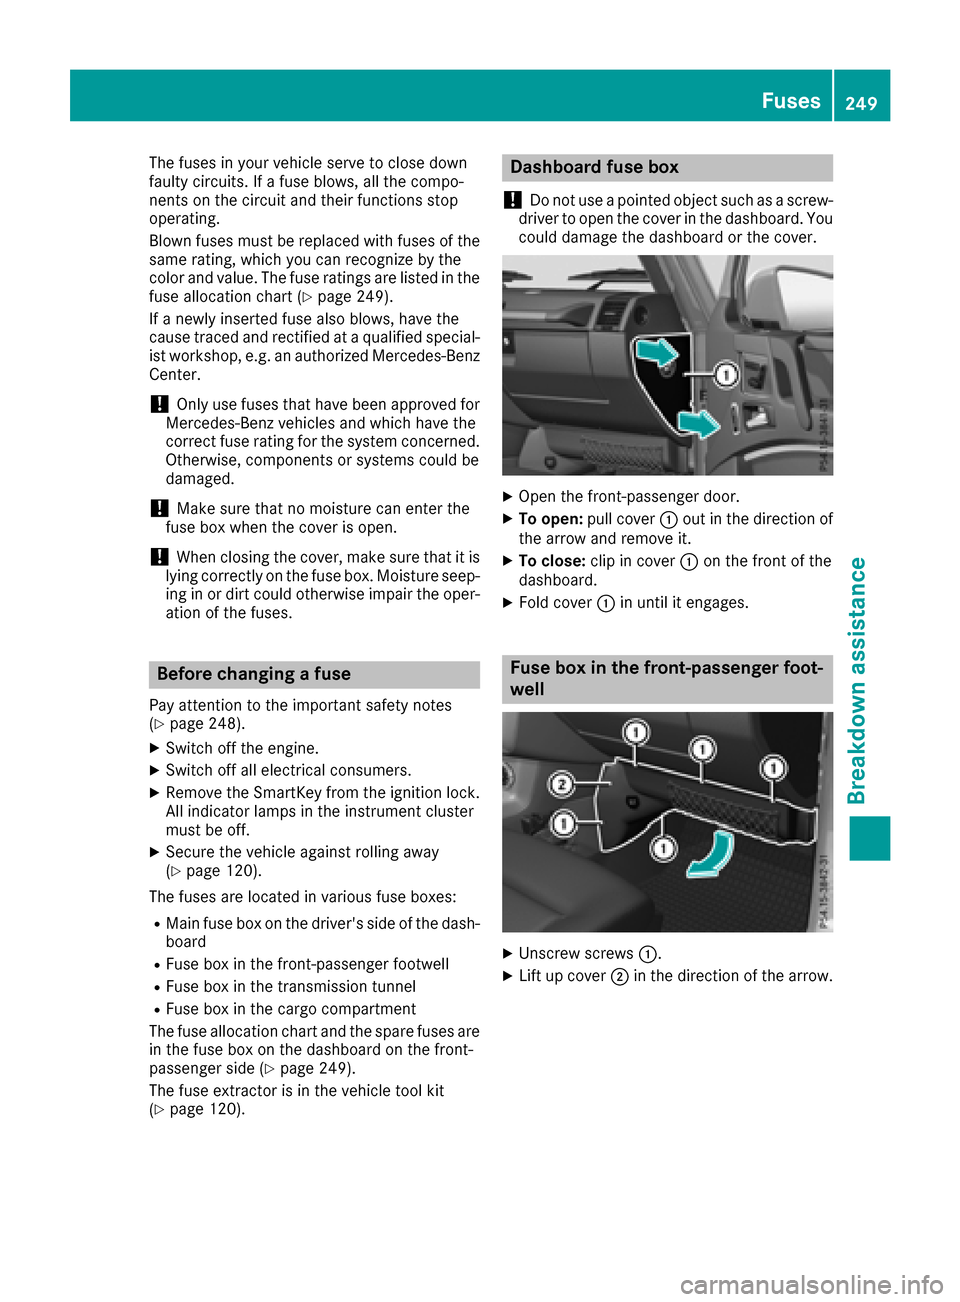
XOpen the front-passenger door.
XTo open: pull cover :out in the direction of
the arrow and remove it.
XTo close: clip in cover :on the front of the
dashboard.
XFold cover :in until it engages.
Fuse box in the front-passenger foot-
well
XUnscrew screws :.
XLift up cover;in the direction of the arrow.
Fuses249
Breakdown assistance
Z
Page 273 of 286

Observe the following when raising the vehi-
cle:
RTo raise the vehicle, only use the vehicle-spe-
cific jack that has been tested and approved
by Mercedes-Benz.Ifused incorrectly, the
jack could tip over with the vehicle raised.
RThe jack is designed only to raise and hold the
vehicle for ashort time while awheel is being
changed. It must not be used for performing
maintenance work under the vehicle.
RAvoid changin gthe wheel on uphill and down-
hill slopes.
RBeforer aising the vehicle, secure it from roll-
ing away by applying the parking brake and
inserting wheel chocks. Do not disengage the
parking brake while the vehicle is raised.
RThe jack must be placed on afirm, flat and
non-slip surface. On aloose surface, alarge,
flat, load-bearing underlay must be used. On a
slippery surface, anon-slip underlay must be
used, e.g. rubber mats.
RDo not use wooden blocks or similar objects
as ajack underlay. Otherwise, the jack will not
be able to achieve its load-bearing capacity
due to the restricted height.
RMake sure that the distanc ebetween the
underside of the tires and the ground does not
exceed 1.2 in (3 cm).
RDo not place your hands or feet under the
raised vehicle.
RDo not lie under the vehicle.
RDo not start the engine when the vehicle is
raised.
RDo not open or close adoor when the vehicle
is raised.
RMake sure that no persons are present in the
vehicle when the vehicle is raised.
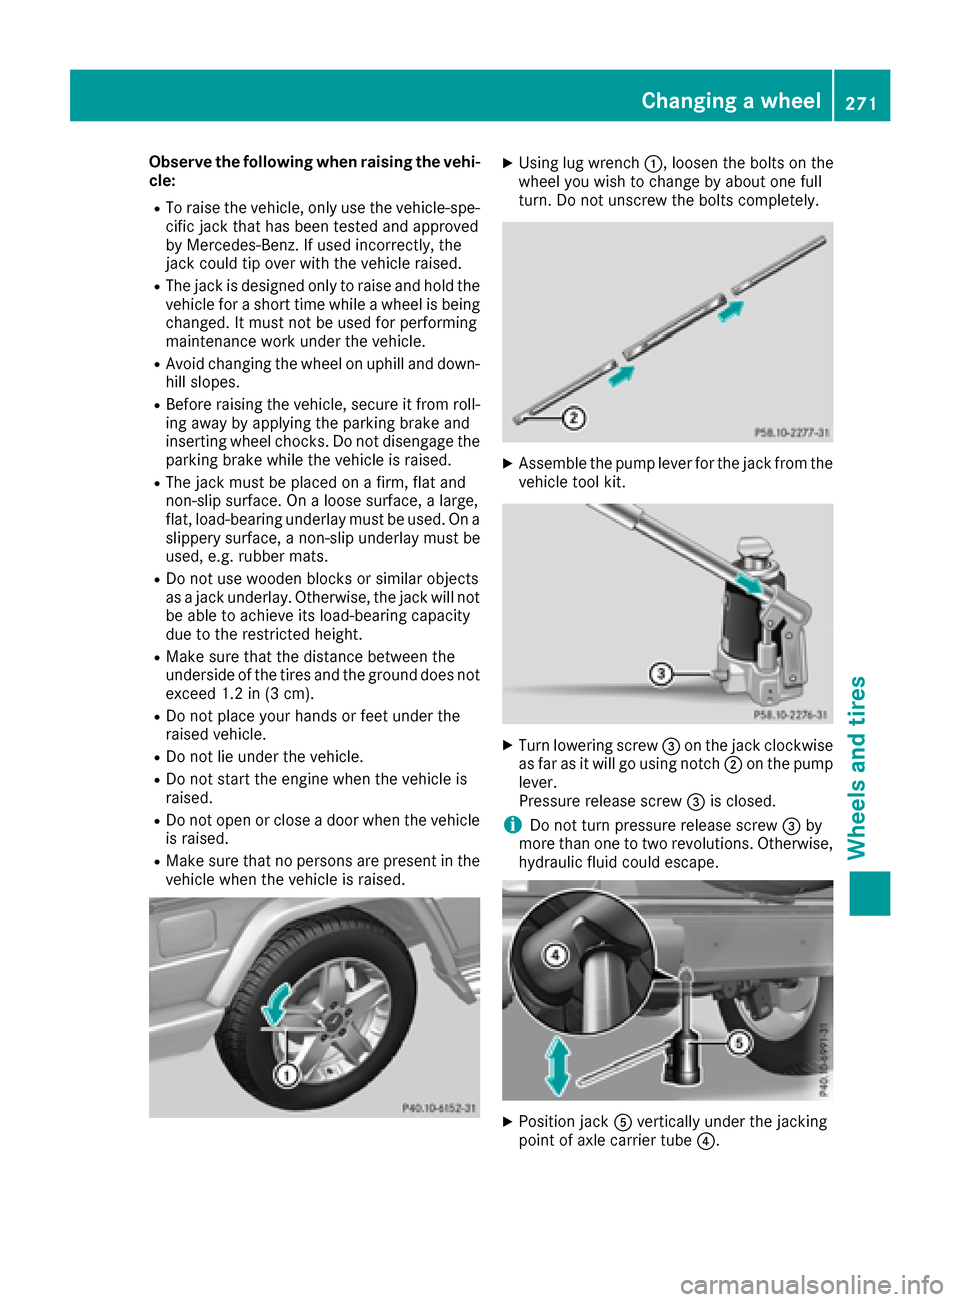
XUsing lug wrench :,loosen the bolts on the
wheel you wish to change by about one full
turn .Don ot unscrew the bolts completely.
XAssemble the pump lever for the jack from the
vehicle tool kit.
XTurn lowering screw =on the jack clockwise
as far as it will go using notch ;on the pump
lever.
Pressure release screw =is closed.
iDo not turn pressure release screw =by
more than one to two revolutions. Otherwise,
hydraulic fluid could escape.
XPosition jack Avertically under the jacking
point of axle carrier tube ?.
Changingawheel271
Wheels and tires
Z