2017 Hyundai Elantra bonnet
[x] Cancel search: bonnetPage 133 of 571
3-41
Convenient features of your vehicle
3
Closing the bonnet
1. Before closing the bonnet, check
the following:
• All filler caps in the engine com-
partment must be correctly
installed.
• Gloves, rags or any other com-
bustible material must be removed
from the engine compartment.
2. Return the support rod to its clip to
prevent it from rattling.
3. Lower the bonnet halfway and let it
drop. Make sure that it locks into
place.
•Before closing the bonnet,
ensure all obstructions are
removed from around bonnet
opening.
•Always double check to be
sure that the bonnet is firmly
latched before driving away. If
it is not latched, the bonnet
could open whilst the vehicle
is being driven, causing a
total loss of visibility, which
might result in an accident.
•Do not move the vehicle with
the bonnet in the raised posi-
tion, as vision is obstructed,
which might result in an acci-
dent, and the bonnet could fall
or be damaged.
WA R N I N G
Support rod
•Grasp the support rod in the
area wrapped in rubber. The
rubber will help prevent you
from being burned by hot
metal when the engine is hot.
•The support rod must be
inserted completely into the
hole provided whenever you
inspect the engine compart-
ment. This will prevent the
bonnet from falling and possi-
bly injuring you.
WA R N I N G
Page 165 of 571
3-73
Convenient features of your vehicle
3
Shift to P or N to start engine
(for smart key system and auto-
matic transmission)
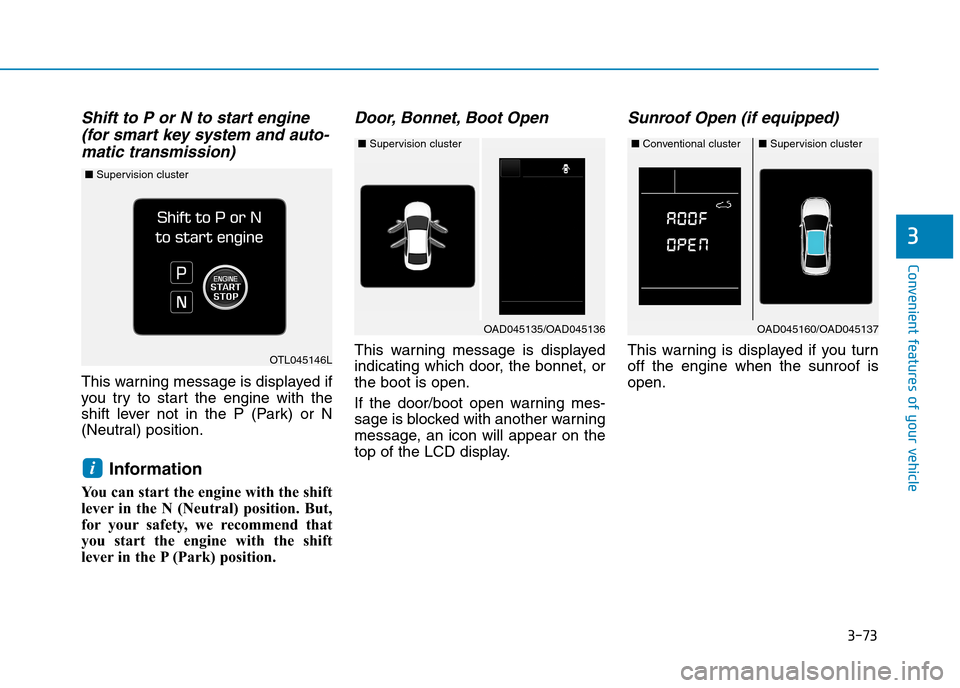
This warning message is displayed if
you try to star t the engine with the
shift lever not in the P (Park) or N
(Neutral) position.
Information
You can start the engine with the shift
lever in the N (Neutral) position. But,
for your safety, we recommend that
you start the engine with the shift
lever in the P (Park) position.
Door, Bonnet, Boot Open
This warning message is displayed
indicating which door, the bonnet, or
the boot is open.
If the door/boot open warning mes-
sage is blocked with another warning
message, an icon will appear on the
top of the LCD display.
Sunroof Open (if equipped)
This warning is displayed if you turn
off the engine when the sunroof is
open.
i
OAD045160/OAD045137
OTL045146L
■Supervision cluster
■Conventional cluster■Supervision cluster
OAD045135/OAD045136
■Supervision cluster
Page 218 of 571
3-126
Convenient features of your vehicle
System operation
Ventilation
1. Set the mode to the position.
2. Set the air intake control to the
outside (fresh) air position.
3. Set the temperature control to the
desired position.
4. Set the fan speed control to the
desired speed.
Heating
1. Set the mode to the position.
2. Set the air intake control to the
outside (fresh) air position.
3. Set the temperature control to the
desired position.
4. Set the fan speed control to the
desired speed.
5. If dehumidified heating is desired,
turn the air conditioning system (if
equipped) on.
If the windscreen fogs up, set the
mode to the or position.
Operation Tips
•To keep dust or unpleasant fumes
from entering the vehicle through
the ventilation system, temporarily
set the air intake control to the
recirculated air position. Be sure to
return the control to the fresh air
position when the irritation has
passed to keep fresh air in the
vehicle. This will help keep the driv-
er alert and comfortable.
•Air for the heating/cooling system
is drawn in through the grilles just
ahead of the windscreen. Care
should be taken that these are not
blocked by leaves, snow, ice or
other obstructions.
•To prevent interior fog on the wind-
screen, set the air intake control to
the fresh air position and fan speed
to the desired position. Turn on the
air conditioning system, and adjust
the temperature control to the
desired temperature.
Air conditioning
HYUNDAI Air Conditioning Systems
are filled with R-134a refrigerant.
1. Start the engine. Push the air con-
ditioning button.
2. Set the mode to the position.
3. Set the air intake control to the
outside air or recirculated air posi-
tion.
4. Adjust the fan speed control and
temperature control to maintain
maximum comfort.
Information
Yo u r v e h i c l e i s f i l l e d w i t h R - 1 3 4 a
according to the regulation in your
country at the time of production. You
can find out which air conditioning
refrigerant is applied to your vehicle
on the label located inside the bonnet.
i
Page 221 of 571
3-129
Convenient features of your vehicle
3
Air Conditioning refrigerant
label
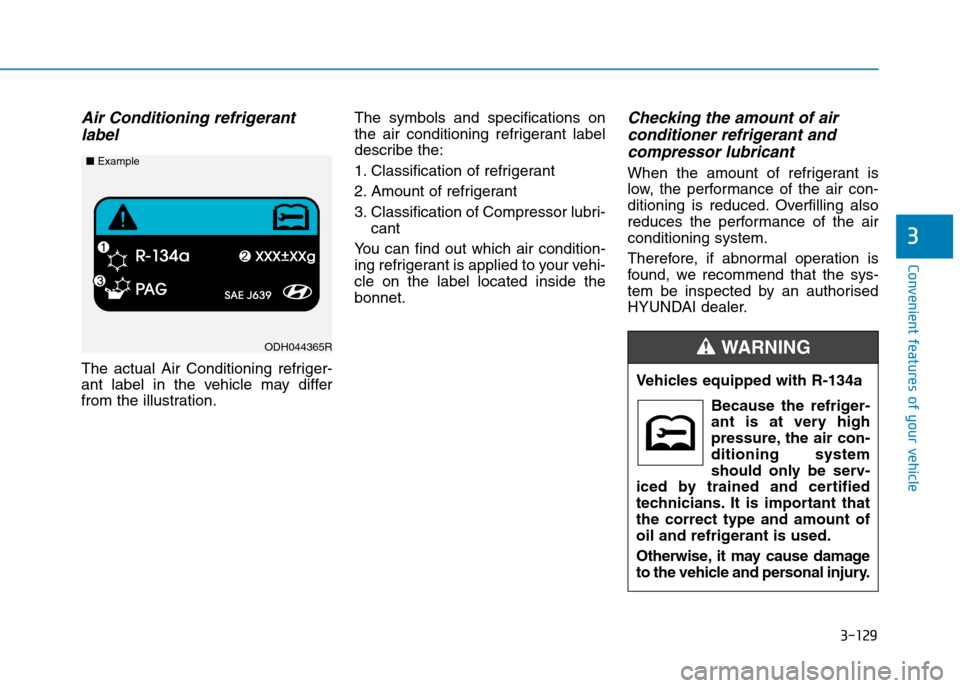
The actual Air Conditioning refriger-
ant label in the vehicle may differ
from the illustration.
The symbols and specifications on
the air conditioning refrigerant label
describe the:
1. Classification of refrigerant
2. Amount of refrigerant
3. Classification of Compressor lubri-
cant
Yo u c a n f i n d o u t w h i c h a i r c o n d i t i o n -
ing refrigerant is applied to your vehi-
cle on the label located inside the
bonnet.
Checking the amount of air
conditioner refrigerant and
compressor lubricant
When the amount of refrigerant is
low, the performance of the air con-
ditioning is reduced. Overfilling also
reduces the performance of the air
conditioning system.
Therefore, if abnormal operation is
found, we recommend that the sys-
tem be inspected by an authorised
HYUNDAI dealer.
Vehicles equipped with R-134a
Because the refriger-
ant is at very high
pressure, the air con-
ditioning system
should only be serv-
iced by trained and certified
technicians. It is important that
the correct type and amount of
oil and refrigerant is used.
Otherwise, it may cause damage
to the vehicle and personal injury.
WA R N I N GODH044365R
■Example
Page 231 of 571
3-139
Convenient features of your vehicle
3
System operation
Ventilation
1. Set the mode to the position.
2. Set the air intake control to the
outside (fresh) air position.
3. Set the temperature control to the
desired position.
4. Set the fan speed control to the
desired speed.
Heating
1. Set the mode to the position.
2. Set the air intake control to the
outside (fresh) air position.
3. Set the temperature control to the
desired position.
4. Set the fan speed control to the
desired speed.
5. If dehumidified heating is desired,
turn the air conditioning system on.
•If the windscreen fogs up, set the
mode to the or position.
Operation Tips
•To keep dust or unpleasant fumes
from entering the vehicle through
the ventilation system, temporarily
set the air intake control to the
recirculated air position. Be sure to
return the control to the fresh air
position when the irritation has
passed to keep fresh air in the
vehicle. This will help keep the driv-
er alert and comfortable.
•Air for the heating/cooling system
is drawn in through the grilles just
ahead of the windscreen. Care
should be taken that these are not
blocked by leaves, snow, ice or
other obstructions.
•To prevent interior fog on the wind-
screen, set the air intake control to
the fresh air position and fan speed
to the desired position. Turn on the
air conditioning system, and adjust
the temperature control to the
desired temperature.
Air conditioning
HYUNDAI Air Conditioning Systems
are filled with R-134a refrigerant.
1. Start the engine. Push the air con-
ditioning button.
2. Set the mode to the position.
3. Set the air intake control to the out-
side air or recirculated air position.
4. Adjust the fan speed control and
temperature control to maintain
maximum comfort.
Information
Yo u r v e h i c l e i s f i l l e d w i t h R - 1 3 4 a
according to the regulation in your
country at the time of production. You
can find out which air conditioning
refrigerant is applied to your vehicle
on the label located inside the bonnet.
i
Page 234 of 571
3-142
Convenient features of your vehicle
Air Conditioning refrigerant
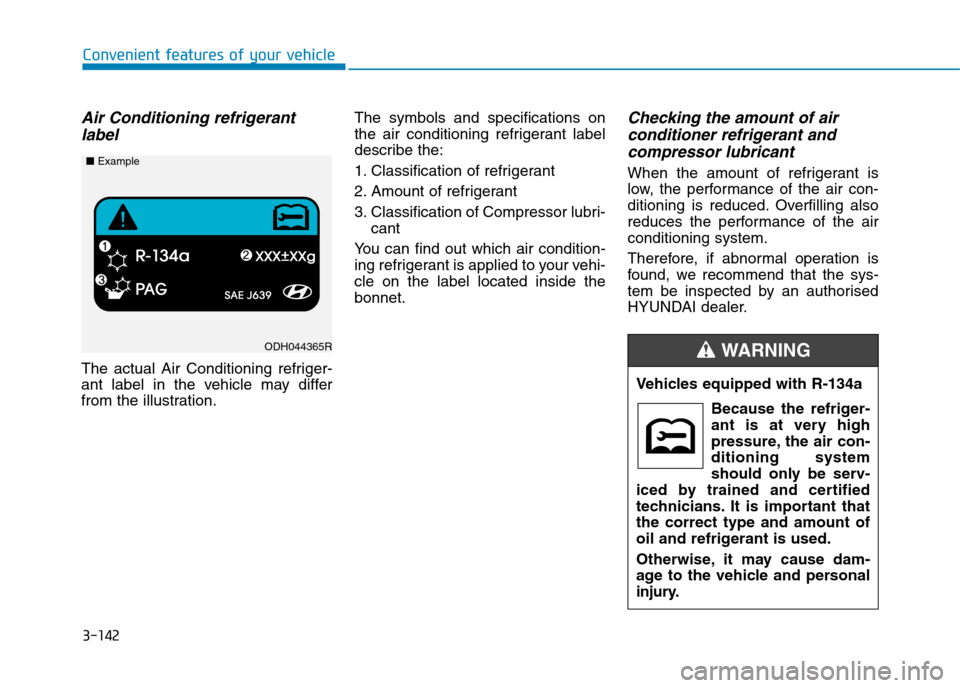
label
The actual Air Conditioning refriger-
ant label in the vehicle may differ
from the illustration.
The symbols and specifications on
the air conditioning refrigerant label
describe the:
1. Classification of refrigerant
2. Amount of refrigerant
3. Classification of Compressor lubri-
cant
Yo u c a n f i n d o u t w h i c h a i r c o n d i t i o n -
ing refrigerant is applied to your vehi-
cle on the label located inside the
bonnet.
Checking the amount of air
conditioner refrigerant and
compressor lubricant
When the amount of refrigerant is
low, the performance of the air con-
ditioning is reduced. Overfilling also
reduces the performance of the air
conditioning system.
Therefore, if abnormal operation is
found, we recommend that the sys-
tem be inspected by an authorised
HYUNDAI dealer.
Vehicles equipped with R-134a
Because the refriger-
ant is at very high
pressure, the air con-
ditioning system
should only be serv-
iced by trained and certified
technicians. It is important that
the correct type and amount of
oil and refrigerant is used.
Otherwise, it may cause dam-
age to the vehicle and personal
injury.
WA R N I N GODH044365R
■Example
Page 235 of 571
3-143
Convenient features of your vehicle
3
•For maximum defrosting, set the
temperature control to the extreme
right/hot position and the fan speed
control to the highest speed.
•If warm air to the floor is desired
whilst defrosting or defogging, set
the mode to the floor-defrost posi-
tion.
•Before driving, clear all snow and
ice from the windscreen, rear win-
dow, outside rear view mirrors, and
all side windows.
•Clear all snow and ice from the
bonnet and air inlet in the cowl grill
to improve heater and defroster
efficiency and to reduce the proba-
bility of fogging up inside of the
windscreen.
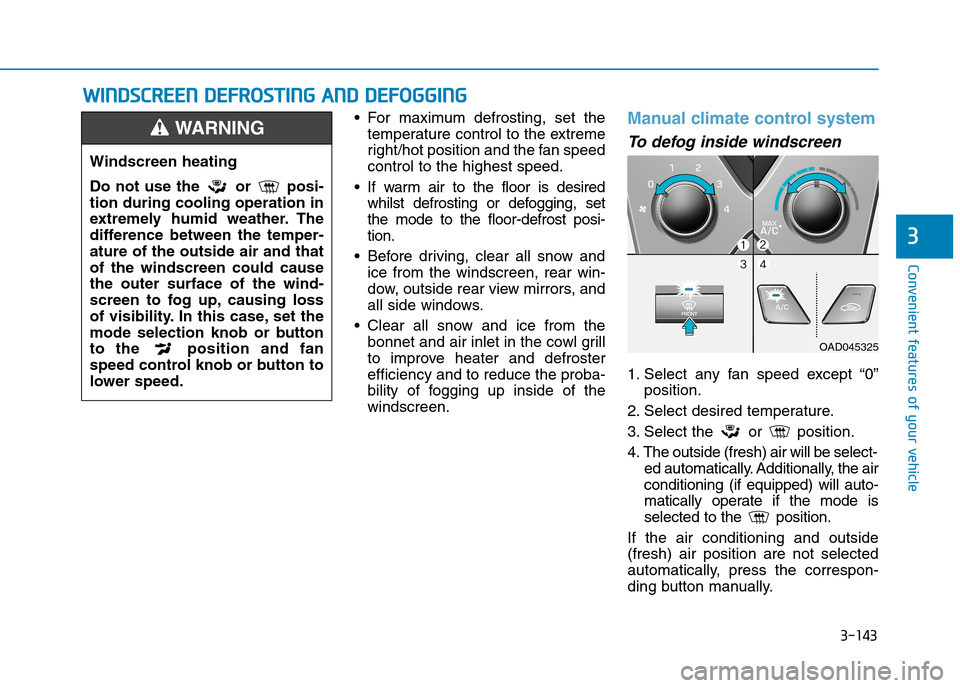
Manual climate control system
To d e f o g i n s i d e w i n d s c r e e n
1. Select any fan speed except “0”
position.
2. Select desired temperature.
3. Select the or position.
4. The outside (fresh) air will be select-
ed automatically. Additionally, the air
conditioning (if equipped) will auto-
matically operate if the mode is
selected to the position.
If the air conditioning and outside
(fresh) air position are not selected
automatically, press the correspon-
ding button manually.
WWIINNDDSSCCRREEEENN DDEEFFRROOSSTTIINNGG AANNDD DDEEFFOOGGGGIINNGG
Windscreen heating
Do not use the or posi-
tion during cooling operation in
extremely humid weather. The
difference between the temper-
ature of the outside air and that
of the windscreen could cause
the outer surface of the wind-
screen to fog up, causing loss
of visibility. In this case, set the
mode selection knob or button
to the position and fan
speed control knob or button to
lower speed.
WA R N I N G
OAD045325
Page 379 of 571
5-3
Driving your vehicle
5
Before entering the vehicle
•Be sure all windows, outside mir-
ror(s), and outside lights are clean
and unobstructed.
•Remove frost, snow, or ice.
•Visually check the tyres for uneven
wear and damage.
•Check under the vehicle for any
sign of leaks.
•Be sure there are no obstacles
behind you if you intend to reverse.
Before starting
•Make sure the bonnet, the boot,
and the doors are securely closed
and locked.
•Adjust the position of the seat and
steering wheel.
•Adjust the inside and outside
rearview mirrors.
•Verify all the lights work.
•Fasten your seat belt.Check that
all passengers have fastened their
seat belts.
•Check the gauges and indicators in
the instrument panel and the mes-
sages on the instrument display
when the ignition switch is in the
ON position.
•Check that any items you are car-
rying are stored properly or fas-
tened down securely.
BBEEFFOORREE DDRRIIVVIINNGG
To r e d u c e t h e r i s k o f S E R I O U S
INJURY or DEATH, take the fol-
lowing precautions:
•ALWAYS wear your seat belt.
All passengers must be prop-
erly restrained whenever the
vehicle is moving. For more
information, refer to "Seat
Belts" in chapter 2.
•Always drive defensively.
Assume other drivers or pedes-
trians may be careless and
make mistakes.
•Stay focused on the task of
driving. Driver distraction can
cause accidents.
•Leave plenty of space between
you and the vehicle in front of
you.
WA R N I N G