2017 Hyundai Elantra lock
[x] Cancel search: lockPage 372 of 571
![Hyundai Elantra 2017 Owners Manual - RHD (UK. Australia) 4-123
Multimedia System
4
With the Clock/Calendar Button
Press the [SETUP]button !Select
[Clock/Calendar]
Yo u c a n s e l e c t a n d c o n t r o l o p t i o n s
related to [Clock Settings Hyundai Elantra 2017 Owners Manual - RHD (UK. Australia) 4-123
Multimedia System
4
With the Clock/Calendar Button
Press the [SETUP]button !Select
[Clock/Calendar]
Yo u c a n s e l e c t a n d c o n t r o l o p t i o n s
related to [Clock Settings](/manual-img/35/14544/w960_14544-371.png)
4-123
Multimedia System
4
With the Clock/Calendar Button
Press the [SETUP]button !Select
[Clock/Calendar]
Yo u c a n s e l e c t a n d c o n t r o l o p t i o n s
related to [Clock Settings], [Calendar
Settings] and [Clock Display(Power
off)].
Clock Settings
Use the [Up/Down] buttons to set the
Hour, Minutes and AM/PM setting.
Press and hold the [CLOCK]button
to display the Clock/Calendar screen.
Calendar Settings
Use the [Up/Down] buttons to set the
Ye a r , M o n t h a n d D a y s e t t i n g .
Clock Display(Power off)
This feature is used to display a clock
on the screen when the audio sys-
tem is turned off.
Page 377 of 571
Driving your vehicle
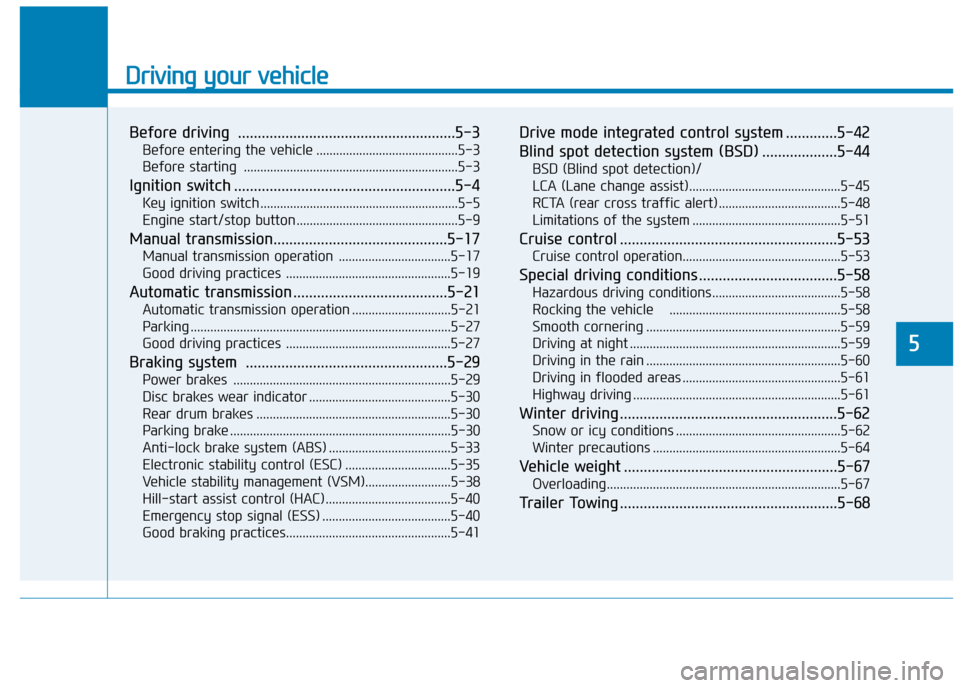
Before driving .......................................................5-3
Before entering the vehicle ...........................................5-3
Before starting .................................................................5-3
Ignition switch ........................................................5-4
Key ignition switch ............................................................5-5
Engine start/stop button .................................................5-9
Manual transmission............................................5-17
Manual transmission operation ..................................5-17
Good driving practices ..................................................5-19
Automatic transmission .......................................5-21
Automatic transmission operation ..............................5-21
Parking ...............................................................................5-27
Good driving practices ..................................................5-27
Braking system ...................................................5-29
Power brakes ..................................................................5-29
Disc brakes wear indicator ...........................................5-30
Rear drum brakes ...........................................................5-30
Parking brake ...................................................................5-30
Anti-lock brake system (ABS) .....................................5-33
Electronic stability control (ESC) ................................5-35
Ve h i c l e s tab i l i t y m a n a g e m e n t ( V S M ) . . . . . . . . . . . . . . . . . . . . . . . . . . 5 - 3 8
Hill-start assist control (HAC) ......................................5-40
Emergency stop signal (ESS) .......................................5-40
Good braking practices..................................................5-41
Drive mode integrated control system .............5-42
Blind spot detection system (BSD) ...................5-44
BSD (Blind spot detection)/
LCA (Lane change assist)..............................................5-45
RCTA (rear cross traffic alert) .....................................5-48
Limitations of the system .............................................5-51
Cruise control .......................................................5-53
Cruise control operation................................................5-53
Special driving conditions ...................................5-58
Hazardous driving conditions.......................................5-58
Rocking the vehicle ....................................................5-58
Smooth cornering ...........................................................5-59
Driving at night ................................................................5-59
Driving in the rain ...........................................................5-60
Driving in flooded areas ................................................5-61
Highway driving ...............................................................5-61
Winter driving .......................................................5-62
Snow or icy conditions ..................................................5-62
Winter precautions .........................................................5-64
Ve h i c l e w e i g h t . . . . . . . . . . . . . . . . . . . . . . . . . . . . . . . . . . . . . . . . . . . . . . . . . . . . . . 5 - 6 7
Overloading.......................................................................5-67
Tr a i l e r To w i n g . . . . . . . . . . . . . . . . . . . . . . . . . . . . . . . . . . . . . . . . . . . . . . . . . . . . . . . 5 - 6 8
5
Page 379 of 571
5-3
Driving your vehicle
5
Before entering the vehicle
•Be sure all windows, outside mir-
ror(s), and outside lights are clean
and unobstructed.
•Remove frost, snow, or ice.
•Visually check the tyres for uneven
wear and damage.
•Check under the vehicle for any
sign of leaks.
•Be sure there are no obstacles
behind you if you intend to reverse.
Before starting
•Make sure the bonnet, the boot,
and the doors are securely closed
and locked.
•Adjust the position of the seat and
steering wheel.
•Adjust the inside and outside
rearview mirrors.
•Verify all the lights work.
•Fasten your seat belt.Check that
all passengers have fastened their
seat belts.
•Check the gauges and indicators in
the instrument panel and the mes-
sages on the instrument display
when the ignition switch is in the
ON position.
•Check that any items you are car-
rying are stored properly or fas-
tened down securely.
BBEEFFOORREE DDRRIIVVIINNGG
To r e d u c e t h e r i s k o f S E R I O U S
INJURY or DEATH, take the fol-
lowing precautions:
•ALWAYS wear your seat belt.
All passengers must be prop-
erly restrained whenever the
vehicle is moving. For more
information, refer to "Seat
Belts" in chapter 2.
•Always drive defensively.
Assume other drivers or pedes-
trians may be careless and
make mistakes.
•Stay focused on the task of
driving. Driver distraction can
cause accidents.
•Leave plenty of space between
you and the vehicle in front of
you.
WA R N I N G
Page 381 of 571
5-5
Driving your vehicle
5
Key ignition switch
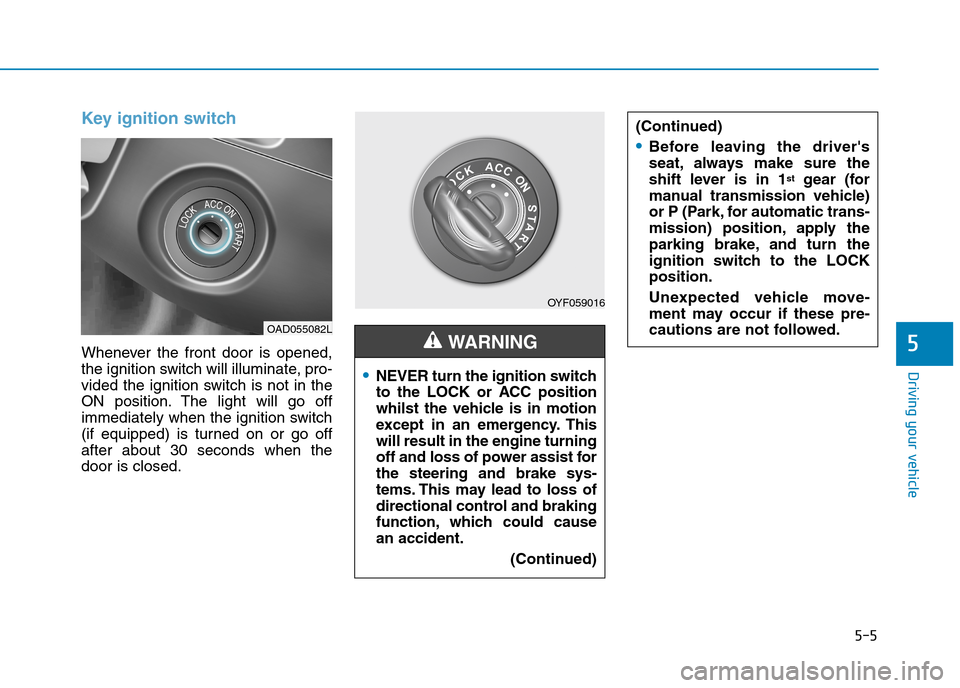
Whenever the front door is opened,
the ignition switch will illuminate, pro-
vided the ignition switch is not in the
ON position. The light will go off
immediately when the ignition switch
(if equipped) is turned on or go off
after about 30 seconds when the
door is closed.
OY F 0 5 9 0 1 6
•NEVER turn the ignition switch
to the LOCK or ACC position
whilst the vehicle is in motion
except in an emergency. This
will result in the engine turning
off and loss of power assist for
the steering and brake sys-
tems. This may lead to loss of
directional control and braking
function, which could cause
an accident.
(Continued)
WA R N I N G
(Continued)
•Before leaving the driver's
seat, always make sure the
shift lever is in 1stgear (for
manual transmission vehicle)
or P (Park, for automatic trans-
mission) position, apply the
parking brake, and turn the
ignition switch to the LOCK
position.
Unexpected vehicle move-
ment may occur if these pre-
cautions are not followed.OAD055082L
Page 382 of 571
5-6
Driving your vehicle
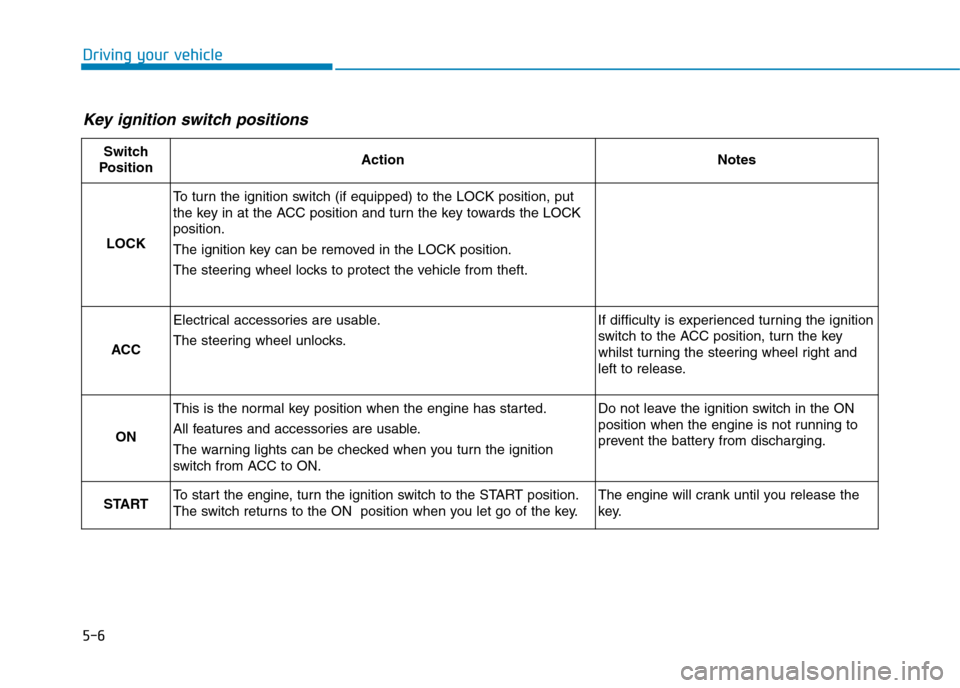
Key ignition switch positions
Switch
PositionActionNotes
LOCK
To t u r n t h e i g n i t i o n s w i t c h ( i f e q u i p p e d ) t o t h e L O C K p o s i t i o n , p u t
the key in at the ACC position and turn the key towards the LOCK
position.
The ignition key can be removed in the LOCK position.
The steering wheel locks to protect the vehicle from theft.
ACC
Electrical accessories are usable.
The steering wheel unlocks.
If difficulty is experienced turning the ignition
switch to the ACC position, tur n the key
whilst turning the steering wheel right and
left to release.
ON
This is the normal key position when the engine has started.
All features and accessories are usable.
The warning lights can be checked when you turn the ignition
switch from ACC to ON.
Do not leave the ignition switch in the ON
position when the engine is not running to
prevent the battery from discharging.
STARTTo s t a r t t h e e n g i n e , t u r n t h e i g n i t i o n s w i t c h t o t h e S TA R T p o s i t i o n .
The switch returns to the ON position when you let go of the key.
The engine will crank until you release the
key.
Page 386 of 571
5-10
Driving your vehicle
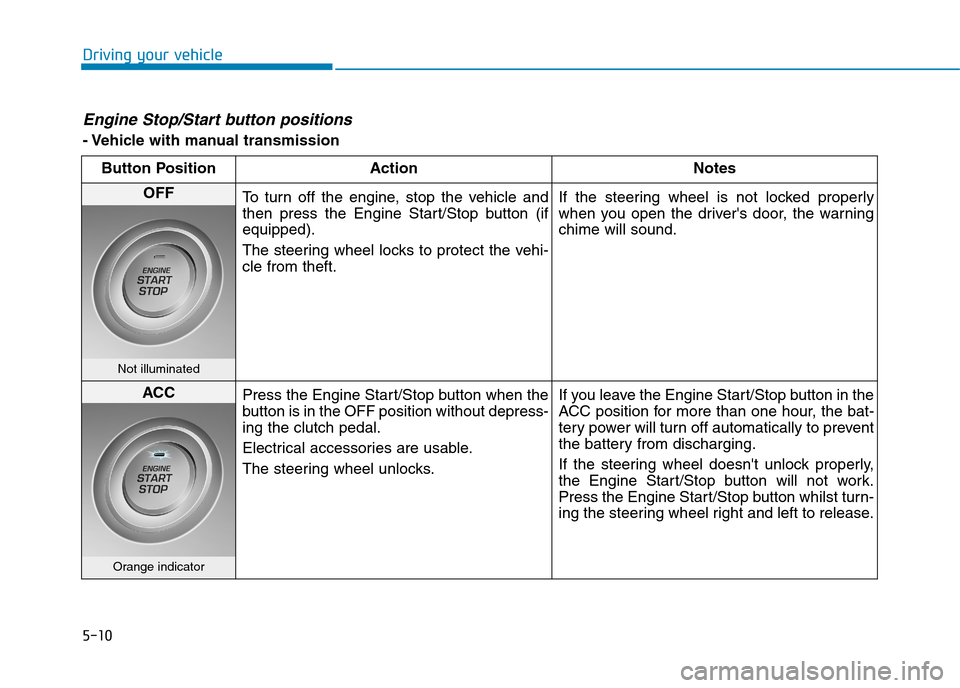
Engine Stop/Start button positions
- Vehicle with manual transmission
Button Position Action Notes
OFFTo t u r n o f f t h e e n g i n e , s t o p t h e v e h i c l e a n d
then press the Engine Start/Stop button (if
equipped).
The steering wheel locks to protect the vehi-
cle from theft.
If the steering wheel is not locked properly
when you open the driver's door, the warning
chime will sound.
Not illuminated
ACCPress the Engine Start/Stop button when the
button is in the OFF position without depress-
ing the clutch pedal.
Electrical accessories are usable.
The steering wheel unlocks.
If you leave the Engine Start/Stop button in the
ACC position for more than one hour, the bat-
tery power will turn off automatically to prevent
the battery from discharging.
If the steering wheel doesn't unlock properly,
the Engine Start/Stop button will not work.
Press the Engine Start/Stop button whilst turn-
ing the steering wheel right and left to release.
Orange indicator
Page 388 of 571
5-12
Driving your vehicle
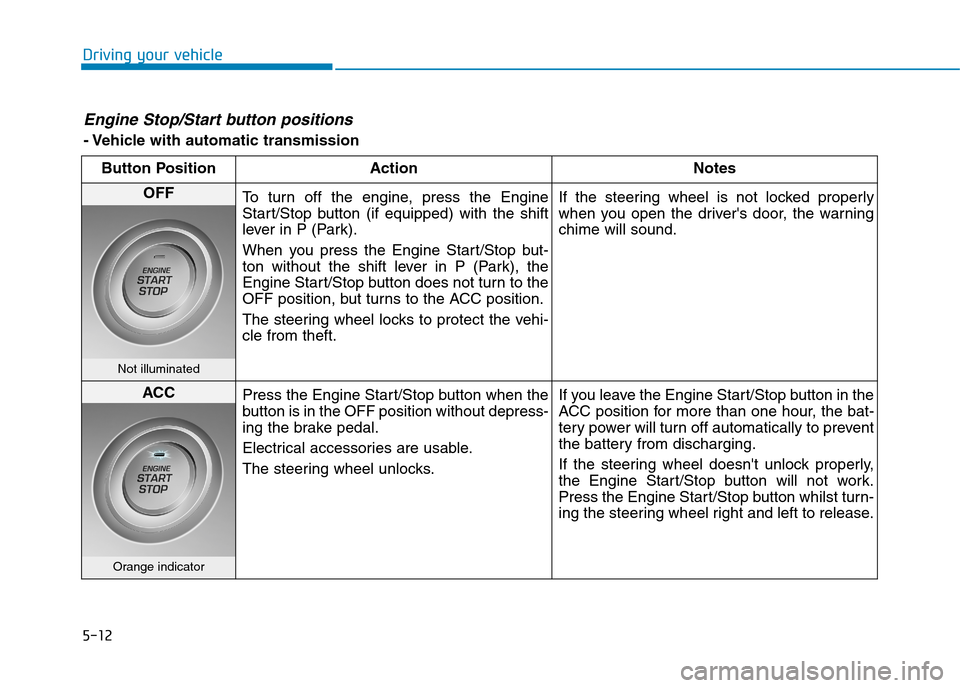
Engine Stop/Start button positions
- Vehicle with automatic transmission
Button Position Action Notes
OFFTo t u r n o f f t h e e n g i n e , p r e s s t h e E n g i n e
Start/Stop button (if equipped) with the shift
lever in P (Park).
When you press the Engine Start/Stop but-
ton without the shift lever in P (Park), the
Engine Start/Stop button does not turn to the
OFF position, but turns to the ACC position.
The steering wheel locks to protect the vehi-
cle from theft.
If the steering wheel is not locked properly
when you open the driver's door, the warning
chime will sound.
Not illuminated
ACCPress the Engine Start/Stop button when the
button is in the OFF position without depress-
ing the brake pedal.
Electrical accessories are usable.
The steering wheel unlocks.
If you leave the Engine Start/Stop button in the
ACC position for more than one hour, the bat-
tery power will turn off automatically to prevent
the battery from discharging.
If the steering wheel doesn't unlock properly,
the Engine Start/Stop button will not work.
Press the Engine Start/Stop button whilst turn-
ing the steering wheel right and left to release.
Orange indicator
Page 393 of 571
5-17
Driving your vehicle
5
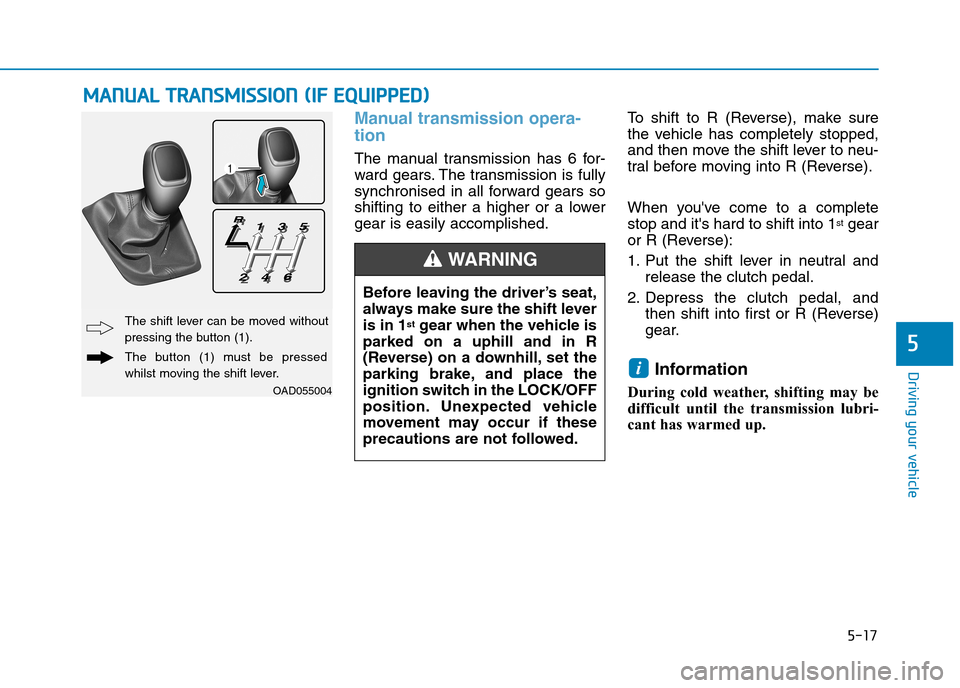
Manual transmission opera-
tion
The manual transmission has 6 for-
ward gears. The transmission is fully
synchronised in all forward gears so
shifting to either a higher or a lower
gear is easily accomplished.
To s h i f t t o R ( R e v e r s e ) , m a k e s u r e
the vehicle has completely stopped,
and then move the shift lever to neu-
tral before moving into R (Reverse).
When you've come to a complete
stop and it's hard to shift into 1stgear
or R (Reverse):
1. Put the shift lever in neutral and
release the clutch pedal.
2. Depress the clutch pedal, and
then shift into first or R (Reverse)
gear.
Information
During cold weather, shifting may be
difficult until the transmission lubri-
cant has warmed up.
i
MMAANNUUAALL TTRRAANNSSMMIISSSSIIOONN ((IIFF EEQQUUIIPPPPEEDD))
Before leaving the driver’s seat,
always make sure the shift lever
is in 1stgear when the vehicle is
parked on a uphill and in R
(Reverse) on a downhill, set the
parking brake, and place the
ignition switch in the LOCK/OFF
position. Unexpected vehicle
movement may occur if these
precautions are not followed.
WA R N I N G
OAD055004
The shift lever can be moved without
pressing the button (1).
The button (1) must be pressed
whilst moving the shift lever.