2017 Hyundai Elantra charging
[x] Cancel search: chargingPage 20 of 571
F20F20
Parking brake .......................................................7-27
Checking the parking brake .........................................7-27
Air cleaner ............................................................7-28
Filter replacement ...........................................................7-28
Climate control air filter .....................................7-30
Filter inspection ...............................................................7-30
Filter replacement ...........................................................7-30
Wiper blades .........................................................7-31
Blade inspection ..............................................................7-31
Blade replacement ..........................................................7-31
Battery...................................................................7-34
For best battery service................................................7-34
Battery capacity label ...................................................7-36
Battery recharging .........................................................7-36
Reset items .......................................................................7-37
Ty r e s a n d w h e e l s . . . . . . . . . . . . . . . . . . . . . . . . . . . . . . . . . . . . . . . . . . . . . . . . . 7 - 3 8
Ty r e c a r e . . . . . . . . . . . . . . . . . . . . . . . . . . . . . . . . . . . . . . . . . . . . . . . . . . . . . . . . . . . . . . . . . . . . . . . . . . . 7 - 3 8
Recommended cold tyre inflation pressures ...........7-38
Checking tyre inflation pressure.................................7-40
Ty r e r o t a t i o n . . . . . . . . . . . . . . . . . . . . . . . . . . . . . . . . . . . . . . . . . . . . . . . . . . . . . . . . . . . . . . . . . . . 7 - 4 1
Wheel alignment and tyre balance .............................7-42
Ty r e r e p l a c e m e n t . . . . . . . . . . . . . . . . . . . . . . . . . . . . . . . . . . . . . . . . . . . . . . . . . . . . . . . . . . . . 7 - 4 2
Wheel replacement ........................................................7-44
Ty r e t r a c t i o n . . . . . . . . . . . . . . . . . . . . . . . . . . . . . . . . . . . . . . . . . . . . . . . . . . . . . . . . . . . . . . . . . . . . . 7 - 4 4
Ty r e m a i n t e n a n c e . . . . . . . . . . . . . . . . . . . . . . . . . . . . . . . . . . . . . . . . . . . . . . . . . . . . . . . . . . 7 - 4 4
Ty r e s i d e w a l l l a b e l l i n g . . . . . . . . . . . . . . . . . . . . . . . . . . . . . . . . . . . . . . . . . . . . . . . . . . . . 7 - 4 4
Low aspect ratio tyre ...................................................7-49
Fuses ......................................................................7-50
Fuse/relay panel description .......................................7-56
Light bulbs.............................................................7-67
Headlamp, position lamp, turn signal lamp and
fog lamp light bulb replacement .................................7-68
Side repeater lamp replacement .................................7-74
Rear combination lamp bulb replacement ................7-75
High mounted stop lamp replacement .......................7-79
Licence plate light bulb replacement ........................7-79
Interior light bulb replacement ....................................7-80
Appearance care ..................................................7-81
Exterior care ....................................................................7-81
Interior care......................................................................7-87
Emission control system .....................................7-88
Crankcase emission control system ...........................7-88
Evaporative emission control system.........................7-89
Exhaust emission control system ...............................7-89
Page 153 of 571
3-61
Convenient features of your vehicle
3
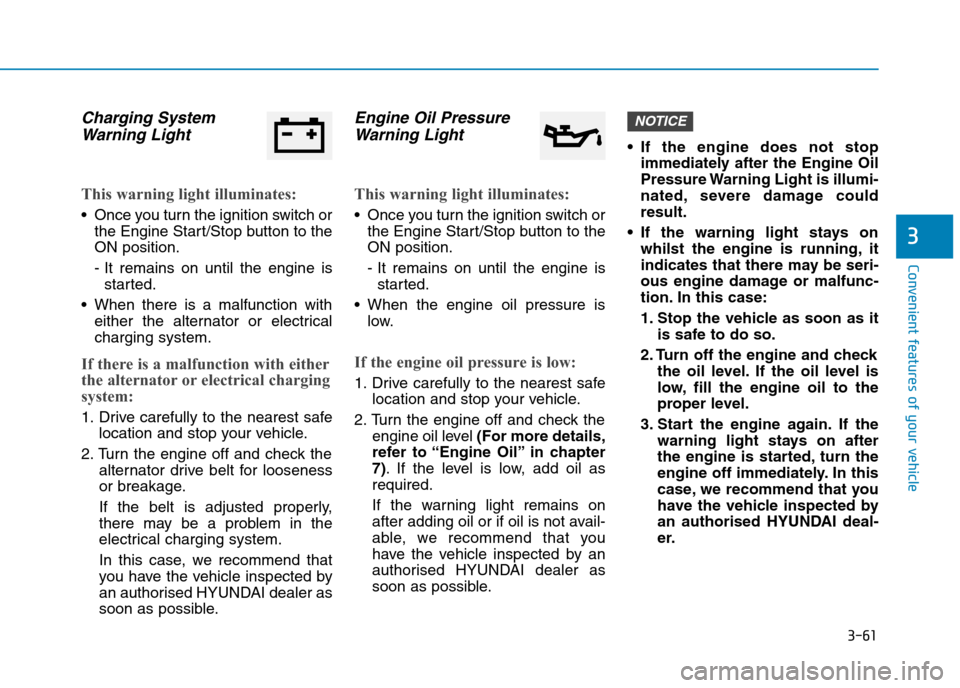
Charging System
Warning Light
This warning light illuminates:
•Once you turn the ignition switch or
the Engine Start/Stop button to the
ON position.
- It remains on until the engine is
started.
•When there is a malfunction with
either the alternator or electrical
charging system.
If there is a malfunction with either
the alternator or electrical charging
system:
1. Drive carefully to the nearest safe
location and stop your vehicle.
2. Turn the engine off and check the
alternator drive belt for looseness
or breakage.
If the belt is adjusted properly,
there may be a problem in the
electrical charging system.
In this case, we recommend that
you have the vehicle inspected by
an authorised HYUNDAI dealer as
soon as possible.
Engine Oil Pressure
Warning Light
This warning light illuminates:
•Once you turn the ignition switch or
the Engine Start/Stop button to the
ON position.
- It remains on until the engine is
started.
•When the engine oil pressure is
low.
If the engine oil pressure is low:
1. Drive carefully to the nearest safe
location and stop your vehicle.
2. Turn the engine off and check the
engine oil level (For more details,
refer to “Engine Oil” in chapter
7).If the level is low, add oil as
required.
If the warning light remains on
after adding oil or if oil is not avail-
able, we recommend that you
have the vehicle inspected by an
authorised HYUNDAI dealer as
soon as possible.
•If the engine does not stop
immediately after the Engine Oil
Pressure Warning Light is illumi-
nated, severe damage could
result.
•If the warning light stays on
whilst the engine is running, it
indicates that there may be seri-
ous engine damage or malfunc-
tion. In this case:
1. Stop the vehicle as soon as it
is safe to do so.
2. Turn off the engine and check
the oil level. If the oil level is
low, fill the engine oil to the
proper level.
3. Start the engine again. If the
warning light stays on after
the engine is started, turn the
engine off immediately. In this
case, we recommend that you
have the vehicle inspected by
an authorised HYUNDAI deal-
er.
NOTICE
Page 199 of 571
3-107
Convenient features of your vehicle
3
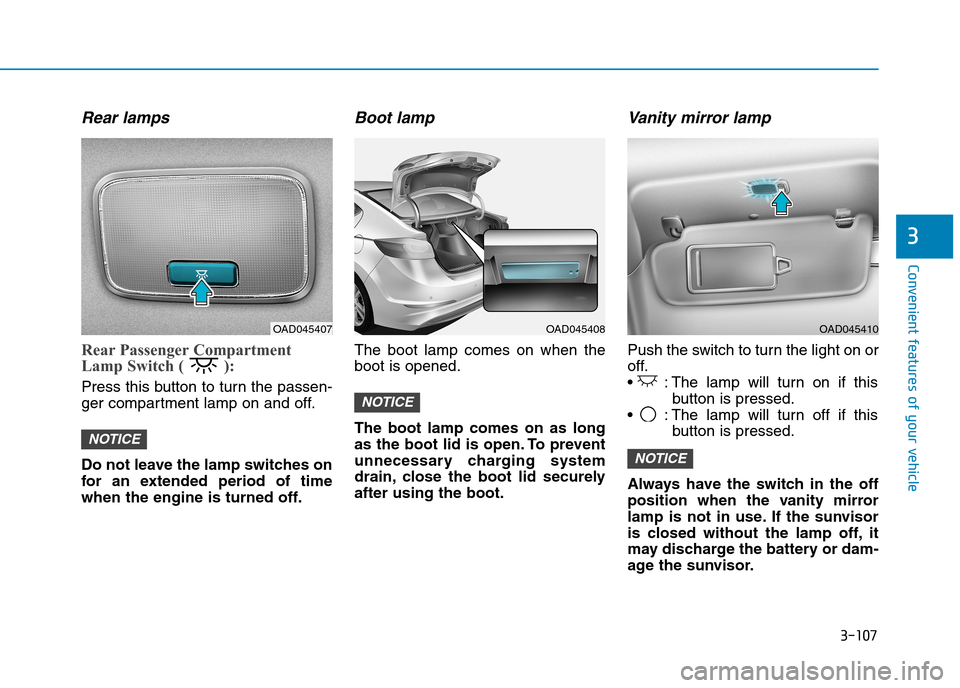
Rear lamps
Rear Passenger Compartment
Lamp Switch ( ):
Press this button to turn the passen-
ger compartment lamp on and off.
Do not leave the lamp switches on
for an extended period of time
when the engine is turned off.
Boot lamp
The boot lamp comes on when the
boot is opened.
The boot lamp comes on as long
as the boot lid is open. To prevent
unnecessary charging system
drain, close the boot lid securely
after using the boot.
Va n i t y m i r ro r l a m p
Push the switch to turn the light on or
off.
• : The lamp will turn on if this
button is pressed.
• : The lamp will turn off if this
button is pressed.
Always have the switch in the off
position when the vanity mirror
lamp is not in use. If the sunvisor
is closed without the lamp off, it
may discharge the battery or dam-
age the sunvisor.
NOTICE
NOTICE
NOTICE
OAD045407OAD045408OAD045410
Page 246 of 571

3-154
Convenient features of your vehicle
USB charger (if equipped)
The USB charger is located inside
the console box between the driver’s
seat and the front passenger’s seat.
Insert the USB charger into the USB
port, and re-charge a smart phone or
a tablet PC.
•A charging status/charging com-
pletion message is displayed on a
screen of a smart phone or a tablet
PC.
•A smart phone or a tablet PC may
get warmer during the re-charging
process. It does not indicate any
malfunction with the charging sys-
tem.
•A smart phone or a tablet PC,
which adopts a different re-charg-
ing method, may not be properly
re-charged. In this case, use a spe-
cific charger for your device.
•The charging terminal is only to
recharge a device. Do not use the
charging terminal either to power
an audio device or to play media
on the Audio/Video/Navigation
(AVN) system.
Cigarette lighter (if equipped)
To u s e t h e c i g a r e t t e l i g h t e r , t h e i g n i -
tion switch must be in the ACC or ON
position.
Push the cigarette lighter all the way
into its socket. When the element is
heated, the lighter will pop out to the
“ready” position.
We recommend that you use par ts
for replacement from an authorised
HYUNDAI dealer.
OAD045428OAD045440R
Page 274 of 571
4-25
Multimedia System
4
(Continued)
•Use of USB accessories such as
rechargers or heaters using USB I/F
may lower performance or cause
trouble.
• If you use devices such as a USB hub
purchased separately, the vehicle’s
audio system may not recognise the
USB device. In that case, connect
the USB device directly to the multi-
media terminal of the vehicle.
• If the USB device is divided by logi-
cal drives, only the music files on the
highest-priority drive are recog-
nised by the audio system.
• Devices such as MP3 Player/ Mobile
phone/Digital camera can be
unrecognisable but standard USB
I/F can be unrecognisable.
• Charging through the USB may not
be supported in some mobile
devices.
• USB HDD or USB types liable to
connection failures due to vehicle
vibrations are not supported (istick
type).
(Continued)
(Continued)
•Some non-standard USB devices
(METAL COVER TYPE USB) can
be unrecognisable.
• Some USB flash memory readers
(such as CF, SD, micro SD, etc.) or
external-HDD type devices can be
unrecognisable.
•Music files protected by DRM
(DIGITAL RIGHTS MANAGE-
MENT) are not recognisable.
• The data in the USB memory may
be lost whilst using this audio.
Always back up important data on a
personal storage device.
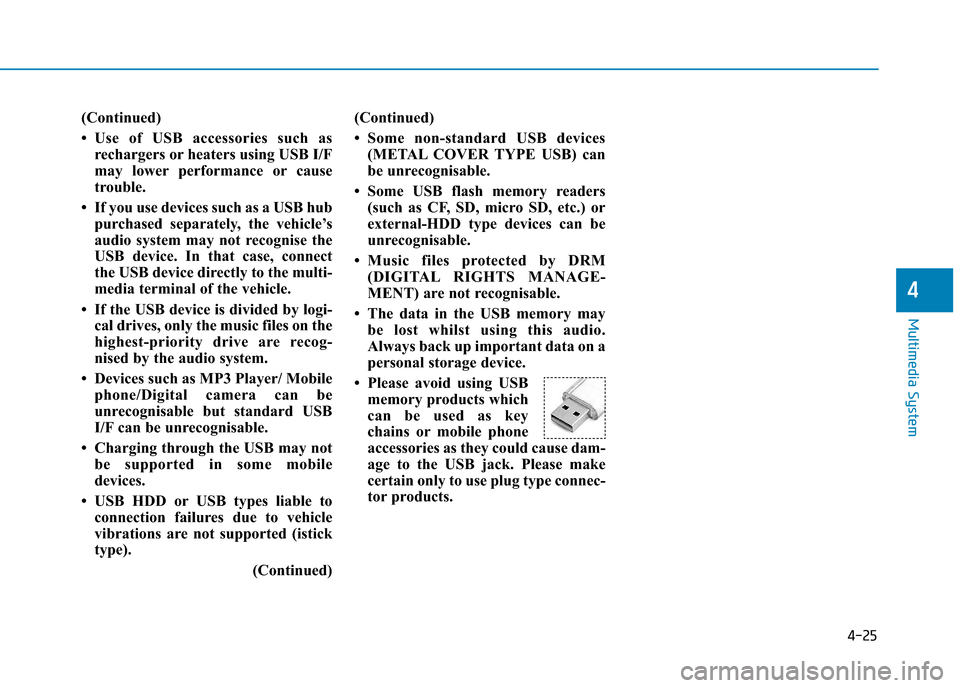
• Please avoid using USB
memory products which
can be used as key
chains or mobile phone
accessories as they could cause dam-
age to the USB jack. Please make
certain only to use plug type connec-
tor products.
Page 320 of 571
4-71
Multimedia System
4
(Continued)
• Charging through the USB may not
work for some mobile devices.
• The device may not support normal
operation when using a USB memo-
ry type besides (Metal Cover Type)
USB Memory.
• The device may not support normal
operation when using formats such
as HDD Type, CF, or SD Memory.
• The device will not support files
locked by DRM (Digital Rights
Management.)
• USB memory sticks used by con-
necting an Adaptor (SD Type or CF
Type) may not be properly recog-
nised.
• The device may not operate proper-
ly when using USB HDDs or USBs
subject to connection failures
caused by vehicle vibrations (e.g.
istick type).
(Continued)
(Continued)
• Avoid use of USB mem-
ory products that can
also be used as key
chains or mobile phone
accessories. Use of such products
may cause damage to the USB jack.
• Connecting an MP3 device or phone
through various channels, such as
AUX/BT or Audio/USB mode may
result in pop noises or abnormal
operation.
Information
-Usingthe iPod®Device
• iPod®is a registered trademark of
Apple Inc.
• In order to use the iPod®whilst
operating the buttons, you must use
a dedicated iPod®cable (the cable
that is supplied when purchasing
iPod®/iPhone®products).
•If the iPod®is connected to the vehicle
whilst it is playing, a high pitch sound
could occur for approximately 1-2
seconds immediately after connecting.
If possible, connect the iPod®to the
vehicle with the iPod®stopped/
paused.
• During ACC ON state, connecting
the iPod®through the iPod®cable
will charge the iPod®through the
audio system.
•When connecting with the iPod®
cable, make sure to fully insert the
jack to prevent communication
interference.
(Continued)
i
Page 321 of 571
4-72
Multimedia System
(Continued)
• When the EQ features of an exter-
nal device, such as the iPod®, and
the audio system are both active, EQ
effects could overlap and cause
sound deterioration and distortion.
Whenever possible, turn off the EQ
feature within the external device
upon use by connecting with the
audio system.
• Noise may occur when an iPod®or
AUX device is connected. When
such devices are not being used, dis-
connect the device for storage.
•When the iPod®or AUX device
power is connected to the power
jack, playing the external device
may result in noise. In such cases,
disconnect the power connection
before use.
•Skipping or improper operation
may occur depending on the charac-
teristics of your iPod®/iPhone®
device.
(Continued)
(Continued)
• If your iPhone®is connected to both
the Bluetooth®Wireless Technology
and USB, the sound may not be
properly played. In your iPhone®,
select the Dock connector or
Bluetooth®Wireless Technology to
change the sound output (source).
•iPod®mode cannot be operated
when the iPod®cannot be recog-
nised due to the playing of versions
that do not support communication
protocols, cases of iPod®abnormali-
ties and defects.
•For fifth generation iPod®Nano
devices, the iPod®may not be recog-
nised when the battery level is low.
Please charge the iPod®for use.
•Search/play orders shown within
the iPod®device may differ with the
orders shown within the audio sys-
tem.
• If the iPod®malfunctions due to an
iPod®device defect, reset the iPod®
and try again. (To learn more, refer
to your iPod®manual).
(Continued)
(Continued)
• Some iPod®s may not sync with the
System depending on its version. If
the Media is removed before the
Media is recognised, then the system
may not properly restore the previ-
ously operated mode (iPad charging
is not supported).
• Use only the original iPod®cable.
Other cables may not be recognised.
Page 382 of 571
5-6
Driving your vehicle
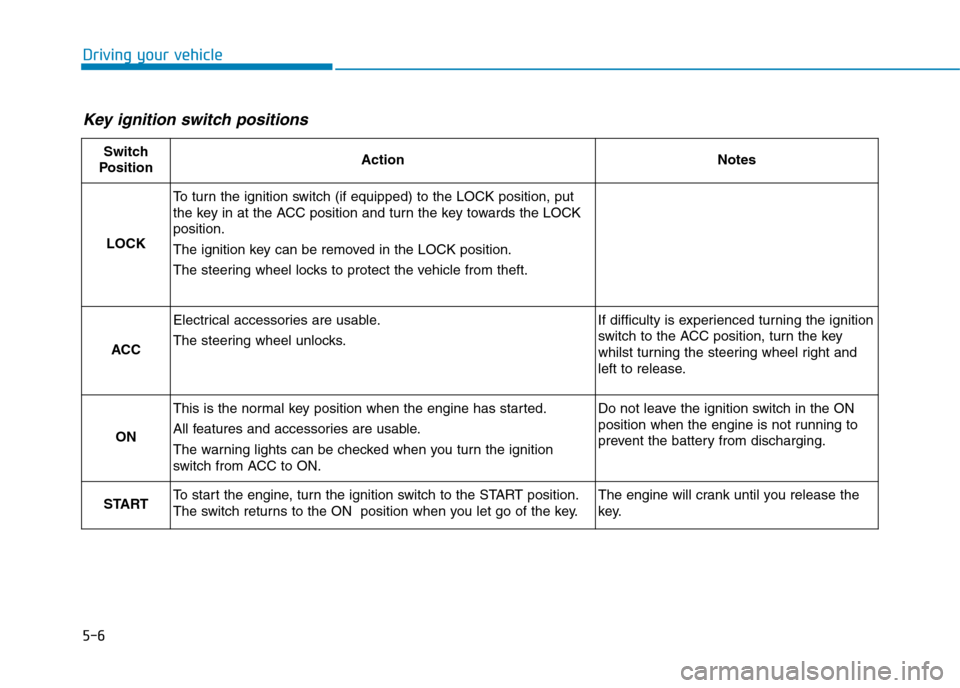
Key ignition switch positions
Switch
PositionActionNotes
LOCK
To t u r n t h e i g n i t i o n s w i t c h ( i f e q u i p p e d ) t o t h e L O C K p o s i t i o n , p u t
the key in at the ACC position and turn the key towards the LOCK
position.
The ignition key can be removed in the LOCK position.
The steering wheel locks to protect the vehicle from theft.
ACC
Electrical accessories are usable.
The steering wheel unlocks.
If difficulty is experienced turning the ignition
switch to the ACC position, tur n the key
whilst turning the steering wheel right and
left to release.
ON
This is the normal key position when the engine has started.
All features and accessories are usable.
The warning lights can be checked when you turn the ignition
switch from ACC to ON.
Do not leave the ignition switch in the ON
position when the engine is not running to
prevent the battery from discharging.
STARTTo s t a r t t h e e n g i n e , t u r n t h e i g n i t i o n s w i t c h t o t h e S TA R T p o s i t i o n .
The switch returns to the ON position when you let go of the key.
The engine will crank until you release the
key.