2017 Hyundai Elantra charging
[x] Cancel search: chargingPage 386 of 571
5-10
Driving your vehicle
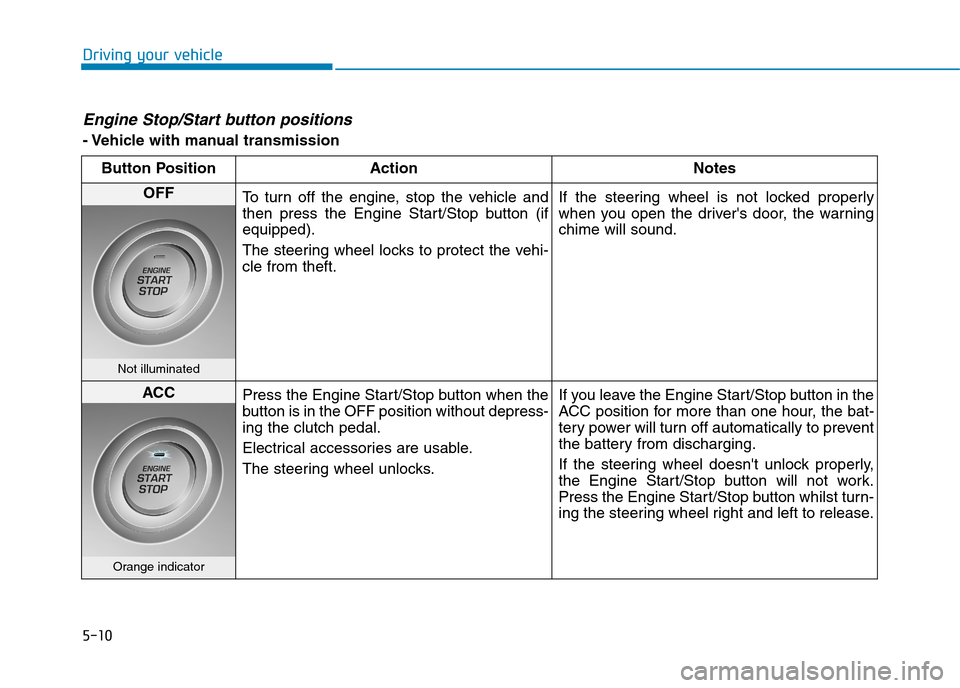
Engine Stop/Start button positions
- Vehicle with manual transmission
Button Position Action Notes
OFFTo t u r n o f f t h e e n g i n e , s t o p t h e v e h i c l e a n d
then press the Engine Start/Stop button (if
equipped).
The steering wheel locks to protect the vehi-
cle from theft.
If the steering wheel is not locked properly
when you open the driver's door, the warning
chime will sound.
Not illuminated
ACCPress the Engine Start/Stop button when the
button is in the OFF position without depress-
ing the clutch pedal.
Electrical accessories are usable.
The steering wheel unlocks.
If you leave the Engine Start/Stop button in the
ACC position for more than one hour, the bat-
tery power will turn off automatically to prevent
the battery from discharging.
If the steering wheel doesn't unlock properly,
the Engine Start/Stop button will not work.
Press the Engine Start/Stop button whilst turn-
ing the steering wheel right and left to release.
Orange indicator
Page 387 of 571
5-11
Driving your vehicle
5
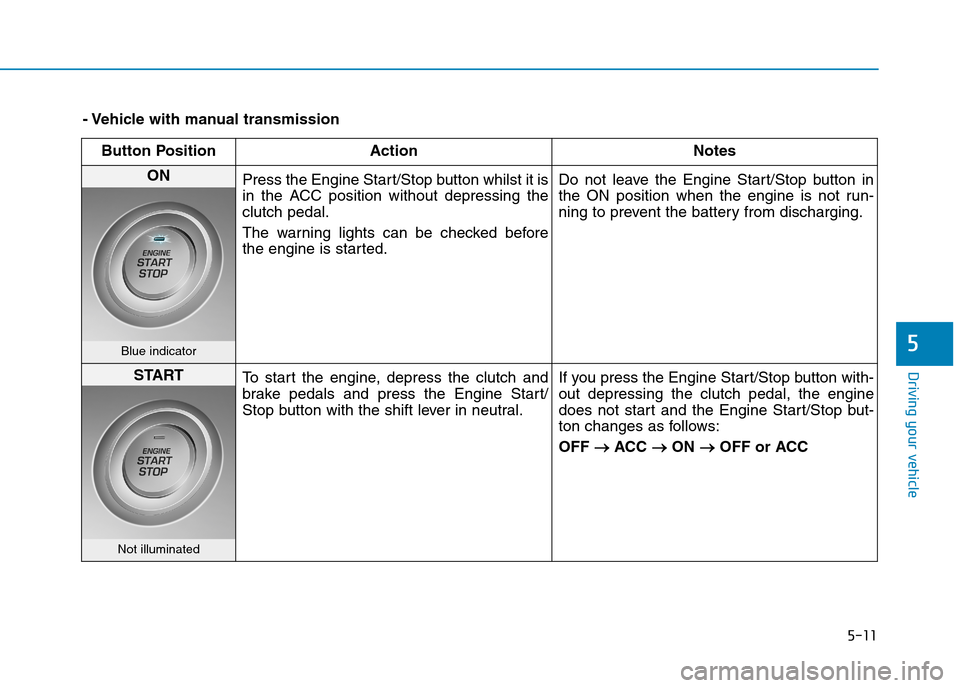
- Vehicle with manual transmission
Button Position Action Notes
ON Press the Engine Start/Stop button whilst it is
in the ACC position without depressing the
clutch pedal.
The warning lights can be checked before
the engine is started.
Do not leave the Engine Start/Stop button in
the ON position when the engine is not run-
ning to prevent the battery from discharging.
Blue indicator
STARTTo s t a r t t h e e n g i n e , d e p r e s s t h e c l u t c h a n d
brake pedals and press the Engine Start/
Stop button with the shift lever in neutral.
If you press the Engine Start/Stop button with-
out depressing the clutch pedal, the engine
does not start and the Engine Start/Stop but-
ton changes as follows:
OFF →→ACC →→ON →→OFF or ACC
Not illuminated
Page 388 of 571
5-12
Driving your vehicle
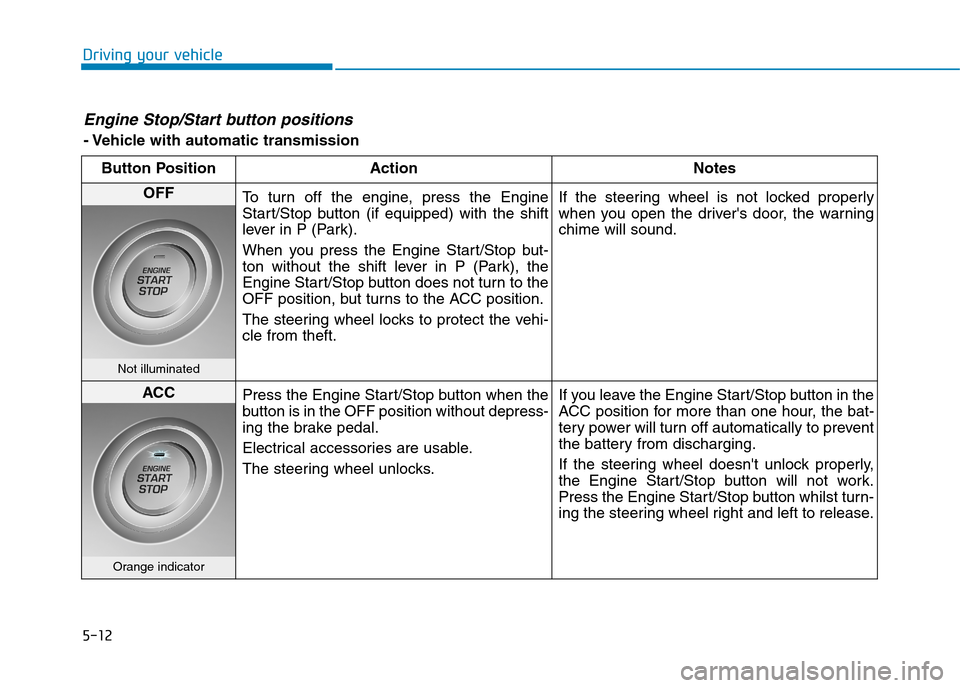
Engine Stop/Start button positions
- Vehicle with automatic transmission
Button Position Action Notes
OFFTo t u r n o f f t h e e n g i n e , p r e s s t h e E n g i n e
Start/Stop button (if equipped) with the shift
lever in P (Park).
When you press the Engine Start/Stop but-
ton without the shift lever in P (Park), the
Engine Start/Stop button does not turn to the
OFF position, but turns to the ACC position.
The steering wheel locks to protect the vehi-
cle from theft.
If the steering wheel is not locked properly
when you open the driver's door, the warning
chime will sound.
Not illuminated
ACCPress the Engine Start/Stop button when the
button is in the OFF position without depress-
ing the brake pedal.
Electrical accessories are usable.
The steering wheel unlocks.
If you leave the Engine Start/Stop button in the
ACC position for more than one hour, the bat-
tery power will turn off automatically to prevent
the battery from discharging.
If the steering wheel doesn't unlock properly,
the Engine Start/Stop button will not work.
Press the Engine Start/Stop button whilst turn-
ing the steering wheel right and left to release.
Orange indicator
Page 389 of 571
5-13
Driving your vehicle
5
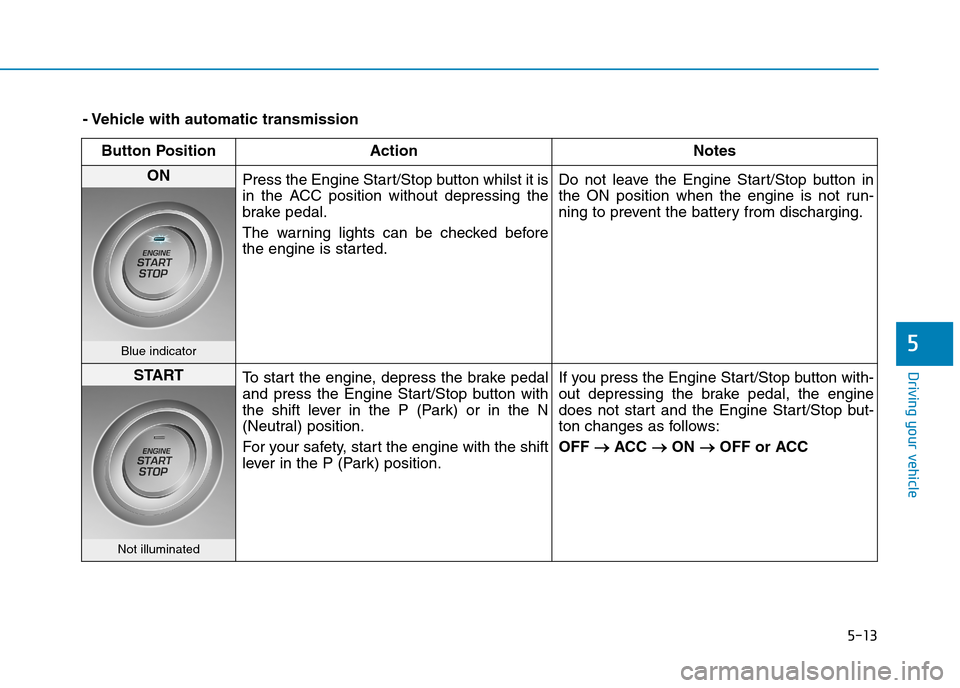
- Vehicle with automatic transmission
Button Position Action Notes
ON Press the Engine Start/Stop button whilst it is
in the ACC position without depressing the
brake pedal.
The warning lights can be checked before
the engine is started.
Do not leave the Engine Start/Stop button in
the ON position when the engine is not run-
ning to prevent the battery from discharging.
Blue indicator
STARTTo s t a r t t h e e n g i n e , d e p r e s s t h e b r a k e p e d a l
and press the Engine Start/Stop button with
the shift lever in the P (Park) or in the N
(Neutral) position.
For your safety, start the engine with the shift
lever in the P (Park) position.
If you press the Engine Start/Stop button with-
out depressing the brake pedal, the engine
does not start and the Engine Start/Stop but-
ton changes as follows:
OFF →→ACC →→ON →→OFF or ACC
Not illuminated
Page 441 of 571
5-65
Driving your vehicle
5
Check battery and cables
Winter temperatures increase bat-
tery consumption.Inspect the bat-
tery and cables, as specified in the
chapter 7.The battery charging level
can be checked by an authorised
HYUNDAI dealer or in a service sta-
tion.
Change to "winter weight" oil if
necessary
In some regions during winter, it is
recommended to use the "winter
weight" oil with lower viscosity. For
further information, refer to chapter
8. When you are not sure about a
type of winter weight oil, consult an
authorised HYUNDAI dealer.
Check spark plugs and ignition
system
Inspect the spark plugs, as speci-
fied in chapter 7.If necessary,
replace them. Also check all ignition
wirings and components for any
cracks, wear-out, and damage.
To p r e v e n t l o c k s f r o m f r e e z i n g
To p r e v e n t t h e l o c k s f r o m b e i n g
frozen, spray approved de-icing fluid
or glycerin into key holes. When a
lock opening is already covered with
ice, spray approved de-icing fluid
over the ice to remove it. When an
internal part of a lock freezes, try to
thaw it with a heated key. Use the
heated key carefully to avoid an
injury.
Use approved window washer
anti-freeze solution in system
To p r e v e n t t h e w i n d o w w a s h e r f r o m
being frozen, add authorised window
washer anti-freeze solution, as spec-
ified on the window washer contain-
er. Window washer anti-freeze solu-
tion is available from an authorised
HYUNDAI dealer, and most vehicle
accessory outlets. Do not use engine
coolant or other types of anti-freeze
solution, to prevent any damage to
the vehicle paint.
Page 451 of 571
6-7
What to do in an emergency
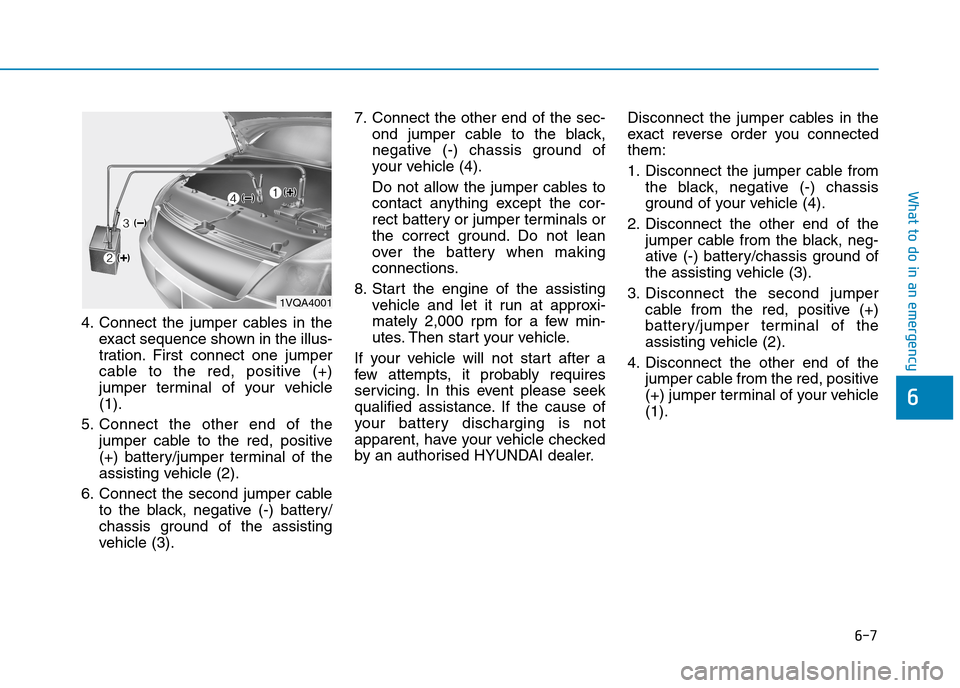
4. Connect the jumper cables in the
exact sequence shown in the illus-
tration. First connect one jumper
cable to the red, positive (+)
jumper terminal of your vehicle
(1).
5. Connect the other end of the
jumper cable to the red, positive
(+) battery/jumper terminal of the
assisting vehicle (2).
6. Connect the second jumper cable
to the black, negative (-) battery/
chassis ground of the assisting
vehicle (3).
7. Connect the other end of the sec-
ond jumper cable to the black,
negative (-) chassis ground of
your vehicle (4).
Do not allow the jumper cables to
contact anything except the cor-
rect battery or jumper terminals or
the correct ground. Do not lean
over the battery when making
connections.
8. Start the engine of the assisting
vehicle and let it run at approxi-
mately 2,000 rpm for a few min-
utes. Then start your vehicle.
If your vehicle will not start after a
few attempts, it probably requires
servicing. In this event please seek
qualified assistance. If the cause of
your battery discharging is not
apparent, have your vehicle checked
by an authorised HYUNDAI dealer.
Disconnect the jumper cables in the
exact reverse order you connected
them:
1. Disconnect the jumper cable from
the black, negative (-) chassis
ground of your vehicle (4).
2. Disconnect the other end of the
jumper cable from the black, neg-
ative (-) battery/chassis ground of
the assisting vehicle (3).
3. Disconnect the second jumper
cable from the red, positive (+)
battery/jumper terminal of the
assisting vehicle (2).
4. Disconnect the other end of the
jumper cable from the red, positive
(+) jumper terminal of your vehicle
(1).6
1VQA4001
Page 471 of 571
7
Maintenance
7
Maintenance
Engine compartment .............................................7-3
Maintenance services ...........................................7-4
Owne's responsibility........................................................7-4
Owner maintenance precautions ..................................7-4
Owner maintenance ...............................................7-5
Owner maintenance schedule ........................................7-6
Scheduled maintenance services.........................7-8
Normal Maintenance Schedule .....................................7-9
Maintenance under severe usage and
low mileage conditions ..................................................7-13
Explanation of scheduled maintenance items..7-15
Engine oil ..............................................................7-19
Checking the engine oil level ....................................7-19
Checking the engine oil and filter ..............................7-20
Engine coolant......................................................7-21
Checking the engine coolant level..............................7-21
Changing the coolant .....................................................7-23
Brake/clutch fluid ................................................7-24
Checking the brake/clutch fluid level ........................7-24
Washer fluid .........................................................7-26
Checking the washer fluid level ...............................7-26
Parking brake .......................................................7-27
Checking the parking brake .........................................7-27
Air cleaner ............................................................7-28
Filter replacement ...........................................................7-28
Climate control air filter .....................................7-30
Filter inspection ...............................................................7-30
Filter replacement ...........................................................7-30
Wiper blades .........................................................7-31
Blade inspection ..............................................................7-31
Blade replacement ..........................................................7-31
Battery...................................................................7-34
For best battery service................................................7-34
Battery capacity label ...................................................7-36
Battery recharging .......................................................7-36
Reset items .......................................................................7-37
Ty r e s a n d w h e e l s . . . . . . . . . . . . . . . . . . . . . . . . . . . . . . . . . . . . . . . . . . . . . . . . . 7 - 3 8
Ty r e c a r e . . . . . . . . . . . . . . . . . . . . . . . . . . . . . . . . . . . . . . . . . . . . . . . . . . . . . . . . . . . . . . . . . . . . . . . . . . . 7 - 3 8
Recommended cold tyre inflation pressures ...........7-38
Checking tyre inflation pressure.................................7-40
Ty r e r o t a t i o n . . . . . . . . . . . . . . . . . . . . . . . . . . . . . . . . . . . . . . . . . . . . . . . . . . . . . . . . . . . . . . . . . . . 7 - 4 1
Wheel alignment and tyre balance ..........................7-42
Ty r e r e p l a c e m e n t . . . . . . . . . . . . . . . . . . . . . . . . . . . . . . . . . . . . . . . . . . . . . . . . . . . . . . . . . . . . 7 - 4 2
Wheel replacement ........................................................7-44
Ty r e t r a c t i o n . . . . . . . . . . . . . . . . . . . . . . . . . . . . . . . . . . . . . . . . . . . . . . . . . . . . . . . . . . . . . . . . . . . . . 7 - 4 4
Ty r e m a i n t e n a n c e . . . . . . . . . . . . . . . . . . . . . . . . . . . . . . . . . . . . . . . . . . . . . . . . . . . . . . . . . . 7 - 4 4
Ty r e s i d e w a l l l a b e l l i n g . . . . . . . . . . . . . . . . . . . . . . . . . . . . . . . . . . . . . . . . . . . . . . . . . . . . 7 - 4 4
Low aspect ratio tyre ...................................................7-49
7
Page 506 of 571
7-36
Maintenance
Battery capacity label
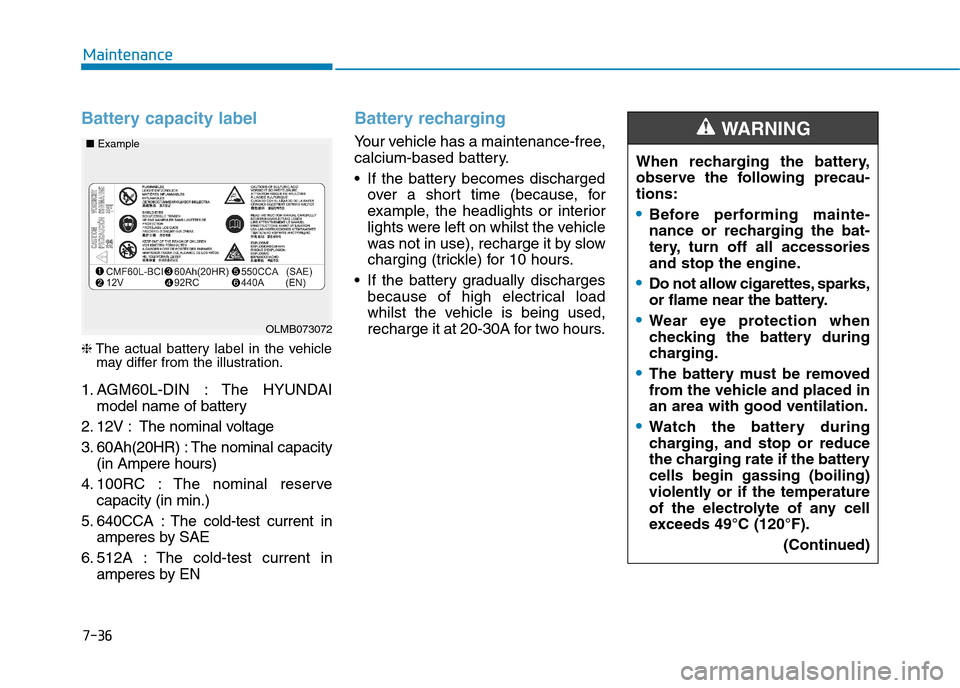
❈The actual battery label in the vehiclemay differ from the illustration.
1. AGM60L-DIN : The HYUNDAI
model name of battery
2. 12V : The nominal voltage
3. 60Ah(20HR) : The nominal capacity
(in Ampere hours)
4. 100RC : The nominal reser ve
capacity (in min.)
5. 640CCA : The cold-test current in
amperes by SAE
6. 512A : The cold-test current in
amperes by EN
Battery recharging
Yo u r v e h i c l e h a s a m a i n t e n a n c e - f r e e ,
calcium-based battery.
•If the battery becomes discharged
over a shor t time (because, for
example, the headlights or interior
lights were left on whilst the vehicle
was not in use), recharge it by slow
charging (trickle) for 10 hours.
•If the battery gradually discharges
because of high electrical load
whilst the vehicle is being used,
recharge it at 20-30A for two hours.OLMB073072
■Example
When recharging the battery,
observe the following precau-
tions:
•Before performing mainte-
nance or recharging the bat-
tery, turn off all accessories
and stop the engine.
•Do not allow cigarettes, sparks,
or flame near the battery.
•Wear eye protection when
checking the battery during
charging.
•The battery must be removed
from the vehicle and placed in
an area with good ventilation.
•Watch the battery during
charging, and stop or reduce
the charging rate if the battery
cells begin gassing (boiling)
violently or if the temperature
of the electrolyte of any cell
exceeds 49°C (120°F).
(Continued)
WA R N I N G