2017 FORD SUPER DUTY lights
[x] Cancel search: lightsPage 70 of 636
When you open one of the front doors and
lock your vehicle using the power door lock
control, all doors will lock then unlock if
the ignition is on.
Autolock and Autounlock (If Equipped)
The autolock feature locks all the doors
when your doors are closed, the ignition is
on, and your vehicle reaches a speed
greater than
12 mph (20 km/h).
When your doors autolock while driving,
stopping the vehicle then switching the
ignition off or to accessory and opening
the driver door unlocks all your doors. This
autounlock feature remains active for 10
minutes after stopping.
Note: The doors do not autounlock if you
have electronically locked them before
opening the driver door.
Enabling or Disabling
You can enable or disable these features
independently of each other using the
information display. An authorized dealer
can also help you enable or disable these
features. See General Information (page
111
).
Illuminated Entry
The interior lamps and select exterior
lamps illuminate when you unlock the
doors with the remote entry system.
The illuminated entry system turns off the
lights if:
• The ignition is on.
• You press the remote control lock
button.
• After 25 seconds of illumination.
The dome lamp does not turn on if the
control is set to the off position. The lights do not turn off if:
•
You switch them on with the dimmer
control.
• Any door is open.
Battery Saver
The battery saver turns off the interior
lamps 30 minutes after you switch off the
ignition if a door is open and the dome
lamp switch is on. It turns off the interior
lamps after 10 minutes if the dome lamp
switch is off.
Accessory Mode Battery Saver for
Intelligent Access Keys (If Equipped)
If you leave the ignition on after leaving
your vehicle, it turns off 15 minutes after
you close all of the doors.
KEYLESS ENTRY
(If Equipped)
SECURICODE™ KEYLESS ENTRY
KEYPAD
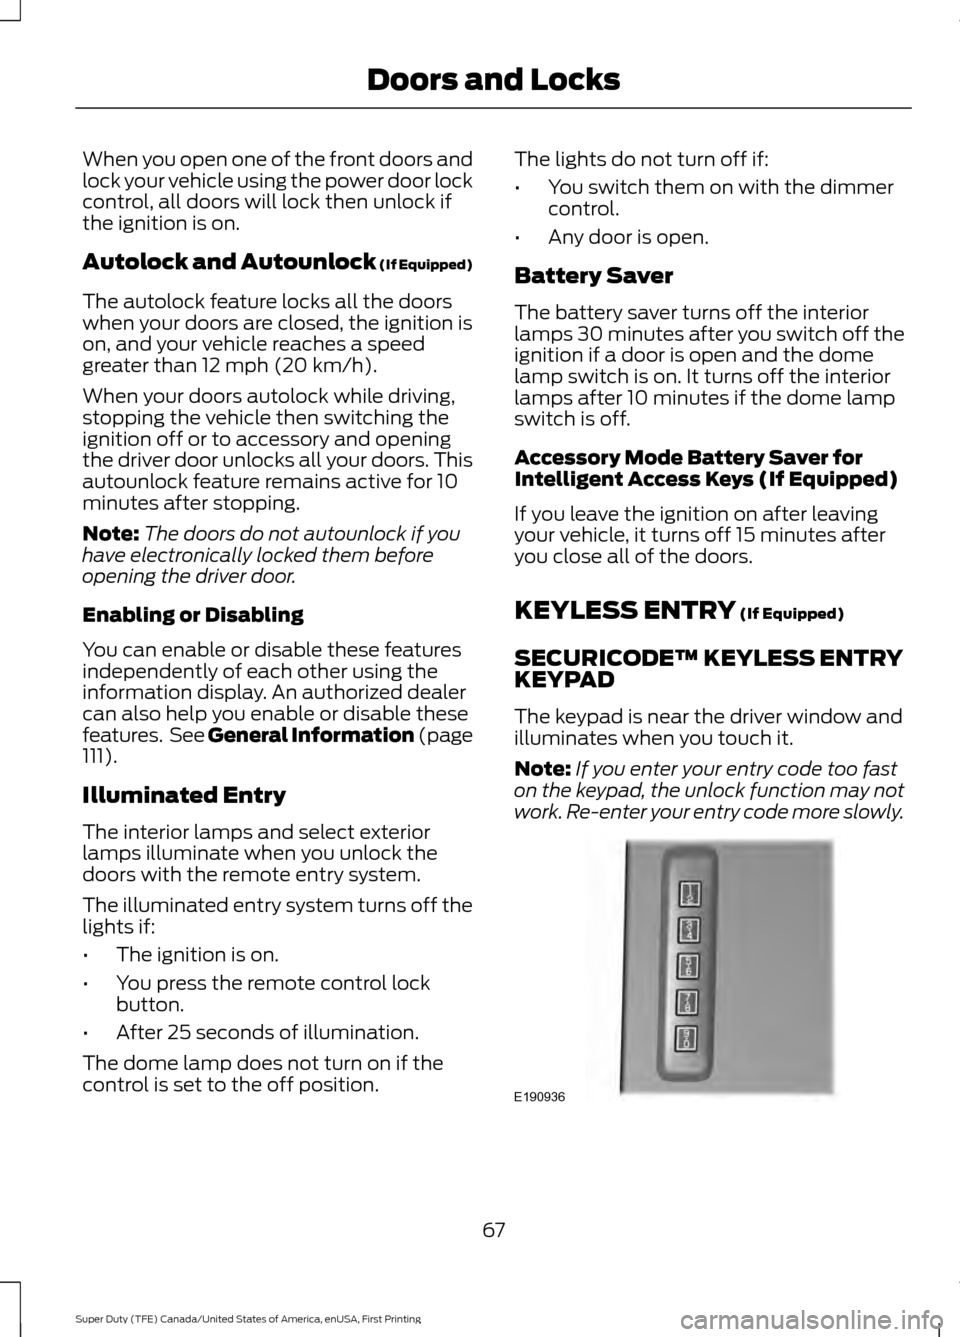
The keypad is near the driver window and
illuminates when you touch it.
Note: If you enter your entry code too fast
on the keypad, the unlock function may not
work. Re-enter your entry code more slowly. 67
Super Duty (TFE) Canada/United States of America, enUSA, First Printing Doors and LocksE190936
Page 92 of 636
3. The transmission is not in park (P) for
vehicles with automatic transmissions
or the parking brake is released for
vehicles with manual transmissions.
4. The lighting control is in the autolamps
position.
5. The headlamps are off.
The other lighting control switch positions
do not activate the daytime running lamps,
and you can use them to temporarily
override autolamp control.
When switched off in the information
display, the daytime running lamps are off
in all lighting control switch positions.
AUTOMATIC HIGH BEAM
CONTROL (If Equipped)
The system automatically turns on the high
beams if it is dark enough and no other
traffic is present. When it detects the
headlights of an approaching vehicle, the
tail lamps of the preceding vehicle or street
lighting, the system turns off the high
beams before they distract other drivers.
The low beams remain on.
Note: If it appears that automatic high
beam is not functioning properly, check the
windshield in front of the camera for a
blockage. A clear view of the road is required
for proper system operation. Make sure that
authorized personnel repair any windshield
damage in the area of the camera's field of
view.
Note: If the system detects a blockage such
as bird droppings, bug splatter, snow or ice,
and you do not observe changes, the system
may go into low beam mode until you clear
the blockage. A message may also appear
in the information display noting the front
camera is blocked. Note:
Typical road dust, dirt and water
spots do not affect the performance of the
automatic high beam control. However, in
cold or inclement weather conditions, you
may notice a decrease in the availability of
the automatic high beam control, especially
at start up. If you want to change the beam
state independently of the system, you may
switch the high beams on or off using the
high beam lever. Automatic high beam
control resumes when conditions are
correct.
Note: Using much larger tires or equipping
vehicle accessories such as snowplows can
modify your vehicle's ride height and
degrade automatic high beam control
performance.
A camera sensor, centrally mounted
behind the windshield of your vehicle,
continuously monitors conditions to decide
when to switch the high beams off and on.
Once the system is active, the high beams
switch on if:
• The outside light level is low enough.
• There is no traffic in front of your
vehicle.
• The vehicle speed is greater than
32 mph (52 km/h)
.
The high beams switch off if:
• The system detects the headlamps of
an approaching vehicle or the rear
lamps of a vehicle in front of you.
• Vehicle speed falls below
16 mph
(26 km/h).
• The outside light level is high enough
that high beams are not required.
• The system detects severe rain, snow
or fog.
• The camera is blocked.
89
Super Duty (TFE) Canada/United States of America, enUSA, First Printing Lighting
Page 99 of 636
Window Lock (If Equipped)
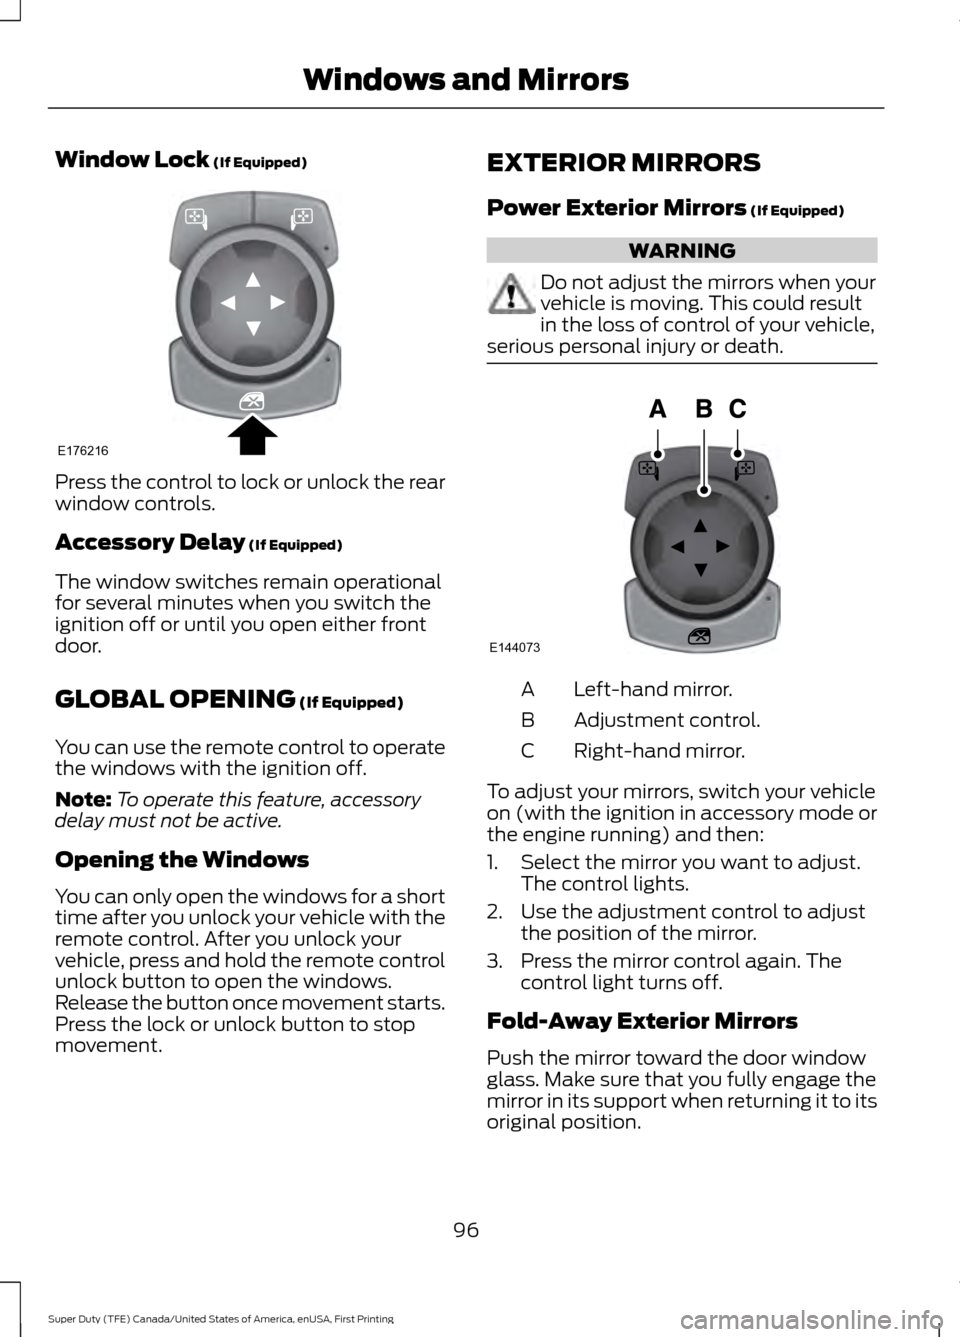
Press the control to lock or unlock the rear
window controls.
Accessory Delay
(If Equipped)
The window switches remain operational
for several minutes when you switch the
ignition off or until you open either front
door.
GLOBAL OPENING
(If Equipped)
You can use the remote control to operate
the windows with the ignition off.
Note: To operate this feature, accessory
delay must not be active.
Opening the Windows
You can only open the windows for a short
time after you unlock your vehicle with the
remote control. After you unlock your
vehicle, press and hold the remote control
unlock button to open the windows.
Release the button once movement starts.
Press the lock or unlock button to stop
movement. EXTERIOR MIRRORS
Power Exterior Mirrors
(If Equipped) WARNING
Do not adjust the mirrors when your
vehicle is moving. This could result
in the loss of control of your vehicle,
serious personal injury or death. Left-hand mirror.
A
Adjustment control.
B
Right-hand mirror.
C
To adjust your mirrors, switch your vehicle
on (with the ignition in accessory mode or
the engine running) and then:
1. Select the mirror you want to adjust. The control lights.
2. Use the adjustment control to adjust the position of the mirror.
3. Press the mirror control again. The control light turns off.
Fold-Away Exterior Mirrors
Push the mirror toward the door window
glass. Make sure that you fully engage the
mirror in its support when returning it to its
original position.
96
Super Duty (TFE) Canada/United States of America, enUSA, First Printing Windows and MirrorsE176216 E144073
Page 101 of 636
To adjust your mirrors, make sure you
switch your vehicle on (with the ignition in
accessory mode or the engine running) and
then press the adjustment control to
position the mirrors.
Note:
Moving the mirrors 10 or more times
within one minute, or repeated folding,
unfolding and telescoping of the mirrors
while holding the control down during full
travel, may disable the system to protect
the motors from overheating. Wait
approximately three minutes with the
vehicle running, and up to 10 minutes with
the vehicle off, for the system to reset and
for function to return to normal.
Loose Mirror
If your power-folding mirrors are manually
folded, they may not work properly even
after you re-position them. You need to
reset them if:
• The mirrors vibrate when you drive.
• The mirrors feel loose.
• The mirrors do not stay in the folded or
unfolded position.
• One of the mirrors is not in its normal
driving position.
To reset the power-fold feature, use the
power-folding mirror control to fold and
unfold the mirrors. You may hear a loud
noise as you reset the power-folding
mirrors. This sound is normal. Repeat this
process as needed each time the mirrors
are manually folded.
Heated Exterior Mirrors (If Equipped)
See Heated Windows and Mirrors (page
150
).
Memory Mirrors
(If Equipped)
You can save and recall the mirror
positions through the memory function.
See
Memory Function (page 157). Direction Indicator Mirrors (If Equipped)
While the vehicle is running, the
forward-facing portion of the appropriate
mirror housing blinks when you switch on
the direction indicator.
Puddle Lamps
(If Equipped)
The lamps on the bottom part of the mirror
housing light when you use your
transmitter to unlock the doors or when
you open a door.
Clearance Lamps
(If Equipped)
The lower, outer part of the mirror housings
light when you switch the headlamps or
parking lamps on.
Spot Lamps
(If Equipped)
The area lights are on the forward-facing
portion of the mirror housing. You can
switch them on and off by using the
controls located on the instrument panel.
See
Lighting (page 86).
Trailer Towing Camera System
(If
Equipped)
See
Rear View Camera (page 232).
Blind Spot Information System
(If
Equipped)
See
Blind Spot Information System
(page 249).
INTERIOR MIRROR WARNING
Do not adjust the mirror when your
vehicle is moving.
98
Super Duty (TFE) Canada/United States of America, enUSA, First Printing Windows and Mirrors
Page 102 of 636
Note:
Do not clean the housing or glass of
any mirror with harsh abrasives, fuel or other
petroleum or ammonia-based cleaning
products.
You can adjust the interior mirror to your
preference. Some mirrors also have a
second pivot point. This lets you move the
mirror head up or down and from side to
side.
Pull the tab below the mirror toward you
to reduce glare at night.
Auto-Dimming Mirror (If Equipped)
Note: Do not block the sensors on the front
and back of the mirror. Mirror performance
may be affected. A rear center passenger or
raised rear center head restraint may also
block light from reaching the sensor.
The mirror will dim automatically to reduce
glare when bright lights are detected from
behind your vehicle. It will automatically
return to normal reflection when you select
reverse gear to make sure you have a clear
view when backing up.
SLIDING WINDOWS
(If Equipped)
Power Sliding Back Window
(If
Equipped) WARNINGS
When operating the power sliding
back window, you must make sure
all rear seat occupants and cargo are
not in the proximity of the back window. Do not leave children unattended in
your vehicle and do not let them play
with the power sliding back window.
They may seriously injure themselves. The control is on the overhead console.
Press and hold the control to open the
window. Pull and hold the control to close
the window.
SUN VISORS
Rotate the sun visor toward the side
window and extend it rearward for extra
shade.
99
Super Duty (TFE) Canada/United States of America, enUSA, First Printing Windows and MirrorsE176217 E138666
Page 112 of 636
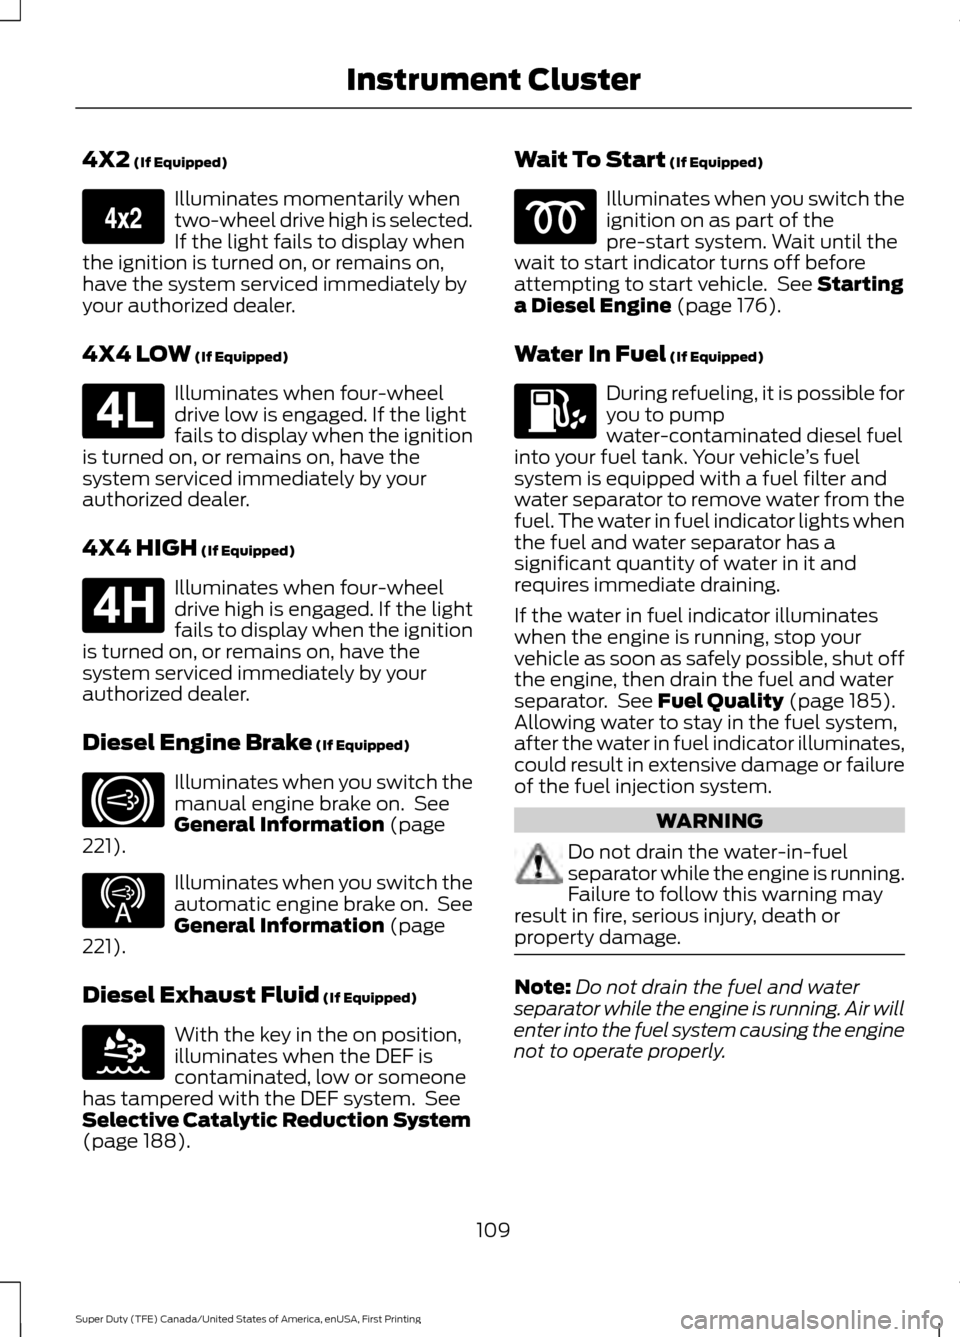
4X2 (If Equipped)
Illuminates momentarily when
two-wheel drive high is selected.
If the light fails to display when
the ignition is turned on, or remains on,
have the system serviced immediately by
your authorized dealer.
4X4 LOW
(If Equipped) Illuminates when four-wheel
drive low is engaged. If the light
fails to display when the ignition
is turned on, or remains on, have the
system serviced immediately by your
authorized dealer.
4X4 HIGH
(If Equipped) Illuminates when four-wheel
drive high is engaged. If the light
fails to display when the ignition
is turned on, or remains on, have the
system serviced immediately by your
authorized dealer.
Diesel Engine Brake
(If Equipped) Illuminates when you switch the
manual engine brake on. See
General Information
(page
221). Illuminates when you switch the
automatic engine brake on. See
General Information
(page
221).
Diesel Exhaust Fluid
(If Equipped) With the key in the on position,
illuminates when the DEF is
contaminated, low or someone
has tampered with the DEF system. See
Selective Catalytic Reduction System
(page
188). Wait To Start
(If Equipped) Illuminates when you switch the
ignition on as part of the
pre-start system. Wait until the
wait to start indicator turns off before
attempting to start vehicle. See
Starting
a Diesel Engine (page 176).
Water In Fuel
(If Equipped) During refueling, it is possible for
you to pump
water-contaminated diesel fuel
into your fuel tank. Your vehicle ’s fuel
system is equipped with a fuel filter and
water separator to remove water from the
fuel. The water in fuel indicator lights when
the fuel and water separator has a
significant quantity of water in it and
requires immediate draining.
If the water in fuel indicator illuminates
when the engine is running, stop your
vehicle as soon as safely possible, shut off
the engine, then drain the fuel and water
separator. See
Fuel Quality (page 185).
Allowing water to stay in the fuel system,
after the water in fuel indicator illuminates,
could result in extensive damage or failure
of the fuel injection system. WARNING
Do not drain the water-in-fuel
separator while the engine is running.
Failure to follow this warning may
result in fire, serious injury, death or
property damage. Note:
Do not drain the fuel and water
separator while the engine is running. Air will
enter into the fuel system causing the engine
not to operate properly.
109
Super Duty (TFE) Canada/United States of America, enUSA, First Printing Instrument ClusterE163173 E181780 E181779 E171217 E234452 E163176
Page 122 of 636
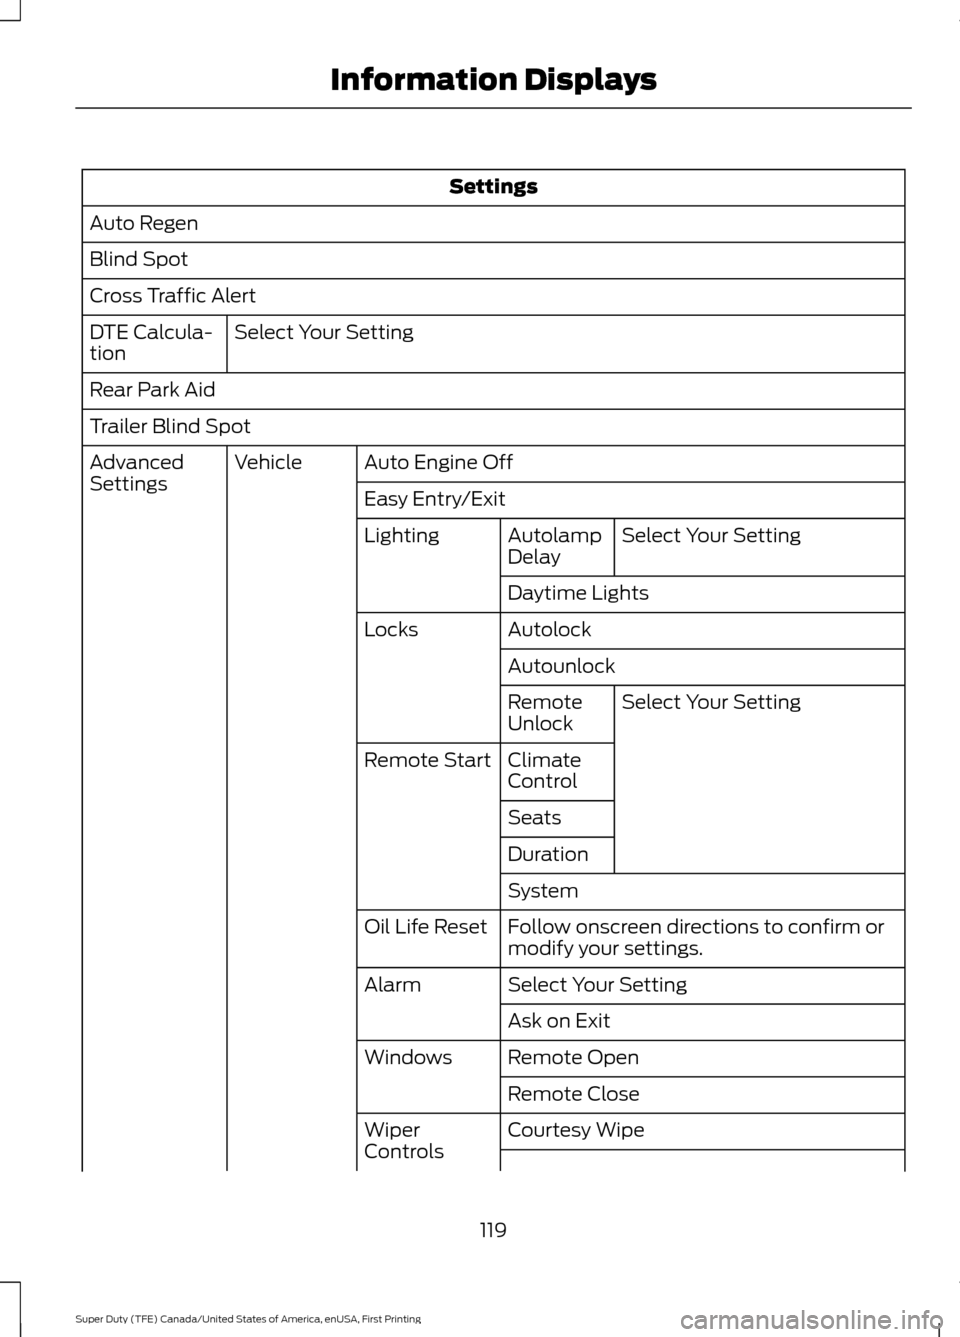
Settings
Auto Regen
Blind Spot
Cross Traffic Alert Select Your Setting
DTE Calcula-
tion
Rear Park Aid
Trailer Blind Spot
Auto Engine Off
Vehicle
Advanced
Settings
Easy Entry/Exit
Select Your Setting
Autolamp
Delay
Lighting
Daytime Lights
Autolock
Locks
AutounlockSelect Your Setting
Remote
Unlock
Climate
Control
Remote Start
Seats
Duration
System
Follow onscreen directions to confirm or
modify your settings.
Oil Life Reset
Select Your Setting
Alarm
Ask on Exit
Remote Open
Windows
Remote Close
Courtesy Wipe
Wiper
Controls
119
Super Duty (TFE) Canada/United States of America, enUSA, First Printing Information Displays
Page 130 of 636
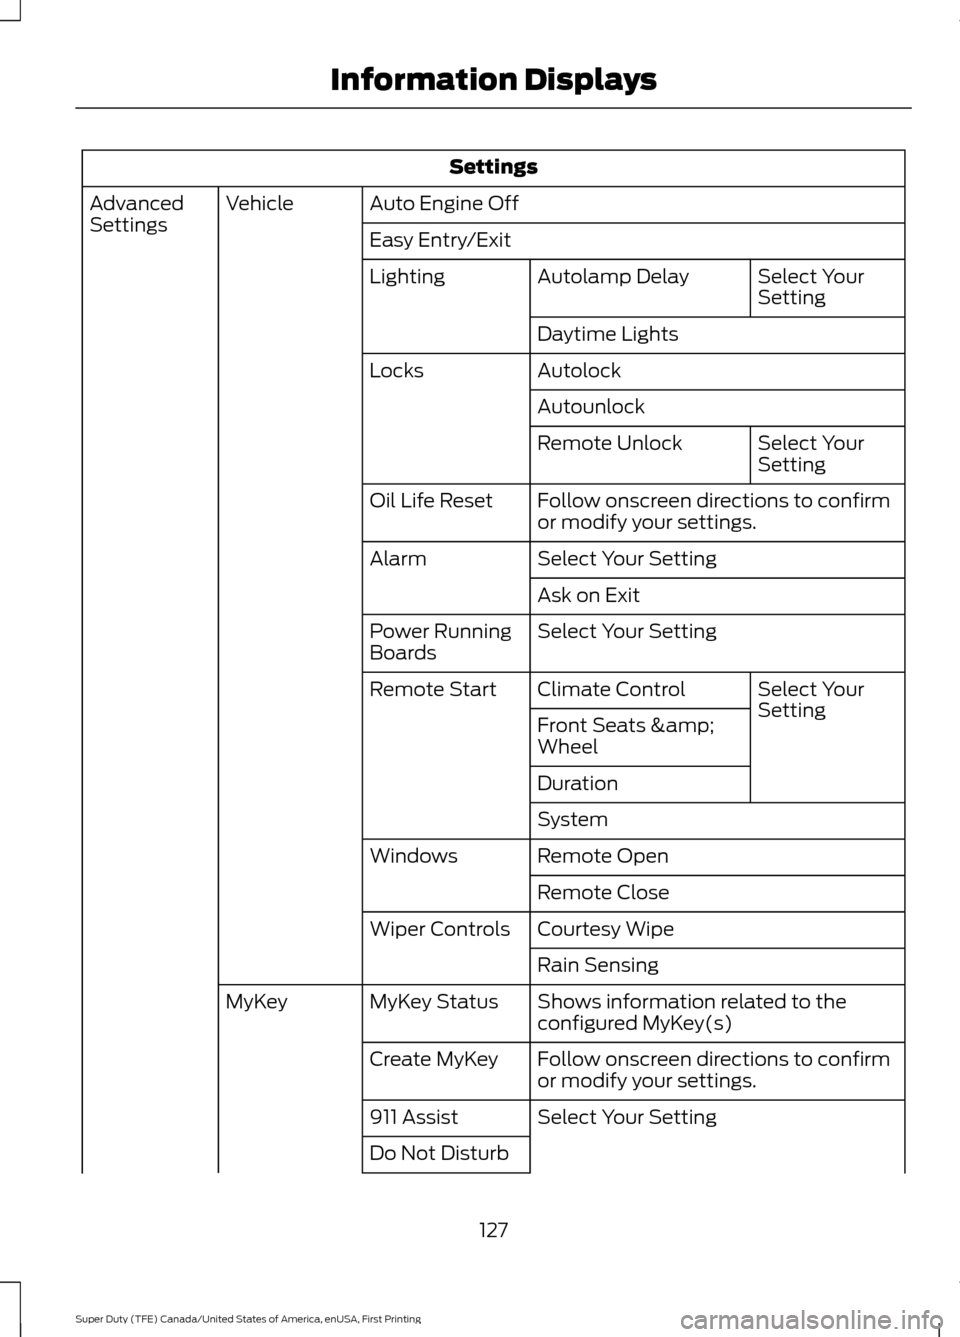
Settings
Auto Engine Off
Vehicle
Advanced
Settings
Easy Entry/Exit
Select Your
Setting
Autolamp Delay
Lighting
Daytime Lights
Autolock
Locks
Autounlock Select Your
Setting
Remote Unlock
Follow onscreen directions to confirm
or modify your settings.
Oil Life Reset
Select Your Setting
Alarm
Ask on Exit
Select Your Setting
Power Running
Boards
Select Your
Setting
Climate Control
Remote Start
Front Seats &
Wheel
Duration
System
Remote Open
Windows
Remote Close
Courtesy Wipe
Wiper Controls
Rain Sensing
Shows information related to the
configured MyKey(s)
MyKey Status
MyKey
Follow onscreen directions to confirm
or modify your settings.
Create MyKey
Select Your Setting
911 Assist
Do Not Disturb
127
Super Duty (TFE) Canada/United States of America, enUSA, First Printing Information Displays