2017 FORD SUPER DUTY warning lights
[x] Cancel search: warning lightsPage 99 of 636
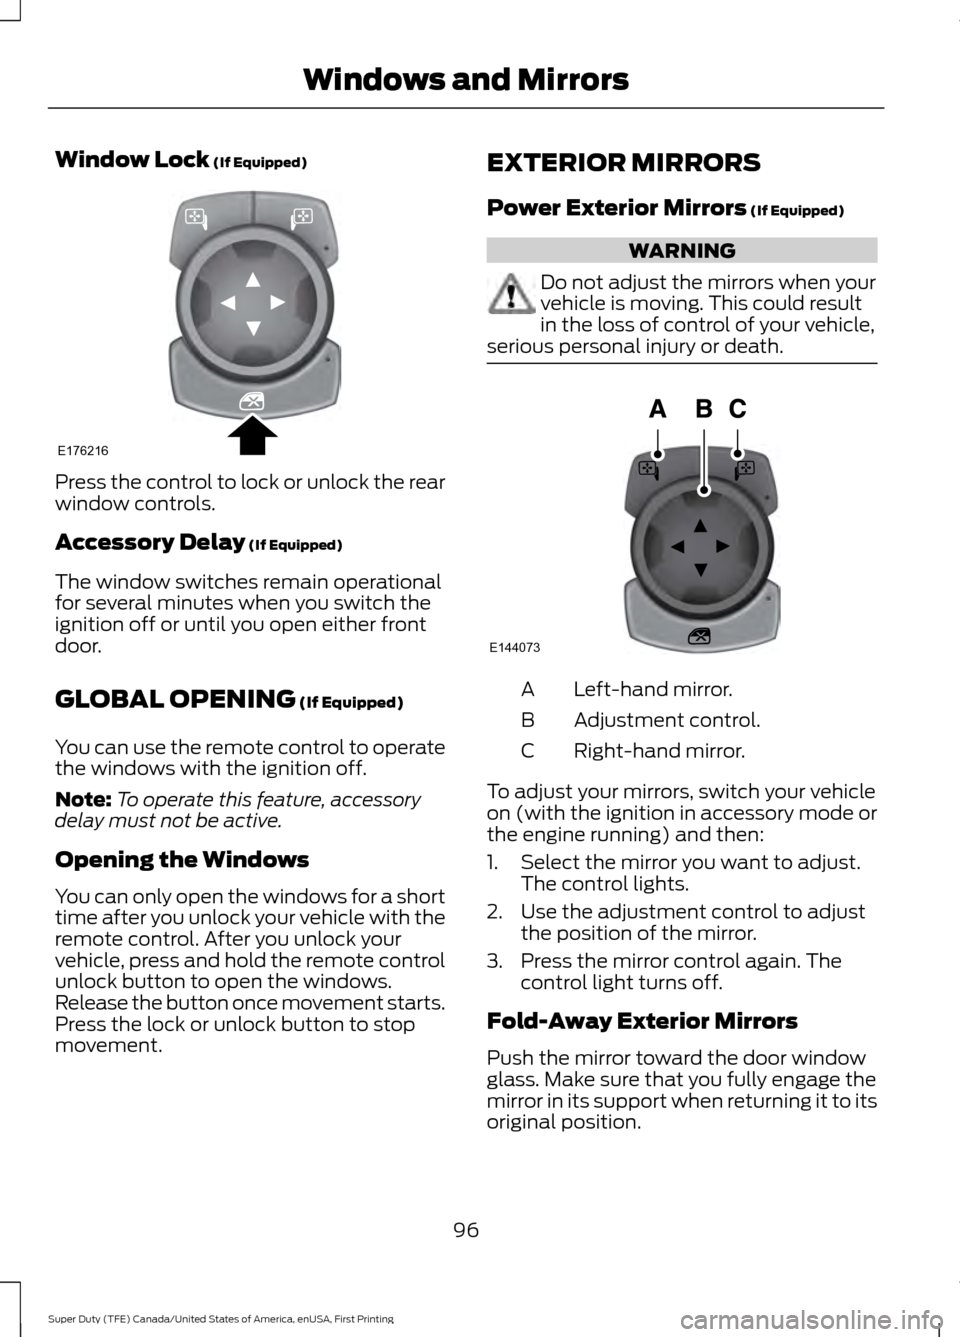
Window Lock (If Equipped)
Press the control to lock or unlock the rear
window controls.
Accessory Delay
(If Equipped)
The window switches remain operational
for several minutes when you switch the
ignition off or until you open either front
door.
GLOBAL OPENING
(If Equipped)
You can use the remote control to operate
the windows with the ignition off.
Note: To operate this feature, accessory
delay must not be active.
Opening the Windows
You can only open the windows for a short
time after you unlock your vehicle with the
remote control. After you unlock your
vehicle, press and hold the remote control
unlock button to open the windows.
Release the button once movement starts.
Press the lock or unlock button to stop
movement. EXTERIOR MIRRORS
Power Exterior Mirrors
(If Equipped) WARNING
Do not adjust the mirrors when your
vehicle is moving. This could result
in the loss of control of your vehicle,
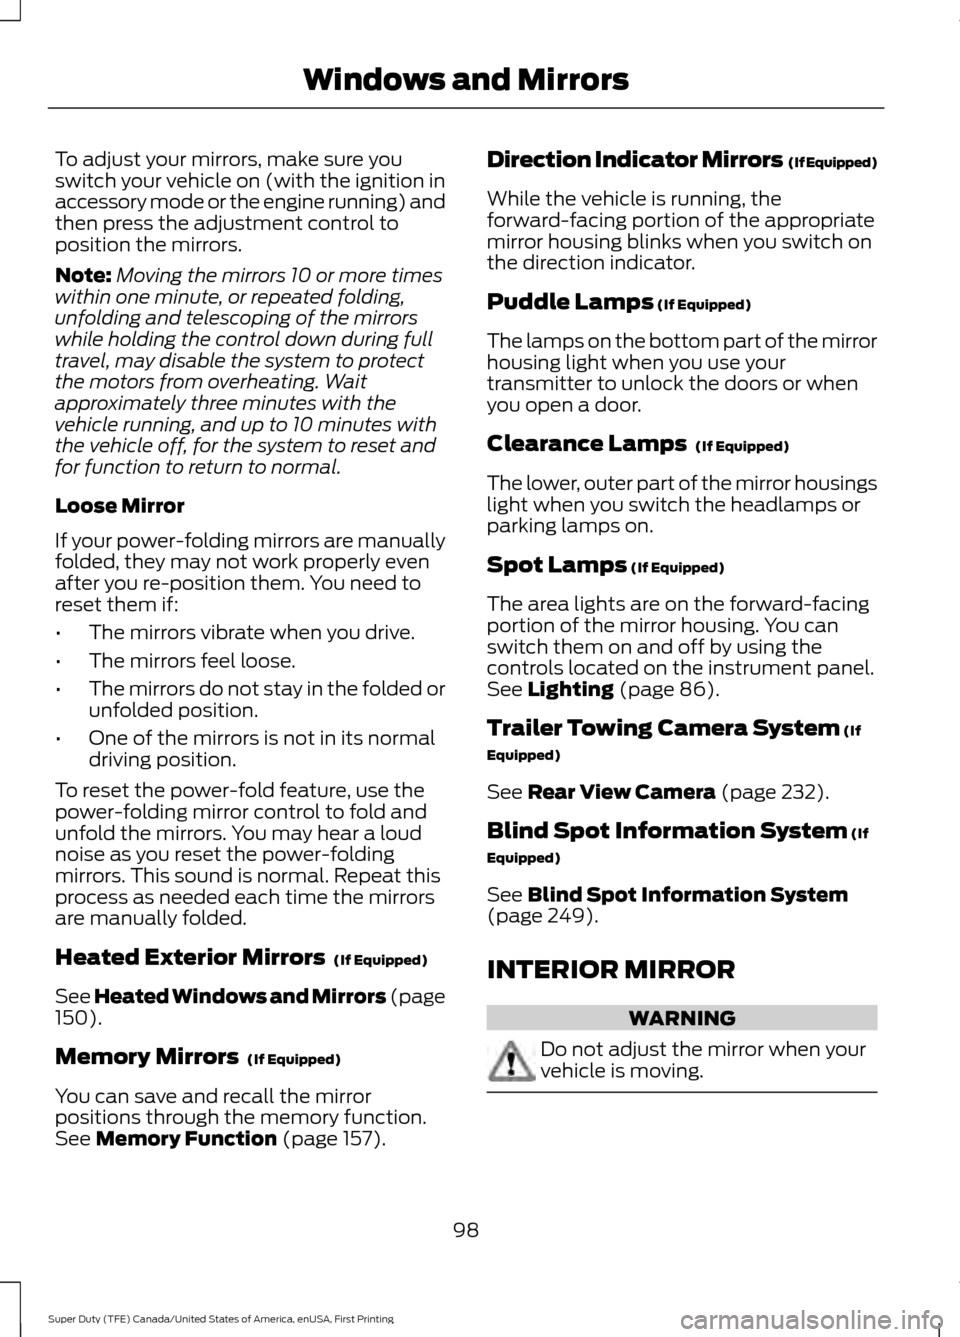
serious personal injury or death. Left-hand mirror.
A
Adjustment control.
B
Right-hand mirror.
C
To adjust your mirrors, switch your vehicle
on (with the ignition in accessory mode or
the engine running) and then:
1. Select the mirror you want to adjust. The control lights.
2. Use the adjustment control to adjust the position of the mirror.
3. Press the mirror control again. The control light turns off.
Fold-Away Exterior Mirrors
Push the mirror toward the door window
glass. Make sure that you fully engage the
mirror in its support when returning it to its
original position.
96
Super Duty (TFE) Canada/United States of America, enUSA, First Printing Windows and MirrorsE176216 E144073
Page 101 of 636
To adjust your mirrors, make sure you
switch your vehicle on (with the ignition in
accessory mode or the engine running) and
then press the adjustment control to
position the mirrors.
Note:
Moving the mirrors 10 or more times
within one minute, or repeated folding,
unfolding and telescoping of the mirrors
while holding the control down during full
travel, may disable the system to protect
the motors from overheating. Wait
approximately three minutes with the
vehicle running, and up to 10 minutes with
the vehicle off, for the system to reset and
for function to return to normal.
Loose Mirror
If your power-folding mirrors are manually
folded, they may not work properly even
after you re-position them. You need to
reset them if:
• The mirrors vibrate when you drive.
• The mirrors feel loose.
• The mirrors do not stay in the folded or
unfolded position.
• One of the mirrors is not in its normal
driving position.
To reset the power-fold feature, use the
power-folding mirror control to fold and
unfold the mirrors. You may hear a loud
noise as you reset the power-folding
mirrors. This sound is normal. Repeat this
process as needed each time the mirrors
are manually folded.
Heated Exterior Mirrors (If Equipped)
See Heated Windows and Mirrors (page
150
).
Memory Mirrors
(If Equipped)
You can save and recall the mirror
positions through the memory function.
See
Memory Function (page 157). Direction Indicator Mirrors (If Equipped)
While the vehicle is running, the
forward-facing portion of the appropriate
mirror housing blinks when you switch on
the direction indicator.
Puddle Lamps
(If Equipped)
The lamps on the bottom part of the mirror
housing light when you use your
transmitter to unlock the doors or when
you open a door.
Clearance Lamps
(If Equipped)
The lower, outer part of the mirror housings
light when you switch the headlamps or
parking lamps on.
Spot Lamps
(If Equipped)
The area lights are on the forward-facing
portion of the mirror housing. You can
switch them on and off by using the
controls located on the instrument panel.
See
Lighting (page 86).
Trailer Towing Camera System
(If
Equipped)
See
Rear View Camera (page 232).
Blind Spot Information System
(If
Equipped)
See
Blind Spot Information System
(page 249).
INTERIOR MIRROR WARNING
Do not adjust the mirror when your
vehicle is moving.
98
Super Duty (TFE) Canada/United States of America, enUSA, First Printing Windows and Mirrors
Page 102 of 636
Note:
Do not clean the housing or glass of
any mirror with harsh abrasives, fuel or other
petroleum or ammonia-based cleaning
products.
You can adjust the interior mirror to your
preference. Some mirrors also have a
second pivot point. This lets you move the
mirror head up or down and from side to
side.
Pull the tab below the mirror toward you
to reduce glare at night.
Auto-Dimming Mirror (If Equipped)
Note: Do not block the sensors on the front
and back of the mirror. Mirror performance
may be affected. A rear center passenger or
raised rear center head restraint may also
block light from reaching the sensor.
The mirror will dim automatically to reduce
glare when bright lights are detected from
behind your vehicle. It will automatically
return to normal reflection when you select
reverse gear to make sure you have a clear
view when backing up.
SLIDING WINDOWS
(If Equipped)
Power Sliding Back Window
(If
Equipped) WARNINGS
When operating the power sliding
back window, you must make sure
all rear seat occupants and cargo are
not in the proximity of the back window. Do not leave children unattended in
your vehicle and do not let them play
with the power sliding back window.
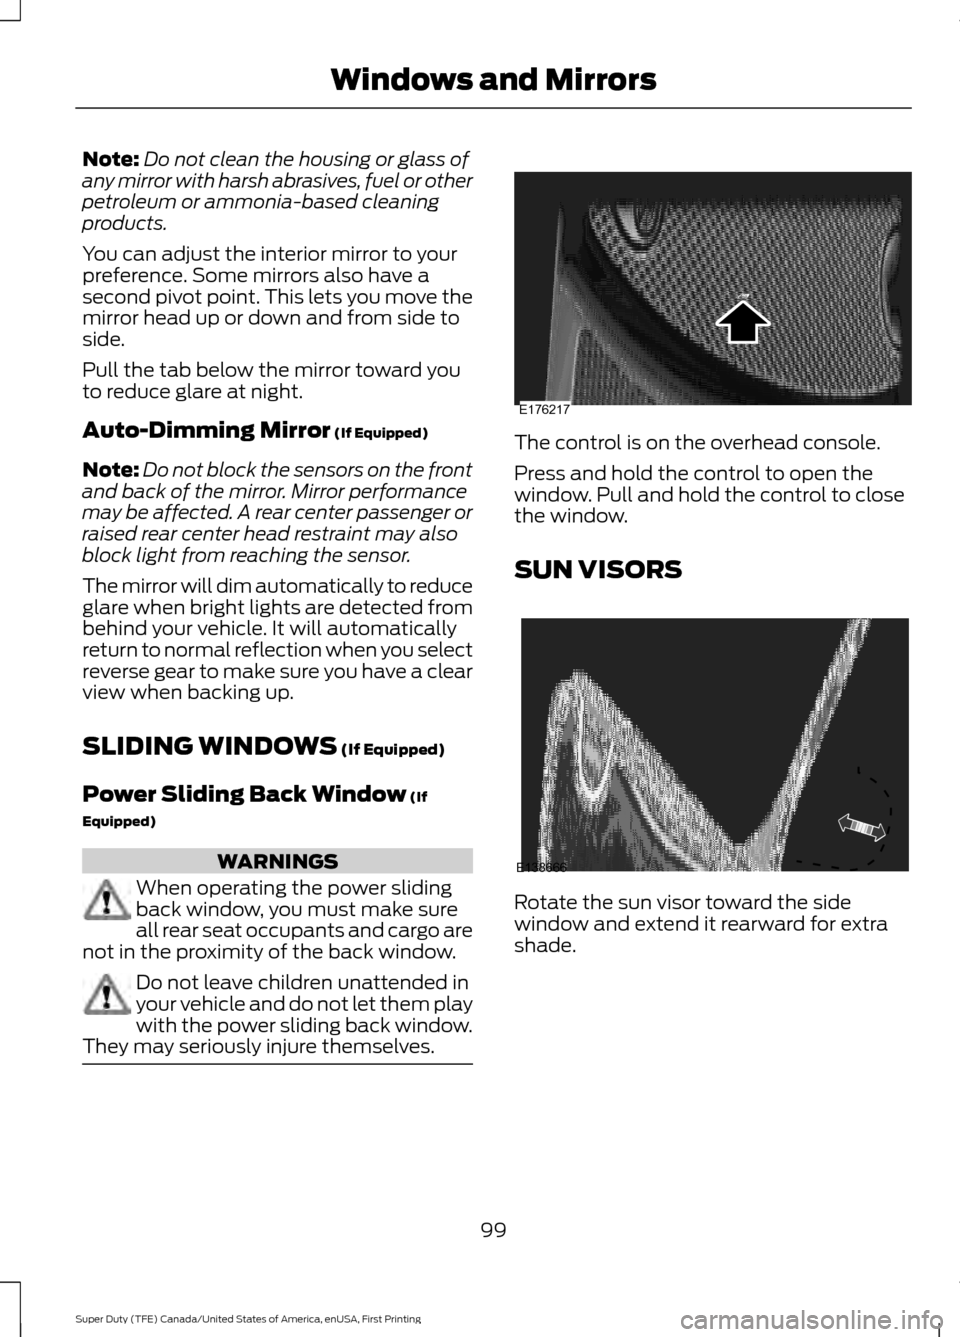
They may seriously injure themselves. The control is on the overhead console.
Press and hold the control to open the
window. Pull and hold the control to close
the window.
SUN VISORS
Rotate the sun visor toward the side
window and extend it rearward for extra
shade.
99
Super Duty (TFE) Canada/United States of America, enUSA, First Printing Windows and MirrorsE176217 E138666
Page 112 of 636
4X2 (If Equipped)
Illuminates momentarily when
two-wheel drive high is selected.
If the light fails to display when
the ignition is turned on, or remains on,
have the system serviced immediately by
your authorized dealer.
4X4 LOW
(If Equipped) Illuminates when four-wheel
drive low is engaged. If the light
fails to display when the ignition
is turned on, or remains on, have the
system serviced immediately by your
authorized dealer.
4X4 HIGH
(If Equipped) Illuminates when four-wheel
drive high is engaged. If the light
fails to display when the ignition
is turned on, or remains on, have the
system serviced immediately by your
authorized dealer.
Diesel Engine Brake
(If Equipped) Illuminates when you switch the
manual engine brake on. See
General Information
(page
221). Illuminates when you switch the
automatic engine brake on. See
General Information
(page
221).
Diesel Exhaust Fluid
(If Equipped) With the key in the on position,
illuminates when the DEF is
contaminated, low or someone
has tampered with the DEF system. See
Selective Catalytic Reduction System
(page
188). Wait To Start
(If Equipped) Illuminates when you switch the
ignition on as part of the
pre-start system. Wait until the
wait to start indicator turns off before
attempting to start vehicle. See
Starting
a Diesel Engine (page 176).
Water In Fuel
(If Equipped) During refueling, it is possible for
you to pump
water-contaminated diesel fuel
into your fuel tank. Your vehicle ’s fuel
system is equipped with a fuel filter and
water separator to remove water from the
fuel. The water in fuel indicator lights when
the fuel and water separator has a
significant quantity of water in it and
requires immediate draining.
If the water in fuel indicator illuminates
when the engine is running, stop your
vehicle as soon as safely possible, shut off
the engine, then drain the fuel and water
separator. See
Fuel Quality (page 185).
Allowing water to stay in the fuel system,
after the water in fuel indicator illuminates,
could result in extensive damage or failure
of the fuel injection system. WARNING
Do not drain the water-in-fuel
separator while the engine is running.
Failure to follow this warning may
result in fire, serious injury, death or
property damage. Note:
Do not drain the fuel and water
separator while the engine is running. Air will
enter into the fuel system causing the engine
not to operate properly.
109
Super Duty (TFE) Canada/United States of America, enUSA, First Printing Instrument ClusterE163173 E181780 E181779 E171217 E234452 E163176
Page 163 of 636
HEATED SEATS (If Equipped)
WARNING
People who are unable to feel pain
to their skin because of advanced
age, chronic illness, diabetes, spinal
cord injury, medication, alcohol use,
exhaustion or other physical conditions,
must exercise care when using the heated
seat. The heated seat may cause burns
even at low temperatures, especially if
used for long periods of time. Do not place
anything on the seat that insulates against
heat, such as a blanket or cushion. This
may cause the heated seat to overheat.
Do not puncture the seat with pins, needles
or other pointed objects. This may damage
the heating element which may cause the
heated seat to overheat. An overheated
seat may cause serious personal injury. Do not do the following:
•
Place heavy objects on the seat.
• Operate the heated seat if water or any
other liquid spills on the seat. Allow the
seat to dry thoroughly.
Note: The engine must be running to use
this feature. Press the heated seat symbol to cycle
through the various heat settings and off.
More indicator lights indicate warmer
settings. Note:
The heated seats may remain on
after you remote start your vehicle, based
on your remote start settings. The heated
seats may also turn on when you start your
vehicle if they were on when you switched
your vehicle off.
Rear Heated Seats
(If Equipped) WARNING
People who are unable to feel pain
to their skin because of advanced
age, chronic illness, diabetes, spinal
cord injury, medication, alcohol use,
exhaustion or other physical conditions,
must exercise care when using the heated
seat. The heated seat may cause burns
even at low temperatures, especially if
used for long periods of time. Do not place
anything on the seat that insulates against
heat, such as a blanket or cushion. This
may cause the heated seat to overheat.
Do not puncture the seat with pins, needles
or other pointed objects. This may damage
the heating element which may cause the
heated seat to overheat. An overheated
seat may cause serious personal injury. Do not do the following:
•
Place heavy objects on the seat.
• Operate the heated seat if water or any
other liquid spills on the seat. Allow the
seat to dry thoroughly.
Note: The engine must be running to use
this feature.
The rear seat heat controls are on the rear
of the center console.
160
Super Duty (TFE) Canada/United States of America, enUSA, First Printing SeatsE146322
Page 164 of 636
Press the heated seat symbol to cycle
through the various heat settings and off.
More indicator lights indicate warmer
settings.
The heated seat module resets at every
ignition run cycle. While the ignition is in
the on position, press the heated seat
switch to enable heating mode. When
activated, they turn off automatically when
you switch off the engine.
CLIMATE CONTROLLED SEATS
(If Equipped)
Heated Seats
WARNING
People who are unable to feel pain
to their skin because of advanced
age, chronic illness, diabetes, spinal
cord injury, medication, alcohol use,
exhaustion or other physical conditions,
must exercise care when using the heated
seat. The heated seat may cause burns
even at low temperatures, especially if
used for long periods of time. Do not place
anything on the seat that insulates against
heat, such as a blanket or cushion. This
may cause the heated seat to overheat.
Do not puncture the seat with pins, needles
or other pointed objects. This may damage
the heating element which may cause the
heated seat to overheat. An overheated
seat may cause serious personal injury. Do not do the following:
•
Place heavy objects on the seat.
• Operate the heated seat if water or any
other liquid spills on the seat. Allow the
seat to dry thoroughly.
Note: The engine must be running to use
this feature. Press the heated seat symbol to cycle
through the various heat settings and off.
More indicator lights indicate warmer
settings.
Note:
The heated seats may remain on
after you remote start your vehicle, based
on your remote start settings. The heated
seats may also turn on when you start your
vehicle if they were on when you switched
your vehicle off.
Note: After 60 minutes of operation, the
heated seats switch off. Press the heated
seat symbol to switch the heated seats on.
Cooled Seats
Note: The engine must be running to use
this feature. 161
Super Duty (TFE) Canada/United States of America, enUSA, First Printing SeatsE146322 E146322 E146309
Page 214 of 636
For proper operation, make sure that each
hub is fully engaged and that both hub
locks are set to the same position (both
set to LOCK or both set to AUTO). To
engage LOCK, turn the hub locks
completely clockwise; to engage AUTO,
turn the hub locks completely
counterclockwise.
The ESOF 4WD system:
•
provides 4x4 High engagement and
disengagement while the vehicle is
moving.
• is operated by a rotary control located
on the instrument panel that allows
you select 4x2, 4x4 High or 4x4 Low
operation.
• uses auto-manual hub locks that can
be engaged and disengaged
automatically based on the 4x4 mode
selected.
• will increase fuel economy when used
in the hub lock's recommended AUTO
mode.
4WD Indicator Lights
Note: When a 4X4 system fault is present,
the system will typically remain in whichever
4X4 mode was selected prior to the fault
condition occurring. It will not default to 4X2
in all circumstances. When this warning is
displayed, have your vehicle serviced by an
authorized dealer.
4X2 Momentarily illuminates when
2H is selected.
4X4 HIGH Continuously illuminates when
4H is selected. 4X4 LOW Continuously illuminates when
4L is selected.
CHECK 4X4 Displays when a 4X4 fault is
present.
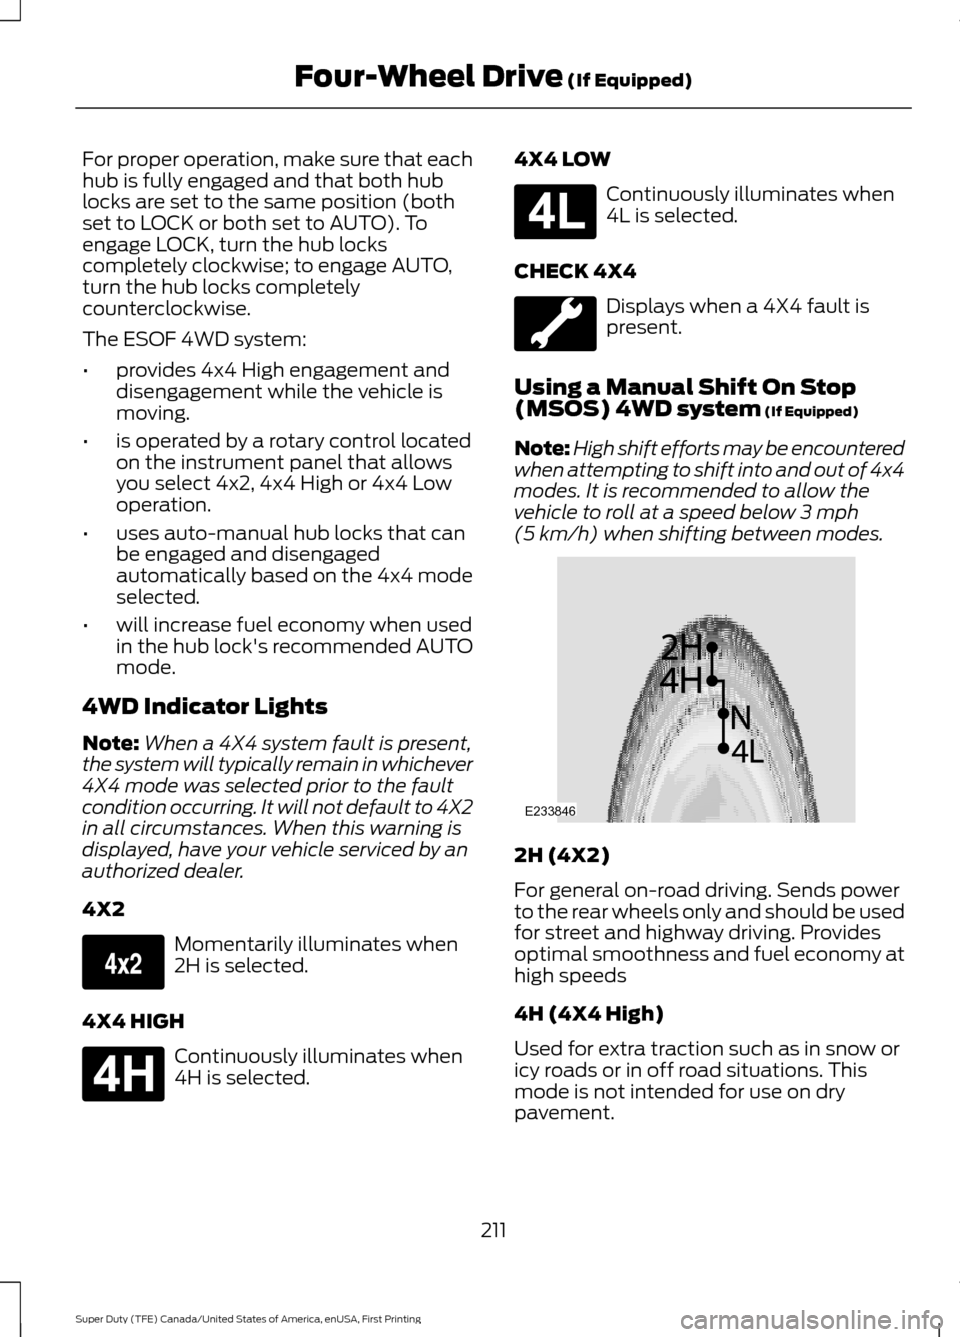
Using a Manual Shift On Stop
(MSOS) 4WD system (If Equipped)
Note: High shift efforts may be encountered
when attempting to shift into and out of 4x4
modes. It is recommended to allow the
vehicle to roll at a speed below
3 mph
(5 km/h) when shifting between modes. 2H (4X2)
For general on-road driving. Sends power
to the rear wheels only and should be used
for street and highway driving. Provides
optimal smoothness and fuel economy at
high speeds
4H (4X4 High)
Used for extra traction such as in snow or
icy roads or in off road situations. This
mode is not intended for use on dry
pavement.
211
Super Duty (TFE) Canada/United States of America, enUSA, First Printing Four-Wheel Drive
(If Equipped)E163173 E181779 E181780 E233846
Page 226 of 636

Apply the parking brake whenever your
vehicle is parked. Press the pedal
downward to set the parking brake. The
brake warning lamp in the instrument
cluster will illuminate and remains
illuminated until the parking brake is
released.
To release, pull the brake release lever
located at the lower left side of the
instrument panel.
If you are parking your vehicle on a grade
or with a trailer, press and hold the brake
pedal down, then set the parking brake.
There may be a little vehicle movement as
the parking brake sets to hold the vehicle's
weight. This is normal and should be no
reason for concern. If needed, press and
hold the service brake pedal down, then
try reapplying the parking brake. Chock the
wheels if required. If the parking brake
cannot hold the weight of the vehicle, the
parking brake may need to be serviced or
the vehicle may be overloaded.
HILL START ASSIST
WARNINGS
The system does not replace the
parking brake. When you leave your
vehicle, always apply the parking
brake and shift the transmission into park
(P) (automatic transmission) or first gear
(1) (manual transmission). You must remain in your vehicle once
you have activated the system.
During all times, you are responsible
for controlling your vehicle,
supervising the system and
intervening, if required. If the engine is revved excessively, or
if a malfunction is detected, the
system will be deactivated. The system makes it easier to pull away
when your vehicle is on a slope without the
need to use the parking brake.
When the system is active, your vehicle will
remain stationary on the slope for two to
three seconds after you release the brake
pedal. This allows you time to move your
foot from the brake to the accelerator
pedal. The brakes release automatically
when the engine has sufficient torque to
prevent your vehicle from rolling down the
grade. This is an advantage when pulling
away on a slope, for example from a car
park ramp, traffic lights or when reversing
uphill into a parking space.
The system will activate automatically on
any slope that will cause significant vehicle
rollback. For vehicles with a manual
transmission, you can switch this feature
off using the information display. See
Information Displays (page 111). The
system will remain on or off depending on
how it was last set.
Note: There is no warning lamp to indicate
the system is either on or off.
Note: If your vehicle is equipped with Auto
Hold, Hill Start Assist will not be available
while Auto Hold is active.
Using Hill Start Assist
1. Bring your vehicle to a complete standstill. Keep the brake pedal
pressed and select an uphill gear (for
example, first (1) when facing uphill or
reverse (R) when facing downhill).
2. If the sensors detect that your vehicle is on a slope, the system will activate
automatically.
3. When you remove your foot from the brake pedal, your vehicle will remain
on the slope without rolling away for
about two or three seconds. This hold
time will automatically be extended if
you are in the process of driving off.
223
Super Duty (TFE) Canada/United States of America, enUSA, First Printing Brakes