2017 FORD SUPER DUTY manual radio set
[x] Cancel search: manual radio setPage 64 of 636

PRINCIPLE OF OPERATION
MyKey allows you to program keys with
restricted driving modes to promote good
driving habits. You can program the
restrictions to all keys but one. Any keys
that you did not program are administrator
keys or admin keys.
You can use admin keys to:
•
Create a MyKey with certain vehicle
restrictions.
• Program certain MyKey settings.
• Clear all MyKey restrictions.
After you program a MyKey, you can view
the following information through the
information display:
• The total number of admin keys and
MyKeys for your vehicle.
• The total distance a MyKey driver
traveled with your vehicle.
Note: Every MyKey receives the same
restrictions and settings. You cannot
program them individually.
Note: For vehicles equipped with a
push-button start switch: When both a
MyKey and an admin key are present when
you start your vehicle, the system recognizes
the admin key only. Standard Settings
Not every vehicle includes the features
listed below. If your vehicle has this
equipment, then you cannot change the
following settings when using a MyKey:
•
Seatbelt reminder or Belt-Minder™.
MyKey mutes the audio system until
drivers, and in some instances,
passengers, fasten their seatbelts.
Note: If your vehicle includes an
AM/FM radio or a very basic audio
system, then the radio may not mute.
• Earlier low-fuel warning. The low-fuel
warning activates earlier for MyKey
drivers, giving them more time to refuel.
• Certain driver alerts, stability systems
or parking aids turn on automatically
when you use the MyKey system. For
example, Blind Spot Information
System (BLIS), cross traffic alert, lane
departure warning or forward collision
warning. Note:
MyKey drivers may be
able to turn the lane departure warning
feature off, but this feature turns back
on automatically with every new key
cycle.
• Restricted touchscreen operation in
some markets. For example, MyKey
may prevent manual navigation
destination input while the vehicle is in
any gear other than park (P) or when
the vehicle reaches a certain rate of
speed.
• Satellite radio adult content
restrictions, if this feature is available
in your market.
Optional Settings
You can configure certain vehicle feature
settings when you first create a MyKey. You
can also change the settings afterward
with an admin key.
61
Super Duty (TFE) Canada/United States of America, enUSA, First Printing MyKey
™
Page 440 of 636
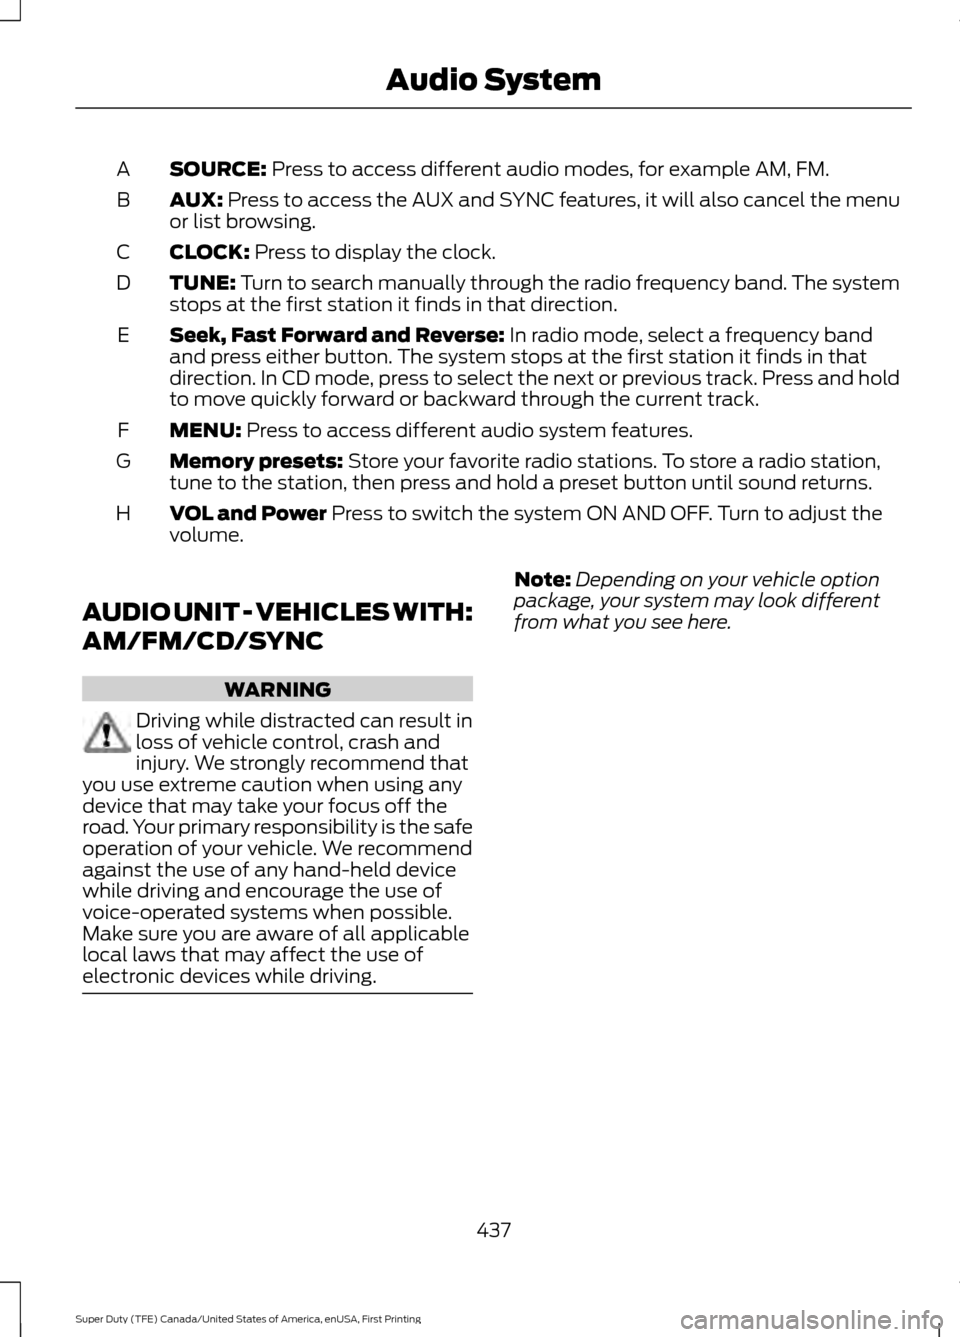
SOURCE: Press to access different audio modes, for example AM, FM.
A
AUX:
Press to access the AUX and SYNC features, it will also cancel the menu
or list browsing.
B
CLOCK:
Press to display the clock.
C
TUNE:
Turn to search manually through the radio frequency band. The system
stops at the first station it finds in that direction.
D
Seek, Fast Forward and Reverse:
In radio mode, select a frequency band
and press either button. The system stops at the first station it finds in that
direction. In CD mode, press to select the next or previous track. Press and hold
to move quickly forward or backward through the current track.
E
MENU:
Press to access different audio system features.
F
Memory presets:
Store your favorite radio stations. To store a radio station,
tune to the station, then press and hold a preset button until sound returns.
G
VOL and Power
Press to switch the system ON AND OFF. Turn to adjust the
volume.
H
AUDIO UNIT - VEHICLES WITH:
AM/FM/CD/SYNC WARNING
Driving while distracted can result in
loss of vehicle control, crash and
injury. We strongly recommend that
you use extreme caution when using any
device that may take your focus off the
road. Your primary responsibility is the safe
operation of your vehicle. We recommend
against the use of any hand-held device
while driving and encourage the use of
voice-operated systems when possible.
Make sure you are aware of all applicable
local laws that may affect the use of
electronic devices while driving. Note:
Depending on your vehicle option
package, your system may look different
from what you see here.
437
Super Duty (TFE) Canada/United States of America, enUSA, First Printing Audio System
Page 441 of 636
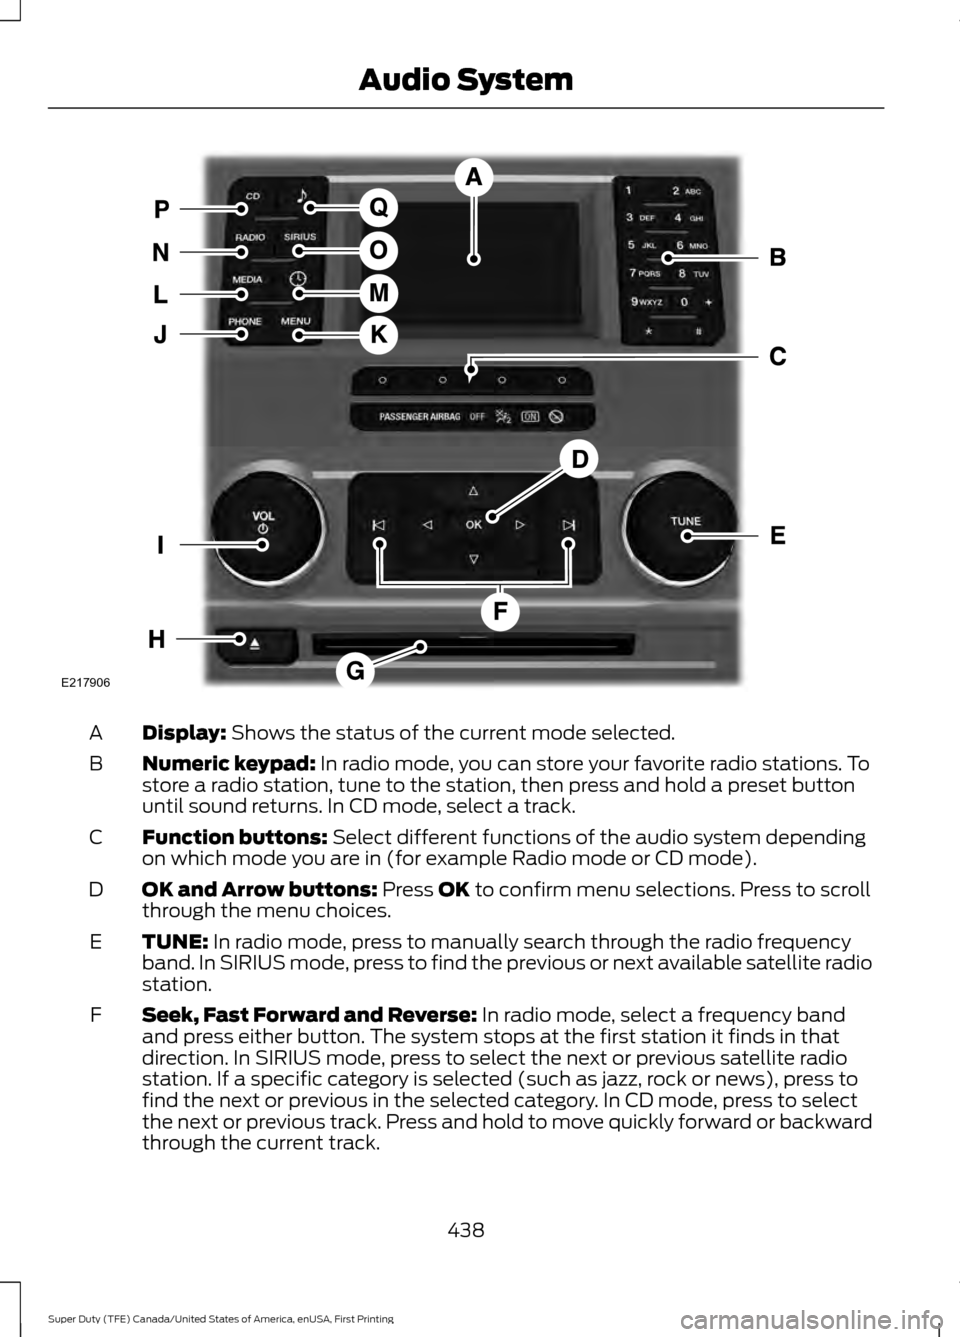
Display: Shows the status of the current mode selected.
A
Numeric keypad:
In radio mode, you can store your favorite radio stations. To
store a radio station, tune to the station, then press and hold a preset button
until sound returns. In CD mode, select a track.
B
Function buttons:
Select different functions of the audio system depending
on which mode you are in (for example Radio mode or CD mode).
C
OK and Arrow buttons:
Press OK to confirm menu selections. Press to scroll
through the menu choices.
D
TUNE:
In radio mode, press to manually search through the radio frequency
band. In SIRIUS mode, press to find the previous or next available satellite radio
station.
E
Seek, Fast Forward and Reverse:
In radio mode, select a frequency band
and press either button. The system stops at the first station it finds in that
direction. In SIRIUS mode, press to select the next or previous satellite radio
station. If a specific category is selected (such as jazz, rock or news), press to
find the next or previous in the selected category. In CD mode, press to select
the next or previous track. Press and hold to move quickly forward or backward
through the current track.
F
438
Super Duty (TFE) Canada/United States of America, enUSA, First Printing Audio SystemE217906
Page 443 of 636
Radio
Use the left and right arrows to go up or down the
frequency band.
Manual tune
Select for a brief sampling of all available channels.
Scan
Select to store the six strongest local stations on the AM-
AST and FM-AST frequency bands.
AST
Select to view additional broadcast data (radio text), if
available. This feature defaults to off. RBDS must be on
for you to set a category, or display radio text and station
names.
RBDS/RDS Audio Settings
Automatically adjusts the volume to compensate for
speed and wind noise. You can set the system between
0 and +7.
Speed Compensated
Volume
Select to adjust settings for Treble, Midrange, Bass, Fade
or Balance.
Sound
Select to optimize sound quality for the chosen seating
position.
Occupancy Mode
Choose between the stereo modes.
DSP CD Settings
Select to scan all disc selections.
Scan All
Select to scan all music in the current MP3 folder.
Scan Folder
Select to bring soft and loud passages together for a more
consistent listening level.
CD Compression Clock Settings
Select to set the time.
Set Time
Select to set the calendar date.
Set Date
Select to view clock time in a 12-hour mode or 24-hour
mode.
24h Mode
440
Super Duty (TFE) Canada/United States of America, enUSA, First Printing Audio System
Page 445 of 636
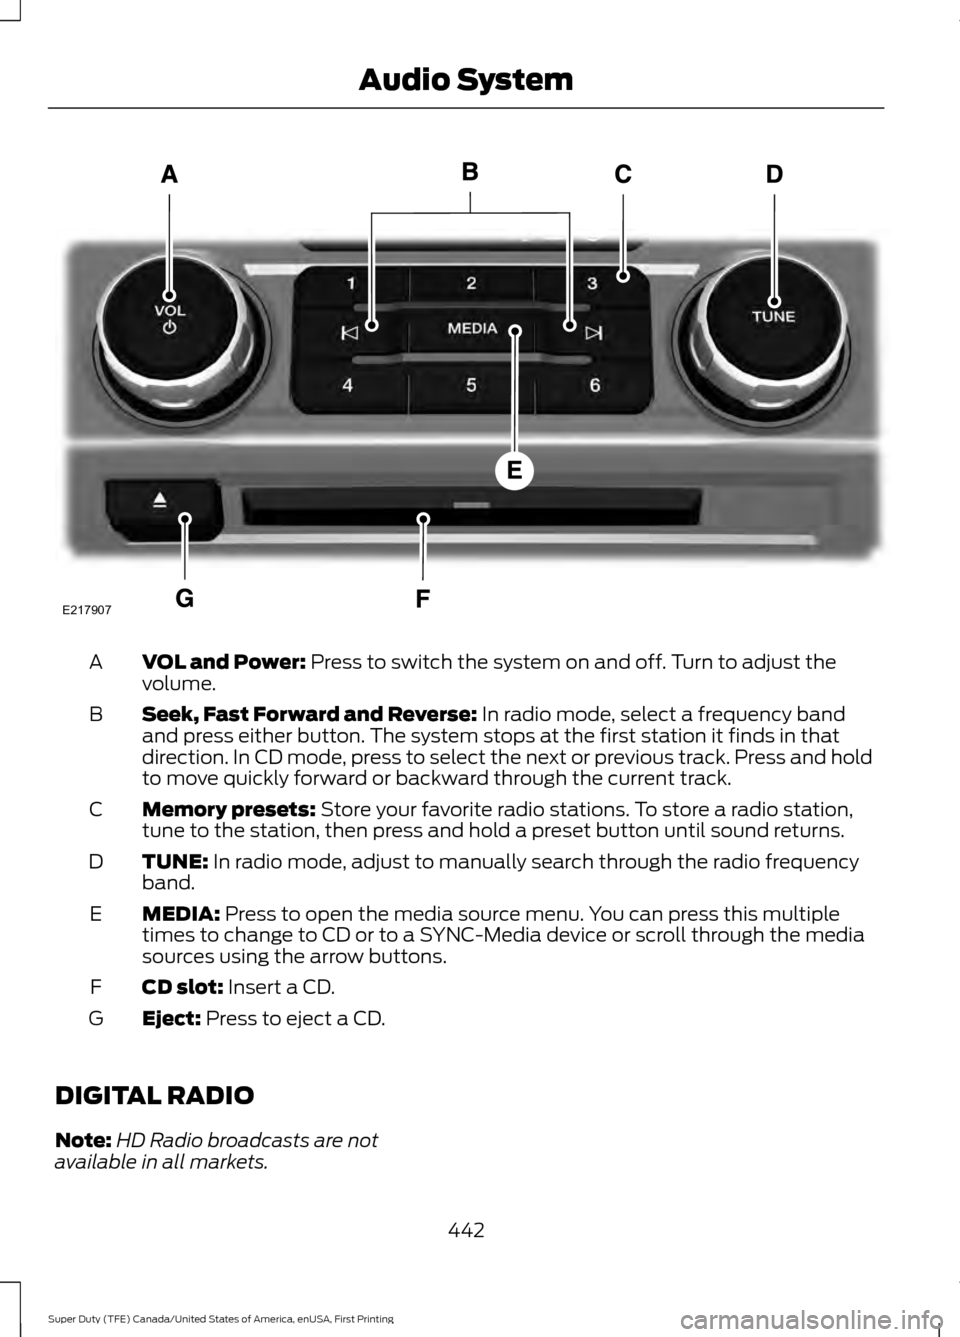
VOL and Power: Press to switch the system on and off. Turn to adjust the
volume.
A
Seek, Fast Forward and Reverse:
In radio mode, select a frequency band
and press either button. The system stops at the first station it finds in that
direction. In CD mode, press to select the next or previous track. Press and hold
to move quickly forward or backward through the current track.
B
Memory presets:
Store your favorite radio stations. To store a radio station,
tune to the station, then press and hold a preset button until sound returns.
C
TUNE:
In radio mode, adjust to manually search through the radio frequency
band.
D
MEDIA:
Press to open the media source menu. You can press this multiple
times to change to CD or to a SYNC-Media device or scroll through the media
sources using the arrow buttons.
E
CD slot:
Insert a CD.
F
Eject:
Press to eject a CD.
G
DIGITAL RADIO
Note: HD Radio broadcasts are not
available in all markets.
442
Super Duty (TFE) Canada/United States of America, enUSA, First Printing Audio SystemE217907
Page 457 of 636
Other features, such as text messaging
using Bluetooth and automatic phonebook
download, are phone-dependent features.
To check your phone's compatibility, see
your phone's manual and visit
www.SYNCMyRide.com,
www.SYNCMyRide.ca or
www.syncmaroute.ca.
Pairing a Phone for the First Time
Wirelessly pairing your phone with SYNC
allows you to make and receive hands-free
calls.
Note:
SYNC can support downloading up
to approximately 4000 entries per
Bluetooth-enabled cellular phone.
Note: Make sure to switch on the ignition
and the radio. Shift the transmission into
park (P) for automatic transmission or first
gear for manual transmission.
Using the Audio System
Note: To scroll through the menus, press
the up and down arrows on your audio
system.
1. Make sure to switch on your phone's Bluetooth feature before starting the
search. See your device's manual if
necessary.
2. Press the PHONE button. When the
audio display indicates there is no
paired phone, select the option to add.
3. When a message to begin pairing appears in the audio display, search for
SYNC on your phone to start the pairing
process. 4. When prompted on your cell phone
’s
display, confirm that the PIN provided
by SYNC matches the PIN displayed
on your cell phone. Your phone is now
paired and the display indicates that
the pairing was successful. If you are
prompted to enter a PIN on your device,
enter the PIN displayed on the screen.
The display indicates when the pairing
is successful.
Depending on your phone's capability and
your market, the system may prompt you
with questions, such as setting the current
phone as the primary phone (the phone
SYNC automatically tries to connect with
first upon vehicle start-up) and
downloading your phonebook.
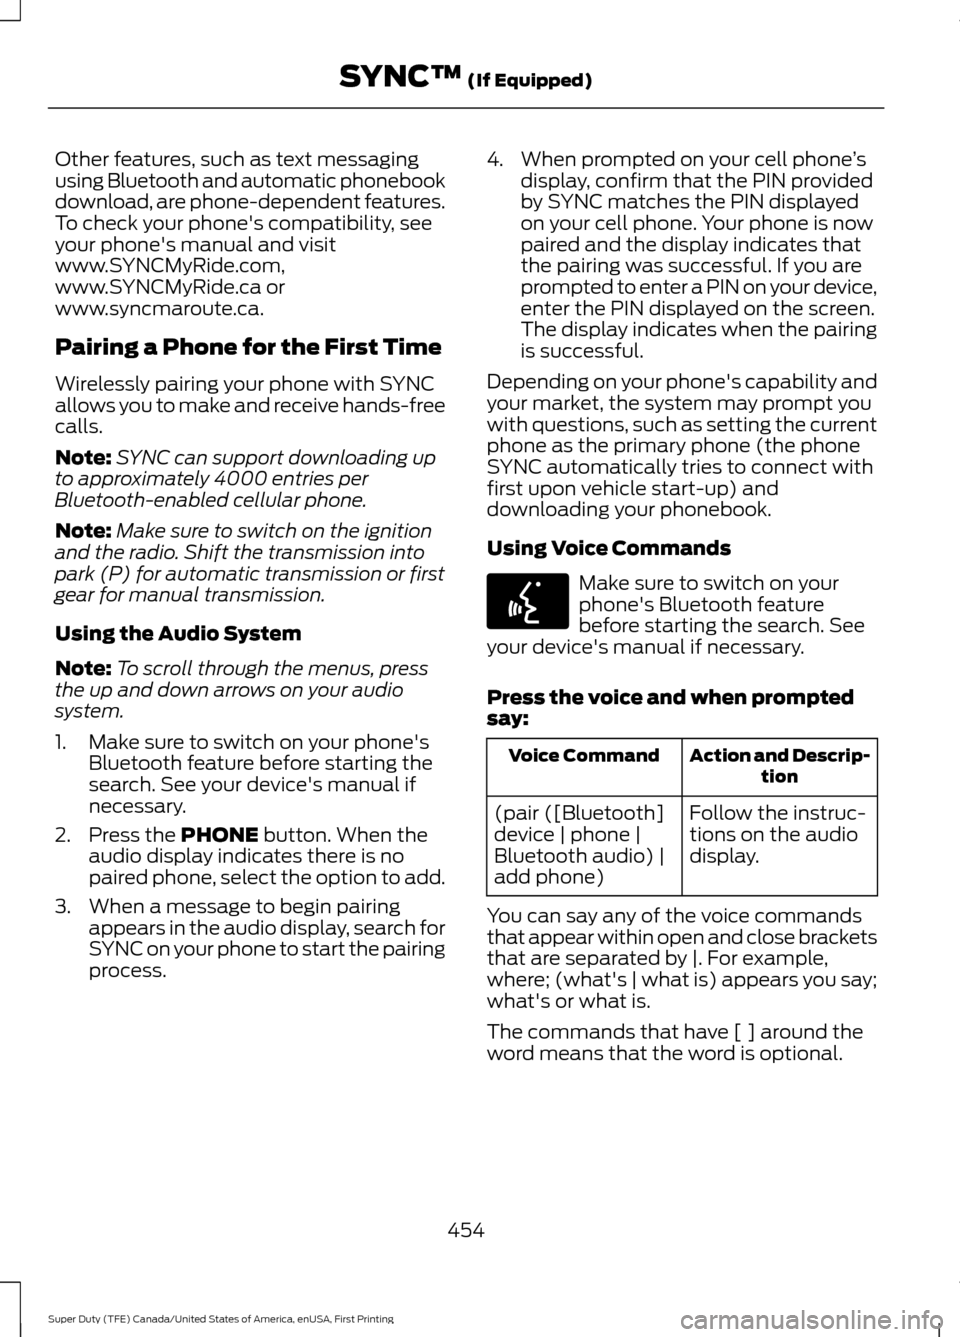
Using Voice Commands Make sure to switch on your
phone's Bluetooth feature
before starting the search. See
your device's manual if necessary.
Press the voice and when prompted
say: Action and Descrip-
tion
Voice Command
Follow the instruc-
tions on the audio
display.
(pair ([Bluetooth]
device | phone |
Bluetooth audio) |
add phone)
You can say any of the voice commands
that appear within open and close brackets
that are separated by |. For example,
where; (what's | what is) appears you say;
what's or what is.
The commands that have [ ] around the
word means that the word is optional.
454
Super Duty (TFE) Canada/United States of America, enUSA, First Printing SYNC™
(If Equipped)E142599
Page 458 of 636
Depending on your phone's capability and
your market, the system may prompt you
with questions, such as setting the current
phone as the primary phone (the phone
SYNC automatically tries to connect with
first upon vehicle start-up) and
downloading your phonebook.
Pairing Subsequent Phones
Note:
Make sure to switch on the ignition
and the radio. Shift the transmission into
park (P) for automatic transmission or first
gear for manual transmission.
Note: To scroll through the menus, press
the up and down arrows on your audio
system.
1. Make sure to switch on your phone's Bluetooth feature before starting the
search. See your device's manual if
necessary.
2. Press the PHONE button.
3. Select the option for Bluetooth Devices.
4. Press the
OK button.
5. Select the option to add. This starts the pairing process.
6. When a message to begin pairing appears in the audio display, search for
SYNC on your device.
7. When prompted on your cell phone ’s
display, confirm that the PIN provided
by SYNC matches the PIN displayed
on your cell phone. Your phone is now
paired and the display indicates that
the pairing was successful. If you are
prompted to enter a PIN on your device,
enter the PIN displayed on the screen.
The display indicates when the pairing
is successful. SYNC may prompt you with more cell
phone options. Your cell phone may also
prompt you to give SYNC permission to
access information. For more information
on your cell phone
’s capability, see your
cell phone ’s manual and visit the website.
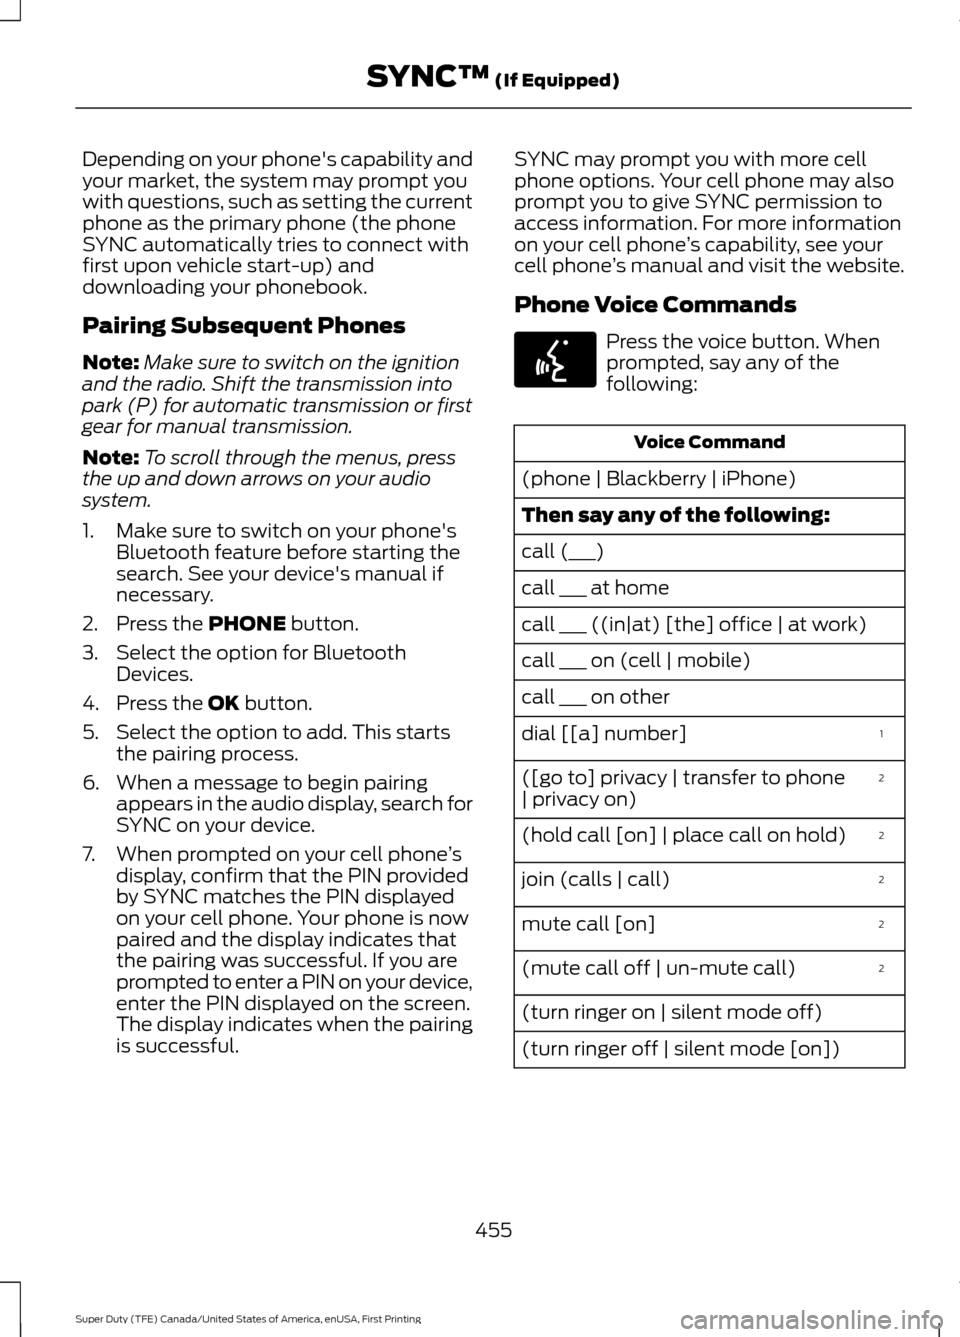
Phone Voice Commands Press the voice button. When
prompted, say any of the
following:
Voice Command
(phone | Blackberry | iPhone)
Then say any of the following:
call (___)
call ___ at home
call ___ ((in|at) [the] office | at work)
call ___ on (cell | mobile)
call ___ on other 1
dial [[a] number]
2
([go to] privacy | transfer to phone
| privacy on)
2
(hold call [on] | place call on hold)
2
join (calls | call)
2
mute call [on]
2
(mute call off | un-mute call)
(turn ringer on | silent mode off)
(turn ringer off | silent mode [on])
455
Super Duty (TFE) Canada/United States of America, enUSA, First Printing SYNC™
(If Equipped)E142599
Page 549 of 636
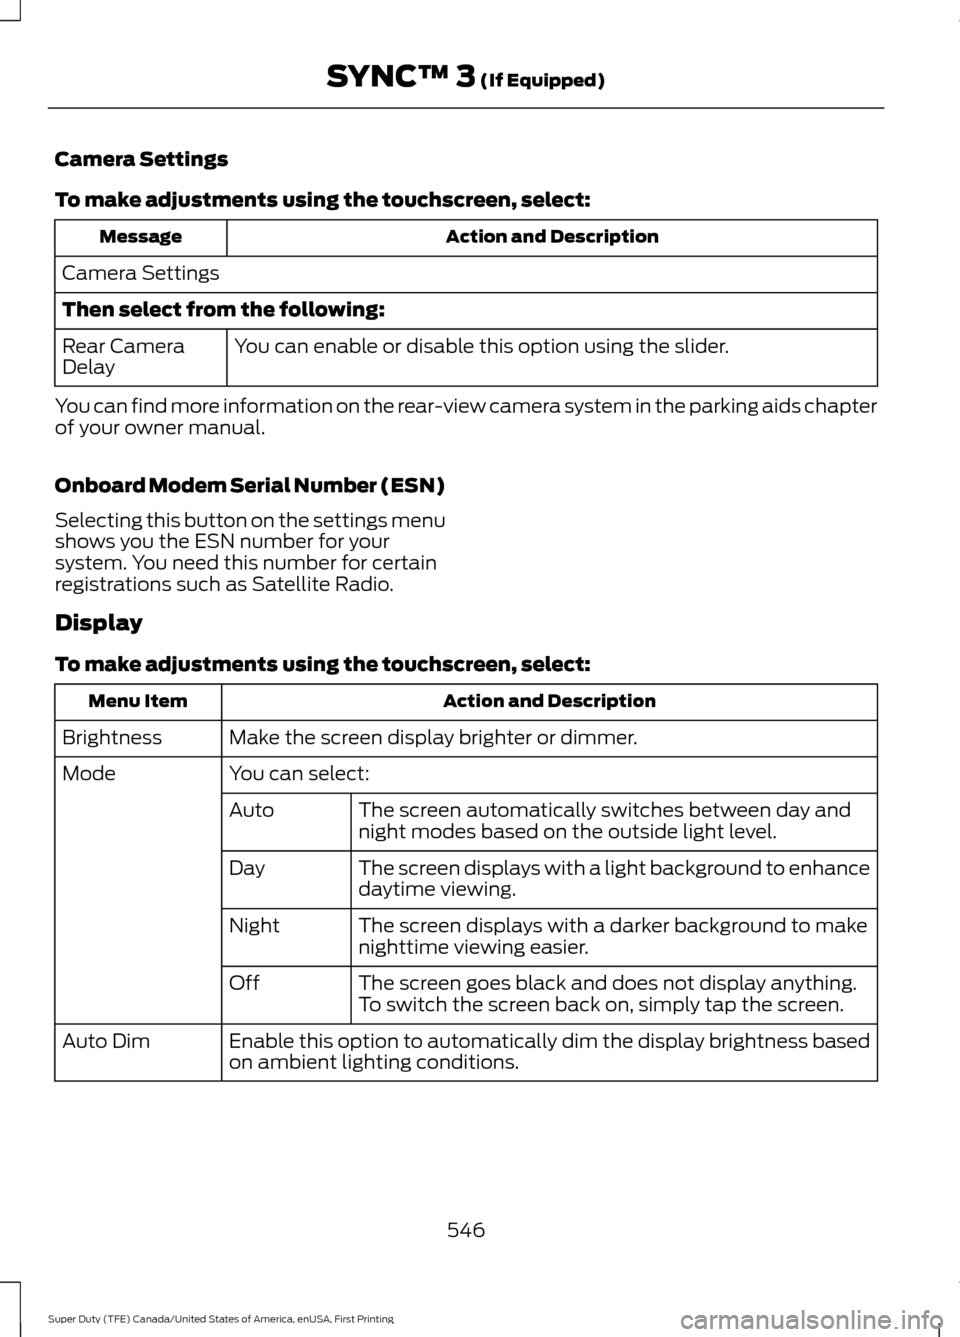
Camera Settings
To make adjustments using the touchscreen, select:
Action and Description
Message
Camera Settings
Then select from the following: You can enable or disable this option using the slider.
Rear Camera
Delay
You can find more information on the rear-view camera system in the parking aids chapter
of your owner manual.
Onboard Modem Serial Number (ESN)
Selecting this button on the settings menu
shows you the ESN number for your
system. You need this number for certain
registrations such as Satellite Radio.
Display
To make adjustments using the touchscreen, select: Action and Description
Menu Item
Make the screen display brighter or dimmer.
Brightness
You can select:
Mode
The screen automatically switches between day and
night modes based on the outside light level.
Auto
The screen displays with a light background to enhance
daytime viewing.
Day
The screen displays with a darker background to make
nighttime viewing easier.
Night
The screen goes black and does not display anything.
To switch the screen back on, simply tap the screen.
Off
Enable this option to automatically dim the display brightness based
on ambient lighting conditions.
Auto Dim
546
Super Duty (TFE) Canada/United States of America, enUSA, First Printing SYNC™ 3 (If Equipped)