2017 FORD SUPER DUTY overheating
[x] Cancel search: overheatingPage 101 of 636
To adjust your mirrors, make sure you
switch your vehicle on (with the ignition in
accessory mode or the engine running) and
then press the adjustment control to
position the mirrors.
Note:
Moving the mirrors 10 or more times
within one minute, or repeated folding,
unfolding and telescoping of the mirrors
while holding the control down during full
travel, may disable the system to protect
the motors from overheating. Wait
approximately three minutes with the
vehicle running, and up to 10 minutes with
the vehicle off, for the system to reset and
for function to return to normal.
Loose Mirror
If your power-folding mirrors are manually
folded, they may not work properly even
after you re-position them. You need to
reset them if:
• The mirrors vibrate when you drive.
• The mirrors feel loose.
• The mirrors do not stay in the folded or
unfolded position.
• One of the mirrors is not in its normal
driving position.
To reset the power-fold feature, use the
power-folding mirror control to fold and
unfold the mirrors. You may hear a loud
noise as you reset the power-folding
mirrors. This sound is normal. Repeat this
process as needed each time the mirrors
are manually folded.
Heated Exterior Mirrors (If Equipped)
See Heated Windows and Mirrors (page
150
).
Memory Mirrors
(If Equipped)
You can save and recall the mirror
positions through the memory function.
See
Memory Function (page 157). Direction Indicator Mirrors (If Equipped)
While the vehicle is running, the
forward-facing portion of the appropriate
mirror housing blinks when you switch on
the direction indicator.
Puddle Lamps
(If Equipped)
The lamps on the bottom part of the mirror
housing light when you use your
transmitter to unlock the doors or when
you open a door.
Clearance Lamps
(If Equipped)
The lower, outer part of the mirror housings
light when you switch the headlamps or
parking lamps on.
Spot Lamps
(If Equipped)
The area lights are on the forward-facing
portion of the mirror housing. You can
switch them on and off by using the
controls located on the instrument panel.
See
Lighting (page 86).
Trailer Towing Camera System
(If
Equipped)
See
Rear View Camera (page 232).
Blind Spot Information System
(If
Equipped)
See
Blind Spot Information System
(page 249).
INTERIOR MIRROR WARNING
Do not adjust the mirror when your
vehicle is moving.
98
Super Duty (TFE) Canada/United States of America, enUSA, First Printing Windows and Mirrors
Page 169 of 636
3.
Press and hold the function button you
want to program for 2 seconds, then
release. Repeat this step. Depending
on your brand of garage door opener,
you may need to repeat this sequence
a third time.
Gate Operator / Canadian
Programming
Canadian radio-frequency laws require
transmitter signals to “time-out” (or quit)
after several seconds of transmission –
which may not be long enough for
HomeLink to pick up the signal during
programming. Similar to this Canadian law,
some U.S. gate operators are designed to
“time-out” in the same manner.
Note: If programming a garage door opener
or gate operator, it is advised to unplug the
device during the “cycling” process to
prevent possible overheating.
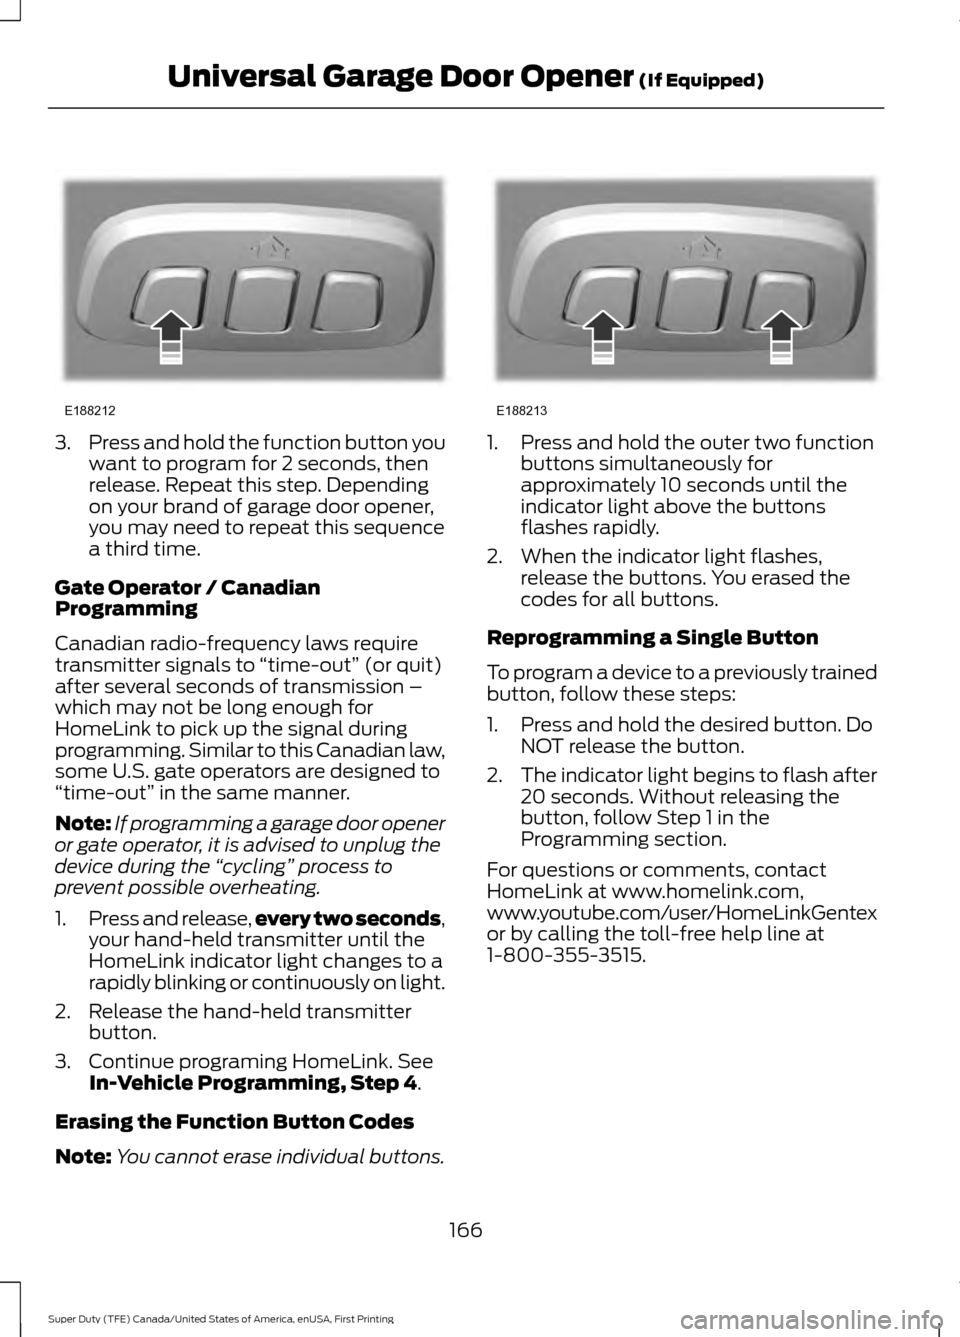
1. Press and release, every two seconds,
your hand-held transmitter until the
HomeLink indicator light changes to a
rapidly blinking or continuously on light.
2. Release the hand-held transmitter button.
3. Continue programing HomeLink. See In-Vehicle Programming, Step 4.
Erasing the Function Button Codes
Note: You cannot erase individual buttons. 1. Press and hold the outer two function
buttons simultaneously for
approximately 10 seconds until the
indicator light above the buttons
flashes rapidly.
2. When the indicator light flashes, release the buttons. You erased the
codes for all buttons.
Reprogramming a Single Button
To program a device to a previously trained
button, follow these steps:
1. Press and hold the desired button. Do NOT release the button.
2. The indicator light begins to flash after
20 seconds. Without releasing the
button, follow Step 1 in the
Programming section.
For questions or comments, contact
HomeLink at www.homelink.com,
www.youtube.com/user/HomeLinkGentex
or by calling the toll-free help line at
1-800-355-3515.
166
Super Duty (TFE) Canada/United States of America, enUSA, First Printing Universal Garage Door Opener
(If Equipped)E188212 E188213
Page 189 of 636
Note:
Do not blend used engine oil with
diesel fuel under any circumstances.
Blending used oil with the fuel will
significantly increase your vehicle ’s exhaust
emissions and reduce engine life due to
increased internal wear. Using low sulfur diesel fuel
(16-500 ppm) or high sulfur
diesel fuel (greater than 500
ppm) in your diesel engine will cause
certain emission components to
malfunction which may also cause the
service engine soon light to illuminate
indicating an emissions-related concern.
Diesel fuel is adjusted seasonally for cold
temperature. For best results at
temperatures below 19°F (-7°C), it is
recommended to use a diesel fuel which
has been seasonally adjusted for the
ambient conditions.
Fuel Requirements - Choosing The
Right Fuel: Vehicles Operated
Where Ultra Low Sulfur Diesel Fuel
Is Not Required
For the engine to operate reliably on
low-sulfur or high-sulfur diesel fuel, the
engine must be a factory built high-sulfur
engine (available as a dealer order option
for select markets) or an ultra low sulfur
diesel fuel configured engine that has been
retrofitted for high-sulfur diesel fuel using
Ford Motor Company dealer service parts.
Failure to use retrofit components other
than those available through your
authorized dealer will result in coolant
system damage, engine overheating,
selective catalyst reduction system or
diesel particulate filter damage and
possible base engine damage. Use only a diesel engine configured for use
with high sulfur diesel fuel in markets with
diesel fuel that has sulfur content greater
than 15 ppm. Using low sulfur diesel fuel
(16–500 ppm) or high sulfur diesel fuel
(greater than 500 ppm) in a diesel engine
designed to use only Ultra Low Sulfur
Diesel fuel may result in damage to engine
emission control devices and the
aftertreatment system, potentially
rendering the vehicle inoperable.
Vehicles with engines configured for use
with high sulfur diesel fuel are only
available for sale in countries where ultra
low sulfur diesel fuel is generally not
available or mandated by the government.
Vehicles originally sold in a ultra low sulfur
diesel fuel market that are subsequently
exported to non- ultra low sulfur diesel fuel
markets will need to be retrofitted (at the
customer
’s expense using Ford authorized
dealer service parts) in order to be reliably
operated on non- ultra low sulfur diesel
fuel.
Biodiesel WARNINGS
Do not use home heating oil,
agricultural fuel, raw fats and oils,
waste cooking greases, biodiesel
fuels greater than 20% or any diesel fuel
not intended for highway use. Damage to
the fuel injection system, engine and
exhaust catalyst can occur if an improper
fuel is used. Do not add gasoline, gasohol
or alcohol to diesel fuel. This practice
creates a serious fire hazard and engine
performance problems. Do not mix diesel fuel with gasoline,
gasohol or alcohol. This could cause
an explosion resulting in personal
injury.
186
Super Duty (TFE) Canada/United States of America, enUSA, First Printing Fuel and Refueling
Page 219 of 636
After driving through mud, clean off residue
stuck to rotating driveshafts and tires.
Excess mud stuck on tires and rotating
driveshafts can cause an imbalance that
could damage drive components.
Water
If you must drive through high water, drive
slowly. Traction or brake capability may
be limited.
When driving through water, determine the
depth and avoid water higher than the
bottom of the hubs. If the ignition system
gets wet, your vehicle may stall.
Once through water, always try the brakes.
Wet brakes do not stop your vehicle as
effectively as dry brakes. Drying can be
improved by applying light pressure to the
brake pedal while moving slowly.
Note:
Driving through deep water may
damage the transmission. If the front or rear
axle is submerged in water, the axle
lubricant and power transfer unit lubricant
should be checked and changed if
necessary.
Driving on Hilly or Sloping Terrain
Although natural obstacles may make it
necessary to travel diagonally up or down
a hill or steep incline, you should always
try to drive straight up or straight down.
Note: Avoid turning on steep slopes or hills.
A danger lies in losing traction, slipping
sideways and possible vehicle roll over.
Whenever driving on a hill, determine
beforehand the route you will use. Do not
drive over the crest of a hill without seeing
what conditions are on the other side. Do
not drive in reverse over a hill without the
aid of an observer.
When climbing a steep slope or hill, start
in a lower gear rather than downshifting to
a lower gear from a higher gear once the
ascent has started. This reduces strain on
the engine and the possibility of stalling. If your vehicle stalls, do not try to turn
around because this could cause vehicle
roll over. It is better to reverse back to a
safe location.
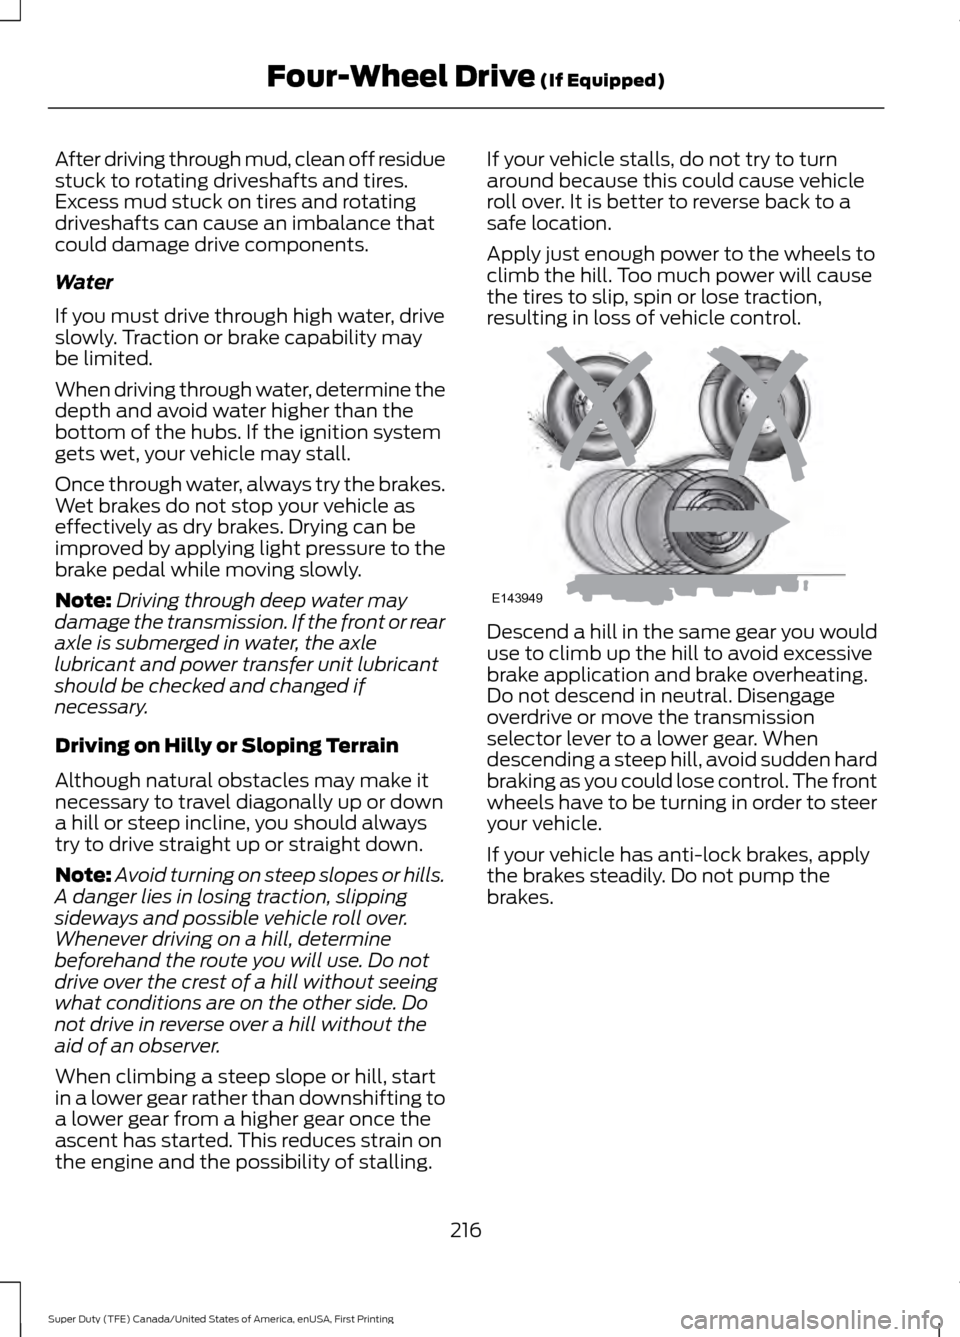
Apply just enough power to the wheels to
climb the hill. Too much power will cause
the tires to slip, spin or lose traction,
resulting in loss of vehicle control.
Descend a hill in the same gear you would
use to climb up the hill to avoid excessive
brake application and brake overheating.
Do not descend in neutral. Disengage
overdrive or move the transmission
selector lever to a lower gear. When
descending a steep hill, avoid sudden hard
braking as you could lose control. The front
wheels have to be turning in order to steer
your vehicle.
If your vehicle has anti-lock brakes, apply
the brakes steadily. Do not pump the
brakes.
216
Super Duty (TFE) Canada/United States of America, enUSA, First Printing Four-Wheel Drive (If Equipped)E143949
Page 246 of 636
Each time you start the vehicle, the system
selects the last chosen gap for the current
driver.
Disengaging the System
Press the brake pedal or press CNCL. The
last set speed displays in grey but does not
erase.
Overriding the System WARNING
If you override the system by pressing
the accelerator pedal, it does not
automatically apply the brakes to
maintain a gap from any vehicle ahead. When you press the accelerator pedal, you
override the set speed and gap distance.
The green indicator illuminates
when the system engages.
The system resumes operation
when you release the accelerator pedal.
The vehicle speed decreases to the set
speed, or to a lower speed if following a
slower vehicle.
Changing the Set Speed
• Accelerate or brake to the desired
speed, then press and release
SET+.
• Press and hold SET+ or SET- until the
desired set speed shows on the
information display. The vehicle speed
gradually changes to the selected
speed.
• Press and release
SET+ or SET-. The
set speed changes in approximately
1 mph (1 km/h)
.
• Hold the
SET+ or SET- button to
change the set speed in increments of
approximately 5 mph or 10 km/h. The system may apply the brakes to slow
the vehicle to the new set speed. The set
speed displays continuously in the
information display while the system is
active.
Resuming the Set Speed
Note:
Only use resume if you are aware of
the set speed and intend to return to it.
Press and release RES. The vehicle returns
to the previously set speed. The set speed
shows continuously in the information
display while the system is active.
Low Speed Automatic
Cancellation
The system does not function at vehicle
speeds below
12.4 mph (20 km/h). An
audible alarm sounds and the automatic
braking releases if the vehicle drops below
this speed.
Hilly Condition and Trailer Tow
Usage
Note: An audible alarm sounds and the
system shuts down if it applies brakes for
an extended period of time. This allows the
brakes to cool. The system functions
normally again when the brakes have
cooled.
Note: When towing with adaptive cruise
control, turn on Tow/Haul Mode and Diesel
Engine Brake.
Select a lower gear when the system is
active in situations such as prolonged
downhill driving on steep grades, for
example in mountainous areas. The
system needs additional engine braking in
these situations to reduce the load on the
vehicle ’s regular brake system to prevent
it from overheating.
243
Super Duty (TFE) Canada/United States of America, enUSA, First Printing Cruise Control
(If Equipped)E144529
Page 260 of 636
If the power steering system breaks down
(or if the engine is turned off), you can
steer the vehicle manually, but it takes
more effort.
If the steering wanders or pulls, check for:
•
an improperly inflated tire
• uneven tire wear
• loose or worn suspension components
• loose or worn steering components
• improper vehicle alignment
If any steering components are serviced or
replaced, install new fasteners (many are
coated with thread adhesive or have
prevailing torque features which may not
be re-used). Never re-use a bolt or nut.
Torque fasteners to specifications.
A high crown in the road or high crosswinds
may also make the steering seem to
wander or pull.
Adaptive Steering (If Equipped) WARNING
The adaptive steering system has
diagnostic checks that continuously
monitor the system. If a fault is
detected a message displays in the
information display. Stop your vehicle as
soon as it is safe to do so. This warning
message may clear if the fault is no longer
present. If an adaptive steering system
warning message appears each time you
start your vehicle, have the system
checked as soon as possible. The adaptive steering system continually
changes the steering ratio with changes to
vehicle speed, optimizing the steering
response in all conditions. The system also
changes when you switch on the
transmission tow/haul feature. When you
select the tow/haul button, the adaptive
steering system reduces vehicle sensitivity
to steering inputs at higher vehicle speeds,
while maintaining the ease of parking and
maneuverability at low speeds.
Note:
The adaptive steering system is
designed with a locking device. With the
lock engaged, the adaptive steering system
remains mechanically locked at a fixed
steering ratio. You may also notice a click
when you switch the vehicle on or after you
switch it off, as the lock disengages or
engages.
Note: If your vehicle loses electrical power
or detects a fault when you are driving, the
system automatically shuts down and you
retain normal steering function with a fixed
steering ratio. During this time it is possible
that the steering wheel may not be straight
when the vehicle is driving straight ahead.
In addition, the driver may notice that the
steering wheel angle required to steer the
vehicle may be different.
Note: During parking maneuvers, the
adaptive steering system balances the driver
work load for various steering wheel inputs
and vehicle loading conditions. Under
extreme operating conditions the system
locking device may engage. This strategy
prevents overheating and permanent
damage to the adaptive steering system.
Typical steering and driving maneuvers
allow the system to cool and return to
normal operation.
257
Super Duty (TFE) Canada/United States of America, enUSA, First Printing Driving Aids
Page 333 of 636
It is very important to use prediluted
coolant meeting the correct specification
in order to avoid plugging the small
passageways in the engine cooling system.
See Capacities and Specifications
(page 418). Incorrect prediluted coolant
use can cause damage not covered by the
vehicle Warranty.
If the coolant level is at or below the
minimum mark, add prediluted coolant
immediately.
To top up the coolant level do the
following:
1. Unscrew the cap slowly. Any pressure escapes as you unscrew the cap.
2. Add prediluted coolant meeting the correct specification. See
Capacities
and Specifications (page 411).
3. Add enough prediluted coolant to reach the correct level.
4. Replace the coolant reservoir cap, turn
it clockwise until you feel a strong
resistance.
5. Check the coolant level in the coolant reservoir the next few times you drive
your vehicle.
Note: During normal vehicle operation, the
coolant may change color from orange to
pink or light red. As long as the coolant is
clear and uncontaminated, this color change
does not indicate the coolant has degraded
nor does it require the coolant to be drained,
the system to be flushed, or the coolant to
be replaced.
Do not mix different colors or types of
prediluted coolant in your vehicle. Mixing
of prediluted coolant or using an incorrect
prediluted coolant may harm the engine
or cooling system components and may
not be covered by the vehicle Warranty.
In case of emergency, you can add a large
amount of water without prediluted
coolant in order to reach a vehicle service
location. On arrival do the following: 1. Drain the cooling system.
2. Chemically clean the cooling system.
We recommend Motorcraft Premium
Cooling System Flush.
3. Refill with prediluted coolant as soon as possible.
Water alone, without prediluted coolant,
can cause engine damage from corrosion,
overheating or freezing.
Do not use the following as a coolant
substitute:
• Alcohol.
• Methanol.
• Brine.
• Any coolant mixed with alcohol or
methanol antifreeze.
Alcohol and other liquids can cause engine
damage from overheating or freezing.
Do not add extra inhibitors or additives to
the coolant. These can be harmful and
compromise the corrosion protection of
the coolant.
Recycled Coolant
We do not recommend the use of recycled
coolant as an approved recycling process
is not yet available.
Dispose of used engine coolant in an
appropriate manner. Follow your
community ’s regulations and standards
for recycling and disposing of automotive
fluids.
330
Super Duty (TFE) Canada/United States of America, enUSA, First Printing Maintenance
Page 335 of 636
1. Pull off the road as soon as safely
possible and switch the engine off.
2. If you are a member of a roadside assistance program, we recommend
that you contact your roadside
assistance service provider.
3. If this is not possible, wait a short period for the engine to cool.
4. Check the coolant level. If the coolant level is at or below the minimum mark,
add prediluted coolant immediately.
5. When the engine temperature cools, you can re-start the engine. Have your
vehicle checked as soon as possible to
minimize engine damage.
Note: Driving your vehicle without repair
increases the chance of engine damage.
Engine Coolant Temperature
Management (If Equipped) WARNING
To reduce the risk of crash and injury,
be prepared that the vehicle speed
may reduce and the vehicle may not
be able to accelerate with full power until
the coolant temperature reduces. If you tow a trailer with your vehicle, the
engine may temporarily reach higher a
temperature during severe operating
conditions, for example ascending a long
or steep grade in high ambient
temperatures.
At this time, you may notice the coolant
temperature gauge moves toward the red
zone and a message may appear in the
information display. You may notice a reduction in vehicle
speed caused by reduced engine power.
In order to manage the engine coolant
temperature. Your vehicle may enter this
mode if certain high-temperature and
high-load conditions take place. The
amount of speed reduction depends on
vehicle loading, grade and ambient
temperature. If this occurs, there is no need
to pull off the road. You can continue to
drive your vehicle.
The air conditioning may automatically
turn on and off during severe operating
conditions to protect the engine from
overheating. When the coolant
temperature decreases to the normal
operating temperature, the air conditioning
turns on.
If the coolant temperature gauge moves
fully into the red zone, or if the coolant
temperature warning or service engine
soon messages appear in your information
display, do the following:
1. Pull off the road as soon as safely
possible and shift the transmission into
park
(P).
2. Leave the engine running until the coolant temperature gauge needle
returns to the normal position. After
several minutes, if the temperature
does not drop, follow the remaining
steps.
3. Switch the engine off and wait for it to
cool. Check the coolant level.
4. If the coolant level is at or below the minimum mark, add prediluted coolant
immediately.
5. If the coolant level is normal, restart the engine and continue.
332
Super Duty (TFE) Canada/United States of America, enUSA, First Printing Maintenance