Page 122 of 500
REAR PASSENGER CLIMATE CONTROLS
Fan speed control: Adjust the volume of air circulated in the vehicle.A
Heated seats (if equipped): Press the button to switch the heated seats onand off. See Heated Seats (page 133).B
Temperature control: Control the temperature of the air circulated in yourvehicle.C
Air distribution control: Adjust the control to turn airflow from the instrumentpanel or footwell vents on or off. You can distribute air through any combinationof these vents.
D
Fan speed control lock: When illuminated, you can only operate the rearpassenger settings through the front controls.E
119
Expedition (TB7) Canada/United States of America, enUSA, Edition date: 03/2016, First Printing
Climate ControlE188689
Page 125 of 500
WARNINGS
Install the head restraint properly tohelp minimize the risk of neck injuryin the event of a crash.
Note:Adjust the seatback to an uprightdriving position before adjusting the headrestraint. Adjust the head restraint so thatthe top of it is level with the top of your headand as far forward as possible. Make surethat you remain comfortable. If you areextremely tall, adjust the head restraint toits highest position.
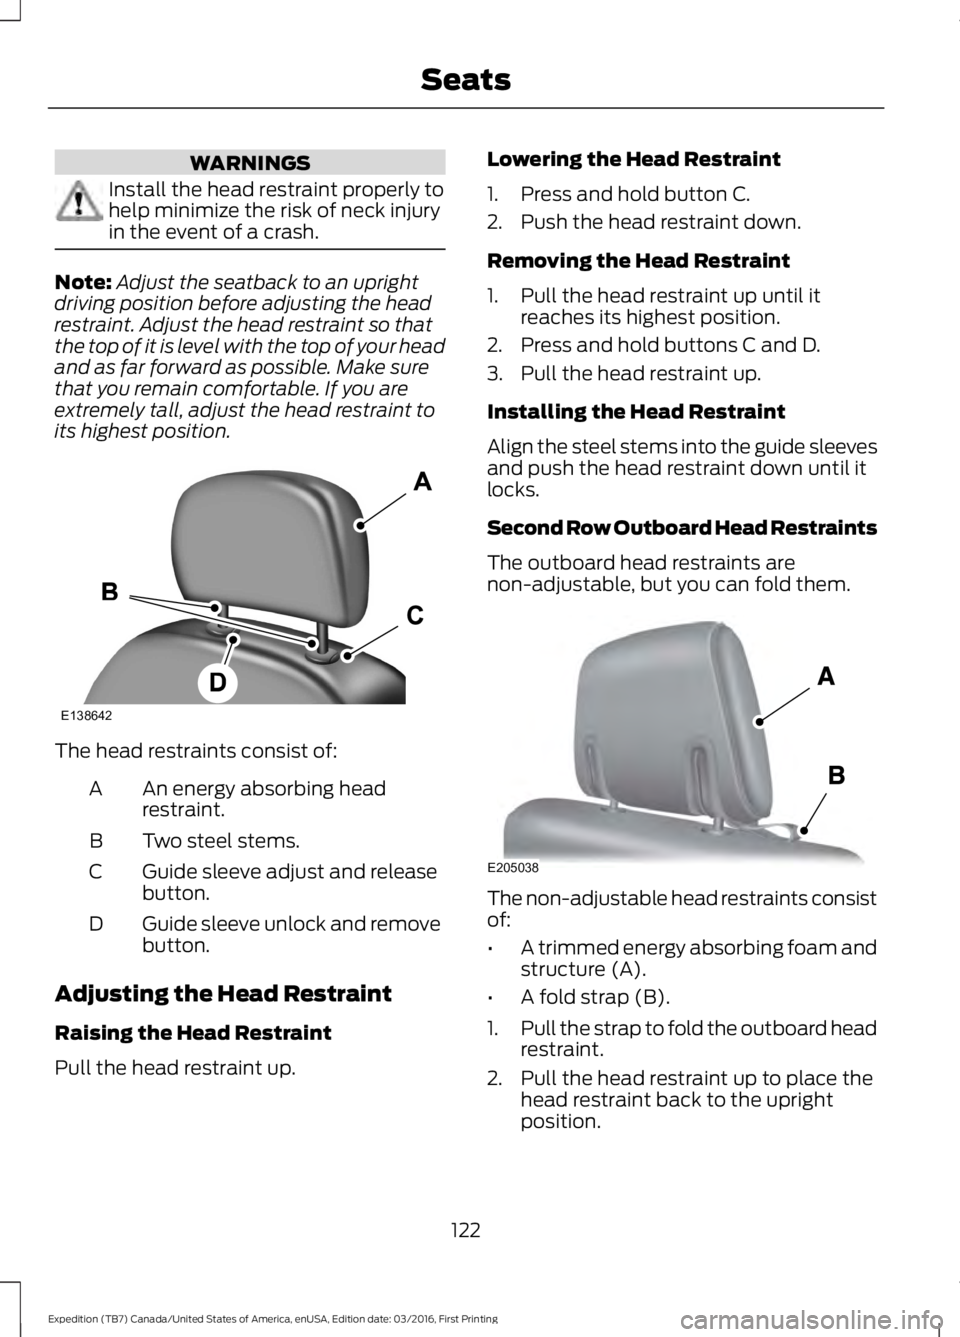
The head restraints consist of:
An energy absorbing headrestraint.A
Two steel stems.B
Guide sleeve adjust and releasebutton.C
Guide sleeve unlock and removebutton.D
Adjusting the Head Restraint
Raising the Head Restraint
Pull the head restraint up.
Lowering the Head Restraint
1. Press and hold button C.
2. Push the head restraint down.
Removing the Head Restraint
1. Pull the head restraint up until itreaches its highest position.
2. Press and hold buttons C and D.
3. Pull the head restraint up.
Installing the Head Restraint
Align the steel stems into the guide sleevesand push the head restraint down until itlocks.
Second Row Outboard Head Restraints
The outboard head restraints arenon-adjustable, but you can fold them.
The non-adjustable head restraints consistof:
•A trimmed energy absorbing foam andstructure (A).
•A fold strap (B).
1.Pull the strap to fold the outboard headrestraint.
2. Pull the head restraint up to place thehead restraint back to the uprightposition.
122
Expedition (TB7) Canada/United States of America, enUSA, Edition date: 03/2016, First Printing
SeatsE138642 E205038
Page 128 of 500
2. Continue pressing the control until itreaches the end of the seat track.
3.Continue pressing the control for abouttwo seconds. You will feel the seatbounce back slightly.
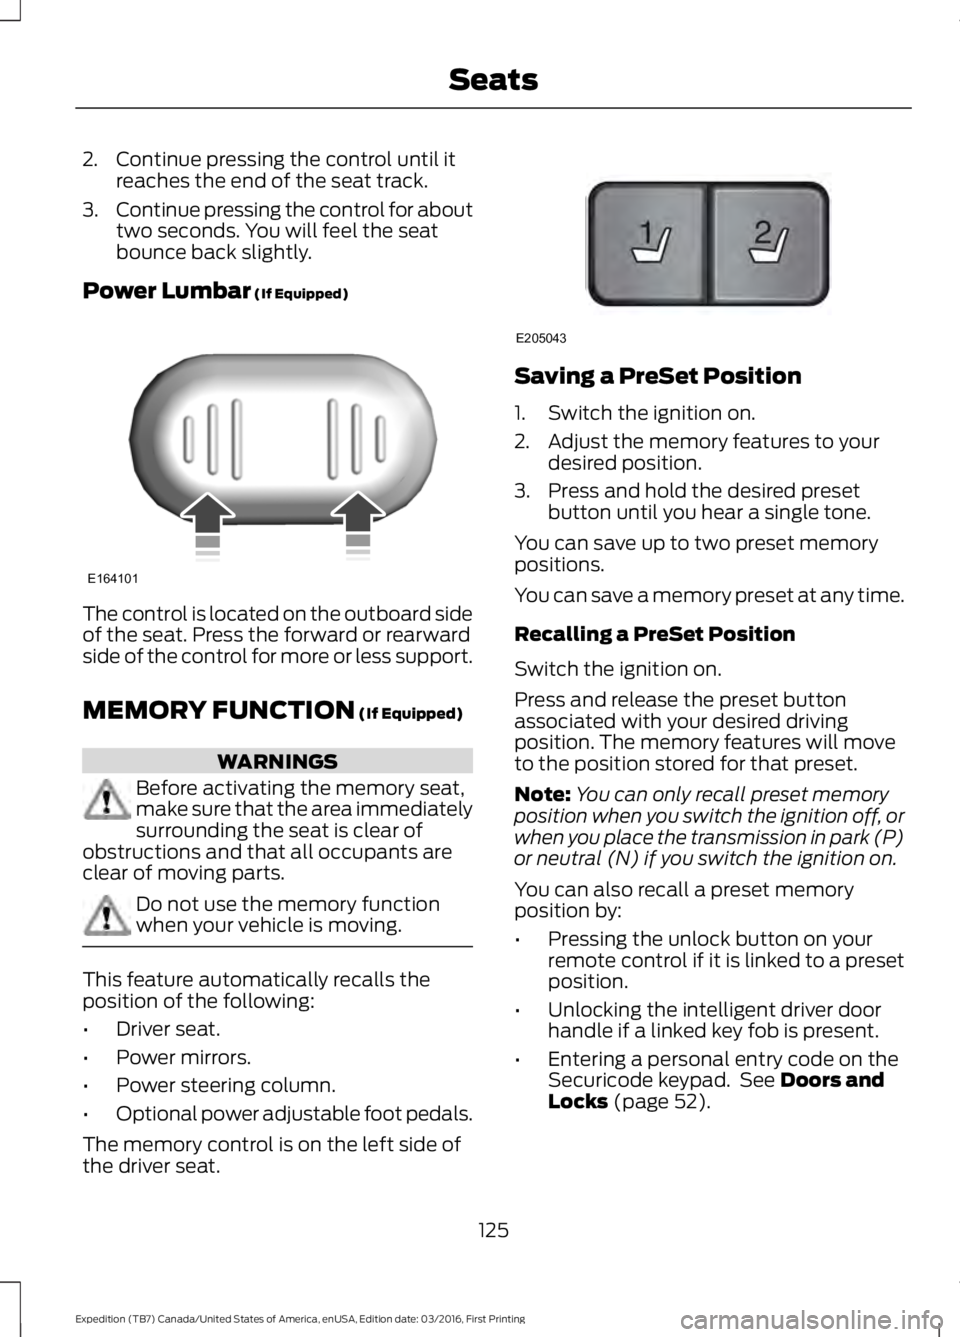
Power Lumbar (If Equipped)
The control is located on the outboard sideof the seat. Press the forward or rearwardside of the control for more or less support.
MEMORY FUNCTION (If Equipped)
WARNINGS
Before activating the memory seat,make sure that the area immediatelysurrounding the seat is clear ofobstructions and that all occupants areclear of moving parts.
Do not use the memory functionwhen your vehicle is moving.
This feature automatically recalls theposition of the following:
•Driver seat.
•Power mirrors.
•Power steering column.
•Optional power adjustable foot pedals.
The memory control is on the left side ofthe driver seat.
Saving a PreSet Position
1. Switch the ignition on.
2. Adjust the memory features to yourdesired position.
3. Press and hold the desired presetbutton until you hear a single tone.
You can save up to two preset memorypositions.
You can save a memory preset at any time.
Recalling a PreSet Position
Switch the ignition on.
Press and release the preset buttonassociated with your desired drivingposition. The memory features will moveto the position stored for that preset.
Note:You can only recall preset memoryposition when you switch the ignition off, orwhen you place the transmission in park (P)or neutral (N) if you switch the ignition on.
You can also recall a preset memoryposition by:
•Pressing the unlock button on yourremote control if it is linked to a presetposition.
•Unlocking the intelligent driver doorhandle if a linked key fob is present.
•Entering a personal entry code on theSecuricode keypad. See Doors andLocks (page 52).
125
Expedition (TB7) Canada/United States of America, enUSA, Edition date: 03/2016, First Printing
SeatsE164101 21
E205043
Page 129 of 500
Note:Using a linked key fob to recall yourmemory position when the ignition is offmoves the seat and steering column to theEasy Entry position.
Note:Pressing any active memory featurecontrol - power seat, mirror (or steeringcolumn switch) (or any memory button)during a memory recall cancels theoperation.
Linking a PreSet Position to yourRemote Control or Intelligent AccessKey Fob
Your vehicle can save the preset memorypositions for up to two remote controls.
1.With the ignition on, move the memorypositions to the desired positions.
2. Press and hold the desired presetbutton for about five seconds. A tonesounds after about two seconds.Continue holding until you hear asecond tone.
3. Within three seconds, press the lockbutton on the remote control you arelinking.
To unlink a remote control, follow thesame procedure – except in step 3, pressthe unlock button on the remote control.
Note:If more than one linked remotecontrol or intelligent access key is in range,the memory function moves to the settingsof the first key to initiate a memory recall.
Easy Entry and Exit Feature (If
Equipped)
This feature adjusts the position of the seatand steering column to allow easier exitand entry to the vehicle.
The driver seat automatically moves 2inches (5 centimeters) rearward when thetransmission is in park (P) and you removethe key from the ignition or you switch theignition off.
The driver seat returns to the previousposition when you put the key in theignition or switch the ignition on.
You can enable or disable this feature inthe information display. See InformationDisplays (page 91).
REAR SEATS
Folding Down the Second Row40% Seat
WARNINGS
Use caution when folding theseatback to the flat back position asthe system will move forward whenyou lift the release handle.
Before returning the seatback to itsoriginal position, make sure thatcargo or any objects are not trappedbehind the seatback. After returning theseatback to its original position, pull on theseatback to make sure that it has fullylatched. An unlatched seat may becomedangerous in the event of a sudden stopor crash.
Make sure that the head restraint is in thedown position and no objects such asbooks, purses or briefcases are on the floorin front of the second row seats beforefolding them down.
Move the front passenger seat forward sothat the second row seat head restraintclears the front seat.
126
Expedition (TB7) Canada/United States of America, enUSA, Edition date: 03/2016, First Printing
Seats
Page 130 of 500
1.Lower the head restraints by pulling onthe strap.
2. Locate the handle on the side of theseat cushion by the door.
3. Pull up on the handle and push theseatback forward toward the front ofthe vehicle.
To return the seat to the upright position:
1.Lift the seatback toward the rear of thevehicle.
2. Rotate the seatback until you hear aclick, locking it in the upright position.
3. Lift up on the head restraint until itlocks into its original position.
Placing the Second Row Outboard40% Seats in Cargo Mode
WARNINGS
Use caution when folding theseatback to the flat back position asthe system will move forward whenyou lift the release handle.
Always return the seat from thekneel position prior to raising theseatback. Failure to do so couldresult in personal injury.
127
Expedition (TB7) Canada/United States of America, enUSA, Edition date: 03/2016, First Printing
SeatsE190842 E205044 E205045 E205046
Page 132 of 500
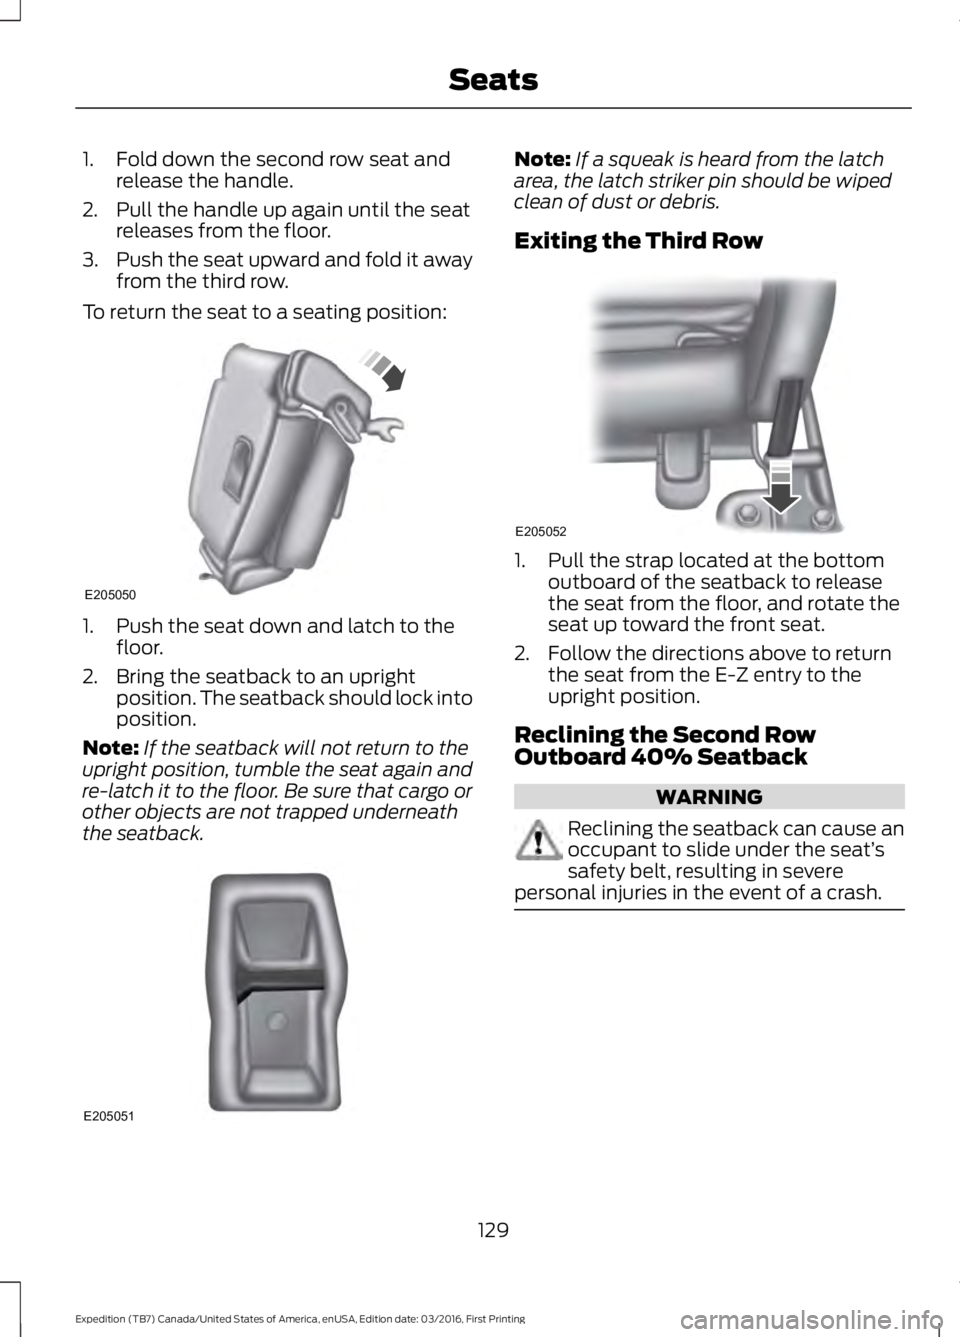
1. Fold down the second row seat andrelease the handle.
2. Pull the handle up again until the seatreleases from the floor.
3.Push the seat upward and fold it awayfrom the third row.
To return the seat to a seating position:
1. Push the seat down and latch to thefloor.
2. Bring the seatback to an uprightposition. The seatback should lock intoposition.
Note:If the seatback will not return to theupright position, tumble the seat again andre-latch it to the floor. Be sure that cargo orother objects are not trapped underneaththe seatback.
Note:If a squeak is heard from the latcharea, the latch striker pin should be wipedclean of dust or debris.
Exiting the Third Row
1. Pull the strap located at the bottomoutboard of the seatback to releasethe seat from the floor, and rotate theseat up toward the front seat.
2. Follow the directions above to returnthe seat from the E-Z entry to theupright position.
Reclining the Second RowOutboard 40% Seatback
WARNING
Reclining the seatback can cause anoccupant to slide under the seat’ssafety belt, resulting in severepersonal injuries in the event of a crash.
129
Expedition (TB7) Canada/United States of America, enUSA, Edition date: 03/2016, First Printing
SeatsE205050 E205051 E205052
Page 135 of 500
To return the seatback to its originalposition, lift the seatback until it latchesinto place.
PowerFold™ Third Row Seat (If
Equipped)
Note:The power fold down seats operatefor 10 minutes after you switch the ignitionoff. The transmission must be in park (P)and the liftgate, or liftgate glass must beopen. Similar to the battery saver feature,the power third row seat disables 10 minutesafter you switch the ignition off.
Note:Be sure that the head restraints arefolded down before powering the third rowseat down.
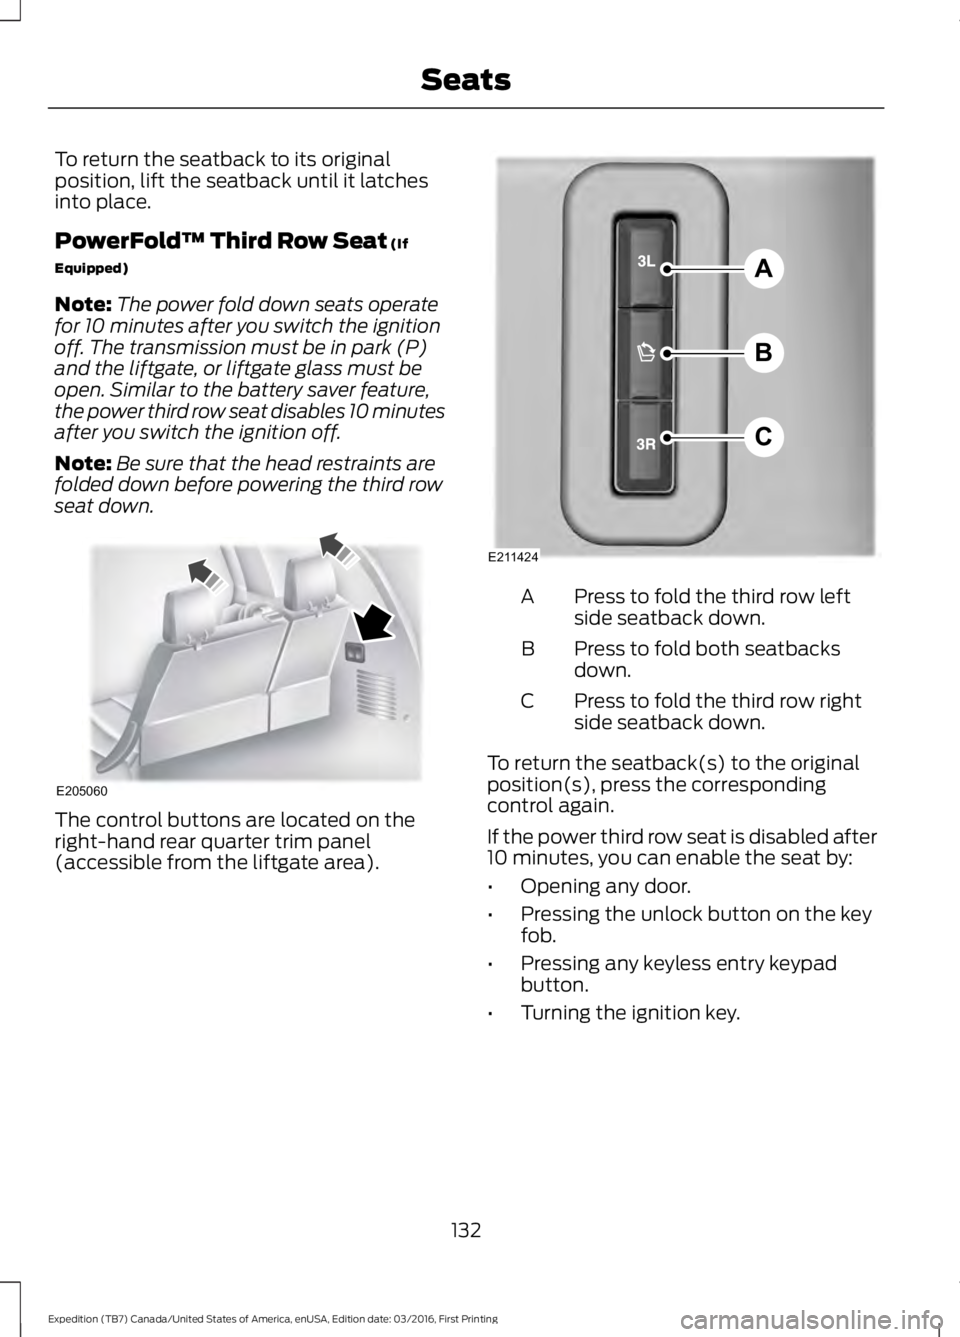
The control buttons are located on theright-hand rear quarter trim panel(accessible from the liftgate area).
Press to fold the third row leftside seatback down.A
Press to fold both seatbacksdown.B
Press to fold the third row rightside seatback down.C
To return the seatback(s) to the originalposition(s), press the correspondingcontrol again.
If the power third row seat is disabled after10 minutes, you can enable the seat by:
•Opening any door.
•Pressing the unlock button on the keyfob.
•Pressing any keyless entry keypadbutton.
•Turning the ignition key.
132
Expedition (TB7) Canada/United States of America, enUSA, Edition date: 03/2016, First Printing
SeatsE205060 A
B
C
E211424
Page 138 of 500
Locate the filters under each front seat andaccess them from the second-row footwellarea. Move the front seats all the wayforward and to the full up positions to easeaccess.
To remove a filter:
1. Switch the ignition off.
2. Press up on the outside rigid edge ofthe filter and rotate counterclockwiseonce the tabs are released, thenremove the filter.
To install a filter:
1. First, position the filter in its housingmaking sure that the far forward endis all the way up in the housing.
2. Push in on the center of the outsideedge of the filter and rotate up into thehousing until it clips into position.
135
Expedition (TB7) Canada/United States of America, enUSA, Edition date: 03/2016, First Printing
SeatsE146319 E146321