Page 185 of 348
183
C5_en_Chap07_info-pratiques_ed01-2016
Very cold climate protection*
HDi 160 Diesel engine
Normal position
The flap 2 is in a horizontal position in the air
duct 3.
Snow position
F Push and rotate the knob 1 by 90 ° in the
direction of the arrow in order to position
the flap 2 in a vertical position in the air
duct 3 .
To return to the normal position, push the
knob
1 then rotate in the opposite direction.
It is essential to remove the very cold
protection when:
- the exterior temperature exceeds 10 °C.
- driving at speeds of over 75 mph (approximately 120 km/h).
Adjustable device which prevents the intake of snow particles, which could obstruct the air filter.
* Depending on the country of sale.
7
Practical information
Page 186 of 348
184
C5_en_Chap07_info-pratiques_ed01-2016
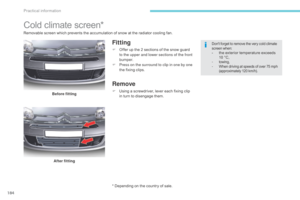
Cold climate screen*
Fitting
F Offer up the 2 sections of the snow guard to the upper and lower sections of the front
b u m p e r.
F
P
ress on the surround to clip in one by one
the fixing clips.
Remove
F Using a screwdriver, lever each fixing clip in turn to disengage them.
Before fitting
After fitting
Don't forget to remove the very cold climate
screen when:
- the exterior temperature exceeds 10 °C,
-
towing,- When driving at speeds of over 75 mph (approximately 120 km/h).
Removable screen which prevents the accumulation of snow at the radiator cooling fan.
* Depending on the country of sale.
Practical information
Page 187 of 348

185
C5_en_Chap07_info-pratiques_ed01-2016
Bonnet
Opening
F At the front of the bonnet, lift the safety catch B and raise the bonnet.
F Unclip the stay C from its housing and pivot
it to insert it in the notch D indicated by a
yellow arrow.
F
F
ix the stay in the notch to hold the bonnet
open.Closing
F Take the stay out of the support notch.
F C lip the stay in its housing.
F
L
ower the bonnet then slam it firmly at the
end of its travel.
F
P
ull on the bonnet to check that it is fully
closed.
F
O
pen the front left-hand door.
F
P
ull the interior bonnet release lever A ,
located at the bottom of the door frame. Before doing anything under the
bonnet, deactivate the Stop & Start
system to avoid any risk of injury
resulting from an automatic change to
START mode.
The location of the interior release lever
prevents opening of the bonnet while
the front left-hand door is closed.
This operation must only be carried out
when the vehicle is stationary.
Avoid opening the bonnet in strong
winds.
When the engine is hot, handle the
safety catch and bonnet stay with care
(risk of burns). Because of the presence of electrical
equipment under the bonnet, it is
recommended that exposure to water
(rain, washing,
...) be limited.
The cooling fan may star t after
switching off the engine: take care
with articles and clothing that might
be caught by the fan blades.
7
Practical information
Page 188 of 348
186
C5_en_Chap07_info-pratiques_ed01-2016
The various caps and covers allow access for
checking fluid levels and for replacing certain
components.THP
Petrol engines
1. Screenwash and headlamp wash fluid reservoir.
2.
P
ower steering fluid reservoir
or
o
r power steering and Hydractive III +
suspension fluid reservoir.
3.
E
ngine coolant header tank.
4.
E
ngine oil dipstick.
5.
E
ngine oil filler cap.
6.
B
rake fluid reservoir.
7.
B
attery.
8.
A
ir filter.
Practical information
Page 189 of 348
187
C5_en_Chap07_info-pratiques_ed01-2016
Diesel engines
HDi 160
BlueHDi 150 / BlueHDi 180
The various caps and covers allow access
for checking fluid levels, for replacing certain
components and for priming the fuel system.
1.
S
creenwash and headlamp wash fluid
reservoir.
2.
P
ower steering fluid reservoir
or
p
ower steering and Hydractive III +
suspension fluid reservoir.
3.
E
ngine coolant header tank.
4.
E
ngine oil dipstick.
5.
E
ngine oil filler cap.
6. A
ir filter.
7. B
rake fluid reservoir.
8.
B
attery.
The Diesel fuel system operates under
high pressure:
-
N
ever carry out any work on this
system yourself.
-
H
Di engines make use of advanced
technology.
All maintenance and repairs require
specially trained staff, which only a
CITROËN dealer can provide.
7
Practical information
Page 190 of 348

188
C5_en_Chap07_info-pratiques_ed01-2016
Checking levels
Engine oil level
The check is carried out either when
the ignition is switched on using the
oil level indicator in the instrument
panel for vehicles so equipped, or
using the dipstick.
Check all of these levels regularly, in line with the manufacturer's service schedule. Top them up if necessary, unless other wise indicated.
If a level drops significantly, have the corresponding system checked by a CITROËN dealer or a qualified workshop.
If you find that the level is above the A mark or
below the B mark, do not star t the engine.
-
I
f the level is above the MAX mark (risk
of damage to the engine), contact a
CITROËN dealer or a qualified workshop.
-
I
f the level is below the MIN mark, you
must top-up the engine oil.
Take care when working under the
bonnet, as certain areas of the engine
may be extremely hot (risk of burns) and
the cooling fan could start at any time
(even with the ignition off).
To ensure that the reading is correct, your
vehicle must be parked on a level sur face
with the engine having been off for more than
30
m
inutes.
It is normal to top-up the oil level between
two services (or oil changes). CITROËN
recommends that you check the level, and top-
up if necessary, every 3 000 miles (5 000 kms).
Checking using the dipstick
The location of the dipstick is shown in the
corresponding underbonnet layout view.
F
T
ake the dipstick by its coloured grip and
remove it completely.
F
W
ipe the end of the dipstick using a clean
non-fluffy cloth.
F
R
efit the dipstick and push fully down, then
pull it out again to make the visual check:
the correct level is between the marks A
and B .
A = MA X
B = MIN
Practical information
Page 191 of 348

189
C5_en_Chap07_info-pratiques_ed01-2016
Oil grade
Before topping-up the oil or changing the oil,
check that the oil is the correct grade for your
engine and conforms to the manufacturer's
recommendations.
Topping-up the engine oil level
The location of the oil filler cap is shown in the
corresponding underbonnet layout view.
F
U
nscrew the oil filler cap to reveal the filler
aperture.
F
A
dd oil in small quantities, avoiding any
spills on engine components (risk of fire).
F
W
ait a few minutes before checking the
level again using the dipstick.
F
A
dd more oil if necessary.
F
A
fter checking the level, carefully refit the
oil filler cap and the dipstick in its tube.
After topping-up the oil, the check when
switching on the ignition with the oil
level indicator in the instrument panel
is not valid during the 30 minutes after
topping-up.
Engine oil change
Refer to the manufacturer's service schedule
for details of the interval for this operation.
In order to maintain the reliability of the engine
and emission control system, never use
additives in the engine oil.
7
Practical information
Page 192 of 348

190
C5_en_Chap07_info-pratiques_ed01-2016
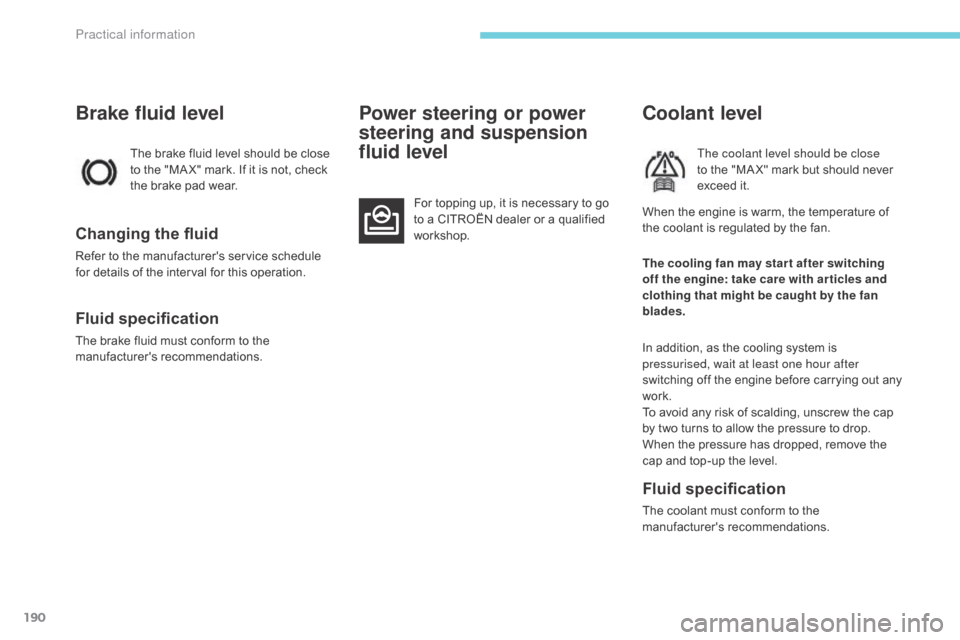
Brake fluid level
The brake fluid level should be close
to the "MA X" mark. If it is not, check
the brake pad wear.
Changing the fluid
Refer to the manufacturer's service schedule
for details of the interval for this operation.
Fluid specification
The brake fluid must conform to the
manufacturer's recommendations.
Power steering or power
steering and suspension
fluid level
For topping up, it is necessary to go
to a CITROËN dealer or a qualified
workshop.
Coolant level
The coolant level should be close
to the "MA X" mark but should never
exceed it.
Fluid specification
The coolant must conform to the
manufacturer's recommendations. The cooling fan may star t after switching
off the engine: take care with ar ticles and
clothing that might be caught by the fan
blades.
In addition, as the cooling system is
pressurised, wait at least one hour after
switching off the engine before carrying out any
work.
To avoid any risk of scalding, unscrew the cap
by two turns to allow the pressure to drop.
When the pressure has dropped, remove the
cap and top-up the level. When the engine is warm, the temperature of
the coolant is regulated by the fan.
Practical information