Page 57 of 100

Navigation
Importing Personal POI Importing the Personal POI to a points of in-
t
er
est destination memory
● Insert the data storage device with the stor-
ed Per
sonal POI or connect it to the Infotain-
ment system ››› page 26.
● Press the Infotainment NAV button and
then sel ect
Settings .
● In the Settings menu, pre
ss the
Manage memory function button.
● Press U
pd
ate my POIs and then press
U
pd ateand
Ne
xt to import the Personal POIs.
● Confirm the import notification with the OKfunction button.
The s
t
ored Personal POI are now in the points
of interest destination memory ›››
page 51
and can be used for navigation purposes.
The stored Personal POI can be deleted in the
Navigation Settings menu
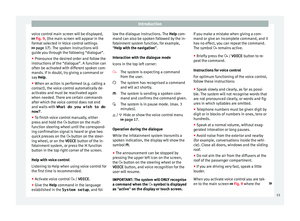
››› page 56. Navigation with images Fig. 37
Images main menu. Selecting an image and starting route guid-
anc
e
B
ear in mind the requirements and formats of
the compatible images ››› page 26.
● Insert the data storage device with the stor-
ed imag
es or connect it to the Infotainment
system.
● Press the Infotainment system MENU but-
t on and then sel
ect Images .
● Press the SOURC
E
› ›
›
Fig. 37 function button
and select the data storage device where the
images are stored.
● Select the desired image.
● If the image displayed was taken using GPS
locali
sation, the function button will ap-
pe ar
. Press to start route guidance. Road sign indicators The road sign indicators must be active in the
Navigation Setup menu ››
› page 56.
If road signs for the road being travelled are
stored in the navigation data, the system can
show them on the map display (e.g. a speed
restriction).
Please bear in mind how recent the naviga-
tion data is and the limitations of the system
››› page 45 !
Traffic sign recognition Some vehicles are also equipped with a cam-
er
a f
or traffic sign recognition. If traffic sign
recognition is installed in the vehicle and ac-
tivated, the recognised traffic signs and addi-
tional information are displayed in the map
view.
Read and take note of the information and in-
dications provided by the traffic sign recogni-
tion system in the vehicle ›››
Booklet Instruc-
tion Manual.
Route guidance in demo mode If demo mode is activated in the
Naviga-
tion Settings menu ››
› page 56, an ad-
ditional pop-up window opens when you
start route guidance. »
55
Page 58 of 100

Navigation
● Pr e
ssing the Demo mode function button
s t
arts a “virtual route guidance” to the desti-
nation you have entered.
● If you press the Normal function button, a
“r e
al route guidance” starts.
The sequence of events and the operations in
virtual route guidance are similar to those in
real route guidance.
Virtual route guidance is repeated when you
reach the fictitious destination and always
starts again from the starting point if not
aborted beforehand.
If the starting point for demo mode has been
defined manually in the Navigation Set-
tings menu, virtual route guidance will start
from the position set.
A manually entered starting point is overwrit-
ten with the current vehicle location if the ve-
hicle moves off. Note
Disable demo mode after use, otherwise you
w i
ll be prompted to choose between virtual
and normal route guidance each time you
start route guidance. Navigation settings
Settin g
s ●
Press the S
ETUP function button in the
m ain
Navigation menu.
Function button: function
Route options: To make adjustments to route calculation.
Suggest 3 alternative routes: After starting route guid-
ance, 3 alternative routes are suggested ››› page 48.
Route: Select the route type.
Economical: The route is calculated by taking into
consideration economic factors.
Fast: The fastest route to the destination.
Short: shortest route to the destination, even if it
results in a longer travelling time.
Most frequent routes: Information on the user's most
frequent routes.
Dynamic route: Dynamic route guidance is activated
when a TMC is received ››› page 53.
Avoid motorways and highways: Motorways will be ex-
cluded from the calculation whenever possible.
Avoid ferries and motorail trains: Ferries and motorail
trains will not be considered in the calculation of the
route whenever possible.
Avoid toll roads: Toll roads will be excluded from the
calculation whenever possible.
Avoid tunnels: Tunnels will be excluded from the cal-
culation whenever possible.
Function button: function
Avoid routes requiring toll stickers (vignette): Routes re-
quiring toll stickers will be excluded from the calcula-
tion whenever possible.
Show available toll stickersa) : To mark the available toll
stickers on the list ( Avoid routes requiring toll stickersmust be active).
Roads requiring toll stickers that have been marked
as having said toll sticker will be taken into account
in the calculation of the route.
Include trailer: Calculate the route and arrival time
for the vehicle with a trailer.
Map: To make adjustments to the visual display of the
map.
Show road signs: The road signs stored in the naviga-
tion data for the road being travelled will be dis-
played during route guidance ››› page 55.
Lane guidance: During route guidance, when driving
and turning on multi-lane roads, an additional dis-
play is shown with lane guidance. This will only ap-
pear if there is information in the database for the
area being driven in.
Show favourites: The stored destinations are shown
on the map as favourites ().
Show POI
Select categories for POI: To select which point of in-
terest categories are displayed on the map
››› page 51.
Show POI flags.: View of category logos of the se-
lected points of interest (e.g. view of petrol station
logos). 56
Page 59 of 100
 addresses,
see also")
NavigationFunction button: function
Manage memory: To modify saved destinations.
Sort contacts: To select the sequential order of the en-
tries in the phonebook that have (postal) addresses,
see also ››› page 49.
Define home address: To assign or edit a home address,
see also ››› page 51.
Delete my points of interest (POI): To delete the points of
interest stored in the destination memory ››› page 55.
Update my POIs: To update the stored points of interest
››› page 55.
Import destinations (SD/USB): To import electronic busi-
ness cards (vCards) into the destination memory
››› page 54.
Delete user data: To delete the stored destinations
(e.g., the Last destinations or the Destina-
tion memory ).
Navigation announcements: To make adjustments to naviga-
tion announcements.
Volume: To adjust the volume for driving recommen-
dations.
Entertainment fading (nav. announcements): Adjusting the
volume of the active audio source during navigation
instructions.
Navigation announcementsb) : To adjust driving recom-
mendations during route guidance.
Comprehensive: Detailed driving recommendations
and other directions.
Brief: Some recommendations and directions are
muted.
Function button: function
Congestion only: Recommendations are only given
in the event of congestion along the route (e.g.
traffic jam).
No voice guidance during call: No audible driving in-
structions will be given during a telephone conversa-
tion.
Warning: My points of interest: Audible announcement
when nearing a point of interest.
Fuel options: To make adjustments relating to fuel.
Select preferred fuel station: The selected petrol station
mark will be shown before other points of interest in
the search.
Fuel warning: The warning to refuel is active.
If the fuel level reaches the reserve level, the corre-
sponding warning is generated which permits the
search for petrol stations.
Version information: Information on the stored navigation
data.
Speed limits: Shows the speed limits, depending on the
road, for the current country.
Advanced setup: To make advanced adjustments to the
navigation.
Time display: displayed during route guidance.
Estimated time of arrival: The estimated time of arrival
at the final destination is displayed.
Duration: The estimated travelling time to the final
destination is displayed.
Status line: displayed during route guidance.
Function button: function
Destination: The distance calculated to final desti-
nation is displayed.
Next stopover: The calculated distance until next
stopover is displayed.
Note: National border crossed: Displays the speed lim-
its of the country in question when crossing the bor-
der.
Demo mode: When Demo mode is activated and
route guidance is started, virtual guidance to the en-
tered destination can be initiated ››› page 55.
Define demo mode starting point: if demo mode is acti-
vated, a fictitious starting point for virtual route
guidance can be defined when the vehicle is sta-
tionary.
Waypoint modeb) : To start Offroad navigation.
a) This function depends on the country.
b) Only available for the model: “Navi System Plus”.
Navigation in Offroad mode*
Introduction 3 On
ly
available for the model: Navi System Plus
Offroad* navigation is a function for offroad
driving that provides directions in “non-digi-
tised areas” at low speeds.
Non-digitised areas are areas about which
the system does not have information for the »
57
Page 60 of 100

Navigation
streets or terrain. It does not detect streets,
b ui
ldings or natural limits such as mountains
or rivers, although they may be shown on the
map.
Offroad* navigation is not suitable for driving
on conventional roads as it does not detect
one-way streets, motorway entries or similar.
Offroad Navigation Menu 3 On
ly available for the model: Navi System Plus Fig. 38
Offroad Navigation Menu start Press the
Setup
function button in the main
Navigation menu.
● In the menu, press the Wa
ypoint mode
function button.
● The Offroad Navigation menu opens
››
› Fig. 38. Function buttons in the Offroad Navigation
menu
Function button: function
RECORD: Initiates the plotting of an Offroad tour.
MEMORY: Opens a list allowing the selection of a stored
Offroad tour.
EXIT: Ends Offroad navigation. Recording an Offroad tour
3 On
ly
available for the model: Navi System Plus Fig. 39
Recording an Offroad tour An Offroad tour is formed by a series of stor-
ed wa
ypoin
ts.
Starting recording
● In the Offroad Navigation menu, in the pop-
up w indo
w press the RECORD pop-up button.●
In the pop-up w indo
w, the user is able to
plot the tour with a given destination or start
plotting the route without giving a final desti-
nation.
● Starts plotting the route.
The offro
ad markers can be recorded by indi-
cating a manual waypoint.
● In the Offroad Navigation menu, press the
ADD W
AYPOINT function button. The tour way-
points defined m
anually are shown on the
map by a marker.
Ending recording
● Press the ST
OP RECORDING function button in
the m ain O
ffroad Navigation menu.
58
Page 61 of 100

Navigation
Managing stored Offroad tours 3 On
ly available for the model: Navi System Plus Fig. 40
Offroad Navigation menu, stored
t our
s ●
Press the MEMORY function button in the
O ffr
oad Navigation menu.
● A list of stored Offroad tours opens, if there
are an
y.
When a tour is selected, the following icons
will appear ››› Fig. 40:
Export the tour to an SD card.
Edit the name of the tour.
Delete the tour.
Load tour
Function button: function
IMPORT: allows the import of an Offroad route in “.GPX”
format.
Loading an Offroad tour
When the O
ffr
oad tour is selected, press Play
and the selected tour will be loaded onto
the Navigation system.
Creating an Offroad tour 3 On
ly available for the model: Navi System Plus Fig. 41
Offroad route guidance mode Start route guidance
● Loads the stored Offroad tour.
● Starting off in a stored route is not detected
b y
the system automatically.
Setup
Function button: function
Invert: Reverses the direction of the stored Offroad tour.
Next point: Starts the Offroad tour from the nearest point.
Function button: function
Start: Starts the complete Offroad tour. When route guidance starts, the system
sw
it
ches to the map view.
Stopping route guidance ● Press the Options button on the screen and
then pr e
ss Stop .
End w a
ypoint navigation
● Press the EXIT function button in the Off-
r o
ad Navigation menu. WARNING
Terrain features are disregarded during route
guid anc
e Drive slowly and following the in-
structions in order to perform the manoeuvre
as far as possible!
● The general direction of travel is indicated
str
aight ahead by direction arrows in the In-
fotainment System pop-up window ››› Fig. 41
A .
Note
If an Offroad tour is being recorded, this is
aut om
atically stored if Offroad navigation is
discontinued. 59
Page 62 of 100

CAR menu
CAR menu Intr oduction t
o managing the
CAR menu
Car menu By pressing the “CAR” infotainment button
y
ou w
ill access its main menu with the follow-
ing options:
● VIEW
● MINIPLAYER, in the top right corner (Radio
or M edi
a function if the HDC descent control*
is not active).
● PREVIOUS-NEXT (to change screen)
● SETUP ››
›
Booklet Instruction Manual,
chapter System setup (CAR)
With the function button View you can access
the f o
llowing information:
● SPORT*
● OFFROAD*
● CONSUMERS
● DRIVING DATA
● ECOTRAINER* ●
VEHICLE
STATUS
Sport* Fig. 42
SPORT menu Fig. 43
Lap Timer SPORT menu ●
Pr e
ss the CAR button on the Infotainment
sy s
tem.
● Press the VIEW function button and then
sel ect
SPORT.
If the corresponding equipment is available,
the information that appears in the Sport op-
tion is the following ››› Fig. 42:
Instantaneous power expressed in kW
G forces
Turbo pressure, expressed in bar
(“bar”), kilopascals (“kPa”) or in pounds
per square inch (“psi”). Press the Setup
button to change the units of pressure
››› page 86
Coolant temperature
Oil temperature
Only three of these items of information can
be displayed at the same time, but the user
chooses which to display, and in what order,
by moving the finger vertically over the dials.
If the Next button is pressed, the
Lap timer1)
menu i s
displayed; this is described below
››› Fig. 43:
Analogue lap timer.
1.
2.
3.
4.
5.
1 1)
This lap timer is independent of the one that ap-
pe ar
s on the instrument panel ››› Booklet Instruction
Manual
60
Page 63 of 100

CAR menu
A new lap timer recording is started by
pr e
ssing on the surface of the digital lap
timer + .
Stop lap timer/Partial time.
The analogue lap timer stops for 5 sec-
onds. After 5 seconds, the analogue lap
timer goes back to showing the real time.
Statistics/delete last lap timer recording.
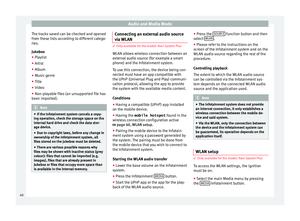
Offroad* Fig. 44
CAR Menu Offroad. ●
Press the CAR button on the Infotainment
sy s
tem.
● Press the VIEW function button and then
sel ect
OFFROAD .
2 3
4
5 If the corresponding equipment is available,
the inf
orm
ation that appears is the following:
Compass.
Altimeter: altitude above sea level.
Turning angle of steered wheels.
Coolant temperature.
Lubricating oil temperature
Only the altimeter and 2 more of these items
of information can be displayed at the same
time, but the user chooses which to display,
and in what order, by moving their finger ver-
tically over the dials.
Consumers Fig. 45
Convenience consumers. 1.
2.
3.
4.
5.
By pressing the
C
on sumers button, informa-
tion on the s t
atus of the vehicle's main con-
sumption devices is obtained. It is shown via
a consumption indicator bar in l/h (gal/h) 1)
.
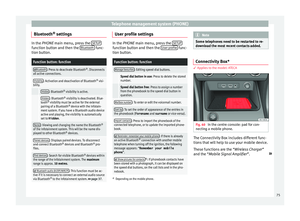
Driving data Fig. 46
Driving data. The onboard computer is equipped with 3
memorie
s
that work automatically. In these
memories you can see the distance travelled,
average speed, time passed, average con-
sumption and autonomy of the vehicle.
1. Since start
Indicates and stores the values of the journey
completed and the consumption from when »1)
In the case of Gas (CNG) vehicles, the units are in
k g/h.
61
Page 64 of 100

CAR menu
the ignition is switched on to when it is
sw it
ched off.
2. Since refuelling
Display and storage of the values for the jour-
ney and the consumption. By refuelling, the
memory will be erased automatically.
3. Long-term
The memory records the values for a specific
number of partial trips, up to a total of 19
hours and 59 minutes or 99 hours and 59 mi-
nutes, or 1999.9 km (or miles) for 9999 km
(or miles), depending on the model of instru-
ment panel.
When one of these values is reached (de-
pending on the version of the instrument
panel), the memory is automatically deleted
and it starts counting from 0 again. Ecotrainer* Fig. 47
CAR Menu Ecotrainer. Fig. 48
Driving style symbols. Open ECOTRAINER menu
● With the vehicle stopped, press the CAR button on the Infotainment system.
● Press the VIEW function button and then
sel ect
ECOTRAINER . If the corresponding equipment is available,
the EC
OTRAINER will provide information on
driving style. The information on driving style
is only evaluated and displayed when mov-
ing forward.
∅ ECO points: Driving style display
This indicates the driving style since starting
the vehicle on a scale of 0 to 100. The higher
the score displayed, the more efficient the
driving style. To see more information, press
the display. It shows statistics for the last 30
minutes of driving since starting the vehicle.
If the car has not yet been driven for 30 mi-
nutes, it shows values from the last trip in
grey.
∅ l/100 km: Average fuel consumption
Shows the average fuel consumption. The
value is calculated by using the kilometres
covered since starting the vehicle. To see
more information, press the display. It shows
statistics for the last 30 minutes of driving
since starting the vehicle. If the car has not
yet been driven for 30 minutes, it shows val-
ues from the last trip in grey.
ECO tips: Tips on how to save fuel
By pressing the ECO tips function button, you
c an
view tips on how to save fuel. These tips
can only be viewed when the vehicle is stop-
ped.
62