2016 MERCEDES-BENZ SL-CLASS ROADSTER audio
[x] Cancel search: audioPage 447 of 614
Storing channels
XPressWthe COMAND controller when the
display/selection window is active.
or
XSelect Presetsin the submenu bar by turn-
ing cVd the COMAND controller and press
W to confirm.
In both cases, the channel presets appear.
The #dot in front of a preset entry indi-
cates that the currently selected channel is
stored under this preset.
XSelect a preset by turning cVdthe
COMAND controller and press and hold W
until you hear a tone.
or
XPress and hold a number button, e.g. n,
until you hear a tone.
The channel is stored under the preset.
Storing channels automatically
This function automatically stores channels
with adequate reception in the preset mem-
ory. Channels stored manually in the preset
memory will be overwritten.
XOption 1: pressWthe COMAND controller
when the display/selection window is
active.
XSelect Autostorein the presets by turning
cVd the COMAND controller and press W
to confirm.
XOption 2: selectPresetsin the submenu
bar by sliding VÆandcVd turning the
COMAND controller and press Wto con-
firm.
XSelect Autostoreand press Wto confirm.
In both cases, COMAND searches for chan- nels that can be received. You will see a
message to this effect. The available chan-
nels are automatically stored in the preset
positions.
XTo cancel storing: selectCanceland
press Wto confirm. Selecting a channel from the preset list
XTo call up the channel preset list:
select
Presets
in the submenu bar by turning
cVd the COMAND controller and press W
to confirm.
The channel preset list appears.
XTo set a channel: select a preset by turn-
ing cVd the COMAND controller and press
W to confirm.
or
XPress a number key, such as n.
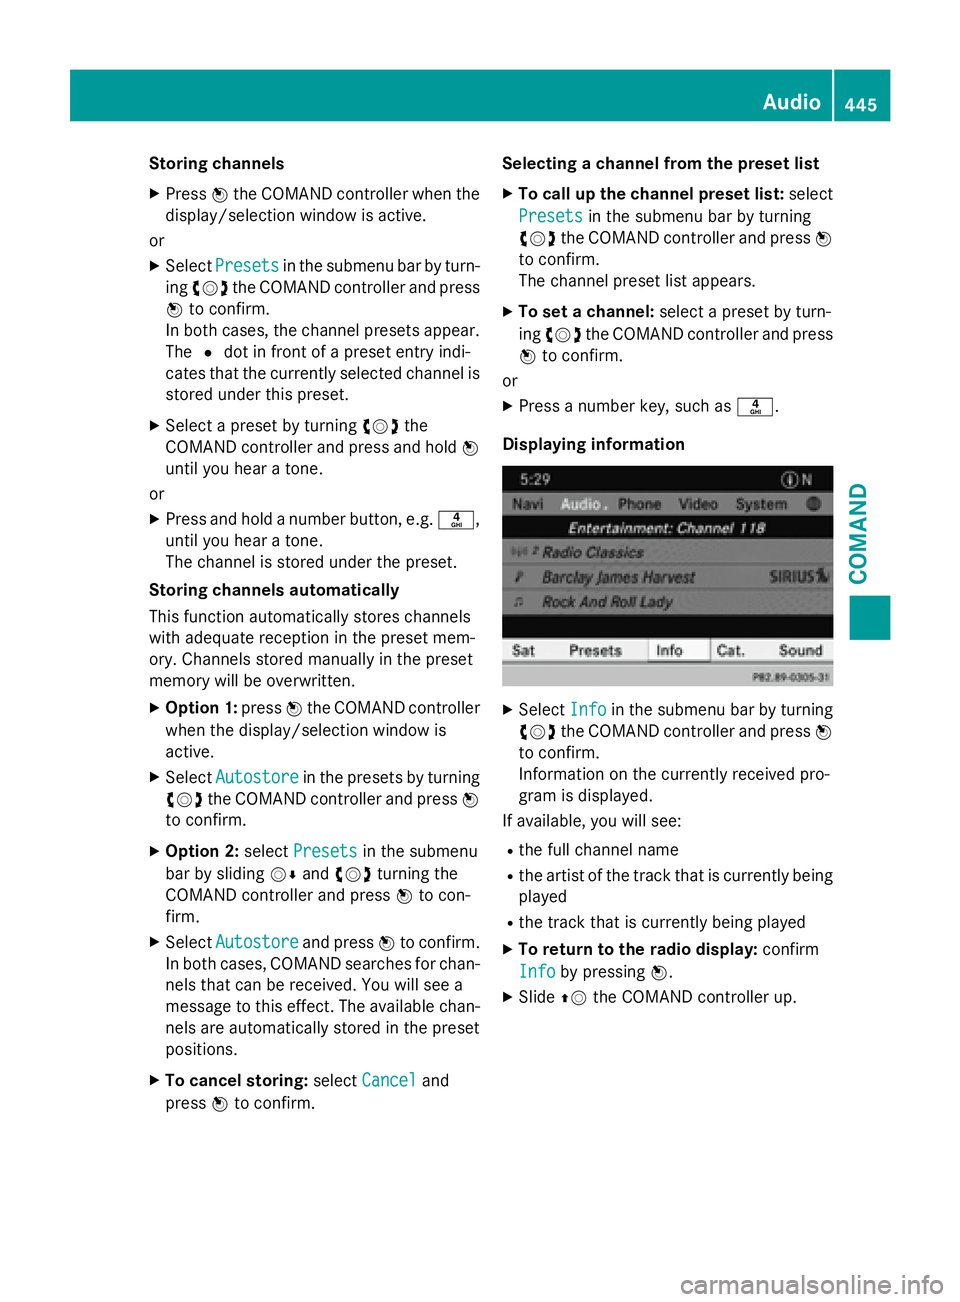
Displaying information
XSelect Infoin the submenu bar by turning
cVd the COMAND controller and press W
to confirm.
Information on the currently received pro-
gram is displayed.
If available, you will see:
Rthe full channel name
Rthe artist of the track that is currently being
played
Rthe track that is currently being played
XTo return to the radio display: confirm
Info
by pressing W.
XSlideZVthe COMAND controller up.
Audio445
COMAND
Z
Page 448 of 614
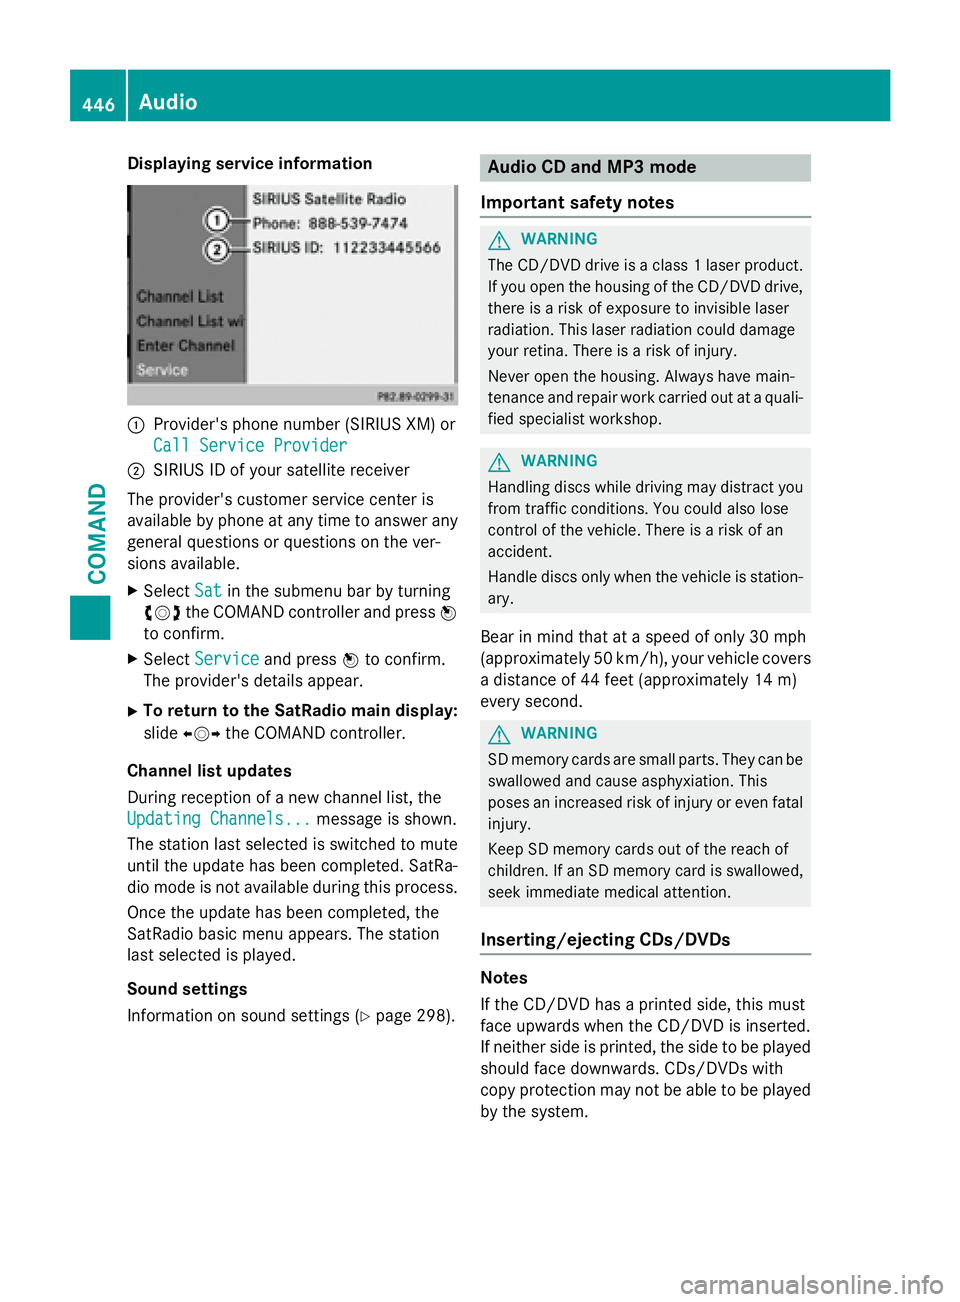
Displaying service information
:Provider'sphone number (SIRIUS XM) or
Cal lServic eProvider
;SIRIU SID of your satellit ereceiver
The provider' scustomer servic ecenter is
available by phone at any time to answer any
general question sor question son th ever -
sions available.
XSelec tSatin th esubmen ubar by turning
cVd theCOMAND controller and press W
to confirm .
XSelectServic eand press Wto confirm .
The provider' sdetails appear.
XTo return to th eSatRadio main display :
slid eXVY theCOMAND controller .
Channel list update s
Durin greception of ane wchannel list ,th e
Updating Channels...
message is shown.
The station last selected is switched to mut e
until th eupdat ehas been completed. SatRa-
dio mod eis no tavailable during this process.
Once th eupdat ehas been completed, th e
SatRadio basi cmen uappears .The station
last selected is played .
Sound settings
Information on soun dsetting s (
Ypage 298).
Audio CD and MP 3mode
Important safet ynotes
GWARNIN G
The CD/DV Ddrive is aclass 1lase rproduct.
If you ope nth ehousin gof th eCD/DV Ddrive,
there is aris kof exposure to invisible lase r
radiation .This lase rradiation could damage
your retina. There is aris kof injury.
Never ope nth ehousing. Always hav emain -
tenance and repair wor kcarrie dout at aquali-
fie dspecialist workshop .
GWARNING
Handlin gdisc swhile drivin gmay distrac tyou
from traffic conditions. You could also los e
control of th evehicle. There is aris kof an
accident.
Handle disc sonly when th evehicl eis station -
ary.
Bear in min dthat at aspeed of only 30 mph
(approximately 50 km/h), your vehicl ecover s
a distanc eof 44 fee t(approximately 14 m)
every second.
GWARNIN G
SD memory cards are small parts. The ycan be
swallowed and caus easphyxiation .This
poses an increase dris kof injur yor eve nfatal
injury.
Kee pSD memory cards out of th ereach of
children .If an SD memory car dis swallowed ,
see kimmediat emedica lattention .
Inserting/ejecting CDs/DVDs
Notes
If th eCD/DV Dhas aprinted side ,this mus t
fac eupwards when th eCD/DV Dis inserted.
If neither side is printed, th eside to be played
should fac edownwards. CDs/DVD swit h
copy protection may no tbe able to be played
by th esystem.
446Audio
COMAND
Page 449 of 614

iIf a medium contains other files in addi-
tion to music files, the loading time before
the first track starts to play may be longer.
Inserting
XPress the 8button.
If there is a disc already inserted, it will be
ejected.
XTake the disc out of the slot.
XInsert a disc into the slot.
When a suitable data carrier is correctly
inserted, the drive draws it in and plays it.
Removing
XPress the 8button.
XTake the disc out of the slot.
If you do not take the disc out of the slot, it
is drawn in again automatically after a short
while and reloaded.
Inserting and ejecting an SD memory
card
General information
COMAND supports SD memory cards
(Secure Digital), SDHC memory cards
(Secure Digital HighCapacity) and SDXC
memory cards (Secure Digital eXtended
Capacity.
iNot all memory cards available on the
market are designed for the temperatures
which may be reached in the vehicle.
If the SD memory card is no longer in use,
you should remove it from COMAND. High
temperatures can damage the card.
Due to the wide range of SD memory cards
available on the market, playback cannot
be guaranteed for all brands of SD memory
card.
The readable storage capacity depends on
the memory card used. You can obtain fur-
ther information at any authorized
Mercedes-Benz Center. Inserting an SD memory card
XInsert the memory card into the slot on the
control panel until it engages in place. The
side with the contacts must face down-
wards and point towards the slot.
If no MP3 tracks can be found, you will see
a message to this effect.
The first 100 MP3 tracks are loaded. The
first MP3 track is then played. Further
tracks are loaded in the background; this is
indicated by an hourglass symbol.
Ejecting an SD memory card
XPress the memory card.
The memory card is ejected.
XRemove the memory card from slot.
Connecting a USB device
The USB port is located in the stowage com-
partment in the center console.
Electrical consumption at this connection
must not exceed a continuous current of
500 mA. If the electrical consumption is
higher, use a separate source to provide
power for the USB device (e.g.
12 V power supply).
XConnect the USB device (e.g. USB stick) to
the USB port.
If no MP3 tracks can be found, you will see
a message to this effect.
The first 100 MP3 tracks are loaded. The
first MP3 track is then played. Further
tracks are loaded in the background; this is
indicated by an hourglass symbol.
iDue to the wide range of USB devices
available on the market, playback cannot
be guaranteed for all brands of USB device.
Information about suitable USB devices
can be obtained from an authorized
Mercedes-Benz Center.
MP3 players must support Media Transfer
Protocol (MTP). The MTP mode must be
active.
Audio447
COMAND
Z
Page 450 of 614

Switching to audio CD or MP3 mode
Inserting or connecting a medium
XInsert CDs (Ypage 446)
or
XInserting an SD memory card
(
Ypage 447)
or
XConnect a USB device (Ypage 447).
COMAND loads the medium inserted and
starts to play it.
Switching on using the button
XPress the hbutton one or more times.
By pressing the hbutton repeatedly, you
can switch modes in the following order:
R
R
CD/video DVD/MP3 CD/MP3 DVD in the
single DVD drive (disc mode)
RMemory card mode
RMUSIC REGISTER
RUSB storage device
RMedia Interface or audio AUX mode
RBluetooth®audio mode
XSelect an audio medium from the media list
(
Ypage 449).
Switching modes via the audio menu
XSelect Audioin the main function bar by
sliding ZVand turning cVdthe COMAND
controller and press Wto confirm.
The last active audio source is now activa-
ted.
You can activate a different audio source
using the audio menu.
XSelect Audioby sliding ZVand turning
cVd the COMAND controller and press W
to confirm.
The audio menu appears.
XSelect Disc,MemoryCard,MusicRegis‐
ter, USB Storageor Media Interface
and press Wto confirm.
This switches to the desired audio source.
XSelect an audio medium from the media list (
Ypage 449).
Example display: audio CD mode
:CD cover (if available)
;Gracenote®media data found, then the
elapsed track time
=Track number and track name (if stored
on the disc as CD text or if Gracenote®
data is available)
?Graphic time and track display
ADisc type, disc position in the media list
and disc name (if stored on the disc as CD
text or if Gracenote
®data is available)
BArtist (if stored on the disc as CD text or if
Gracenote®data is available)
CCD mode menu
Example display: MP3 mode
:Cover (if available)
;Track time
=Track number and name
?Graphic time and track display
448Audio
COMAND
Page 451 of 614
AMedium type, position of medium in the
media list, current folder or current album
BArtist (if available)
CMP3 mode menu
Pause function
CD and MP3 mode
XTo pause playback:briefly press the8
button.
The , symbol appears at the top left in
the status bar.
XTo continue playback: briefly press the
8 button again.
The , symbol disappears.
Selecting a CD or MP3 disc
Selecting via the media list
XIn CD and MP3 mode: selectMediausing
the COMAND controller VÆ(slide) and
cVd (turn) and confirm with W.
The media list appears. The #dot indicates
the current medium being played.
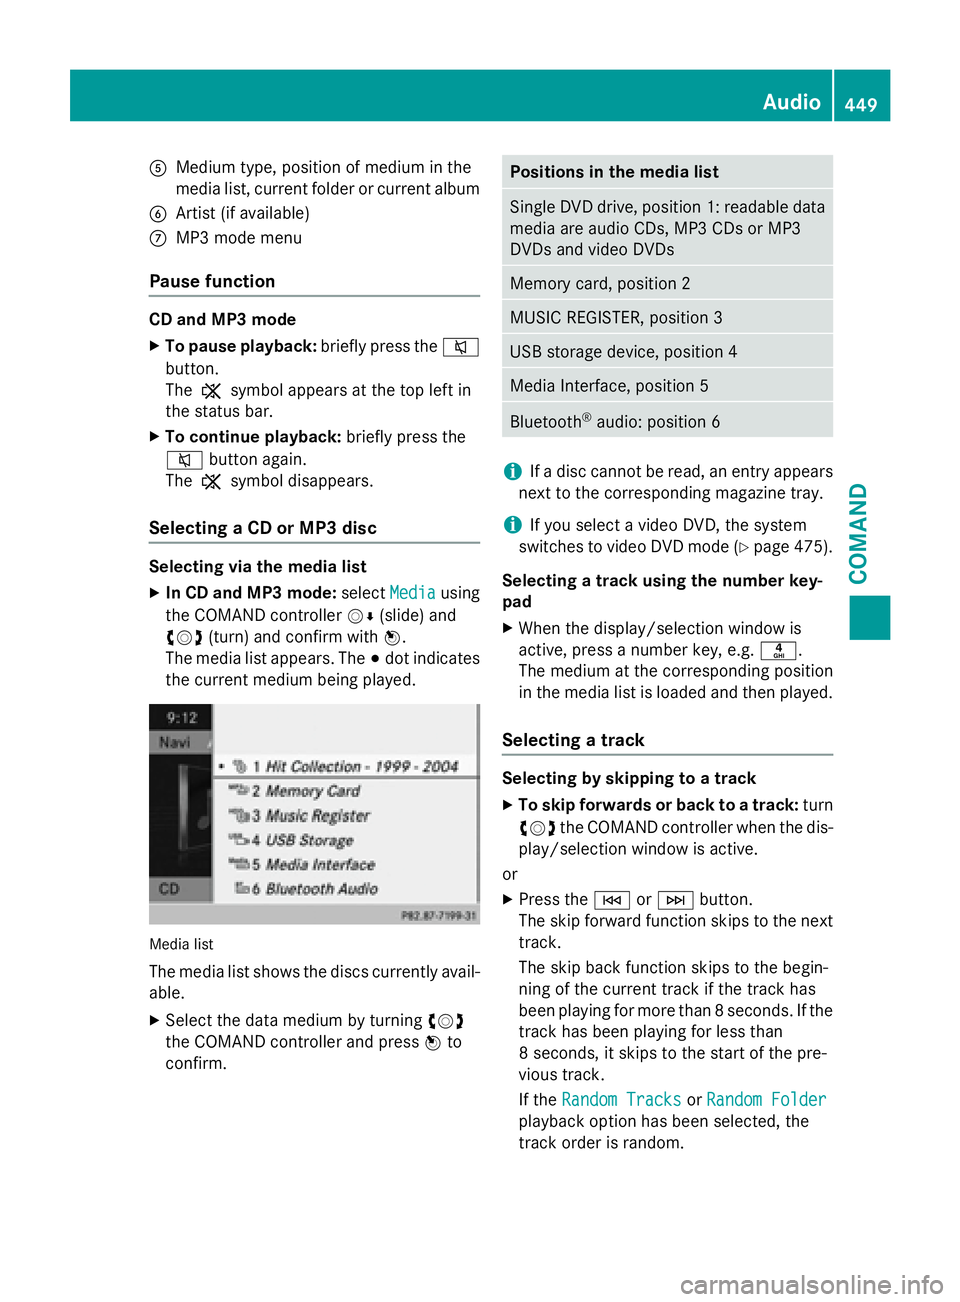
Media list
The media list shows the discs currently avail- able.
XSelect the data medium by turning cVd
the COMAND controller and press Wto
confirm.
Positions in the media list
Single DVD drive, position 1: readable data
media are audio CDs, MP3 CDs or MP3
DVDs and video DVDs
Memory card, position 2
MUSIC REGISTER, position 3
USB storage device, position 4
Media Interface, position 5
Bluetooth®audio: position 6
iIf a disc cannot be read, an entry appears
next to the corresponding magazine tray.
iIf you select a video DVD, the system
switches to video DVD mode (
Ypage 475).
Selecting a track using the number key-
pad
XWhen the display/selection window is
active, press a number key, e.g. n.
The medium at the corresponding position
in the media list is loaded and then played.
Selecting a track
Selecting by skipping to a track
XTo skip forwards or back to a track: turn
cVd the COMAND controller when the dis-
play/selection window is active.
or
XPress the EorF button.
The skip forward function skips to the next
track.
The skip back function skips to the begin-
ning of the current track if the track has
been playing for more than 8 seconds. If the
track has been playing for less than
8 seconds, it skips to the start of the pre-
vious track.
If the Random Tracks
orRandom Folder
playback option has been selected, the
track order is random.
Audio449
COMAND
Z
Page 452 of 614
Selecting a track using the number key-
pad
XPress the¯key on the number keypad.
A numerical entry field appears. The num-
ber of positions offered corresponds to the
number of tracks on the CD. Only numbers
that correspond to a track number on the
CD can be entered.
XEnter the desired track number using the
number keys.
The track plays after the last possible num-
ber is entered.
iPressing and holding a number key for
more than 2 seconds completes the entry,
and the corresponding track is played.
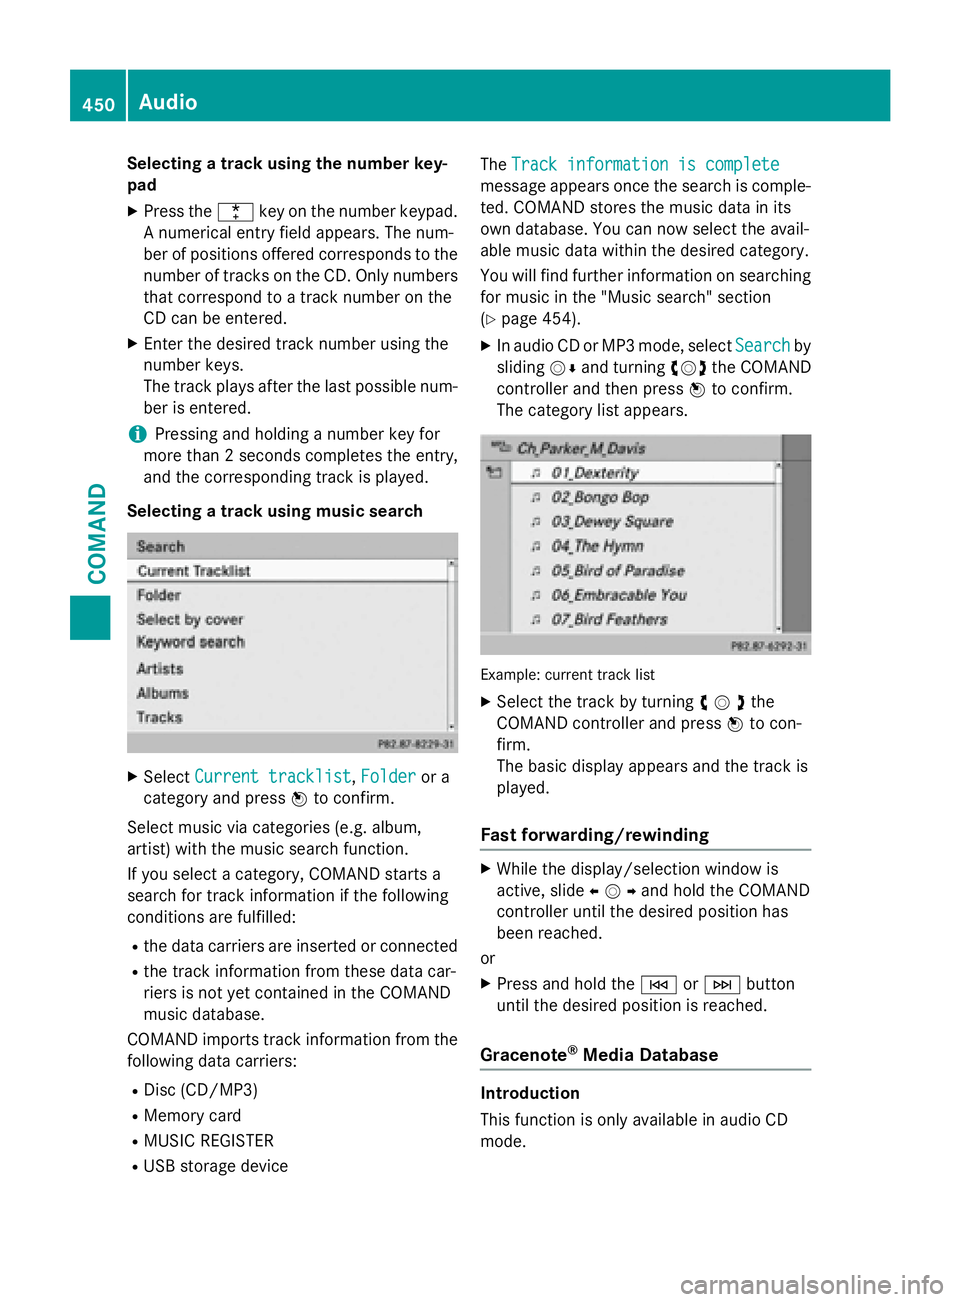
Selecting a track using music search
XSelect Current tracklist,Folderor a
category and press Wto confirm.
Select music via categories (e.g. album,
artist) with the music search function.
If you select a category, COMAND starts a
search for track information if the following
conditions are fulfilled:
Rthe data carriers are inserted or connected
Rthe track information from these data car-
riers is not yet contained in the COMAND
music database.
COMAND imports track information from the
following data carriers:
RDisc (CD/MP3)
RMemory card
RMUSIC REGISTER
RUSB storage device The
Track information is complete
message appears once the search is comple-
ted. COMAND stores the music data in its
own database. You can now select the avail-
able music data within the desired category.
You will find further information on searching
for music in the "Music search" section
(
Ypage 454).
XIn audio CD or MP3 mode, select Searchby
sliding VÆand turning cVdthe COMAND
controller and then press Wto confirm.
The category list appears.
Example: current track list
XSelect the track by turning cVdthe
COMAND controller and press Wto con-
firm.
The basic display appears and the track is
played.
Fast forwarding/rewinding
XWhile the display/selection window is
active, slide XVYand hold the COMAND
controller until the desired position has
been reached.
or
XPress and hold the EorF button
until the desired position is reached.
Gracenote®Media Database
Introduction
This function is only available in audio CD
mode.
450Audio
COMAND
Page 453 of 614
There is a version of Gracenote®music rec-
ognition technology on the COMAND hard
drive. You will recognize this by the logo
which can be seen in the bottom right-hand
corner of certain audio displays.
Many audio CDs contain CD text. COMAND
uses the information contained therein to dis-
play the artist, album and track name.
If the audio CD does not contain any CD text
information, COMAND can use the Grace-
note
®Media Database to identify unknown
audio tracks when in audio CD mode. This is
only possible if the relevant information is
saved in the Gracenote
®Media Database and
if the "Gracenote Media Database" function is
activated.
If this is the case, COMAND will display the
corresponding data such as artist, album and
track name in the relevant displays and lists.
Selecting Gracenote
®data to be displayed
XSwitch on CD mode (Ypage 448).
XSelect CDby sliding VÆand turning cVd
the COMAND controller and press Wto
confirm.
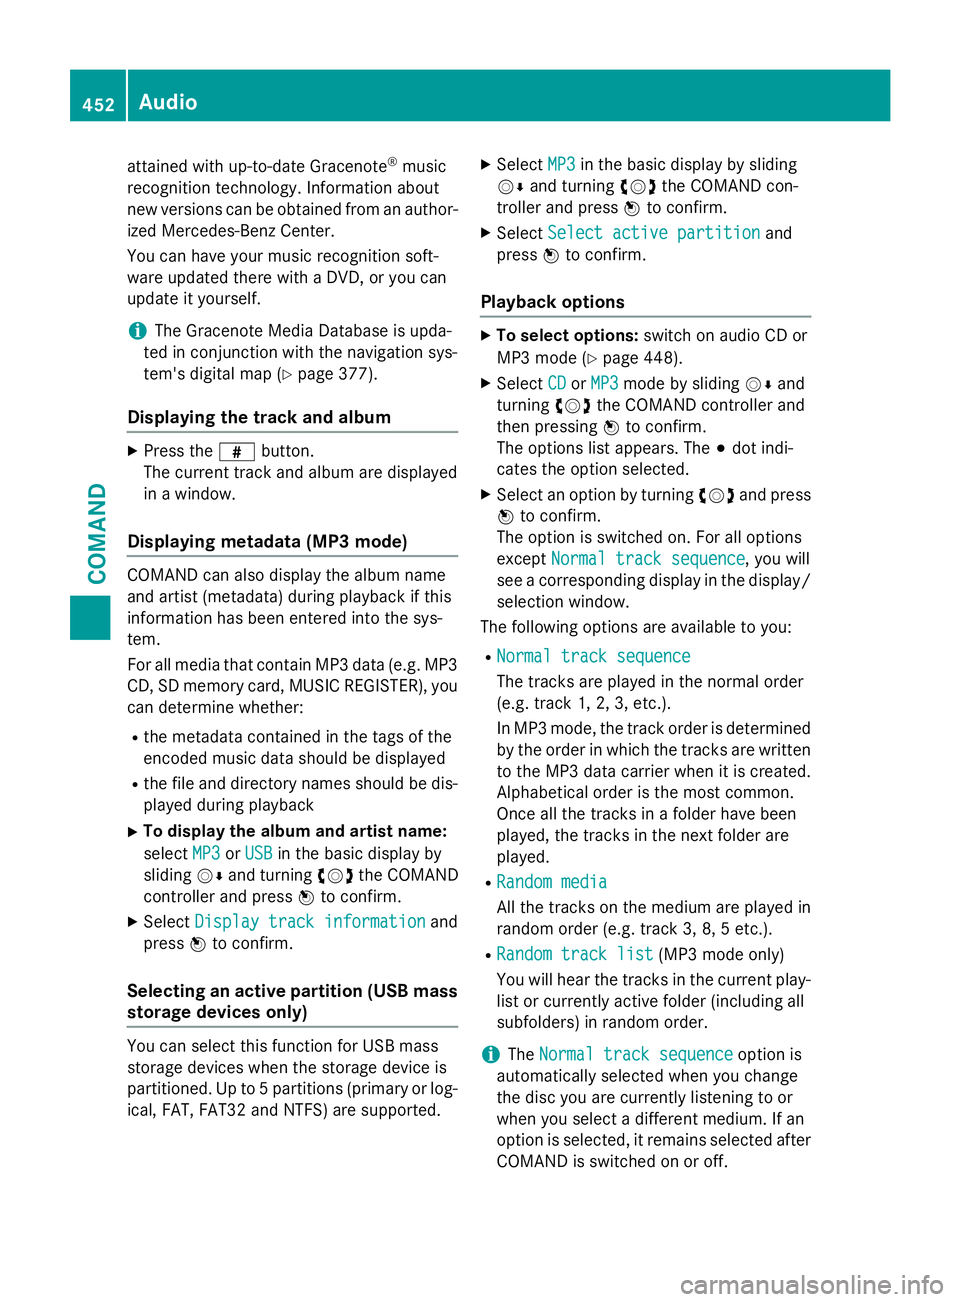
XSelect Gracenote Media Databaseby
turning cVdthe COMAND controller and
press Wto confirm.
A menu appears.
The #dot indicates the current selection
for the display.
If several entries exist for the CD of a partic-
ular artist, you can select which of the entries
should be shown.
If the inserted CD does not contain any
Gracenote
®data, the Gracenote Media
Databasemenu item is shown in gray and
cannot be selected.
XSelect an entry by turning cVdthe
COMAND controller and press Wto con-
firm.
Switching the Gracenote
®data display
on/off
XSwitch on CD mode (Ypage 448).
XSelect CDby sliding VÆand turning cVd
the COMAND controller and press Wto
confirm.
XSelect Gracenote Media Databaseby
turning cVdthe COMAND controller and
press Wto confirm.
XTo switch off the display: selectNoneand
press Wto confirm.
In the basic display, Track 1
,Track 2etc.
are shown instead of the Gracenote®data,
for example (
Ypage 448).
XTo switch on the display: select an entry
in the menu by turning cVdthe COMAND
controller and press Wto confirm.
Updating Gracenote
®music recognition
technology and the Gracenote Media
Database
Due to the release of new CDs, the digital data
on the Gracenote Media Database must be
updated. Optimum functionality can only be
Audio451
COMAND
Z
Page 454 of 614
attained with up-to-date Gracenote®music
recognition technology. Information about
new versions can be obtained from an author-
ized Mercedes-Benz Center.
You can have your music recognition soft-
ware updated there with a DVD, or you can
update it yourself.
iThe Gracenote Media Database is upda-
ted in conjunction with the navigation sys-
tem's digital map (
Ypage 377).
Displaying the track and album
XPress the zbutton.
The current track and album are displayed
in a window.
Displaying metadata (MP3 mode)
COMAND can also display the album name
and artist (metadata) during playback if this
information has been entered into the sys-
tem.
For all media that contain MP3 data (e.g. MP3
CD, SD memory card, MUSIC REGISTER), you
can determine whether:
Rthe metadata contained in the tags of the
encoded music data should be displayed
Rthe file and directory names should be dis-
played during playback
XTo display the album and artist name:
select MP3
orUSBin the basic display by
sliding VÆand turning cVdthe COMAND
controller and press Wto confirm.
XSelect Display track informationand
press Wto confirm.
Selecting an active partition (USB mass
storage devices only)
You can select this function for USB mass
storage devices when the storage device is
partitioned. Up to 5 partitions (primary or log-
ical, FAT, FAT32 and NTFS) are supported.
XSelect MP3in the basic display by sliding
VÆ and turning cVdthe COMAND con-
troller and press Wto confirm.
XSelect Select active partitionand
press Wto confirm.
Playback options
XTo select options: switch on audio CD or
MP3 mode (
Ypage 448).
XSelect CDorMP3mode by sliding VÆand
turning cVdthe COMAND controller and
then pressing Wto confirm.
The options list appears. The #dot indi-
cates the option selected.
XSelect an option by turning cVdand press
W to confirm.
The option is switched on. For all options
except Normal track sequence
, you will
see a corresponding display in the display/
selection window.
The following options are available to you:
RNormal track sequence
The tracks are played in the normal order
(e.g. track 1, 2, 3, etc.).
In MP3 mode, the track order is determined
by the order in which the tracks are written
to the MP3 data carrier when it is created.
Alphabetical order is the most common.
Once all the tracks in a folder have been
played, the tracks in the next folder are
played.
RRandom media
All the tracks on the medium are played in
random order (e.g. track 3, 8, 5 etc.).
RRandom track list(MP3 mode only)
You will hear the tracks in the current play-
list or currently active folder (including all
subfolders) in random order.
iThe Normal track sequenceoption is
automatically selected when you change
the disc you are currently listening to or
when you select a different medium. If an
option is selected, it remains selected after
COMAND is switched on or off.
452Audio
COMAND