2016 MERCEDES-BENZ SL-CLASS ROADSTER audio
[x] Cancel search: audioPage 300 of 614
Adjusting the volumefor phone calls
You can adjust the volume for hands-free
mode during a telephone call.
XTurn the qcontrol knob.
or
XPress the WorX button on the mul-
tifunction steering wheel.
Adjusting the sound settings
Calling up the sound menu
You can make various sound settings for the
diff erent audio and video sources. This means
that it ispossible to set more bass for radio
mode than for audio CDmode, for example.
You can call up the respective sound menu
from the menu of the desired mode.
The example describes how to call up the
sound menu inradio mode.
XPress the $button.
The radio display appears. You will hear the
last station played on the last waveband.
XSe lect Soundby sliding VÆand turning
cVd the COMAND controller and press W
to confirm.
You can now set the treble, bass and bal-
ance for radio mode. Adjusting
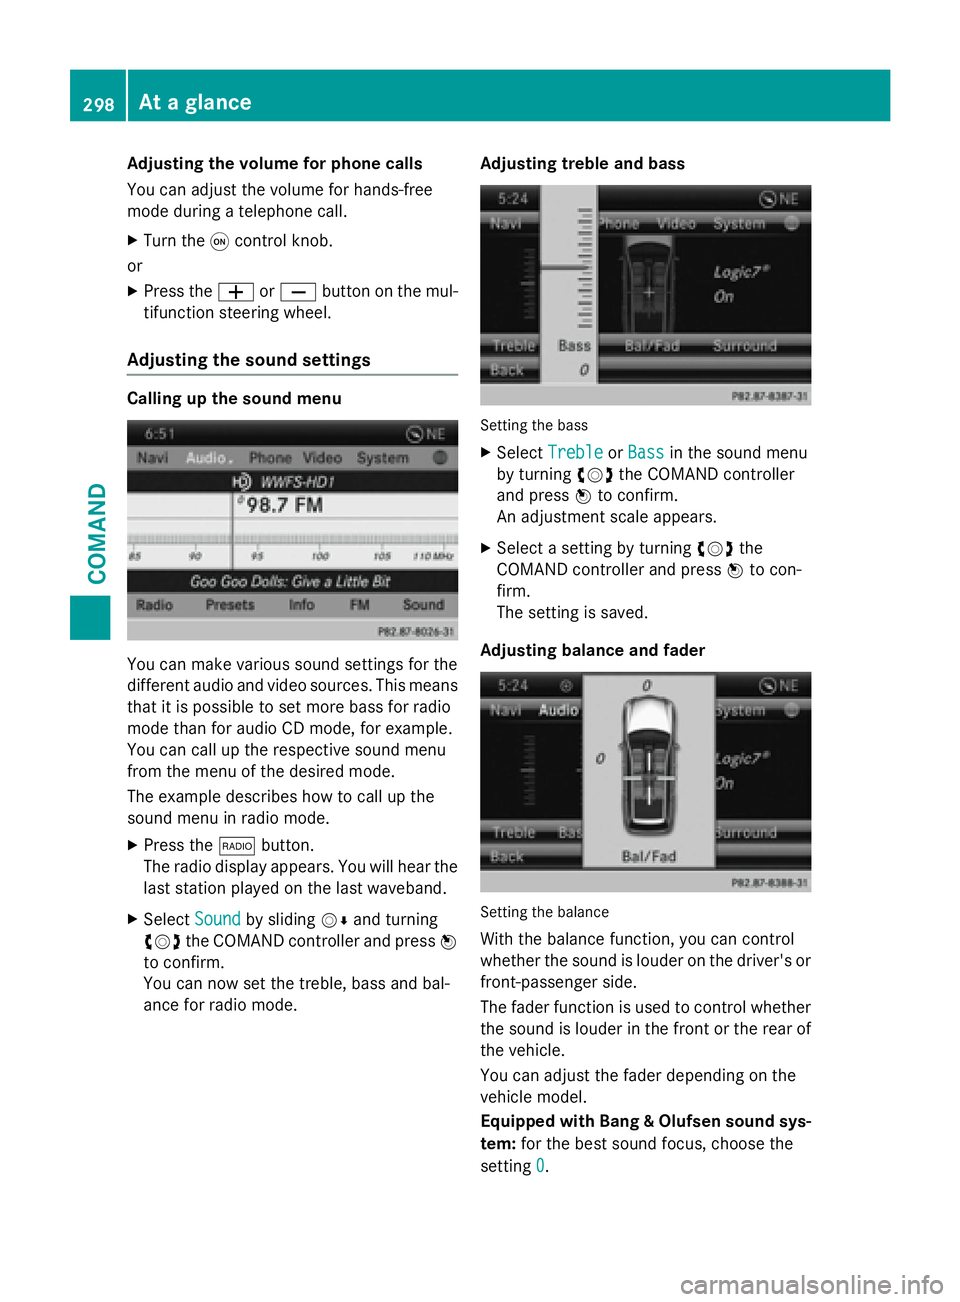
treble and bass
Setting th ebass
XSe lect TrebleorBassinthe sound menu
by turning cVdthe COMAND controller
and press Wto confirm.
An adjustment scale appears.
XSe lect a setting byturning cVdthe
COMAND controller and press Wto con-
firm.
The setting issave d.
Adjusting balance and fader
Setting th ebalance
With the balance function, you can control
whether the sound islouder on the driver's or
front-passenger side.
The fader function isused to control whether
the sound islouder inthe front or the rear of
the veh icle.
You can adjust the fader depending on the
veh icle model.
Equipped with Bang & Olufsen sound sys-
tem: for the best sound focus, choose the
setting 0
.
298At a glance
COMAND
Page 301 of 614
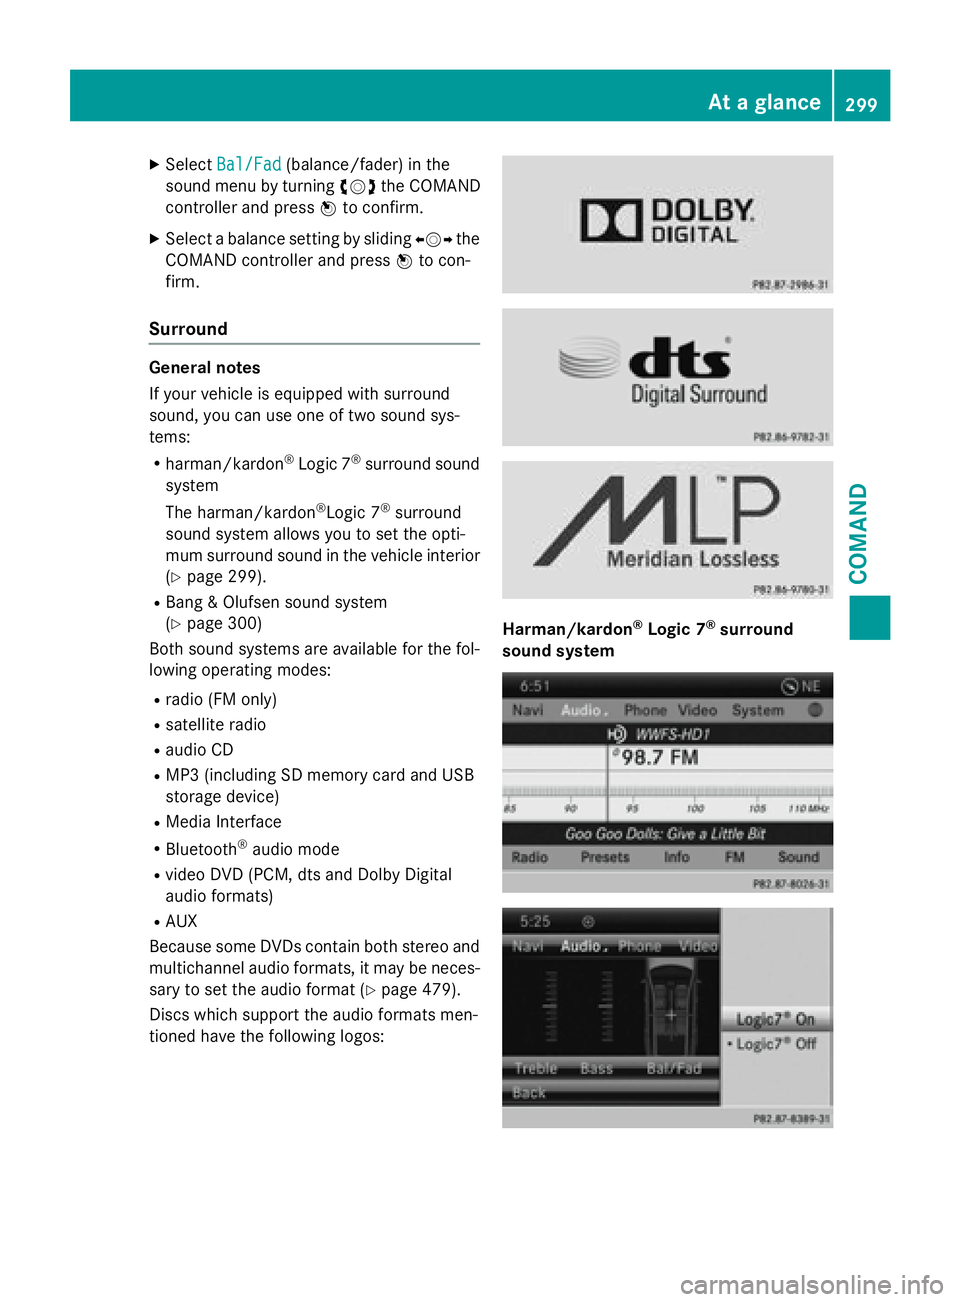
XSelectBal/Fad(balance/fader) in the
sound menu by turning cVdthe COMAND
controller and press Wto confirm.
XSelect a balance setting by sliding XVYthe
COMAND controller and press Wto con-
firm.
Surround
General notes
If your vehicle is equipped with surround
sound, you can use one of two sound sys-
tems:
Rharman/kardon®Logic 7®surround sound
system
The harman/kardon
®Logic 7®surround
sound system allows you to set the opti-
mum surround sound in the vehicle interior
(
Ypage 299).
RBang & Olufsen sound system
(
Ypage 300)
Both sound systems are available for the fol-
lowing operating modes:
Rradio (FM only)
Rsatellite radio
Raudio CD
RMP3 (including SD memory card and USB
storage device)
RMedia Interface
RBluetooth®audio mode
Rvideo DVD (PCM, dts and Dolby Digital
audio formats)
RAUX
Because some DVDs contain both stereo and
multichannel audio formats, it may be neces- sary to set the audio format (
Ypage 479).
Discs which support the audio formats men-
tioned have the following logos:
Harman/kardon®Logic 7®surround
sound system
At a glance299
COMAND
Z
Page 302 of 614
The example describes how to set the sur-
round sound for radio mode.
XTo switch surround sound on/off:press
the $ button.
The radio display appears. You will hear the
last station played on the last waveband.
XSelect Soundby sliding VÆand turning
cVd the COMAND controller and press W
to confirm.
XSelect Surroundand press Wto confirm.
XSelect Logic7®OnorLogic7®Offby turn-
ing cVd the COMAND controller and press
W to confirm.
Depending on your selection, surround
sound is switched on or off and the menu is
exited.
XTo exit the menu without saving: press
the k back button or slide XVYthe
COMAND controller.
iPlease note the following: for the opti-
mum audio experience for all passengers
when Logic7
®is switched on, the balance
should be set to the center of the vehicle
interior.
You will achieve the best sound results by
playing video DVD media.
MP3 tracks should have a bit rate of at least
128 kbit/ s.
Surround sound playback does not func-
tion for mono signal sources, such as for
AM radio mode.
If radio reception is poor, e.g. in a tunnel,
you should switch off Logic7
®, since it may
otherwise switch dynamically between
stereo and mono and cause temporary
sound distortions.
On some stereo recordings, the sound
characteristics may differ from conven-
tional stereo playback.
iThe Logic7®Onfunction creates a sur-
round sound experience for every
passenger when playing stereo recordings, for example. It enables optimum playback
of music and films on CD or video DVD with multichannel audio formats, such as MLP,
dts or Dolby Digital. This results in sound
characteristics like those intended by the
sound engineer when the original was
recorded.
iIf you select
Logic7®Off, the sound sys-
tem plays the tracks as stored on the
medium. Due to the design of the
passenger compartment, an optimum
audio experience cannot be guaranteed for
all passengers.
Bang & Olufsen sound system
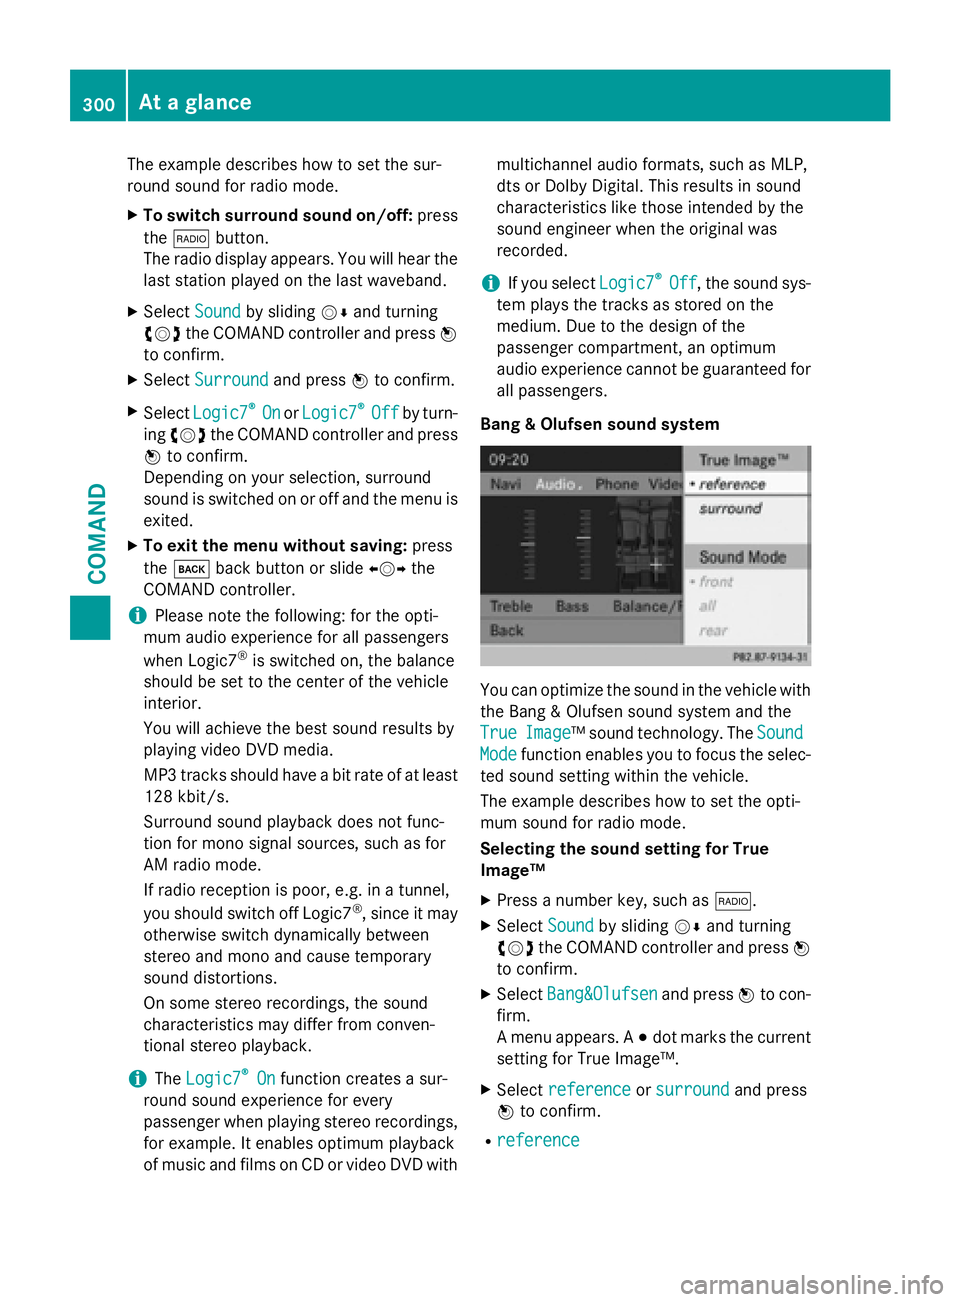
You can optimize the sound in the vehicle with
the Bang & Olufsen sound system and the
True
Image™ sound technology. The Sound
Modefunction enables you to focus the selec-
ted sound setting within the vehicle.
The example describes how to set the opti-
mum sound for radio mode.
Selecting the sound setting for True
Image™
XPress a number key, such as $.
XSelectSoundby sliding VÆand turning
cVd the COMAND controller and press W
to confirm.
XSelect Bang&Olufsenand press Wto con-
firm.
A menu appears. A #dot marks the current
setting for True Image™.
XSelect referenceorsurroundand press
W to confirm.
Rreference
300At a glance
COMAND
Page 308 of 614
You can connect your own headphones to a
special headphones jack. You can use the
remote control to operate them.
Points to remember
RYou can only adjust the volume for the
headphones supplied, directly on the head-
phones.
ROnly entertainment functions, i.e. audio,
TV, video and Internet, for example, may be
used with SPLITVIEW.
RDifferent media can be used on the driver
and front-passenger sides as long as they
use different media sources. Example: if a
medium from the single DVD drive is being
played on the driver's side, then another
medium that is also played from the single
DVD drive cannot be played separately on
the front-passenger side. However, other
media can be used at the same time on the
front-passenger side, including radio,
memory card, MUSIC REGISTER, Media
Interface, USB or AUX.
RIf you use the same medium on both sides, you can both carry out the respective set-
tings.
RInternet use is only available at any one
time to the driver or the front passenger.
A corresponding message appears on the
display.
RInternet can only be used, if it is set and
connected via a telephone on the driver's
side.
RThe multifunction steering wheel can only
be used for functions which relate to the
driver's side.
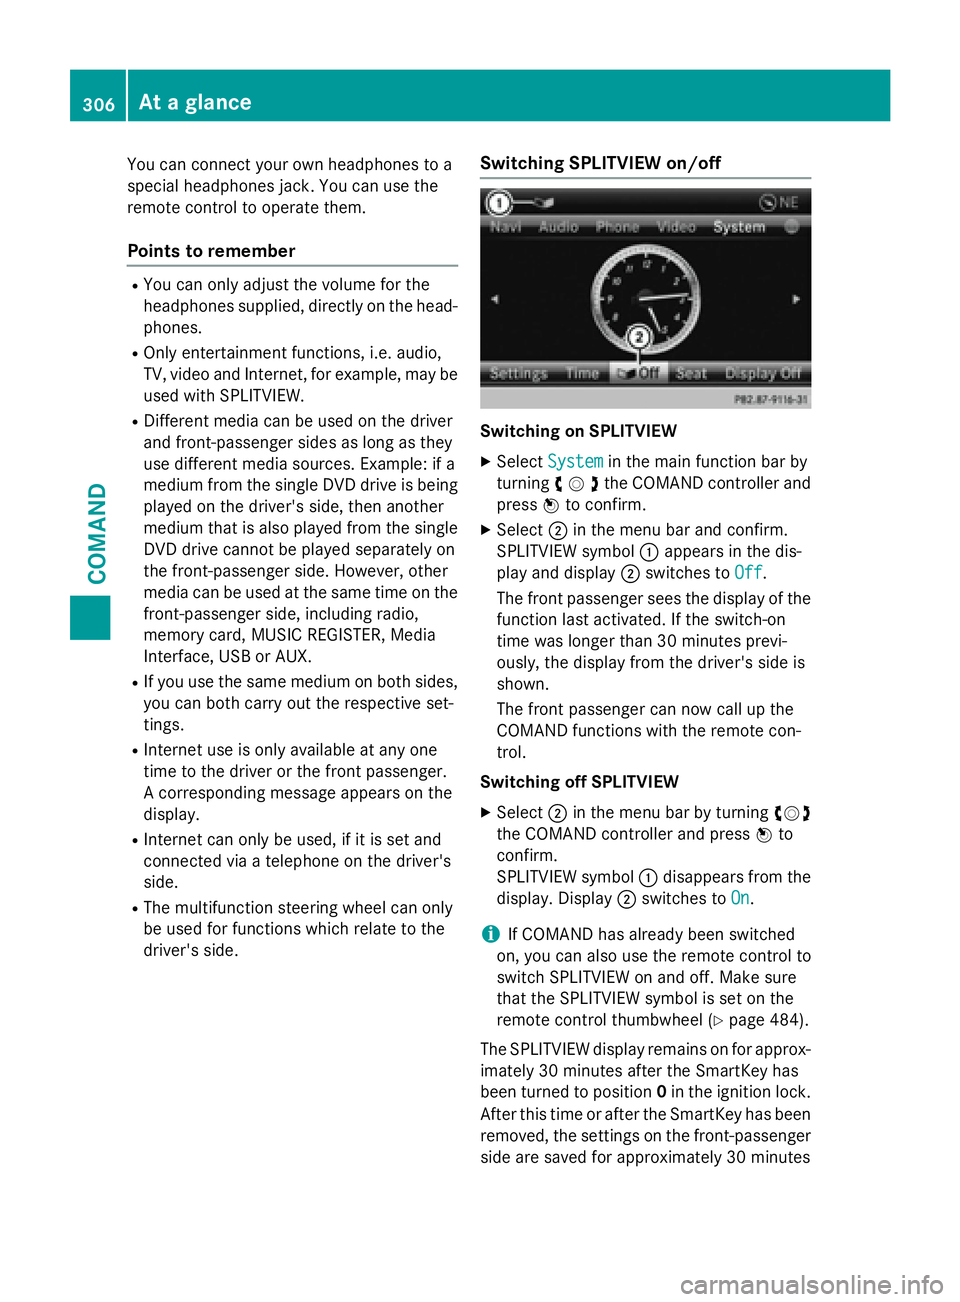
Switching SPLITVIEW on/off
Switching on SPLITVIEW
XSelect Systemin the main function bar by
turning cVdthe COMAND controller and
press Wto confirm.
XSelect ;in the menu bar and confirm.
SPLITVIEW symbol :appears in the dis-
play and display ;switches to Off
.
The front passenger sees the display of the
function last activated. If the switch-on
time was longer than 30 minutes previ-
ously, the display from the driver's side is
shown.
The front passenger can now call up the
COMAND functions with the remote con-
trol.
Switching off SPLITVIEW
XSelect ;in the menu bar by turning cVd
the COMAND controller and press Wto
confirm.
SPLITVIEW symbol :disappears from the
display. Display ;switches to On
.
iIf COMAND has already been switched
on, you can also use the remote control to
switch SPLITVIEW on and off. Make sure
that the SPLITVIEW symbol is set on the
remote control thumbwheel (
Ypage 484).
The SPLITVIEW display remains on for approx-
imately 30 minutes after the SmartKey has
been turned to position 0in the ignition lock.
After this time or after the SmartKey has been
removed, the settings on the front-passenger side are saved for approximately 30 minutes
306At a glance
COMAND
Page 352 of 614
XTo show the menu:pressWthe COMAND
controller.
XSelect RPTin the navigation system menu
bar by turning cVdthe COMAND control-
ler and press Wto confirm.
Switching navigation announcements
on/off
XTo switch off: press the8button dur-
ing an announcement.
You will briefly see the message: The
driving instructions have been
muted.
XTo switch on:pressWthe COMAND con-
troller.
XSelect RPTin the navigation system menu
bar by turning cVdthe COMAND control-
ler and press Wto confirm.
iCOMAND automatically switches the nav-
igation announcements back on when:
Ryou have a new route calculated
Ryou switch COMAND on again or start the engine
Switching announcements and audio
fadeout on/off
XSelect Naviin the main function bar by
sliding ZVand turning cVdthe COMAND
controller and press Wto confirm.
XSelect Announcementsand press Wto
confirm.
A menu appears.
You can activate/deactivate the following
functions:
RAnnounce Street Names
Street names are announced during
route guidance.
RAudible Info During Phone Call
During a phone call, navigation
announcements and traffic reports are
audible in the background.
RAudio Fadeout
The volume of an active audio or video
source is automatically reduced during a navigation announcement.
RGas on Reserve
Once you have reached reserve fuel
level, you will see a prompt asking
whether you wish to start the search for a
gas station (
Ypage 336).
XSelect the function and press Wto confirm.
Switch the function on Oor off ª.
Setting the volume manually
XAdjust the volume using the qcontrol
knob during a navigation announcement.
or
XSelect RPTin the map view with the menu
shown and adjust the volume using the q
control knob.
Announce Street Names
If the function is switched on, the name of the
street which you are turning into is
announced.
Announcements are not made in the chosen
language in all countries. They are made when
relevant street names for the selected lan-
guage are available in the database.
XTo switch to navigation mode: press the
Ø button.
XTo show the menu: pressWthe COMAND
controller.
XSelect Naviin the main function bar by
sliding ZVthe COMAND controller and
press Wto confirm.
XSelect AnnounceStreetNamesand press
W to confirm.
The function is switched on Oor off ª,
depending on the previous status.
350Navigation
COMAND
Page 388 of 614
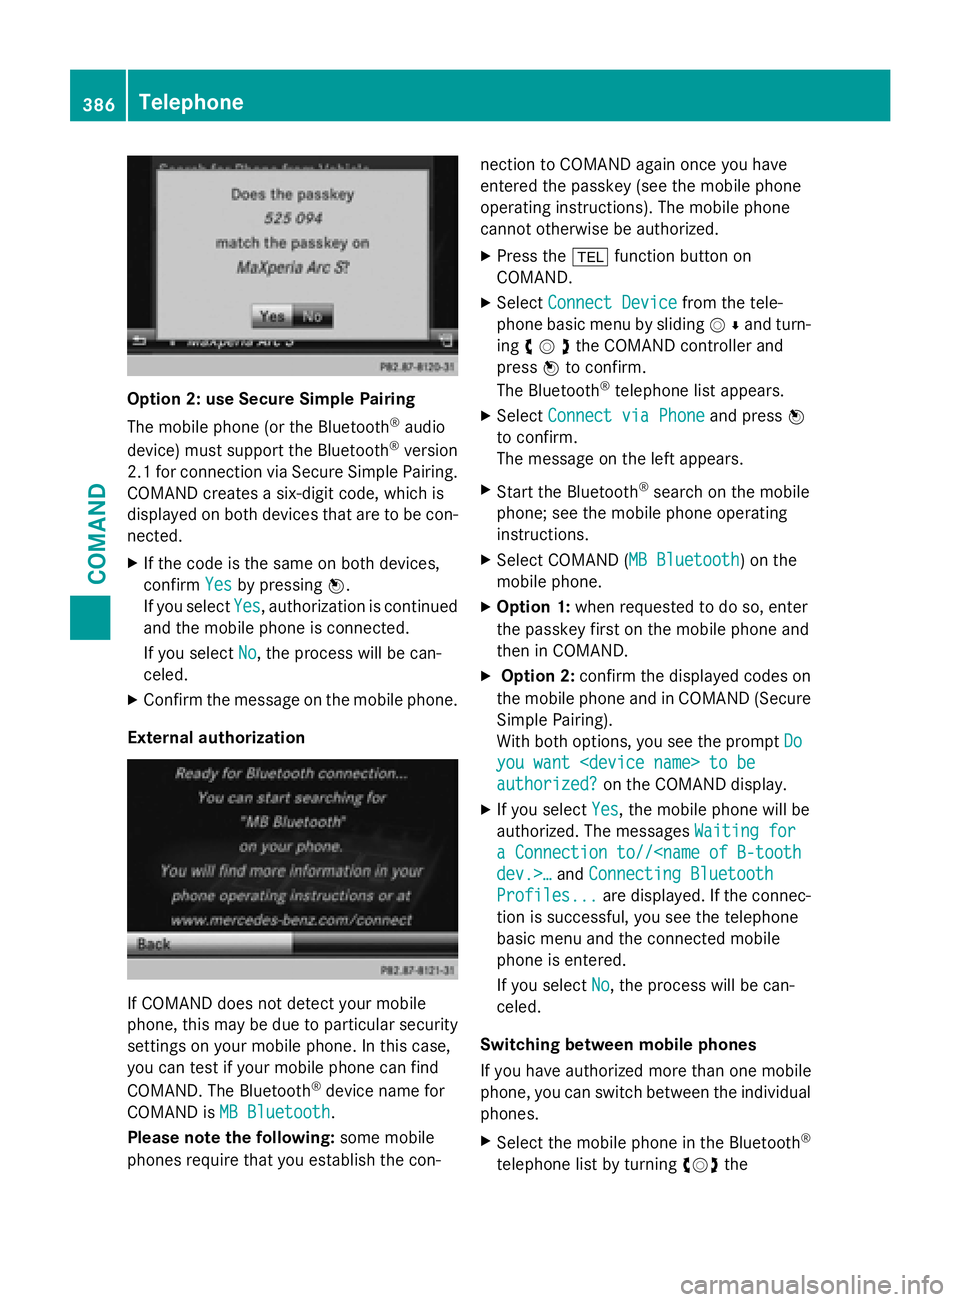
Option 2: use Secure Simple Pairing
The mobile phone (or the Bluetooth
®audio
device) must support the Bluetooth®version
2.1 for connection via Secure Simple Pairing.
COMAND creates a six-digit code, which is
displayed on both devices that are to be con-
nected.
XIf the code is the same on both devices,
confirm Yes
by pressing W.
If you select Yes
, authorization is continued
and the mobile phone is connected.
If you select No
, the process will be can-
celed.
XConfirm the message on the mobile phone.
External authorization
If COMAND does not detect your mobile
phone, this may be due to particular security
settings on your mobile phone. In this case,
you can test if your mobile phone can find
COMAND. The Bluetooth
®device name for
COMAND is MB Bluetooth
.
Please note the following: some mobile
phones require that you establish the con- nection to COMAND again once you have
entered the passkey (see the mobile phone
operating instructions). The mobile phone
cannot otherwise be authorized.
XPress the
%function button on
COMAND.
XSelect Connect Devicefrom the tele-
phone basic menu by sliding VÆand turn-
ing cVdthe COMAND controller and
press Wto confirm.
The Bluetooth
®telephone list appears.
XSelect Connect via Phoneand press W
to confirm.
The message on the left appears.
XStart the Bluetooth®search on the mobile
phone; see the mobile phone operating
instructions.
XSelect COMAND (MB Bluetooth) on the
mobile phone.
XOption 1: when requested to do so, enter
the passkey first on the mobile phone and
then in COMAND.
XOption 2: confirm the displayed codes on
the mobile phone and in COMAND (Secure
Simple Pairing).
With both options, you see the prompt Do
you want
authorized?on the COMAND display.
XIf you selectYes, the mobile phone will be
authorized. The messages Waiting for
a Connection to//
Profiles...are displayed. If the connec-
tion is successful, you see the telephone
basic menu and the connected mobile
phone is entered.
If you select No
, the process will be can-
celed.
Switching between mobile phones
If you have authorized more than one mobile
phone, you can switch between the individual
phones.
XSelect the mobile phone in the Bluetooth®
telephone list by turning cVdthe
386Telephone
COMAND
Page 430 of 614
Internet radio
General notes
A good Internet connection isrequired to
transmit audio data efficiently. To ensure the
best-possible reception, your mobile phone
should beconnected to the vehicle's exterior
antenna via the phone bracket (optional).
Bear inmind that a relatively large volume of
data can betransmitted when using the Inter-
net radio. An average 12 8kbit per second
data transfer rate can transfer 56 MB of data
in one hour.
The data transfer rate of a station is displayed
while receiving data.
Calling up the Internet radio
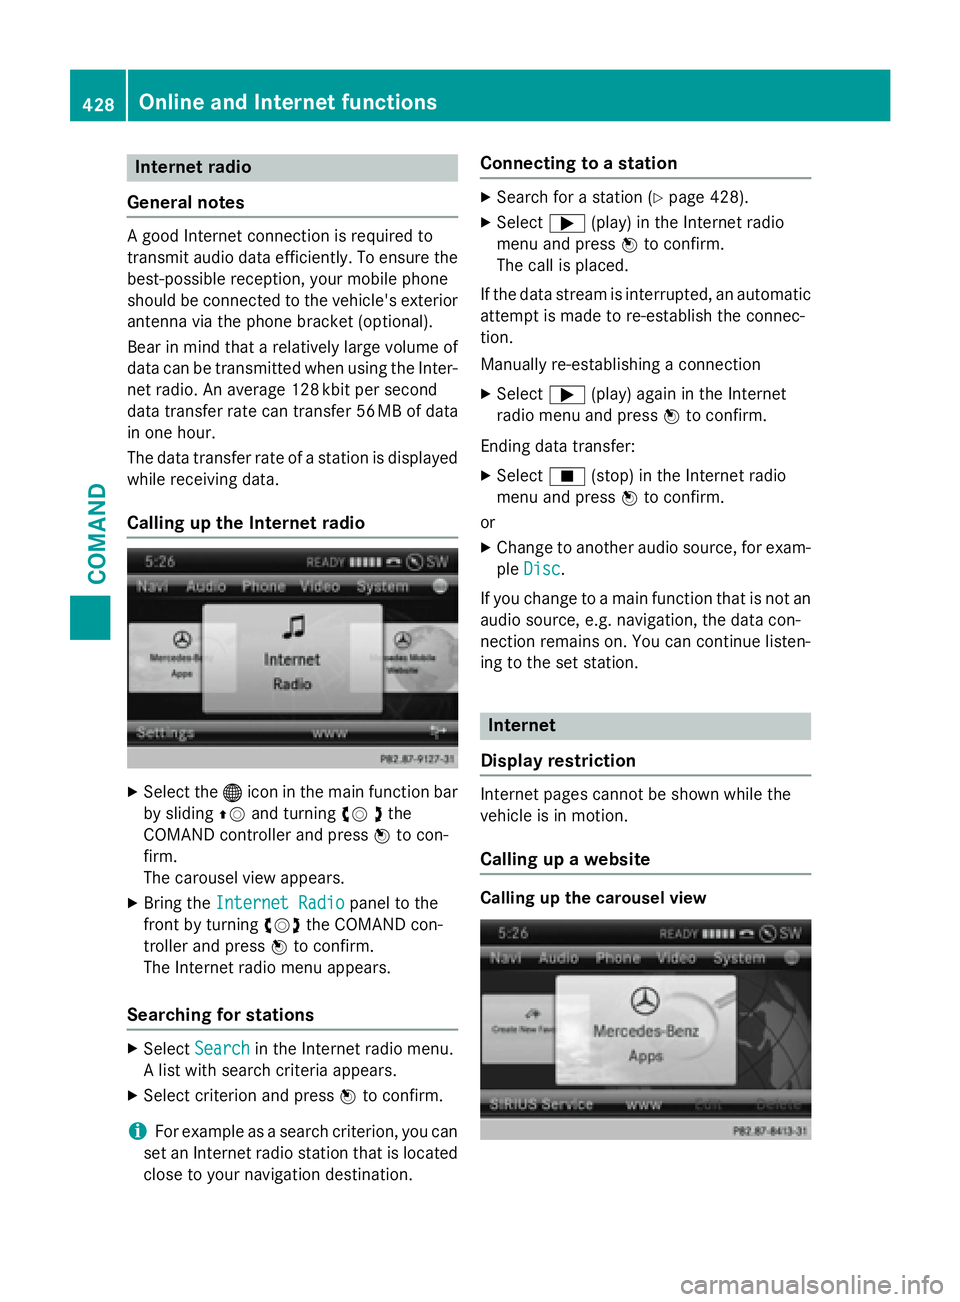
XSelect the ®icon in the main function bar
by sliding ZVand turning cV dthe
COMAND controller and press Wto con-
firm.
The carousel view appears.
XBring the Internet Radiopanel to the
front by turning cVdthe COMAND con-
troller and press Wto confirm.
The Internet radio menu appears.
Searching for stations
XSelect Searchin the Internet radio menu.
A list with search criteria appears.
XSelect criterion and press Wto confirm.
iFor example as a search criterion, you can
set an Internet radio station that is located
close to your navigation destination.
Connecting to a station
XSearch for a station (Ypage 428).
XSelect ;(play) in the Internet radio
menu and press Wto confirm.
The call is placed.
If the data stream is interrupted, an automatic
attempt is made to re-establish the connec-
tion.
Manually re-establishing a connection
XSelect ;(play) again in the Internet
radio menu and press Wto confirm.
Ending data transfer:
XSelect É(stop) in the Internet radio
menu and press Wto confirm.
or
XChange to another audio source, for exam-
ple Disc
.
If you change to a main function that is not an
audio source, e.g. navigation, the data con-
nection remains on. You can continue listen-
ing to the set station.
Internet
Display restriction
Internet pages cannot be shown while the
vehicle is in motion.
Calling up a website
Calling up the carousel view
428Online and Internet functions
COMAND
Page 438 of 614
You can select a different character set
here, e.g. if the characters of a website
appear distorted.
RDelete Private Data
Deletes data which has been saved by the
browser during Internet use.
Changing settings
XSelect a setting by turning cVdthe
COMAND controller and press Wto con-
firm.
Switch the setting on Oor off ª.
XSelect Character SizeorCharacter
Codeby turning cVdor sliding ZVÆthe
COMAND controller and press Wto con-
firm.
XSelect a setting using the COMAND con-
troller and press Wto confirm.
iIf you change the settings, the websites
may not be displayed correctly.
Deleting private data
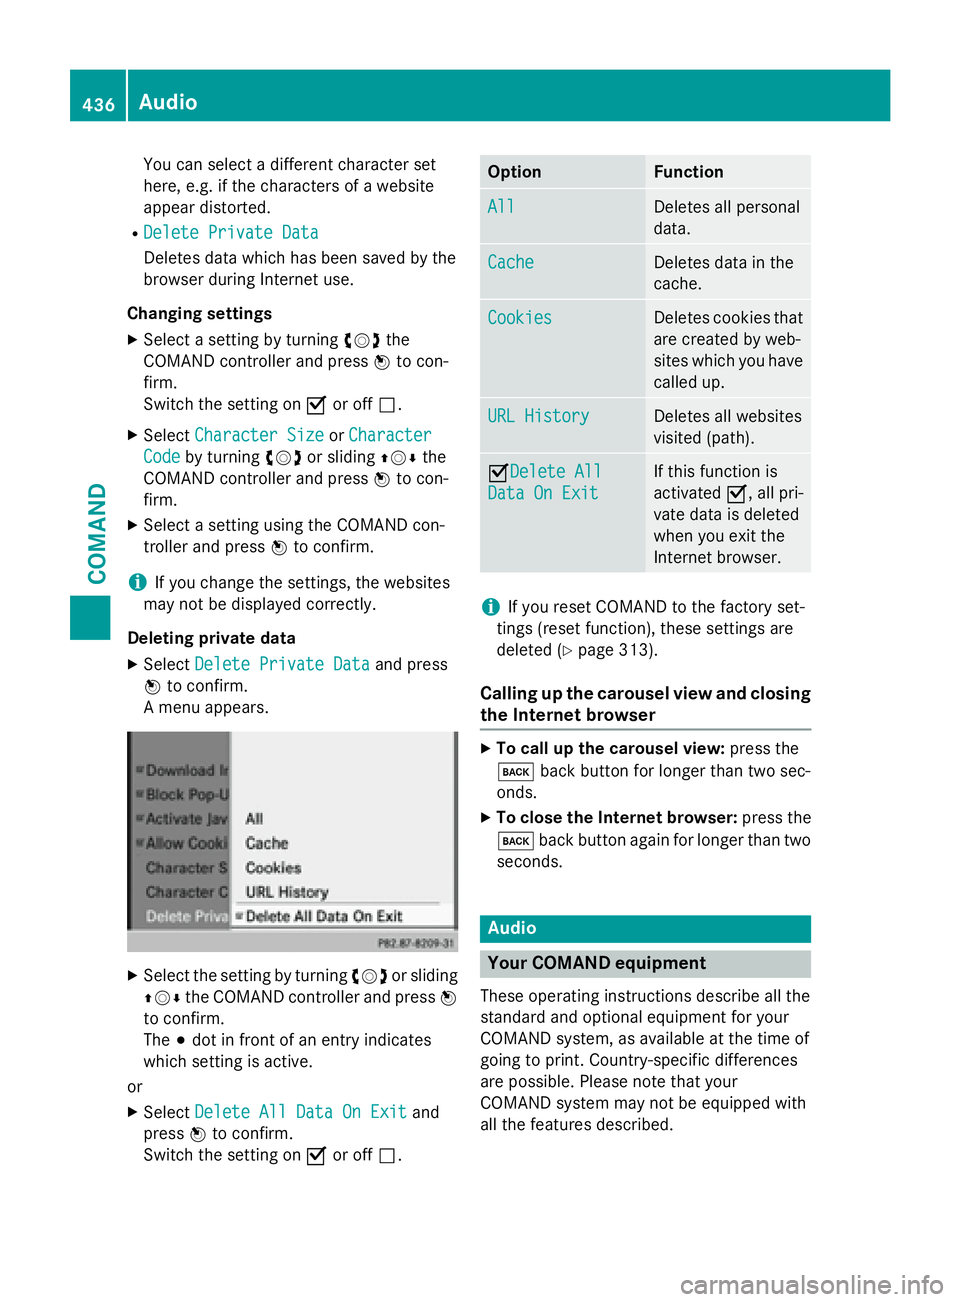
XSelect Delete Private Dataand press
W to confirm.
A menu appears.
XSelect the setting by turning cVdor sliding
ZVÆ the COMAND controller and press W
to confirm.
The #dot in front of an entry indicates
which setting is active.
or
XSelect Delete All Data On Exitand
press Wto confirm.
Switch the setting on Oor off ª.
OptionFunction
AllDeletes all personal
data.
CacheDeletes data in the
cache.
CookiesDeletes cookies that
are created by web-
sites which you have
called up.
URL HistoryDeletes all websites
visited (path).
ODelete All
Data On Exit
If this function is
activated O, all pri-
vate data is deleted
when you exit the
Internet browser.
iIf you reset COMAND to the factory set-
tings (reset function), these settings are
deleted (
Ypage 313).
Calling up the carousel view and closing
the Internet browser
XTo call up the carousel view: press the
k back button for longer than two sec-
onds.
XTo close the Internet browser: press the
k back button again for longer than two
seconds.
Audio
Your COMAND equipment
These operating instructions describe all the
standard and optional equipment for your
COMAND system, as available at the time of
going to print. Country-specific differences
are possible. Please note that your
COMAND system may not be equipped with
all the features described.
436Audio
COMAND