2016 MERCEDES-BENZ G-CLASS SUV warning
[x] Cancel search: warningPage 235 of 261
In th
eevent of damage to th eengine,
transmission or electrical system X
Shift th etransfer cas etoneutral position
Neutral (Ypage 125).
X Shif tthe automatic transmissio ntoposition
N.
In the even tofdamage to the transfer
case Have the propeller shafts between the axles and
the transfe rcase removed.
In the event of damage to the front axle Have the propeller shaft between the rea
raxle
and the transfe rcase removed.
The nhavet he vehicle towe dawayw itht he front
axl eraised.
In the event of damage to the rear axle Have the propeller shaft between the front axle
and the transfe rcase removed.
The nhavet he vehicle towe dwitht he rea raxle
raised and wheel rollers unde rthe front axle. Tow-start
ing( em ergency engine
starting)
! Do not tow-start vehicles with automatic
transmission. Yo ucould otherwis edamage
the automatic transmission.
Yo uc an find informatio non"Jump-starting"
under (Y page 227). Fuses
Importan
tsafety notes G
WARNING
If yo umanipulate, bridge or replace afaulty
fuse with afuse of ahigher amperage ,the
electric cables coul dbeoverloaded. This may
result in afire. There is arisk of an accident
and injury.
Always replace faulty fuses with specified new fuses of the correct amperage. The fuses in your vehicle disconnect fault
ycir-
cuits. If afuse blows, all the components in the
circuit and their functions will fail.
Blown fuses must be replaced with fuses of the same rating, which you can recognise by the
colour and fuse rating. The fuse ratings are listed
in the fuse allocation chart (Y page 233).
If the newly inserted fuse also blows, have the
cause traced and rectified at aqualified special-
ist workshop, e.g. aMercedes-Benz Service
Centre.
! Only use fuses that have been approved for
Mercedes-Benz vehicles and which have the
correc tfuse rating for the system concerned.
Otherwise, components or systems could be
damaged.
! Make sure that no moisture can enter the
fuse box when the cover is open.
! When closing the cover, make sure that it is
lying correctly on the fuse box. Moisture seep-
ing in or dirt could otherwise impair the oper-
ation of the fuses. Bef
orer eplacing afuse
Observ ethe important safety notes
(Y page 232).
X Switch off the engine.
X Switch off al lelectrical consumers.
X Remove the key from the ignition lock.
All indicator lamps on the instrument cluster
must be off.
X Secure the vehicl eagain st rolling away
(Y page 113).
The fuses are locate dinvarious fus eboxes:
R Main fus eboxon the front-passenger side of
the dashboard
R Fus eboxin the front-passenger footwell
R Fus eboxin the transmission tunnel
R Fus eboxin the luggage compartment
The fus ealloc ation chart and the spare fuses are
in the fus eboxon the dashboard on the front-
passenger side (Y page 233).
The fus eextractor is in the vehicl etool kit
(Y page 223). 232
FusesBreakdo
wn assis tance
Page 238 of 261
Important safety notes
G
WARNING
If wheels an dtyres of the wrong size are used,
the whee lbrakes or suspension components
may be damaged. There is arisk of an acci-
dent.
Always replace wheels and tyres with those
that fulfi lthe specifications of the original
part.
When replacing wheels, make sure to fit the
correct:
R designation
R type
When replacing tyres, make sure to fit the
correct:
R designation
R manufacturer
R type G
Warning
Af lat tyre severely impairs the driving, steer-
ing and braking characteristics of the vehicle.
There is arisk of an accident.
Do not drive with aflat tyre. Immediately
replace the flat tyre with yours parew heel, or
consult aqualified specialist workshop.
Accessorie sthat are not approved for yourv ehi-
cle by Mercedes-Benz or are not being used cor- rectly can impair the operating safety.
Before purchasing and using non-approved
accessories, visit aqualified specialist work-
shop and enquire about:
R suitability
R lega lstipulations
R factory recommendations
Further information regarding wheels and tyres
can be found under "Wheel/tyre combinations"
(Y page2 46).
You can ask for information regarding permitted
wheel/tyre combinations at aMercedes-Benz
Service Centre. Information on tyre pressure can be found:
R on the tyre pressure table in the fuel fille rflap
(Y page 109)
R under "Tyre pressure" (Y page 238)
Modification work on the brake system and
wheelsisn ot permitted, nor is the use of spacer
plates or brake dust shields. This invalidates the general operating permit for the vehicle.
i Further information on wheelsa
nd tyres can
be obtained at any qualifieds pecialist work-
shop. Operation
Info
rmatio nondriving
When th evehicl eish eavily laden ,check thet yre
pressures and adjust them prio rtoatrip.
While driving ,pay attention to vibrations, noises
and unusual handlin gcharacteristics ,e.g.p ull-
ing to on eside .This may indicat ethatthe
wheels or tyres are damaged. If you suspec tthat
at yreisd efective, reduce your spee dimmedi-
ately. Stop th evehicl eass oonasp ossible to
chec kthe wheels and tyres for damage. Hidden
tyr ed amag ecould also be causing th eunusual
handlin gcharacteristics .Ifyou fin dnos ignsof
damage, hav ethe tyres and wheels checke data
qualified specialist workshop.
When parking your vehicle, mak esuren otto
squas hthe tyre. If you canno tavoi dd riving over
obstacles, e.g. kerbs ,dososlowly and at an
obtuse angle only. You could otherwise damage
th ew hee lrim sa nd tyres. Regular checking of wheels an
dtyres G
WARNING
Damaged tyres can caus etyre inflation pres-
sure loss. As aresult, you coul dlose control of
yourv ehicle. There is arisk of accident.
Check the tyres regularl yfor signs of damage
and replace any damaged tyres immediately.
Check wheels and tyres for damage at least
once amonth. Check wheels and tyres after
driving off-road or on roug hroads. Damaged
wheels can caus ealoss of tyre pressure. Operation
235Wheels and tyres Z
Page 239 of 261

Pay particular attention to damage such as:
R cuts in the tyres
R punctures
R tears in the tyres
R bulges on the tyres
R deformation or severe corrosion on the
wheels
Regularly check the tyre tread depth and the
condition of the tread across the whole width of
the tyre (Y page 236). In order to inspect the
inner side of the tyre surface, turn the steering
wheel to full lock.
All wheels must have avalve cap to protec tthe
valve against dirt and moisture. Do not fit any-
thing ontot he valve other than the standard
valve cap or avalve cap approved by Mercedes-
Benz for your vehicle. Do not fit any other valve caps or systems, e.g. tyre pressure monitors.
You should regularly check the pressure of all
your tyres including the spare wheel, particu-
larly prior to long trips. Adjust the tyre pressure as necessary (Y page 238).
The service life of atyre depends on various fac-
tors, including the following:
R driving style
R tyre pressure
R mileage Notes on th
etyre tread G
WARNING
Insuffic ient tyre tread willr educe tyre trac-
tion. The tyre is no longer abletod issipate
water .This means that on wet road surfaces,
the risk of aquaplaning increases, in particular where spee disnot adapted to suitt he driving
conditions. There is arisk of accident.
If the tyre pressure is too high or too low,t yres
may exhibi tdifferent levels of wearatd iffer-
ent locations on the tyre tread. Thus ,you
should regularl ycheck the tread depth and
the condition of the tread across the entire
width of all tyres.
Minimu mtyre tread depth for:
R summe rtyres: 3mm
R M+S tyres: 4mm For safety reasons, replace the tyre
sbefore
the legally prescribed limit for the minimum
tyre trea ddepth is reached. Select
ing, fitting and replacing tyres G
WARNING
Exceeding the state dtyre load-bearing capa-
city and the approved maximu mspee dcould
leadtot yre damage or the tyre bursting. There
is ar isk of accident.
Therefore, only use tyre types and sizes
approved for yourv ehiclemodel .Observe the
tyre loadr ating and spee drating required for
yourv ehicle.
Pay special attention to country-specific
requirements for tyre approval .These require-
ments may stipulate aspecific tyre type for your
vehicle. Furthermore ,the use of aspecific tyre
type in certain regions and area sofoperation
can be highly beneficial .You can find further
information regarding tyres at specialist tyre
retailers, at qualified specialist workshops or at
any Mercedes-Benz Service Centre.
R Use only tyres and wheels of the same type
and make.
R Fit only tyres of the correct size onto the
wheels.
R Runinn ew tyres at moderate speeds for the
first 100 km. They reach their full perform-
ance only after this distance.
R Do not drive with tyres that have too little
tread depth. This significantly reduces trac-
tion on wet road s(aquaplaning).
R Replace the tyres after six years at the latest,
regardless of wear. This alsoa ppliestothe
spar ewheel. Winter operation
General notes
Have yourv ehicle winterproofed at aqualified
specialist workshop at the onset of winter.
Observe the notes in the "Changing awheel"
section (Y page 243). 236
Winter operationWheels and tyres
Page 240 of 261
Drivin
gwiths ummer tyres
At temperature sbelo w+ 7† ,summer tyres lose
elasticity and therefore traction and braking
power. Change th etyres on your vehicle to
M+ Styres. Using summer tyres at ver ycold
temperature scould cause tears to form,
thereby damagin gthe tyres permanently.
Mercedes-Ben zcanno taccept responsibilit yfor
this typ eofdamage. G
WARNING
Damaged tyre scan caus etyre inflation pres-
sure loss. As aresult, you coul dlose control of
yourv ehicle. There is arisk of accident.
Check the tyres regularl yfor signs of damage
and replace any damaged tyres immediately. M+S tyres
G
WARNING
M+S tyres with atyre tread depth of less than
4mma re not suitable for use in winter as they
do not provid esufficient traction. There is a
risk of accident.
M+S tyres with atread depth of less than
4mmm ust be replaced. G
WARNING
The whee lortyre size as wellast he tyre type
of the spar ewhee land the whee ltobe
replaced may differ .Driving characteristics
can be severely impaired when you fit the
spar ewheel. There is arisk of an accident.
To prevent risks:
R adapt yourd riving style accordingly and
drive carefully
R never fit more than one spar ewhee lthat
differ sfrom the whee ltobechanged
R only use aspar ew hee lthat differ sfrom the
whee ltobec hanged for abriefp eriod
R do not switch ESP ®
off
R have aspar ew hee lofad ifferent size
replaced at the neares tqualified specialist
workshop. You must make sure that the wheel and tyre dimensions as wel
lasthe
tyr etype are correct.
Do not exceed amaximum speed of 80 km/h if
as pare wheel of adifferen tsizeisf itted.
At temperatures below +7 †, use winter tyres or all-season tyres. Bot htypes of tyr eare identified
by th eM+S marking.
Only winter tyres bearin gthe i snowflake
symbo linaddition to th eM+S marking provide
th eb est possible grip in wintry road conditions.
Only these tyres will allow driving safet ysys-
tem ssuch as AB Sand ESP ®
to function opti-
mally in winter. These tyres have been devel-
oped specifically for driving in snow.
Use M+S tyres of th esame mak eand tread on all
wheels to maintain safe handling characteris-
tics.
Always observe th emaximum permissible
speed specified for th eM+S tyres you have fit-
ted.
If you fit M+S tyres that have alower maximum
permissible speed than that of th evehicle, affix
an appropriat ewarning label in th edriver's field
of vision. This can be obtained at aqualified
specialist workshop.
When you have fitted th eM+S tyres:
X Chec kthe tyrep ressures (Y page 238).
X Restart th etyrep ressure monitor
(Y page 241). Snow chains
G
WARNING
If you drive too fas twith snow chains fitted,
they may snap. As aresult, you coul dinjure
others and damage the vehicle. There is arisk
of an accident.
Observe the maximu mpermissible spee dfor
operation with snow chains.
! Before fitting the snow chains, check them
for damage. Damaged or worn snow chains
may snap and damage the following compo-
nents:
R wheel
R whee lhousing
R whee lsuspension Winter operation
237Wheels and tyres Z
Page 241 of 261
Therefore, only use snow chains that are in
perfect condition. Observe the manufactur-
er's installation instructions.
For safety reasons, Mercedes-Benz recom-
mends that you use only snow chains that have been approved for Mercedes-Benz or that are of
an equivalent standard of quality. For more
information, please contact aqualified special-
ist workshop.
If you wish to fit snow chains, please bear the
following points in mind:
R snow chains cannot be fitted to all wheel/tyre
combinations. Observe the information
regarding permitted wheel/tyre combina-
tions (Y page 246)
R fit the snow chains on all four wheels for max-
imum tractive power and driving stability.
Snow chains must alway sbefitted in pairs; if
you only have two snow chains, fit these on
the rear wheels. The vehicle then remains
more stable under braking
R use snow chains only if the road surface is
completely snow-covered. Remove the snow
chains as soon as possible when you come to ar oad that is not snow-covered
R local regulations may restrict the use of snow
chains. Observe the appropriate regulations if you wish to fit snow chains
R do not exceed the maximum permissible
speed of 50 km/h
You may wish to deactivate ESP ®
when pulling
away with snow chains fitted (Y page 54). This
allows the wheels to spin in acontrolled manner,
achieving increased propulsive force (cut). Tyre pressure
Tyre pressur
especifications
Important safety notes G
WARNING
Underinf lated or overinflated tyres pose the
following risks:
R the tyres may burst, especially as the load
and vehicl espee dincrease.
R the tyres may weare xcessively and/or
unevenly, which may greatly impair tyre
traction.
R the driving characteristics, as wellass teer-
ing and braking, may be greatly impaired.
There is arisk of an accident.
Observe the recommende dtyre pressure and
check the tyre pressure of all the tyres includ-
ing the spar ewheel:
R at least every two weeks
R when the loadc hanges
R before embarking on alonger journey
R for changed operating conditions, e.g. off-
road driving
If necessary, correct the tyre pressure. G
WARNING
If you fit unsuitabl eaccessories onto tyre
valves, the tyre valve smay be overloadeda nd
malfunction, which can caus etyre pressure
loss. Due to their design, retrofitted tyre pres-
sure monitors keep the tyre valve open. This
can alsor esult in tyre pressure loss. There is a
risk of accident.
Only screw standar dvalve caps or valve caps
specifically provided by Mercedes-Benz for
yourv ehicleonto the tyre valve. G
WARNING
If the tyre pressure drops repeatedly ,the
wheel, valve or tyre may be damaged. Tyre
pressure that is too low may result in atyre
blow-out. There is arisk of accident. 238
Tyre pressureWheels and tyres
Page 243 of 261

For further information on displaying this mes-
sage, refe rtothe "Checking the tyre pressure
electronically" section (Y page 240).
Important safety notes It is the driver's responsibility to set the tyre
pressure to the recommended cold tyre pres-
sure suitable for the operating situation
(Y page 238). Note that the correc ttyre pres-
sure for the current operating situation must
first be learnt by the tyre pressure monitor. If a
substantial loss of pressure occurs, the warning threshold for the warning message is aligned to
the learnt reference values. Restart the tyre
pressure monitor after adjusting to the cold tyre pressure (Y page 241). The current pressures
are saved as new reference values. This ensures that awarning message appears only if the tyre
pressure drops significantly.
The tyre pressure monitor does not warn you of
an incorrectly set tyre pressure. Observe the
notes on the recommended tyre pressure
(Y page 238).
The tyre pressure monitor is not abletow arn
you of asudden loss of pressure, e.g. if the tyre
is penetrated by aforeign object. In this event,
bring the vehicle to ahalt by braking carefully.
Avoid abrupt steering manoeuvres.
The tyre pressure monitor has ayellow h
warning lamp on the instrument cluster for indi-
cating apressure loss or malfunction. Depend-
ing on how the warning lamp flashe sorlights up,
at yre pressure that is too low or amalfunction in
the tyre pressure monitor is indicated:
R if the h warning lamp is lit continuously,
the tyre pressure on one or more tyres is sig-
nificantly too low. The tyre pressure monitor
is not malfunctioning.
R if the h warning lamp flashe sfor around a
minute and then remains lit constantly, the
tyre pressure monitor is malfunctioning.
In addition to the hwarning lamp,am essage
appears in the multifunction display. Observe
the information on display messages
(Y page 150).
It may take up to ten minutes for amalfunction
of the tyre pressure monitor to be indicated .A
malfunction willbei ndicated by thehtyre
pressure warning lamp flashing for approx-
imatel yone minute and then remaining lit. When
the faulth as been rectified, the htyre pres-
sure warning lamp goes out after driving for a
few minutes. The tyre pressure values indicated by the on-
board computer may differ from those meas-
ured at
afilling station using apressure gauge.
The tyre pressures shown by the on-board com-
puter refer to those measured at sea level. At
high altitudes, the tyre pressure values indica-
ted by apressure gauge are higher than those
shown by the on-board computer. In this case,
do not reduce the tyre pressures.
The operation of the tyre pressure monitor can
be affected by interferenc efrom radio transmit-
ting equipment (e.g. cordless headphones, two- way radios) that may be being operated in or
near the vehicle.
Checking the tyrep ressureelectroni-
cally X
Make sure that the key is in position 2in the
ignition lock.
X Press the =or; button on the steering
wheel to select the Serv.
Serv. menu.
X Press the 9or: button to select
Tyre pressure
Tyre pressure.
X Press the abutton.
The multifunction display shows the current
tyre pressure of each wheel.
If the vehicle has been parked for over
20 minutes, the Tyre pressures will be Tyre pressures will be
displayed
displayed after a
after afew
fewminutes
minutes of
ofdriv‐
driv‐
ing
ing message appears.
After ateach-in period, the tyre pressure moni-
tor automaticallyd etects new wheels or new
sensors. As long as aclear allocation of the tyre
pressure valuestot he individual wheels is not
possible,t heTyre
Tyre pressure
pressure monitor
monitoractive
active
displaym essage is shown instead of the tyre
pressure display. The tyre pressures are already being monitored.
If as pare wheel is fitted, the system may con-
tinue to show the tyre pressure of the wheel that has been removed for afew minutes. Please
note that in this case, the value displayed for the
replaced wheel does not indicate the current
tyre pressure of the spare wheel.
Warning messages of the tyre pressure monitor If the tyre pressure monitor detects
apressure
loss in one or more tyres, awarning messag eis
shown on the multifunction display. The yellow
h tyre pressure warning lamp then lights up. 240
Tyre pressureWheels and tyres
Page 244 of 261
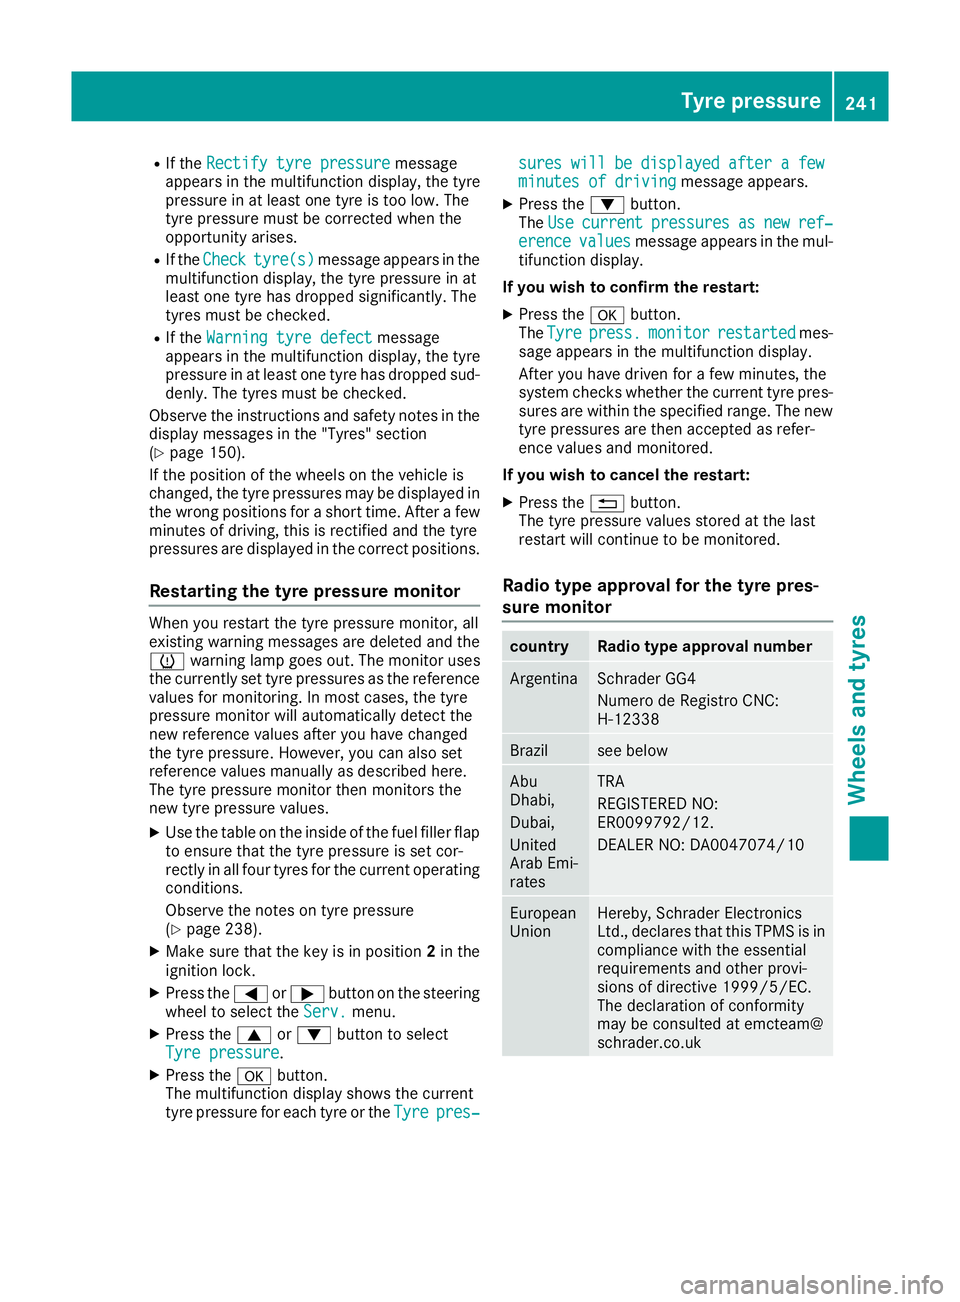
R
If the Rectify tyre pressure
Rectify tyre pressure message
appears in the multifunction display, the tyre
pressure in at least one tyre is too low. The
tyre pressure must be corrected when the
opportunity arises.
R If the Check Check tyre(s)
tyre(s) message appears in the
multifunction display, the tyre pressure in at
least one tyre has droppe dsignificantly. The
tyres must be checked.
R If the Warning tyre defect Warning tyre defect message
appears in the multifunction display, the tyre
pressure in at least one tyre has droppe dsud-
denly.T he tyres must be checked.
Observe the instructions and safety notes in the display messages in the "Tyres" section
(Y page 150).
If the positio nofthe wheelsont he vehicle is
changed, the tyre pressures may be displayedin the wrong positions for ashort time. After afew
minutes of driving, this is rectified and the tyre
pressures are displayedint he correct positions.
Restarting the tyre pressure monitor When you restart the tyre pressure monitor, all
existing warning messages are deleted and the
h
warning lamp goes out. The monitor uses
the currently set tyre pressures as the reference valuesf or monitoring. In most cases, the tyre
pressure monitor will automatically detect the
new reference values after you have changed
the tyre pressure. However, you can also set
reference values manually as described here.
The tyre pressure monitor then monitors the
new tyre pressure values.
X Use the table on the inside of the fuel filler flap
to ensure that the tyre pressure is set cor-
rectly in all four tyres for the curren toperating
conditions.
Observe the notes on tyre pressure
(Y page 238).
X Make sure that the key is in position 2in the
ignition lock.
X Press the =or; button on the steering
wheel to select the Serv.
Serv. menu.
X Press the 9or: button to select
Tyre pressure Tyre pressure .
X Press the abutton.
The multifunction display shows the current
tyre pressure for each tyre or the Tyre
Tyre pres‐
pres‐ sures
sures
will
willbe
bedisplayed
displayed after a
after afew
few
minutes of driving
minutes of driving message appears.
X Press the :button.
The Use
Use current
current pressures
pressures as
asnew
new ref‐
ref‐
erence
erence values
valuesmessage appears in the mul-
tifunction display.
If you wish to confirm the restart:
X Press the abutton.
The Tyre
Tyre press.
press. monitor
monitor restarted
restarted mes-
sage appears in the multifunction display.
After you have driven for afew minutes, the
system checks whether the current tyre pres-
sures are within the specified range. The new tyre pressures are then accepted as refer-
ence valuesa nd monitored.
If you wish to cancelt he restart:
X Press the %button.
The tyre pressure valuess tored at the last
restart will continue to be monitored.
Radio type approval for the tyre pres-
sure monitor country Radi
otype approva lnumber Argentina Schrader GG4
Numero de Registro CNC:
H-12338
Brazil see below
Abu
Dhabi,
Dubai,
United
Arab Emi-
rates TRA
REGISTERED NO:
ER0099792/12.
DEALER NO: DA0047074/10
European
Union Hereby, Schrader Electronics
Ltd., declare
sthat this TPM Sisin
compliance with the essential
requirements and other provi-
sions of directive 1999/5/EC.
The declaration of conformity
may be consulted at emcteam@
schrader.co.uk Tyre pressure
241Wheels and tyres Z
Page 246 of 261
Brazil
Este equipamento opera em caráte
rsecundário,
isto é, não tem direito àproteçã ocontra inter-
ferênci aprejudicial ,mesmo de estaçõe sdo
mesmo tipo, enão pode causa rinterferência a
sistemas operando em caráte rprimário. Changin
gawheel Flat tyre
You can fin dinformation on what to do in the
event of aflat tyr eunder "Breakdown assis-
tance" (Y page 224). Interchanging th
ewheels G
WARNING
Interchangin gthe front and rear wheels may
severely impair the driving characteristics if
the wheels or tyres have different dimensions. The whee lbrakes or suspension components
may alsobed amaged. There is arisk of acci-
dent.
Interchange front and rear wheels only if the
wheels and tyres are of the same dimensions.
! On vehicles fitted with
atyre pressure mon-
itor, electronic components are located in the wheel.
Tyre-fitting tools should not be appliedint he
area of the valve ,asthis coul ddamage the
electronic components.
Only have tyres changed at aqualified spe-
cialist workshop.
Interchanging front and rear wheels of differing
dimensions can render the genera loperating
permi tinvalid.
Always pay attention to the instructions and
safety notes under "Changing awheel"
(Y page2 43). The wear patterns on the front and rear tyres
diffe
rdepending on the operating conditions.
Interchange the wheels before aclear wear pat-
tern has formed on the tyres. Frontt yres typi-
cally wear more on the shoulders, while rear
tyres wear more in the centre.
On vehicles that have front and rear wheels of
the same size, you can interchange the wheels
every 5,000 to 10,00 0kmd epending on the
degree of tyre wear. Ensure that the direction of
rotation is maintained.
Clean the contact surfaces of the wheel and the
brake disc thoroughly every time awheel is
interchanged. Check the tyre pressure and reac-
tivate the tyre pressure monitor if necessary
(Y page 241). Direction of rotation
Tyres with aspecifie ddirection of rotation have
additional benefits, e.g. if there is ariskofa qua-
planing. You will only gain these benefit sifthe
correc tdirection of rotation is observed.
An arrow on th esidewall of th etyrei nd icates its
correc tdirection of rotation.
You may fit th espar ewhee lagainst th edirection
of rotation .Observ ethe time restriction on use
as well as th espeed limitation specifie donthe
spar ewheel. Storin
gwheels
Storet yres that are not being used in acool, dry
and preferably dark place. Protect the tyres
against oil, grease, petrol and diesel. Fitting
awheel
Preparing th evehicle G
WARNING
If yo uremove the spar ewhee lfrom the spare
whee lbracket, the weight distributio nofthe
vehicl echanges .Ifyou have already raised
the vehicle, the jack coul dtip over. There is a
risk of injury.
Remove the spar ewhee lfrom the spar ewheel
bracket before raising the vehicle. Changing
awheel
243Wheels an dtyres Z