2016 MERCEDES-BENZ G-CLASS SUV change key battery
[x] Cancel search: change key batteryPage 61 of 261

The key centrally locks/unlocks:
R the doors
R the rear door
R the fuel filler flap
X To unlock centrally: press the%button.
If you do not open the vehicle within approx-
imately 40 seconds of unlocking:
R the vehicle locks again
R protection against theft is reactivated
X To lock centrally: press the&button.
i If the
& button is pressed when the driv-
er's door is open, the rear side door on the
driver's side is not locked either.
During unlocking, the turn signals flash once.
During locking, they flash three times.
You can also set an audibl esignal to confirm
that the vehicle has been locked. The audible
signal can be activated or deactivated using the
on-board computer (Y page 139).
Only when all the components have been locked is the visual or audibl elockingc onfirmation
issued.
When the surround lighting is activated via the
on-board computer, it lights up when it is dark
after the vehicle is unlocked with the key
(Y page 138). Changing the settings of the locking
system
You can change the settings of the lockin gsys-
tem. This mean sthato nlyt he driver' sdoor and
th ef uel fille rflap are unlocked when th evehicle
is unlocked. This is useful if you frequently travel
alone.
X To change th esetting: pressand hold down
the % and& buttons simultaneously
for about six seconds until th ebattery indica-
to rlamp flashes twice (Y page 59).
If th esettin goft helockin gsystem is changed
within th esignal range of th evehicle ,pressing
the & or% button:
R locks or
R unlock sthe vehicle The key now func
tions as follows:
X To unlock the driver's door and fuel filler
flap:
press the %button once.
X To unlock centrally: press the%button
twice.
X To lock centrally: press the&button.
X To restor ethe factory settings: press and
hold down the %and& button ssimul-
taneously for approximately six seconds until the battery check lamp flashes twice
(Y page 59). Emergency key element
Genera lnotes If the vehicl
ecan no longer be unlocked with the
key, use the emergency key element.
If you use the emergency key element to unlock
and open the driver's door, the anti-theft alarm
system willbet riggered. Switch off the alarm
(Y page 56).
If you unlock the vehicle using the emergency
key element, the fuel fillerf lap willnot be
unlocked automatically.
X To unlockt he fuel fillerf lap:insert the key
into the ignition lock.
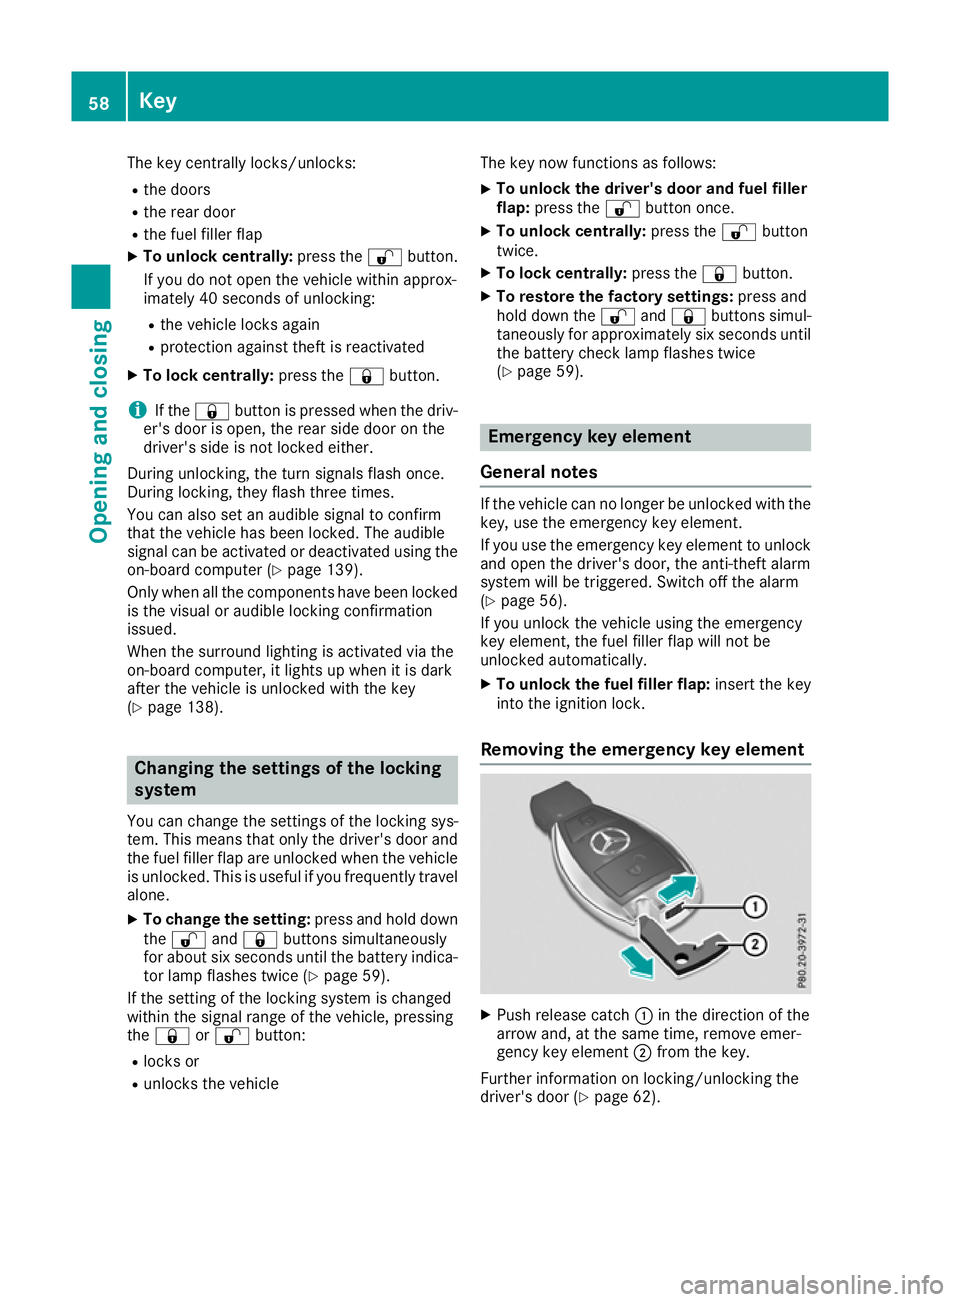
Removing the emergency key element X
Push releasec atch:in the direction of the
arrow and, at the same time, remove emer-
gency key element ;from the key.
Further information on locking/unlocking the
driver's door (Y page 62).58
KeyOpening and closing
Page 93 of 261

Flammable materials such as leaves, grass or
twig smay ignite if they come into contact
with:
R hot parts of the exhaust system
R the exhaust ga sitself
There is arisk of fire.
Whe nthe auxiliary heating is switched on,
make sur ethat:
R no flammable materials come into contact
with hot vehicle components
R the exhaust ga scan escape from the
exhaust pip eunhindered
R the exhaust ga sdoesn ot come into contact
with flammable materials.
! Operating the auxiliary heating/ventilation
draws on the vehicle battery. After yo uhave
heated or ventilated the vehicle amaximum of
two times ,drive for alonger distance.
i Switch the auxiliary heating on regularly –
once amonth –for abou tten minutes.
The auxiliary heating heats the ai rinthe vehicle
interior to the set temperature. Thi soccur swith-
ou tu sing the hea tofthe running engine. The
auxiliary heating is operate ddirectly using the
vehicle' sfuel. For this reason, the fue ltank level
mus tbea bove the reserve rang etoensure that
the auxiliary heating functions.
The auxiliary heating or auxiliary ventilation
automaticall yadjusts to changes in tempera-
ture and weathe rconditions. For this reason,
the auxiliary heating could switch from ventila-
tion mode to heating mode or from heating
mode to ventilation mode.
The auxiliary heating switches off automatically afte r30m inutes. Thi stime period can be
altered .Todot his, consult aquali fied specialist
workshop.
You cannot use the auxiliary ventilation to cool
the vehicle interior to atemperature lower than
the outsid etemperature.
Before switchin gonX
Turn the key to position 2(Ypage 96) in
the ignition lock.
X Set the desired temperature.
Auxiliary heating or auxiliary ventilation can also
be switched on if the manually set climate con- trol is activated. Optimum comfort is attained by
settin gthe syste mtoautomatic mode. Set the
temperatur eto22†.
The auxiliary heating or auxiliary ventilatio ncan
be switched on/off using the button on the
centr econsol eorthe remote control.
The on-board compute rcan be used to specify
up to thre edepartur etimes ,one of which may
be preselected (Y page 139).
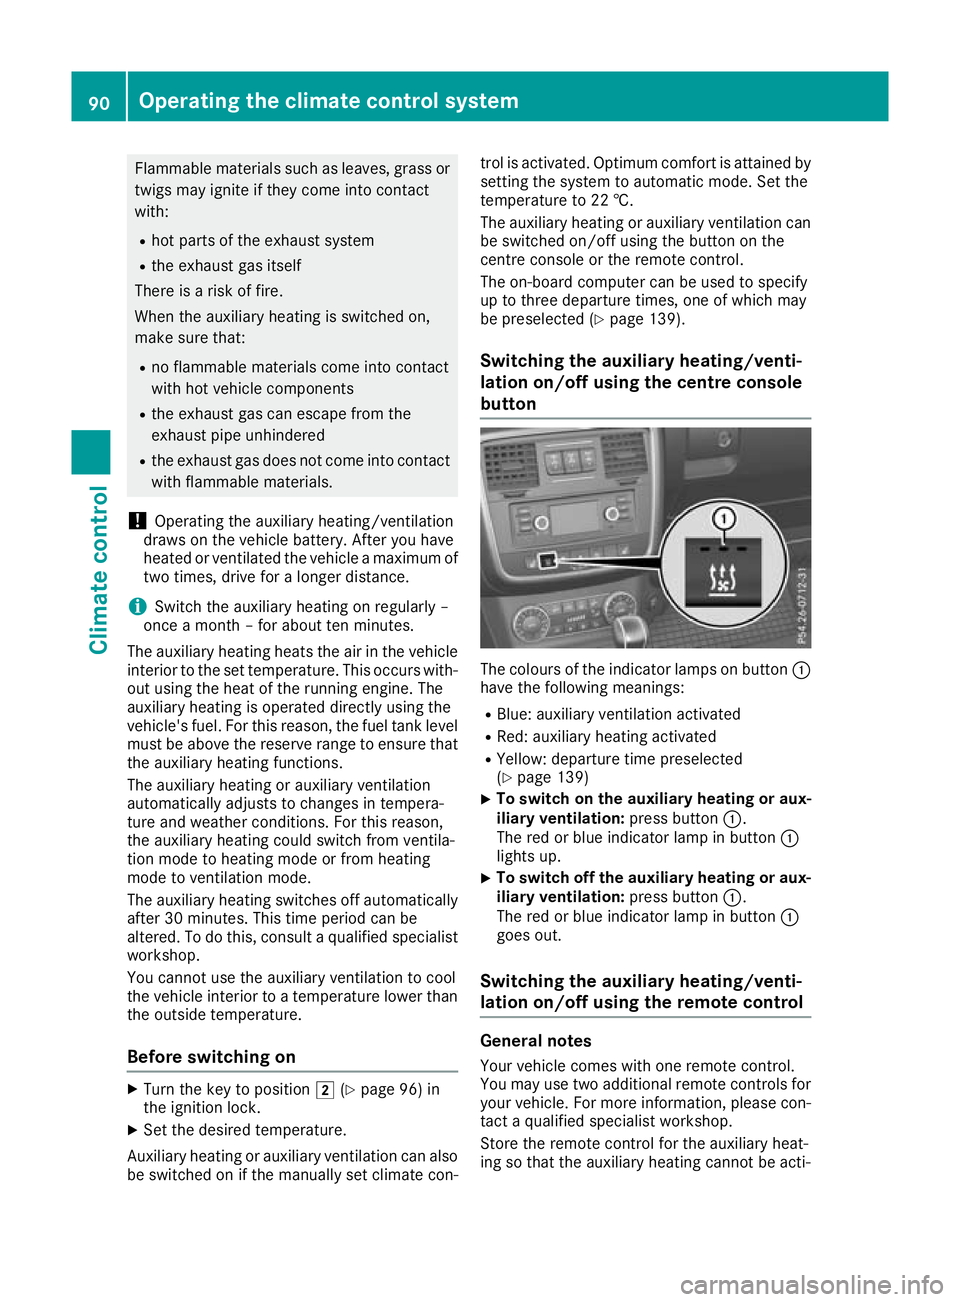
Switchin gthe auxiliary heating/venti-
lation on/off using the centre console
button Th
ec olours of the indicator lamps on button :
have the following meanings:
R Blue: auxiliary ventilation activated
R Red: auxiliary heating activated
R Yellow: departure time preselected
(Y page 139)
X To switch on the auxiliar
yheating or aux-
iliary ventilation: press button:.
The red or blue indicator lamp in button :
lights up.
X To switch off the auxiliar
yheating or aux-
iliary ventilation: press button:.
The red or blue indicator lamp in button :
goes out.
Switching the auxiliar yheating/venti-
lation on/off using the remotec ontrol General notes
Your vehicle comes with one remot econtrol.
You may use two additional remote controls for
yourv ehicle.For more information, please con-
tact aqualified specialist workshop.
Store the remote control for the auxiliary heat-
ing so that the auxiliary heating cannot be acti- 90
Operating the climate control systemClimate control
Page 227 of 261

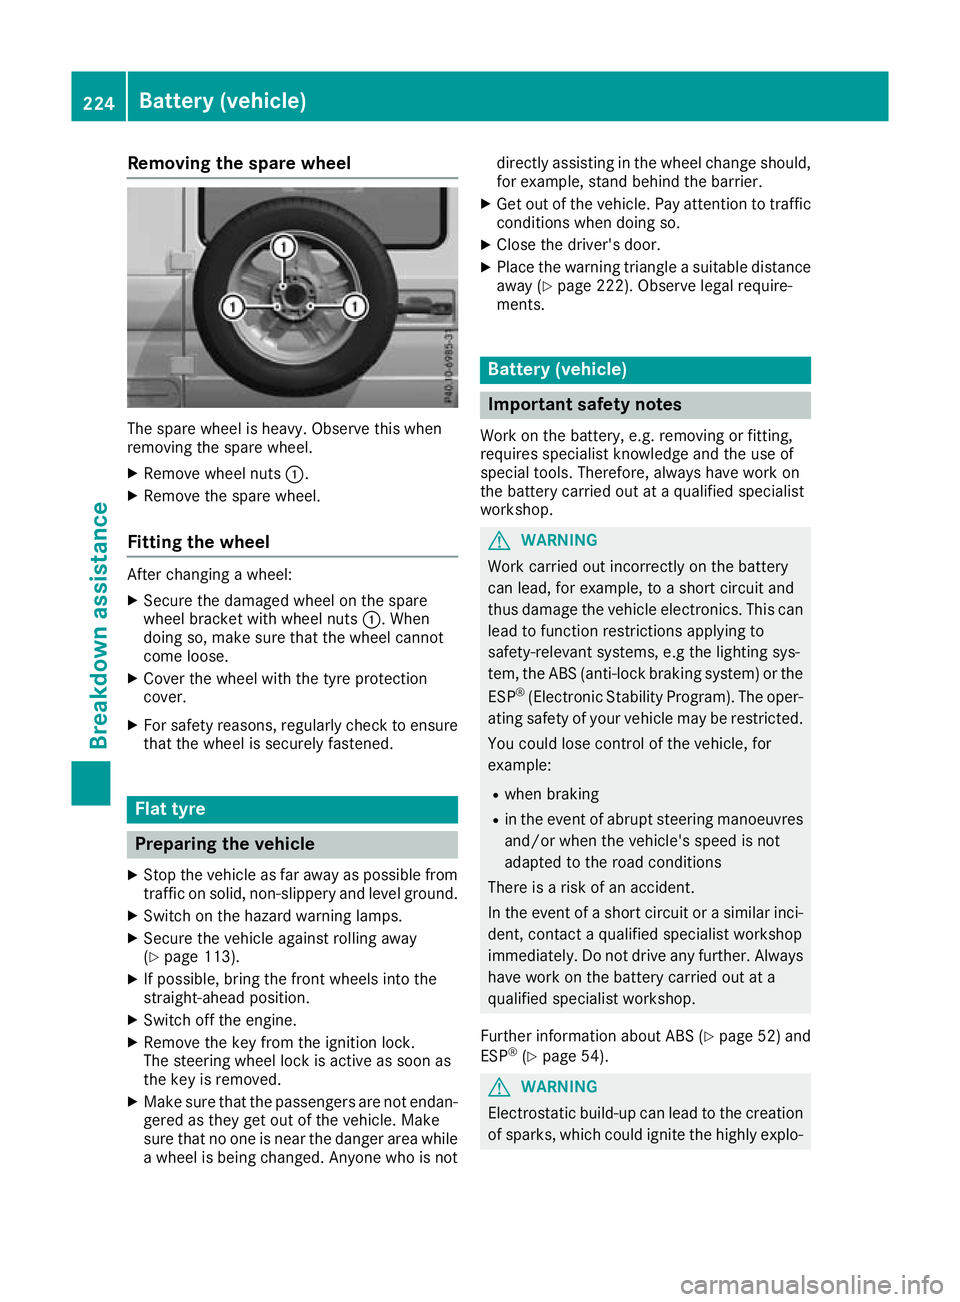
Removin
gthe spare wheel The spare wheel is heavy. Observ
ethis when
removing the spare wheel.
X Remove wheel nuts :.
X Remove the spare wheel.
Fitting the wheel After changing
awheel:
X Secure the damaged whee lonthe spare
whee lbracket with whee lnuts :.W hen
doing so, make sure tha tthe whee lcannot
come loose.
X Cover the whee lwitht he tyr eprotection
cover.
X For safety reasons ,regularly check to ensure
tha tthe whee lissecurel yfastened. Flat tyre
Preparing the vehicle
X Sto pthe vehicle as far away as possible from
traffic on solid, non-slippery and level ground.
X Switch on the hazard warning lamps.
X Secure the vehicle against rolling away
(Y page 113).
X If possible, bring the front wheels into the
straight-ahead position.
X Switch off the engine.
X Remove the key from the ignition lock.
The steering wheel lock is active as soon as
the key is removed.
X Make sure that the passengers are not endan-
gered as they get out of the vehicle. Make
sure that no one is near the danger area while
aw heel is being changed. Anyone who is not directly assisting in the wheel change should,
for example, stand behind the barrier.
X Get out of the vehicle. Pay attention to traffic
condition swhen doing so.
X Close the driver' sdoor.
X Place the warning triangle asuitable distance
away (Y page 222). Observe legal require-
ments. Batter
y(vehicle) Importan
tsafety notes
Wor kont hebattery, e.g. removing or fitting,
require sspecialist knowledge and th euse of
special tools. Therefore, always have wor kon
th eb attery carrie dout at aqualified specialist
workshop. G
WARNING
Work carried ou tincorrectly on the battery
can lead, for example, to ashort circui tand
thus damage the vehicl eelectronics. This can
leadtof unction restrictions applying to
safety-relevant systems ,e.g the lighting sys-
tem, the ABS (anti-lock braking system) or the
ESP ®
(Electronic Stability Program). The oper-
ating safety of yourv ehiclemay be restricted.
You coul dlose control of the vehicle, for
example:
R when braking
R in the event of abrupt steering manoeuvres
and/or when the vehicle's spee disnot
adapted to the road conditions
There is arisk of an accident.
In the event of ashort circui torasimilar inci-
dent, contact aqualified specialist workshop
immediately. Do not drive any further. Always have work on the battery carrie dout at a
qualified specialist workshop.
Further information about ABS (Y page52) and
ESP ®
(Y page5 4). G
WARNING
Electrostatic build-u pcan leadtot he creation
of sparks, which coul dignite the highly explo- 224
Battery (vehicle)Breakdown assistance