2016 MERCEDES-BENZ G-Class mirror
[x] Cancel search: mirrorPage 82 of 302

Position of the steering wheel for driv-
ing
The steering wheel is moved to the last selected
position when:
Rthe driver's door is closed
Ryou insert the SmartKey into the ignition lock
The last position of the steering column is stored
when you switch off the ignition or when you
store the setting with the memory function
(
Ypage 82).
Mirrors
Rear-view mirror
XAdjust the rear-view mirror by hand so you
have a good overview of the traffic conditions
behind you.
Exterior mirrors
Adjusting the exterior mirrors
GWARNING
The exterior mirror on the front-passenger
side reduces the size of the image. Visible
objects are actually closer than they appear.
This means that you could misjudge the dis-
tance from road users traveling behind, e.g.
when changing lane. There is a risk of an acci-
dent.
For this reason, always make sure of the
actual distance from the road users traveling
behind by glancing over your shoulder.
XMake sure that the SmartKey is in position 1
or 2in the ignition lock (Ypage 112).
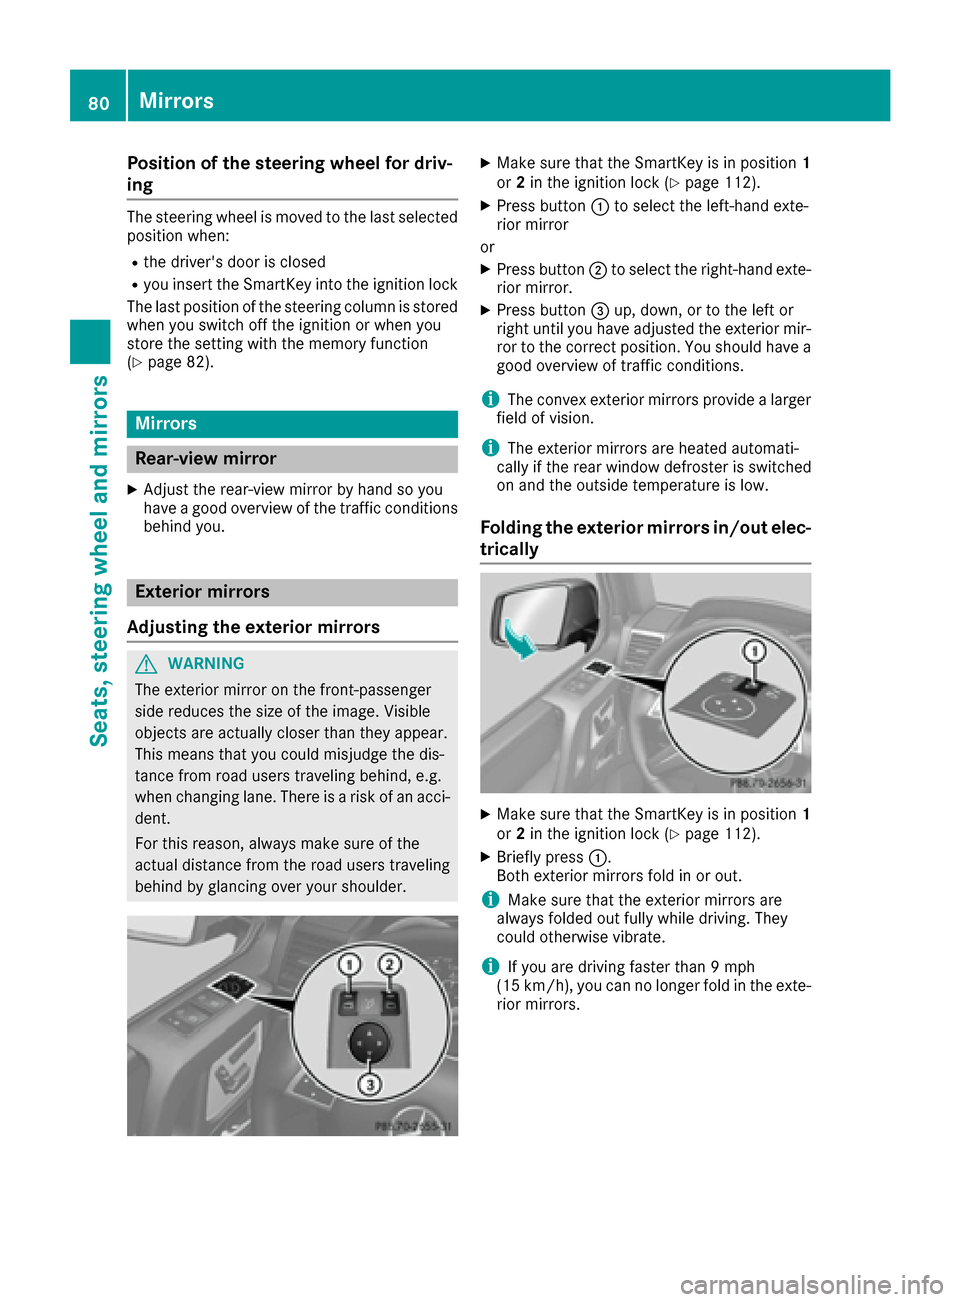
XPress button :to select the left-hand exte-
rior mirror
or
XPress button ;to select the right-hand exte-
rior mirror.
XPress button =up, down, or to the left or
right until you have adjusted the exterior mir- ror to the correct position. You should have a
good overview of traffic conditions.
iThe convex exterior mirrors provide a larger
field of vision.
iThe exterior mirrors are heated automati-
cally if the rear window defroster is switched
on and the outside temperature is low.
Folding the exterior mirrors in/out elec-
trically
XMake sure that the SmartKey is in position 1
or 2in the ignition lock (Ypage 112).
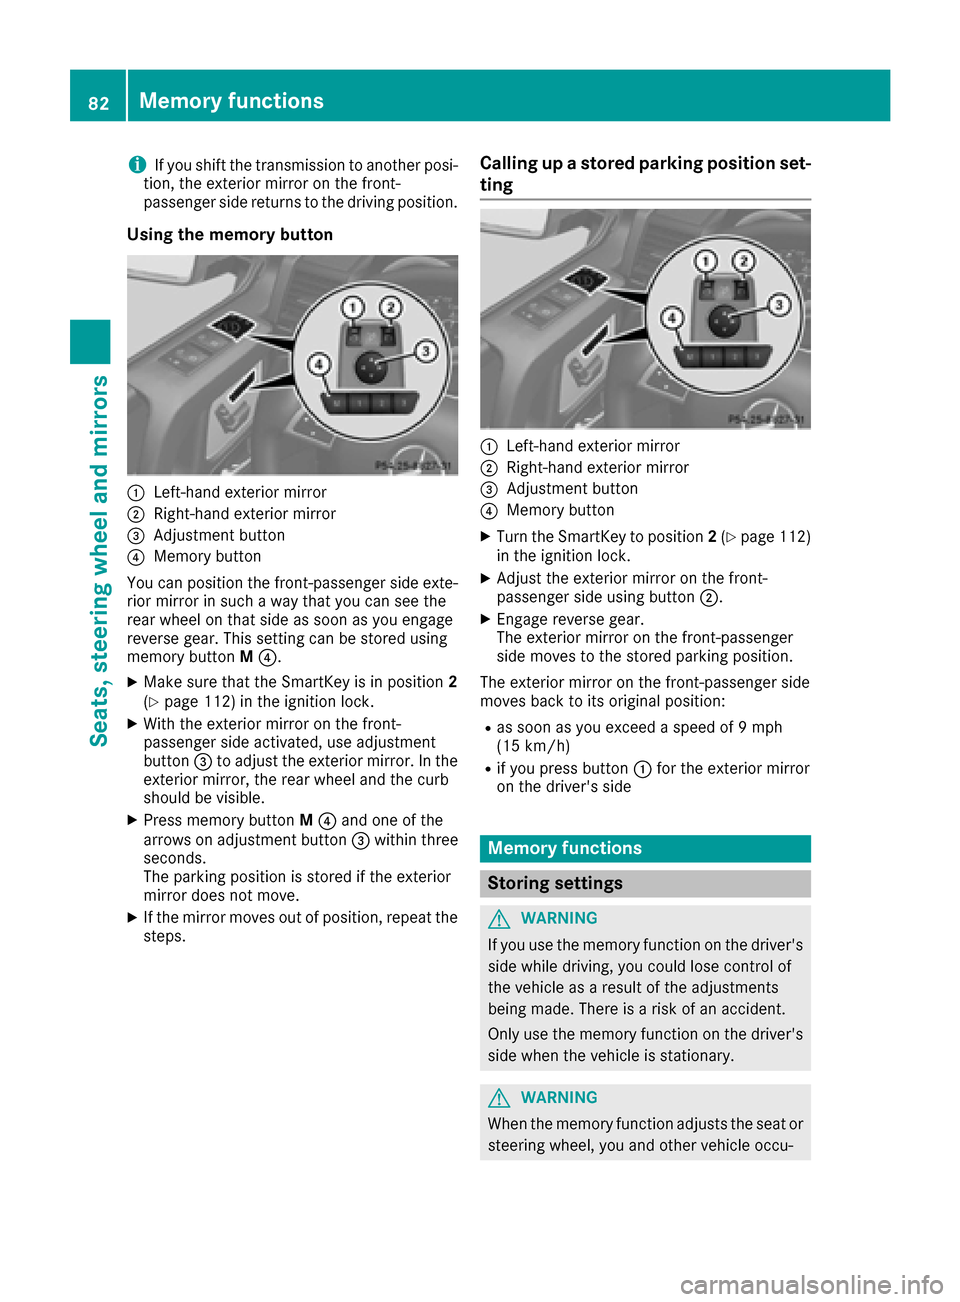
XBriefly press :.
Both exterior mirrors fold in or out.
iMake sure that the exterior mirrors are
always folded out fully while driving. They
could otherwise vibrate.
iIf you are driving faster than 9 mph
(15 km/h), you can no longer fold in the exte-
rior mirrors.
80Mirrors
Seats, steering wheel and mirrors
Page 83 of 302

Setting the exterior mirrors
If the battery has been disconnected or com-
pletely discharged, the exterior mirrors must be
reset. The exterior mirrors will otherwise not
fold in when you select the "Fold in mirrors when
locking" function in the on-board computer
(
Ypage 181).
XMake sure that the SmartKey is in position 1
in the ignition lock (Ypage 112).
XBriefly press :.
Folding the exterior mirrors in/out
automatically
If the "Fold in mirrors when locking" function is
activated in the on-board computer
(
Ypage 181):
Rthe exterior mirrors fold in automatically as
soon as you lock the vehicle from the outside.
Rthe exterior mirrors fold out again automati-
cally as soon as you unlock the vehicle and
then open the driver's or front-passenger
door.
Exterior mirror pushed out of position
XPress button :repeatedly until you hear the
mirror engage in position.
The mirror housing is engaged again and you
can adjust the exterior mirrors as usual
(
Ypage 80).
Automatic anti-glare mirrors
The rear-view mirror and the exterior mirror on
the driver's side automatically go into anti-glare
mode if:
Rthe ignition is switched on and
Rincident light from headlamps strikes the sen-
sor in the rear-view mirror
iThe mirrors do not go into anti-glare mode if
reverse gear is engaged or if the interior light- ing is switched on.
Parking position for the exterior mir-
ror on the front-passenger side
Setting/storing the parking position
Using reverse gear
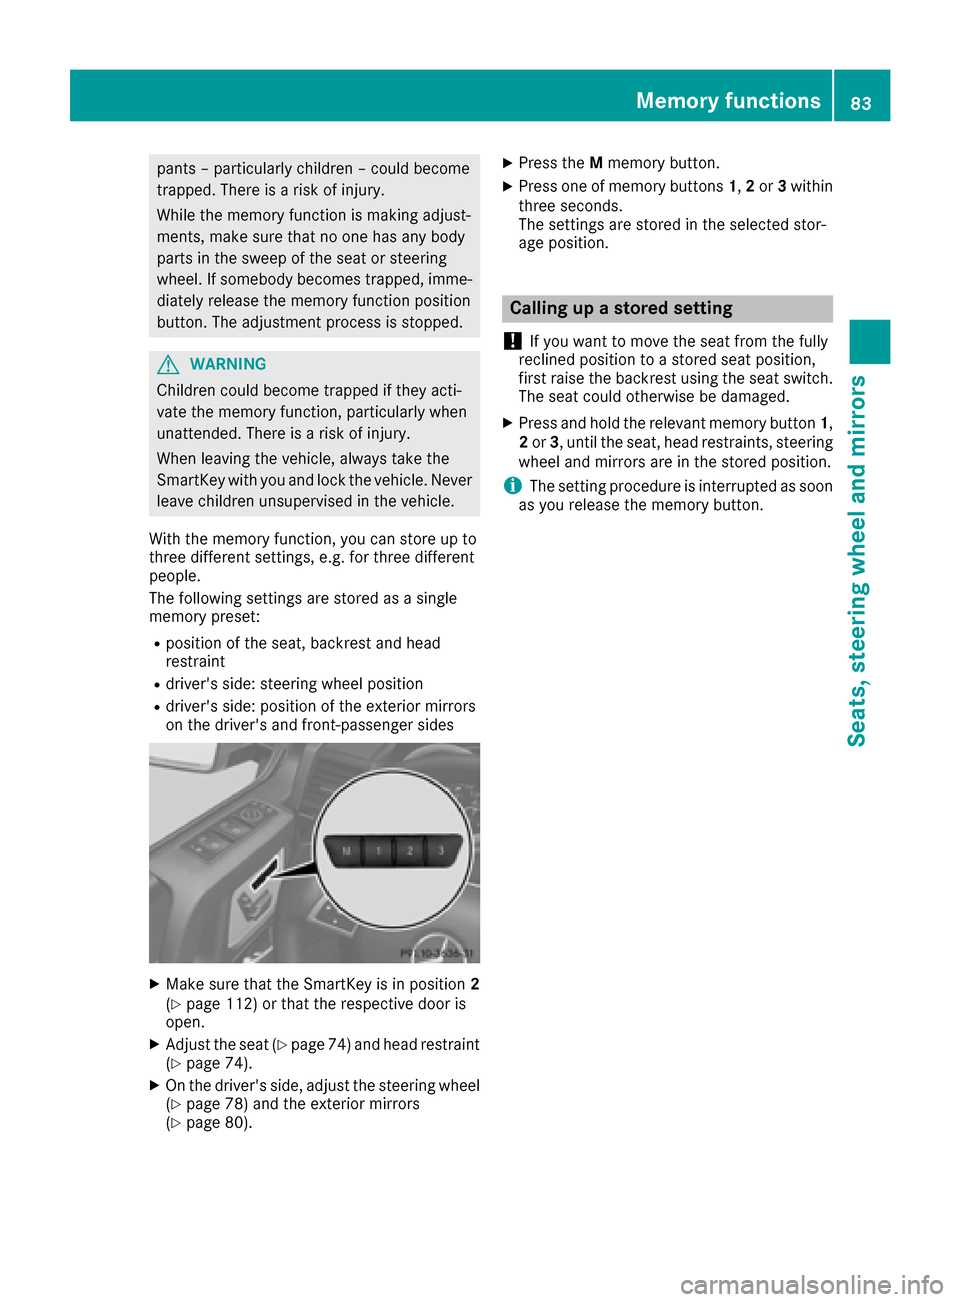
:Left-hand exterior mirror
;Right-hand exterior mirror
=Adjustment button
?Memory button
You can position the front-passenger side exte- rior mirror in such a way that you can see the
rear wheel on that side as soon as you engage
reverse gear. You can store this position.
XMake sure that the vehicle is stationary and
that the SmartKey is in position 2in the igni-
tion lock (
Ypage 112).
XPress button ;for the exterior mirror on the
front-passenger side.
XEngage reverse gear.
The exterior mirror on the front-passenger
side moves to the preset parking position.
XUse adjustment button =to adjust the exte-
rior mirror to a position that allows you to see
the rear wheel and the curb.
The parking position is stored.
Mirrors81
Seats, steering wheel and mirrors
Z
Page 84 of 302

iIf you shift the transmission to another posi-
tion, the exterior mirror on the front-
passenger side returns to the driving position.
Using the memory button
:Left-hand exterior mirror
;Right-hand exterior mirror
=Adjustment button
?Memory button
You can position the front-passenger side exte- rior mirror in such a way that you can see the
rear wheel on that side as soon as you engage
reverse gear. This setting can be stored using
memory button M?.
XMake sure that the SmartKey is in position 2
(Ypage 112) in the ignition lock.
XWith the exterior mirror on the front-
passenger side activated, use adjustment
button =to adjust the exterior mirror. In the
exterior mirror, the rear wheel and the curb
should be visible.
XPress memory button M? and one of the
arrows on adjustment button =within three
seconds.
The parking position is stored if the exterior
mirror does not move.
XIf the mirror moves out of position, repeat the
steps.
Calling up a stored parking position set-
ting
:Left-hand exterior mirror
;Right-hand exterior mirror
=Adjustment button
?Memory button
XTurn the SmartKey to position 2(Ypage 112)
in the ignition lock.
XAdjust the exterior mirror on the front-
passenger side using button ;.
XEngage reverse gear.
The exterior mirror on the front-passenger
side moves to the stored parking position.
The exterior mirror on the front-passenger side
moves back to its original position:
Ras soon as you exceed a speed of 9 mph
(15 km/h)
Rif you press button :for the exterior mirror
on the driver's side
Memory functions
Storing settings
GWARNING
If you use the memory function on the driver's side while driving, you could lose control of
the vehicle as a result of the adjustments
being made. There is a risk of an accident.
Only use the memory function on the driver's
side when the vehicle is stationary.
GWARNING
When the memory function adjusts the seat or steering wheel, you and other vehicle occu-
82Memory functions
Seats, steering wheel and mirrors
Page 85 of 302

pants – particularly children – could become
trapped. There is a risk of injury.
While the memory function is making adjust-
ments, make sure that no one has any body
parts in the sweep of the seat or steering
wheel. If somebody becomes trapped, imme-diately release the memory function position
button. The adjustment process is stopped.
GWARNING
Children could become trapped if they acti-
vate the memory function, particularly when
unattended. There is a risk of injury.
When leaving the vehicle, always take the
SmartKey with you and lock the vehicle. Never
leave children unsupervised in the vehicle.
With the memory function, you can store up to
three different settings, e.g. for three different
people.
The following settings are stored as a single
memory preset:
Rposition of the seat, backrest and head
restraint
Rdriver's side: steering wheel position
Rdriver's side: position of the exterior mirrors
on the driver's and front-passenger sides
XMake sure that the SmartKey is in position 2
(Ypage 112) or that the respective door is
open.
XAdjust the seat (Ypage 74) and head restraint
(Ypage 74).
XOn the driver's side, adjust the steering wheel (Ypage 78) and the exterior mirrors
(Ypage 80).
XPress the Mmemory button.
XPress one of memory buttons 1,2or 3within
three seconds.
The settings are stored in the selected stor-
age position.
Calling up a stored setting
!
If you want to move the seat from the fully
reclined position to a stored seat position,
first raise the backrest using the seat switch.
The seat could otherwise be damaged.
XPress and hold the relevant memory button 1,
2 or 3, until the seat, head restraints, steering
wheel and mirrors are in the stored position.
iThe setting procedure is interrupted as soon
as you release the memory button.
Memory functions83
Seats, steering wheel and mirrors
Z
Page 91 of 302

Hazard warning lamps
XTo switch on the hazard warning lamps:
press button:.
All turn signals flash. If you now switch on a
turn signal using the combination switch, only
the turn signal lamp on the corresponding
side of the vehicle will flash.
XTo switch off the hazard warning lamps:
press button :.
The hazard warning lamps automatically switch
on if:
Ran air bag is deployed or
Rthe Emergency Tensioning Devices are trig-
gered, or
Rthe vehicle decelerates rapidly from a speed
of above 45 mph (70 km/h) and comes to a
standstill
The hazard warning lamps switch on automati-
cally if an air bag or the Emergency Tensioning
Devices are triggered and the SmartKey is in
position 1in the ignition lock.
The hazard warning lamps switch off automati-
cally if the vehicle reaches a speed of above
6 mph (10 km/h) again after a full brake appli-
cation.
iThe hazard warning lamps still operate if the
ignition is switched off.
Headlamps and indicator lamps fog-
ged up on the inside
The headlamps and the indicator lamps in the
exterior mirrors may fog up on the inside if there
is high atmospheric humidity.
XDrive with the headlamps switched on.
The level of moisture diminishes, depending
on the length of the journey and the weather
conditions (humidity and temperature).
If the level of moisture does not diminish:
XHave the headlamps checked at a qualified
specialist workshop.
Interior lighting
Overview of interior lighting
Front overhead control panel
:
p Switches the left-hand front reading
lamp on/off
;c Switches the front interior lighting on
=tSwitches the cargo compartment
lamp/rear compartment lighting on/off
?| Switches the front interior lighting/
automatic interior lighting control off
Ap Switches the right-hand reading lamp
on/off
BSwitches the automatic interior lighting con-
trol on
Interior lighting89
Lights and windshield wipers
Z
Page 95 of 302

tube when cold with alcohol or spirit and rub it
off with a lint-free cloth.
Protect bulbs from moisture during operation.
Do not allow bulbs to come into contact with
liquids.
Xenon bulbs
Bulbs and lamps are an important aspect of
vehicle safety. You must therefore make sure
that these function correctly at all times. Have
the headlamp setting checked regularly.
LED modules
You can replace neither Xenon bulbs nor LED
bulbs. Have LED modules replaced at a qualified
specialist workshop.
Bulbs and lamps are an important aspect of
vehicle safety. You must therefore make sure
that these function correctly at all times. Have
the headlamp setting checked regularly.
Before changing bulbs
Have the following bulbs replaced at a qualified
specialist workshop:
RAdditional turn signals in the exterior mirrors
RHigh-mounted brake lamp
RHigh-beam/low-beam headlamps (Xenon
bulbs)
RDaytime running lamps
RParking lamps/standing lamps
RLicense plate lamp
iIndividual segments of the license plate
lamp LEDs may fail without a display message
appearing in the multifunction di splay
. Regu-
larly check the license plate lamp. If neces-
sary, visit a qualified specialist workshop.
You can replace the following bulbs:
RTurn signal lamp (front)
RBrake/tail lamp
RTurn signal lamp (rear)
RTail lamps/standing lamps
RBackup Light
RRear fog lamp
RSide marker lamps
Other bulbs
There are bulbs other than the Xenon bulbs that you cannot replace yourself. Only replace the
bulbs listed (
Ypage 93). Have the bulbs that
you cannot replace yourself replaced at a quali-
fied specialist workshop.
If you require assistance replacing bulbs, con-
sult a qualified specialist workshop. Do not touch the glass tube of new bulbs with
your bare hands. Even minor contamination can
burn into the glass surface and reduce the ser-
vice life of the bulbs. Always use a lint-free cloth
or only touch the base of the bulb when instal-
ling.
Only use bulbs of the correct type.
If the new bulb still does not light up, consult a
qualified specialist workshop.
Bulbs and lamps are an important aspect of
vehicle safety. You must therefore make sure
that these
function co
rrectly at all times. Have
the headlamp setting checked regularly.
Overview: changing bulbs/bulb types
Front bulbs
You can replace the following bulbs. The bulb
type can be found in the legend.
:Turn signal lamp: 1156 NA
;Side marker lamp: T 4 W
Rear bulbs
You can replace the following bulbs. The bulb
type can be found in the legend.
Replacing bulbs93
Lights and windshield wiper s
Z
Page 157 of 302

As a result, Blind Spot Assist may not give
warnings in such situations. There is a risk of
an accident.
Always observe the traffic conditions care-
fully, and maintain a safe lateral distance.
Blind Spot Assist is only an aid. It may fail to
detect some vehicles and is no substitute for
attentive driving.
In particular, the detection of obstacles can be
impaired if:
Rthere is dirt on the sensors or anything else
covering the sensors
Rvisibility is poor, e.g. due to fog, heavy rain or
snow
Rthere is a narrow vehicle traveling in front, e.g.
a motorcycle or bicycle
Rthe road has very wide lanes
Rthe road has narrow lanes
Ryou are not driving in the middle of the lane
Rthere are barriers or other road boundaries
iUSA only:
This device has been approved by the FCC as
a "Vehicular Radar System". The radar sensor
is intended for use in an automotive radar
system only. Removing, tampering with, or
altering the device will void any warranties,
and is not permitted by the FCC. Do not tam-
per with, alter, or use in any non-approved
way.
Any unauthorized modification to this device
could void the user’s authority to operate the
equipment.
General notes
Blind Spot Assist uses a radar sensor system to
monitor both the left and right sides of your
vehicle. It supports you from a speed of approx-
imately 20 mph (30 km/h). A warning display in
the exterior mirrors draws your attention to
vehicles detected in the monitored area. If you
then switch on the corresponding turn signal to change lanes, you will also receive a visual and
audible collision warning. For this purpose, Blind
Spot Assist uses sensors in the rear bumper.
Monitoring range of the sensors
Blind Spot Assist monitors the area up to 10 ft
(3 m) behind your vehicle and directly next to
your vehicle, as shown in the diagram.
If the lanes are narrow, vehicles driving in the
lane beyond the lane next to your vehicle may be
indicated, especially if the vehicles are not driv-
ing in the middle of their lane. This may be the
case if the vehicles are driving on the inner side
of their lane.
Due to the nature of the system:
Rwarnings may be issued in error when driving
close to crash barriers or similar solid lane
borders.
Rthe warning is canceled when driving for an
extended period next to long vehicles, such as
trucks.
The two sensors for Blind Spot Assist are inte-
grated into the sides of the rear bumper. Make
sure that the bumper is free of dirt, ice or slush
in the vicinity of the sensors. The radar sensors
must not be covered, for example by rear bicycle
racks or overhanging loads. Following a severe
impact or in the event of damage to the bump-
ers, have the function of the radar sensors
checked at a qualified specialist workshop.
Blind Spot Assist may otherwise not work prop-
erly.
Driving systems155
Driving an d parking
Z
Page 158 of 302

Indicator and warning display
GWARNING
Blind Spot Assist does no treac tto :
Rvehicles overtake nto oclosely on th eside ,
placing them in th eblin dspo tarea
Rvehicles bein govertake nat aspee ddiffer -
ence of mor ethan 7. 5mph (12 km/h)
Rvehicles whic happroac hwit h a larg espee d
differential and overtake your vehicl e
As aresult ,Blind Spot Assist may no tgiv e
warning sin suc hsituations. Ther eis aris kof
an accident.
Always observ eth etraffic condition scare-
fully, and maintai n asafelateral distance.
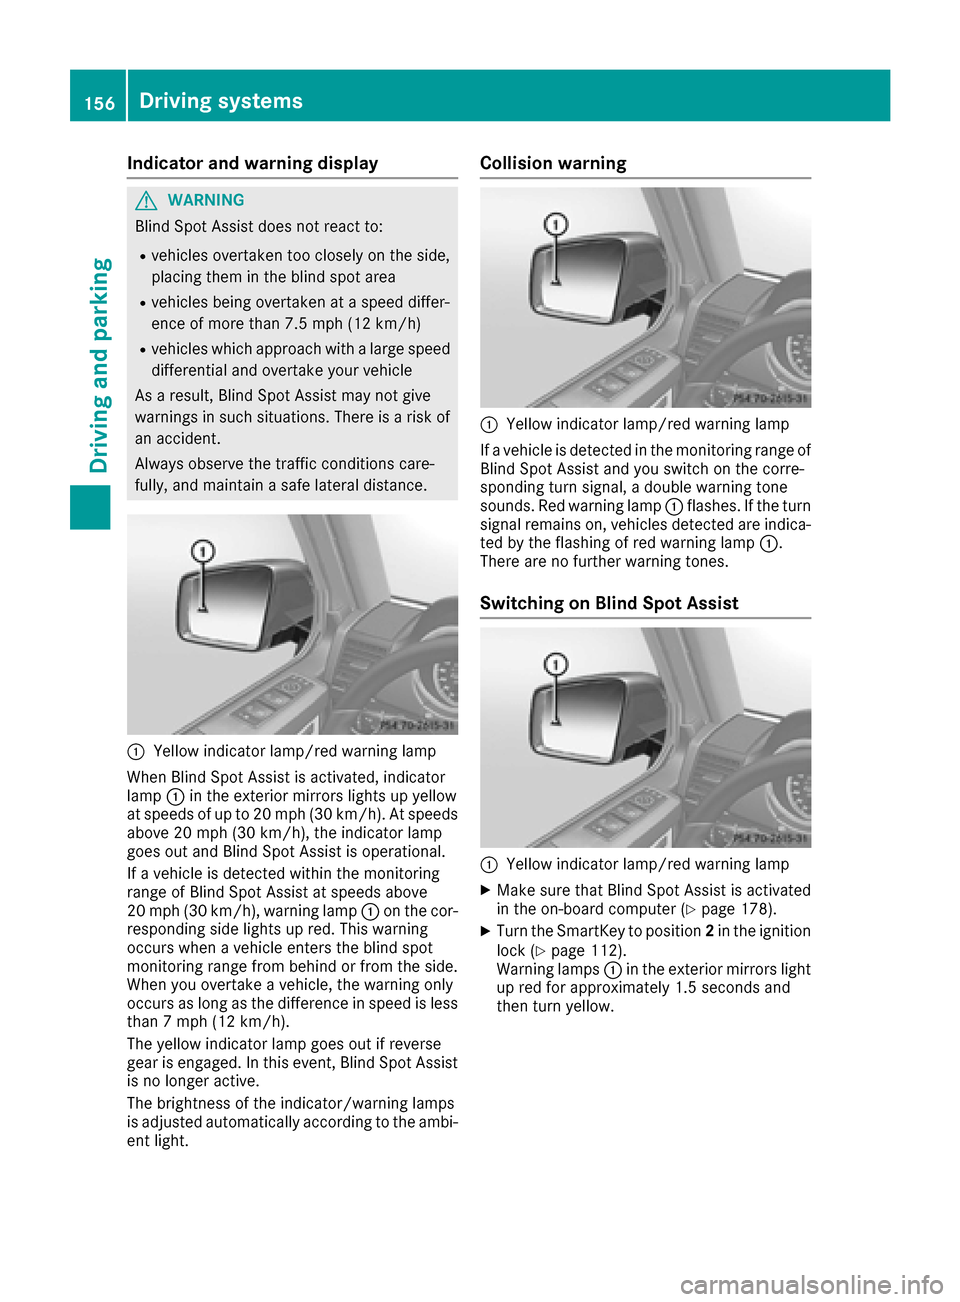
:Yello windicator lamp/red warning lamp
When Blind Spot Assist is activated, indicator
lamp :in th eexterio rmirror slights up yellow
at speeds of up to 20 mph (30 km/h). At speeds
above 20 mph (30 km/h), the indicator lamp
goes out and Blind Spot Assist is operational.
If a vehicle is detected within the monitoring
range of Blind Spot Assist at speeds above
20 mph (30 km/h), warning lamp :on the cor-
responding side lights up red. This warning
occurs when a vehicle enters the blind spot
monitoring range from behind or from the side.
When you overtake a vehicle, the warning only
occurs as long as the difference in speed is less
than 7 mph (12 km/h).
The yellow indicator lamp goes out if reverse
gear is engaged. In this event, Blind Spot Assist
is no longer active.
The brightness of the indicator/warning lamps
is adjusted automatically according to the ambi- ent light.
Collision warning
:Yellow indicator lamp/red warning lamp
If a vehicle is detected in the monitoring range of
Blind Spot Assist and you switch on the corre-
sponding turn signal, a double warning tone
sounds. Red warning lamp :flashes. If the turn
signal remains on, vehicles detected are indica- ted by the flashing of red warning lamp :.
There are no further warning tones.
Switching on Blind Spot Assist
:Yellow indicator lamp/red warning lamp
XMake sure that Blind Spot Assist is activated
in the on-board computer (Ypage 178).
XTurn the SmartKey to position 2in the ignition
lock (Ypage 112).
Warning lamps :in the exterior mirrors light
up red for approximately 1.5 seconds and
then turn yellow.
156Driving systems
Driving and parking