Page 265 of 289

Turn on ESP
®
and adapt your driving style
accordingly. When the outside temperature
falls below 10 †, use M+S tyres.
i Different driving styles may lead to higher
levels of tyre wear, meaning the tyres may
wear down to the minimum tyre tread depth
after less mileage. Regular checking of wheels and tyres
G
WARNING
Damaged tyres can cause tyre inflation pres-
sure loss. As a result, you could lose control of your vehicle. There is a risk of accident.
Check the tyres regularly for signs of damageand replace any damaged tyres immediately.
Check wheels and tyres for damage at least
once a month. Check wheels and tyres after
driving off-road or on rough roads. Damaged
wheels can cause a loss of tyre pressure. Pay
particular attention to damage such as:
R cuts in the tyres
R punctures
R tears in the tyres
R bulges on the tyres
R deformation or severe corrosion on wheels
Regularly check the tyre tread depth and the
condition of the tread across the whole width of
the tyre (Y page 262). If necessary, turn the
front wheels to full lock in order to inspect the
inner side of the tyre surface.
All wheels must have a valve cap to protect the
valve against dirt and moisture. Do not fit any-
thing onto the valve other than the standard
valve cap or other valve caps approved for your vehicle by Mercedes-Benz. Do not fit any other
valve caps or systems, e.g. tyre pressure moni-
toring systems.
Regularly check the pressure of all the tyres,
particularly prior to long trips. Adjust the tyre
pressure as necessary (Y page 264).
Observe the notes on the emergency spare
wheel (Y page 273). The service life of tyres depends on various fac-
tors, including the following:
R driving style
R tyre pressure
R mileage Notes on the tyre tread
G
WARNING
Insufficient tyre tread will reduce tyre trac-
tion. The tyre is no longer able to dissipate
water. This means that on wet road surfaces, the risk of aquaplaning increases, in particularwhere speed is not adapted to suit the driving
conditions. There is a risk of accident.
If the tyre pressure is too high or too low, tyres may exhibit different levels of wear at differ-
ent locations on the tyre tread. Thus, you
should regularly check the tread depth and
the condition of the tread across the entire
width of all tyres.
Minimum tyre tread depth for:
R summer tyres: 3 mm
R M+S tyres: 4 mm
For safety reasons, replace the tyres before
the legally prescribed limit for the minimum
tyre tread depth is reached. Selecting, fitting and replacing tyres
G
WARNING
Exceeding the stated tyre load-bearing capa-
city and the approved maximum speed could
lead to tyre damage or the tyre bursting. There is a risk of accident.
Therefore, only use tyre types and sizes
approved for your vehicle model. Observe the
tyre load rating and speed rating required for your vehicle.
Pay special attention to country-specific
requirements for tyre approval. These require-
ments can stipulate a specific tyre type for your
vehicle. Furthermore, the use of certain tyre
types in certain regions and areas of operation
can be highly beneficial. You can find further 262
OperationWheels and tyres
Page 266 of 289

information regarding tyres at specialist tyre
retailers, at qualified specialist workshops or at any Mercedes-Benz Service Centre.
R Only fit tyres and wheels of the same type and
make.
Exception: it is permissible to fit a different
type or make in the event of a flat tyre.
R Only fit tyres of the correct size onto the
wheels.
R Run in new tyres at moderate speeds for the
first 100 km. They only reach their full per-
formance after this distance.
R Do not drive with tyres which have too little
tread depth. This otherwise significantly
reduces the traction on wet roads (aquaplan-
ing).
R Replace the tyres after six years at the latest,
regardless of wear.
Observe the notes on the emergency spare
wheel (Y page 273). Winter operation
General notes
Have your vehicle winterproofed at a qualified
specialist workshop at the onset of winter.
Observe the notes in the "Changing a wheel"
section (Y page 267). Driving with summer tyres
At temperatures below +7 †, summer tyres lose
elasticity and therefore traction and braking
power. Change the tyres on your vehicle to
M+S tyres. Using summer tyres at very cold
temperatures could cause tears to form,
thereby damaging the tyres permanently.
Mercedes-Benz cannot accept responsibility for
this type of damage. G
WARNING
Damaged tyres can cause tyre inflation pres-
sure loss. As a result, you could lose control of your vehicle. There is a risk of accident.
Check the tyres regularly for signs of damageand replace any damaged tyres immediately. M+S tyres
G
WARNING
M+S tyres with a tyre tread depth of less than 4 mm are not suitable for use in winter as they
do not provide sufficient traction. There is a
risk of accident.
M+S tyres with a tread depth of less than
4 mm must be replaced.
At temperatures below +7 †, use winter tyres or all-season tyres. Both types of tyre are identified
by the M+S marking.
Only winter tyres bearing the isnowflake
symbol in addition to the M+S marking provide
the best possible grip in wintry road conditions. Only these tyres will allow driving safety sys-
tems such as ABS and ESP ®
to function opti-
mally in winter. These tyres have been devel-
oped specifically for driving in snow.
Use M+S tyres of the same make and tread on all
wheels to maintain safe handling characteris-
tics.
Always observe the maximum permissible
speed specified for the M+S tyres you have fit-
ted.
If you fit M+S tyre sthat have a lower maximum
permissible speed than that of the vehicle, affix
an appropriate warning label in the driver's field
of vision. This can be obtained at a qualified
specialist workshop.
Under these circumstances, you should also
restrict the maximum design speed of the vehi- cle using permanent SPEEDTRONIC so that it
does not exceed the maximum permissible
speed for the M+S tyres (Y page 130).
When you have fitted the M+S tyres:
X Check the tyre pressures (Y page 264).
X Restart the tyre pressure monitor
(Y page 267).
Information on driving with an emergency spare
wheel (Y page 273). Snow chains
G
WARNING
If you have fitted snow chains to the front
wheels, they may scrape against the vehicle
body or chassis components. This could Winter operation
263Wheels and tyres
Z
Page 267 of 289

cause damage to the vehicle or the tyres.
There is a risk of an accident.
To avoid hazardous situations:
R never fit snow chains on the front wheels
R fit snow chains to the rear wheels in pairs.
For safety reasons, Mercedes-Benz recom-
mends that you only use snow chains that have been specifically approved for your vehicle by
Mercedes-Benz, or that are of a corresponding
standard of quality. For more information,
please contact a qualified specialist workshop.
If you intend to fit snow chains, please bear the
following points in mind:
R snow chains cannot be fitted to all wheel-tyre
combinations. Permissible wheel-tyre combi-
nations (Y page 272).
R only use snow chains if the road surface is
completely snow-covered. Remove the snow
chains as soon as possible when you come to
a road that is not snow-covered.
R local regulations may restrict the use of snow
chains. Observe the appropriate regulations if you wish to fit snow chains.
R do not exceed the maximum permissible
speed of 50 km/h.
When pulling away with snow chains fitted, you can deactivate ESP ®
(Y page 58). This way you
can allow the wheels to spin in a controlled
manner, achieving increased driving force (cut-
ting action).
Information about driving with an emergency
spare wheel (Y page 273). Tyre pressure
Tyre pressure specifications
G
WARNING
Underinflated or overinflated tyres pose the
following risks:
R the tyres may burst, especially as the load
and vehicle speed increase.
R the tyres may wear excessively and/or
unevenly, which may greatly impair tyre
traction.
R the driving characteristics, as well as steer-
ing and braking, may be greatly impaired. There is a risk of an accident.
Observe the recommended tyre pressure and
check the tyre pressure of all the tyres includ-
ing the spare wheel:
R at least every two weeks
R when the load changes
R before embarking on a longer journey
R for changed operating conditions, e.g. off-
road driving
If necessary, correct the tyre pressure. G
WARNING
If you fit unsuitable accessories onto tyre
valves, the tyre valves may be overloaded and malfunction, which can cause tyre pressure
loss. Due to their design, retrofitted tyre pres-
sure monitors keep the tyre valve open. This
can also result in tyre pressure loss. There is a risk of accident.
Only screw standard valve caps or valve caps
specifically provided by Mercedes-Benz for
your vehicle onto the tyre valve. G
WARNING
If the tyre pressure drops repeatedly, the
wheel, valve or tyre may be damaged. Tyre
pressure that is too low may result in a tyre
blow-out. There is a risk of accident.
R Check the tyre for foreign objects.
R Check whether the wheel is losing air or the
valve is leaking.
If you are unable to rectify the damage, con-
tact a qualified specialist workshop. H
Environmental note
Check the tyre pressure regularly, at least
every 14 days.
The recommended tyre pressures for various
operating conditions can be found in the tyre
pressure table on the fuel filler flap
(Y page 118).
Operation with an emergency spare wheel:
information on operation with an emergency
spare wheel can be found in the general notes in 264
Tyre pressureWheels and tyres
Page 268 of 289
.
Additionally, the tyre pressure table may also
state tyre pressures for different load condi-
tions. These are defined in the table as differe")
the "Emergency spare wheel" section
(Y page 273).
Additionally, the tyre pressure table may also
state tyre pressures for different load condi-
tions. These are defined in the table as different numbers of passengers and amounts of lug-
gage. The actual number of seats may vary; for
more information, please refer to the vehicle's
registration documents.
If tyre sizes are not specified, the tyre pressures stated on the tyre pressure table apply for all
tyres approved for this vehicle. If a tyre size precedes a tyre pressure, the fol-
lowing tyre pressure information is only valid for that tyre size.
Use a suitable pressure gauge to check the tyre
pressure. The outer appearance of a tyre does
not permit any reliable conclusion about the tyre
pressure. You can also check the tyre pressure
using the on-board computer.
If possible, only correct tyre pressures when the
tyres are cold.
The tyres are cold:
R if the vehicle has been parked with the tyres
out of direct sunlight for at least three hours
and
R if the vehicle has not been driven further than
1.6 km
Depending on the ambient temperature, the
vehicle speed and the load on the tyres, the tyre temperature and thus the tyre pressure changes by approximately 10 kPa (0.1 bar/1.5 ps i) per
10 †. Take this into account when checking the
pressure of warm tyres. Only correct the tyre pressure if it is too low for the current operating
conditions.
Driving with tyre pressure that is too high or too
low can:
R shorten the service life of the tyres
R cause increased tyre damage
R have a negative effect on handling character-
istics and thus driving safety (e.g. aquaplan-
ing)
The tyre pressure values given for low loads are
minimum values which offer you good ride com- fort characteristics.
However, you can also use the values given for
higher loads. These are permissible and will not
adversely affect the running of the vehicle.
This improves the ride comfort of your vehicle;
however, fuel consumption may increase
slightly. Tyre pressure monitor
General notes If a tyre pressure monitor system is fitted, the
vehicle's wheels have sensors fitted that moni-
tor the tyre pressures in all four tyres. The tyre
pressure monitor warns you if the pressure
drops in one or more of the tyres. The tyre pres- sure monitor only functions if the corresponding sensors are fitted to all wheels.
Information on tyre pressures is shown in the
multifunction display. After a few minutes of
driving, the current tyre pressure of each tyre is
shown in the Service Servicemenu of the multifunction
display; see illustration (example). For further information on displaying this mes-
sage, refer to the "Checking the tyre pressure
electronically" section (Y
page 266). Tyre pressure
265Wheels and tyres Z
Page 269 of 289
. Note that the correct t")
Important safety notes
It is the driver's responsibility to set the tyre
pressure to the recommended cold tyre pres-
sure suitable for the operating situation
(Y page 264). Note that the correct tyre pres-
sure for the current operating situation must
first be taught-in to the tyre pressure monitor. If
there is a substantial loss of pressure, the warn-
ing threshold for the warning message is aligned to the reference values taught-in. Restart the
tyre pressure monitor after adjusting to the cold tyre pressure (Y page 267). The current pres-
sures are saved as new reference values. This
will ensure that a warning message will only
appear if the tyre pressure drops significantly.
The tyre pressure monitor does not warn you of
an incorrectly set tyre pressure. Observe the
notes on the recommended tyre pressure
(Y page 264).
The tyre pressure monitor is not able to warn
you of a sudden loss of pressure, e.g. if the tyre
is penetrated by a foreign object. In the event of a sudden loss of pressure, bring the vehicle to a
halt by braking carefully. Avoid abrupt steering
manoeuvres.
The tyre pressure monitor has a yellow warning lamp in the instrument cluster for indicating a
pressure loss or malfunction. Depending on how
the warning lamp flashes or lights up, a tyre
pressure that is too low or a malfunction in the
tyre pressure monitor is indicated:
R if the warning lamp is lit continuously, the tyre
pressure on one or more tyres is significantly
too low. The tyre pressure monitor is not mal-
functioning.
R if the warning lamp flashes for around a
minute and then remains lit constantly, the
tyre pressure monitor is malfunctioning.
In addition to the warning lamp, a message
appears in the multifunction display. Observe
the information on display messages
(Y page 189).
It may take up to ten minutes for a malfunction
of the tyre pressure monitor to be indicated. A
malfunction will be indicated by the tyre pres-
sure warning lamp flashing for approximately
one minute and then remaining lit. When the
fault has been rectified, the tyre pressure warn- ing lamp goes out after you have driven for a few
minutes.
The tyre pressure values indicated by the on-
board computer may differ from those meas-
ured at a filling station using a pressure gauge. The tyre pressures shown by the on-board com-
puter refer to those measured at sea level. At
high altitudes, the tyre pressure values indica-
ted by a pressure gauge are higher than those
shown by the on-board computer. In this case,
do not reduce the tyre pressures.
The operation of the tyre pressure monitor can
be affected by interference from radio transmit- ting equipment (e.g. radio headphones, two-way
radios) that may be being operated in or near the vehicle.
Checking the tyre pressure electroni-
cally X
Switch the ignition on (Y page 103).
X Press the òbutton on the steering wheel
to call up the list of menus.
X Press 9or: on the steering wheel to
select the Service Servicemenu.
X Press the abutton.
X Select Tyre pressure
Tyre pressure with9 or:.
X Press the abutton.
The current tyre pressure for each wheel will
be displayed in the multifunction display.
If the vehicle was parked for longer than
20 minutes, the following message appears:
Tyre pressures will be displayed Tyre pressures will be displayed
after a few minutes of driving after a few minutes of driving.
After a teach-in period, the tyre pressure moni-
tor automatically detects new wheels or new
sensors. As long as a clear allocation of the tyre pressure values to the individual wheels is not
possible, the Tyre Tyrepressure
pressure monitor
monitoractive
active
message is shown instead of the tyre pressure
display. The tyre pressures are already being
monitored.
If an emergency spare wheel is fitted, for a few
minutes the system may continue to show the
tyre pressure of the wheel that has been
removed. If this occurs, note that the value dis-
played for the position where the spare wheel is fitted is not the same as the current tyre pres-
sure of the emergency spare wheel. 266
Tyre pressureWheels and ty
res
Page 270 of 289

Warning messages of the tyre pressure
monitor If the tyre pressure monitor detects a pressure
loss in one or more tyres, a warning message is shown in the multifunction display. The yellow
tyre pressure warning lamp then lights up.
R If the Please correct tyre pressure
Please correct tyre pressure
message appears in the multifunction display,
the tyre pressure in at least one tyre is too
low. The tyre pressure must be corrected
when the opportunity arises.
R If the Check Check tyre(s)
tyre(s) message appears in the
multifunction display, the tyre pressure in at
least one tyre has dropped significantly. The
tyres must be checked.
R If the Warning tyre defect Warning tyre defect message
appears in the multifunction display, the tyre
pressure in at least one tyre has dropped sud- denly. The tyres must be checked.
Observe the instructions and safety notes in the display messages in the "Tyres" section
(Y page 189).
If the wheel positions on the vehicle are inter-
changed, the tyre pressures may be displayed
for the wrong positions for a short time. After a
few minutes of driving, this is rectified and the
tyre pressures are displayed for the correct
positions.
Restarting the tyre pressure monitor When you restart the tyre pressure monitor, all
existing warning messages are deleted and the
warning lamps go out. The monitor uses the cur-
rently set tyre pressures as the reference values
for monitoring. In most cases, the tyre pressure monitor will automatically detect the new refer-
ence values after you have changed the tyre
pressure. However, you can also set reference
values manually as described here. The tyre
pressure monitor then monitors the new tyre
pressure values.
X Use the table on the inside of the fuel filler flap
to ensure that the tyre pressure is set cor-
rectly in all four tyres for the current operating
conditions.
Also observe the notes in the section on tyre
pressures (Y page 264).
X Switch the ignition on (Y page 103).
X Press the òbutton on the steering wheel
to call up the list of menus. X
Press 9or: on the steering wheel to
select the Service
Service menu.
X Press the abutton.
X Select Tyre pressure
Tyre pressure with9 or:.
X Press the abutton.
The current tyre pressure for each wheel or
the Tyre Tyre pressures
pressures will
willbe
bedisplayed
displayed
after a few minutes of driving
after a few minutes of driving mes-
sage will be displayed in the multifunction
display.
X Press the :button.
The Use Use current
current pressures
pressures as
asnew
new ref‐
ref‐
erence
erence values
valuesmessage appears in the mul-
tifunction display.
If you wish to confirm the restart: X Press the abutton.
The Tyre
Tyre press.
press. monitor
monitor restarted
restarted mes-
sage appears in the multifunction display.
After you have driven for a few minutes, the
system checks whether the current tyre pres-
sures are within the specified range. The new tyre pressures are then accepted as refer-
ence values and monitored.
If you wish to cancel the restart: X Press the %button.
The tyre pressure values stored at the last
restart will continue to be monitored. Changing a wheel
Flat tyre
You can find information on what to do in the
event of a flat tyre in the "Breakdown assis-
tance" section (Y page 247).
Vehicles with an emergency spare wheel: in
the event of a flat tyre, the emergency spare
wheel is fitted according to the description
under "Fitting a wheel" (Y page 268). Interchanging the wheels
G
WARNING
Interchanging the front and rear wheels may
severely impair the driving characteristics if
the wheels or tyres have different dimensions. The wheel brakes or suspension components Changing a wheel
267Wheels and tyres
Z
Page 271 of 289

may also be damaged. There is a risk of acci-
dent.
Interchange front and rear wheels only if the
wheels and tyres are of the same dimensions.
! On vehicles fitted with a tyre pressure mon-
itor, electronic components are located in the wheel.
Tyre-fitting tools should not be applied in thearea of the valve, as this could damage the
electronic components.
Only have tyres changed at a qualified spe-
cialist workshop.
Interchanging front and rear wheels of differing
dimensions can render the general operating
permit invalid.
Observe the instructions and safety notes in the "Fitting a wheel" section (Y page 268).
The wear patterns on the front and rear tyres
differ depending on the operating conditions.
Interchange the wheels before a clear wear pat-
tern has formed on the tyres. Front tyres typi-
cally wear more on the shoulders and the rear
tyres in the centre.
On vehicles that have the same size front and
rear wheels, you can interchange the wheels
every 5000 to 10,000 km depending on the
degree of tyre wear. Ensure the direction of
rotation is maintained.
Clean the contact surfaces of the wheel and the brake disc thoroughly every time a wheel is
interchanged. Check the tyre pressure and reac-
tivate the tyre pressure monitor if necessary. Direction of rotation
Tyres with a specified direction of rotation have additional benefits, e.g. if there is a risk of aqua- planing. These advantages can only be gained if
the tyres are fitted corresponding to the direc-
tion of rotation.
An arrow on the sidewall of the tyre indicates its correct direction of rotation. Storing wheels
Store wheels in a cool, dry and preferably dark
place if they are not being used. Protect the
tyres against oil, grease, petrol and diesel. Fitting a wheel
Preparing the vehicle X
Stop the vehicle on solid, non-slippery and
level ground.
X Apply the electric parking brake manually.
X Move the front wheels to the straight-ahead
position.
X Shift the transmission to position P.
X Switch off the engine.
X Pump the tyre to the specified tyre pres-
sure:
open the driver's door.
The on-board electronics now have status 0.
This is the same as the key having been
removed.
or X Remove the key from the ignition lock.
X If included in the vehicle equipment, remove
the tyre-change tool kit from the vehicle.
X Safeguard the vehicle against rolling away.
i Apart from some country-specific variants,
vehicles are not equipped with tyre-changing
tools. Some tools for changing a wheel are
specific to the vehicle. For more information
on which tools are required to perform a
wheel change on your vehicle, consult a quali- fied specialist workshop.
Necessary tyre-changing tools may include,
for example:
R jack
R wheel chock
R wheel wrench
R centring pin
Securing the vehicle against rolling
away 268
Changing a wheelWheels and tyres
Page 272 of 289
.
The folding wheel chock is an additional secur-
ing measure to safeguard the vehicle from roll")
If your vehicle is equipped with a wheel chock, it
can be found in the tyre-change tool kit
(Y page 246).
The folding wheel chock is an additional secur-
ing measure to safeguard the vehicle from roll-
ing away, for example when changing a wheel.
X Fold both plates upwards :.
X Fold out lower plate ;.
X Insert the lugs on the lower plate fully into the
openings in base plate =.X
Place chocks or other suitable items under
the front and rear of the wheel that is diago-
nally opposite the wheel you wish to change.
Raising the vehicle G
WARNING
If you do not position the jack correctly at the appropriate jacking point of the vehicle, the
jack could tip over with the vehicle raised.
There is a risk of injury.
Only position the jack at the appropriate jack-
ing point of the vehicle. The base of the jack
must be positioned vertically, directly under
the jacking point of the vehicle.
Observe the following when raising the vehi- cle:
R to raise the vehicle, only use the vehicle-spe-
cific jack that has been tested and approved
by Mercedes-Benz. If the jack is used incor-
rectly, it could tip over while the vehicle is
raised.
R the jack is designed only to raise and hold the
vehicle for a short time while a wheel is being
changed. It is not permissible to use it to per- form maintenance work under the vehicle. R
avoid changing the wheel on uphill and down-
hill slopes.
R before raising the vehicle, safeguard it from
rolling away by applying the parking brake and
positioning wheel chocks. Do not release theparking brake while the vehicle is raised.
R the jack must be placed on a firm, flat and
non-slip surface. On a loose surface, a large,
flat load-bearing underlay must be used. On a
slippery surface, a non-slip underlay must be
used, e.g. rubber mats.
R do not use wooden blocks or similar objects
as a jack underlay. Otherwise, the jack will not
be able to achieve its load-bearing capacity
due to the restricted height.
R make sure that the distance between the
underside of the tyres and the ground does
not exceed 3 cm.
R never place your hands or feet under the
raised vehicle.
R do not lie under the vehicle.
R do not start the engine when the vehicle is
raised.
R do not open or close a door or the tailgate
while the vehicle is raised.
R make sure that no persons are present in the
vehicle when the vehicle is raised.
Vehicles with hub caps: the hub cap covers
the wheel bolts. Before you can unscrew the
wheel bolts, you must remove the hub cap. X
To remove: take socket;and wheel wrench
= from the vehicle tool kit (Y page 246).
X Position socket ;on hub cap :.
X Position wheel wrench =on socket ;.
X Using wheel wrench =, turn hub cap:anti-
clockwise and remove it.
X To fit: before fitting, check hub cap :and
the wheel area for soiling and clean if neces-
sary. Changing a wheel
269Wheels and tyres Z
 1
1 2
2 3
3 4
4 5
5 6
6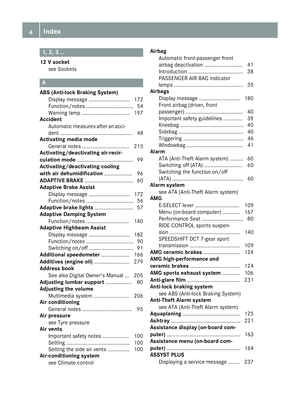 7
7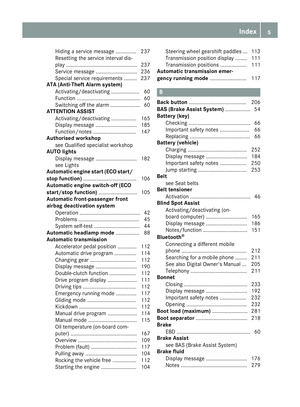 8
8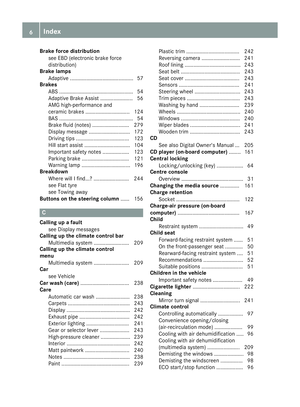 9
9 10
10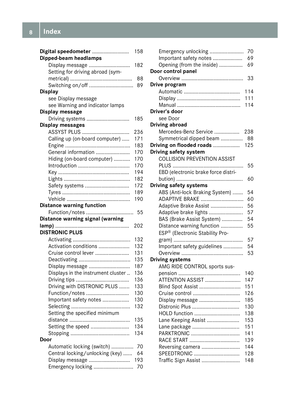 11
11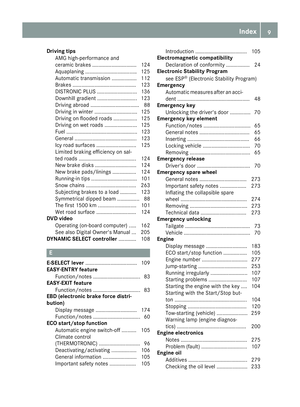 12
12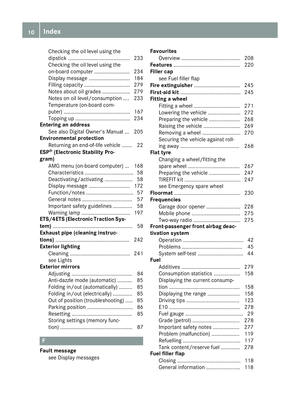 13
13 14
14 15
15 16
16 17
17 18
18 19
19 20
20 21
21 22
22 23
23 24
24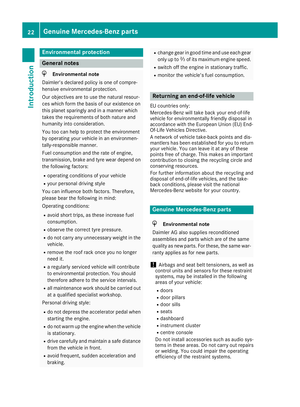 25
25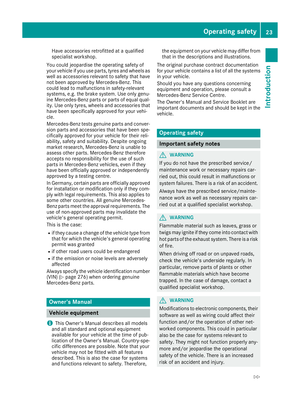 26
26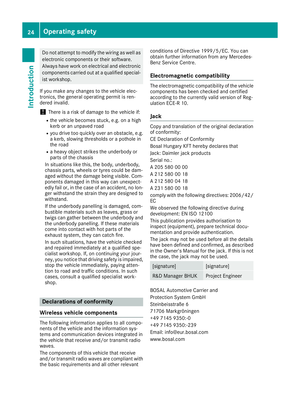 27
27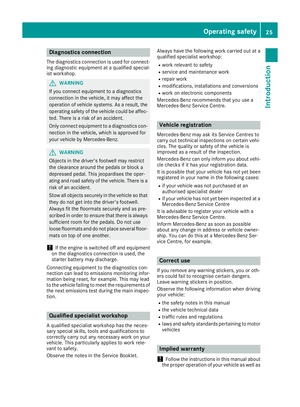 28
28 29
29 30
30 31
31 32
32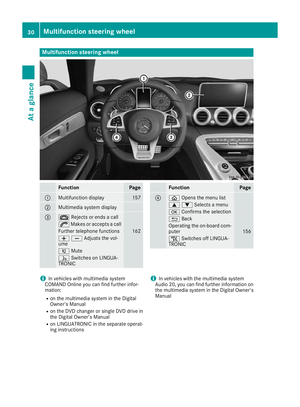 33
33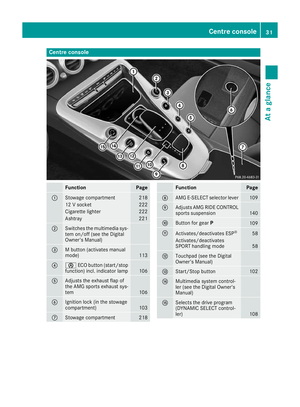 34
34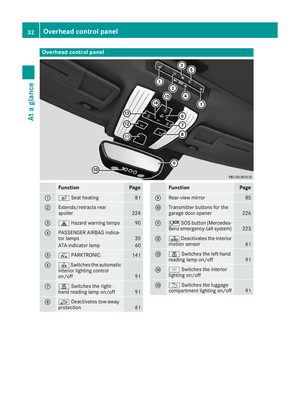 35
35 36
36 37
37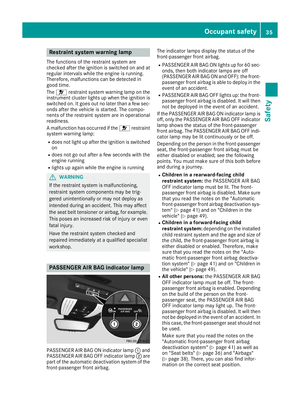 38
38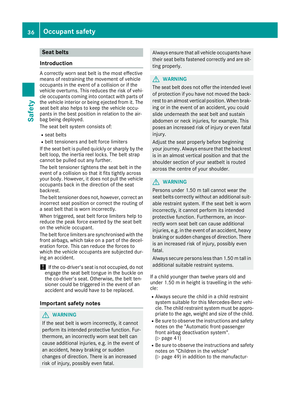 39
39 40
40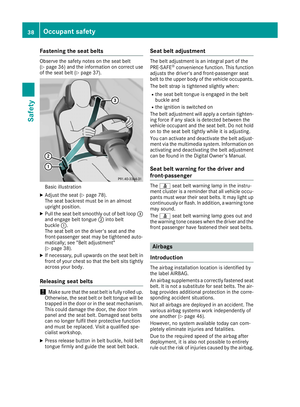 41
41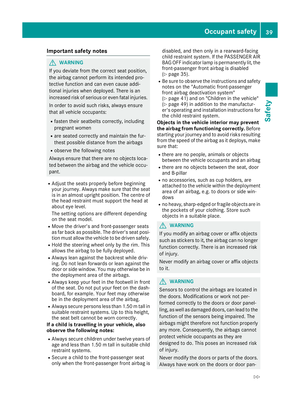 42
42 43
43 44
44 45
45 46
46 47
47 48
48 49
49 50
50 51
51 52
52 53
53 54
54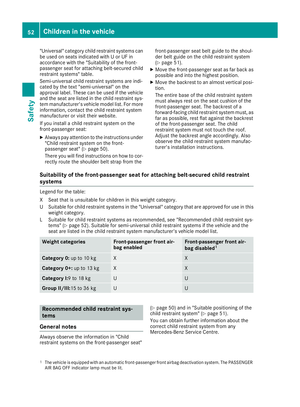 55
55 56
56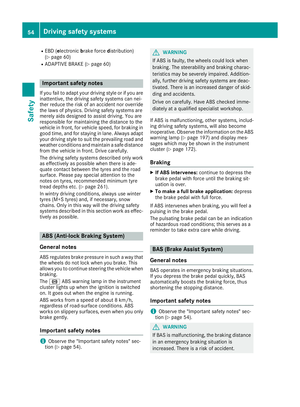 57
57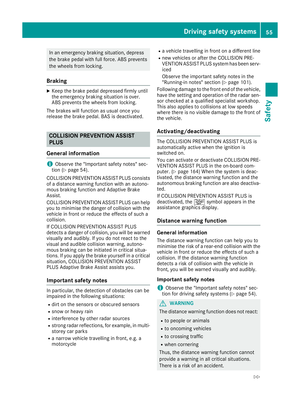 58
58 59
59 60
60 61
61 62
62 63
63 64
64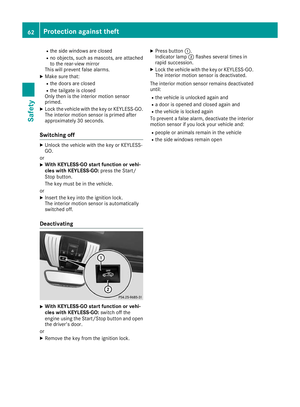 65
65 66
66 67
67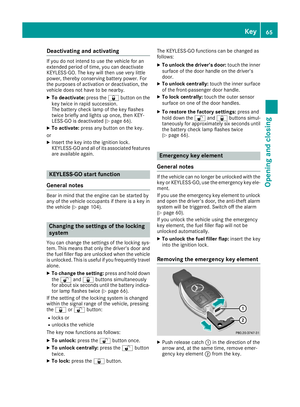 68
68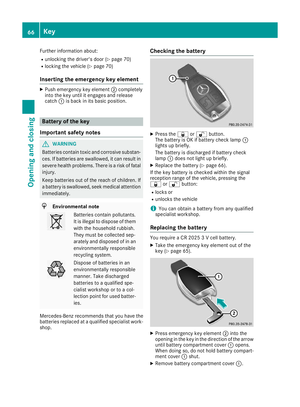 69
69 70
70 71
71 72
72 73
73 74
74 75
75 76
76 77
77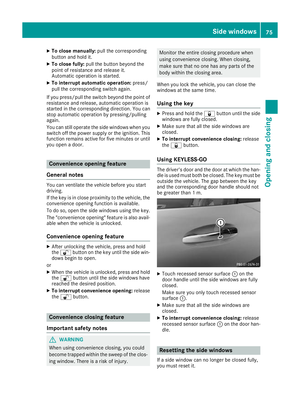 78
78 79
79 80
80 81
81 82
82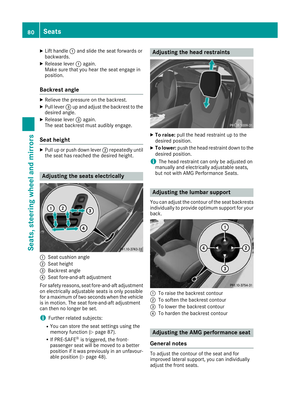 83
83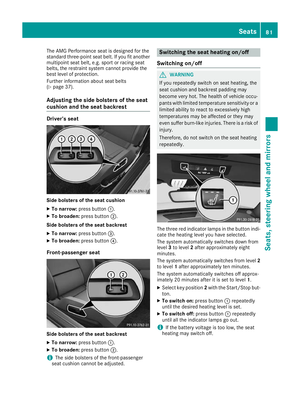 84
84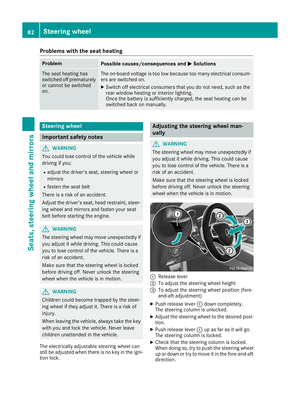 85
85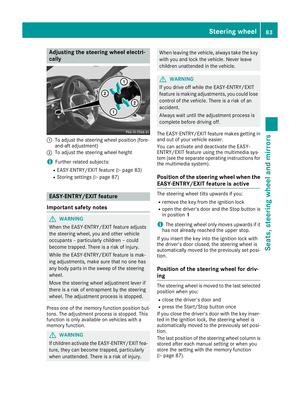 86
86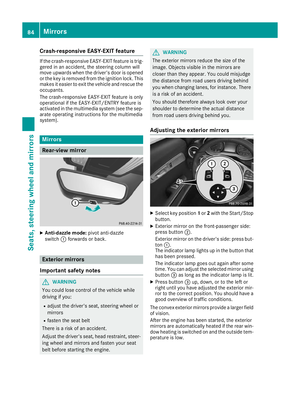 87
87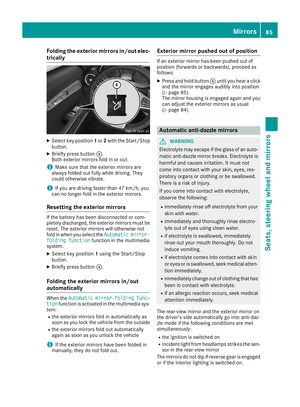 88
88 89
89 90
90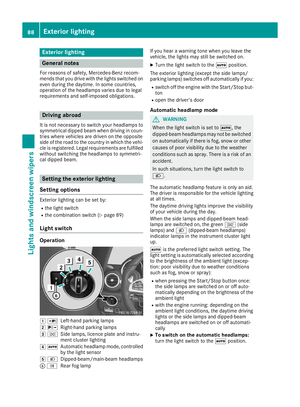 91
91 92
92 93
93 94
94 95
95 96
96 97
97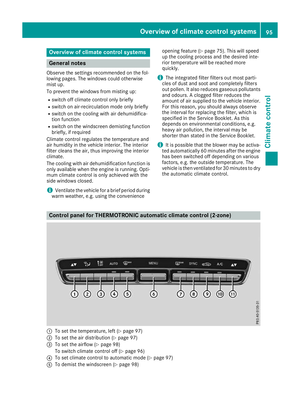 98
98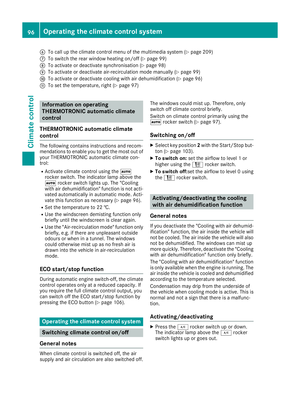 99
99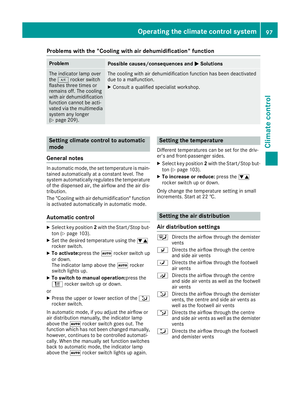 100
100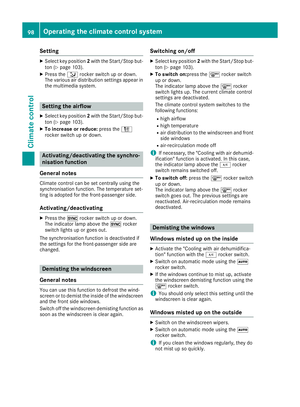 101
101 102
102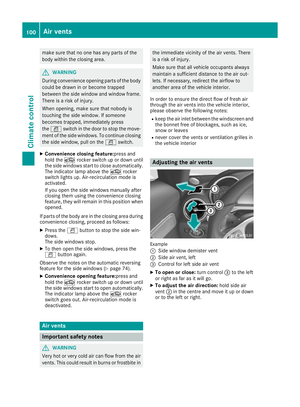 103
103 104
104 105
105 106
106 107
107 108
108 109
109 110
110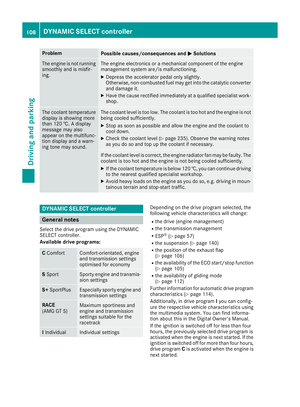 111
111 112
112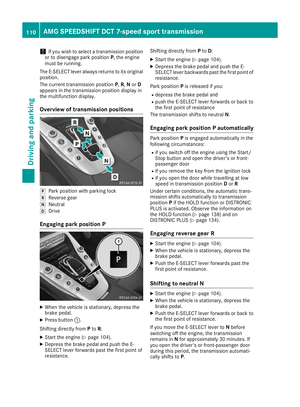 113
113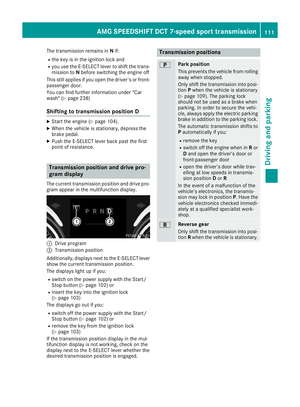 114
114 115
115 116
116 117
117 118
118 119
119 120
120 121
121 122
122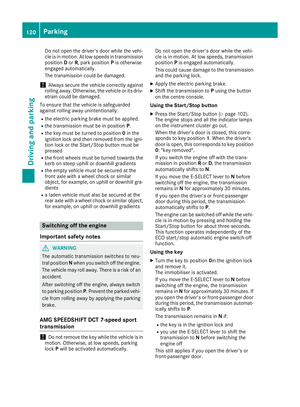 123
123 124
124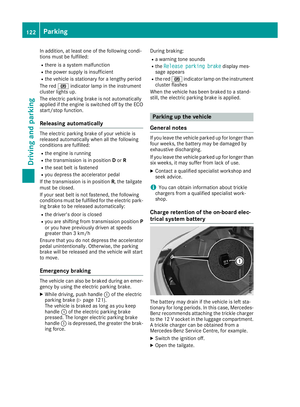 125
125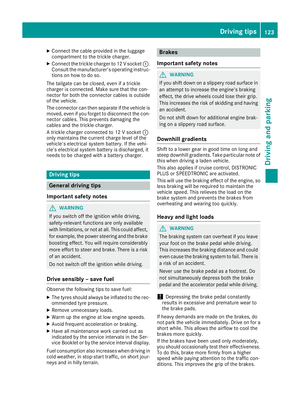 126
126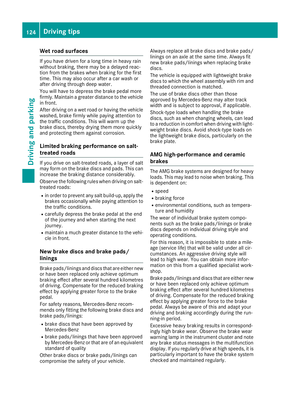 127
127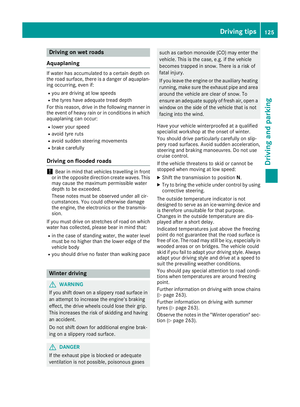 128
128 129
129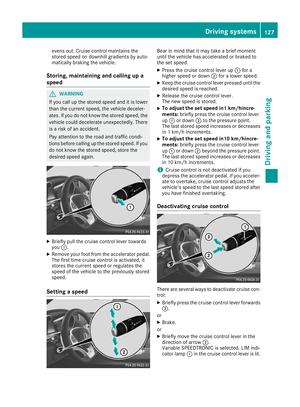 130
130 131
131 132
132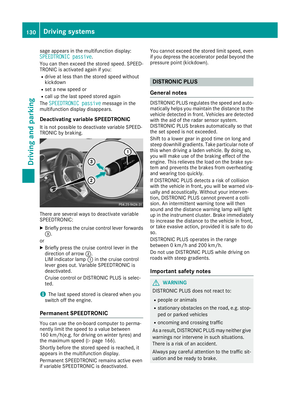 133
133 134
134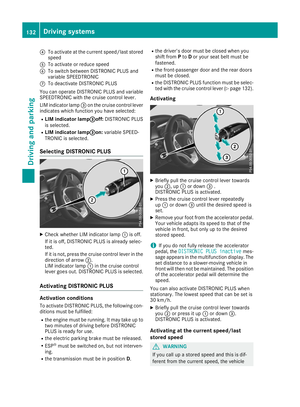 135
135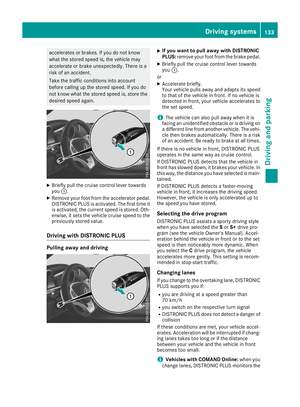 136
136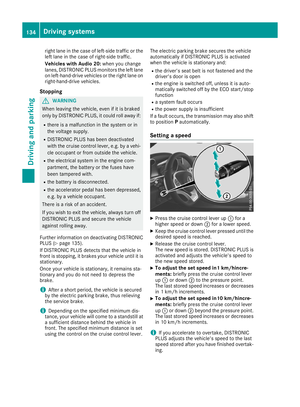 137
137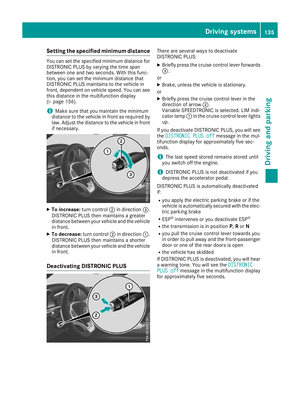 138
138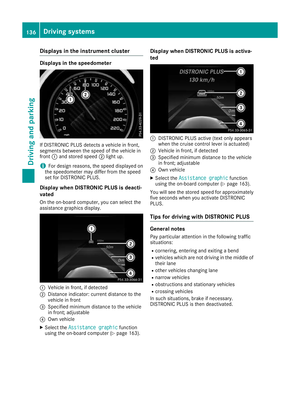 139
139 140
140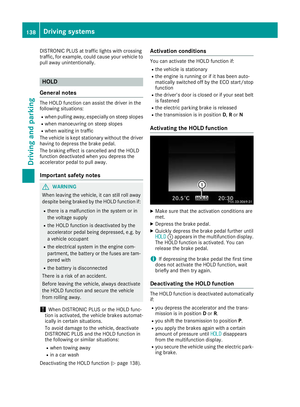 141
141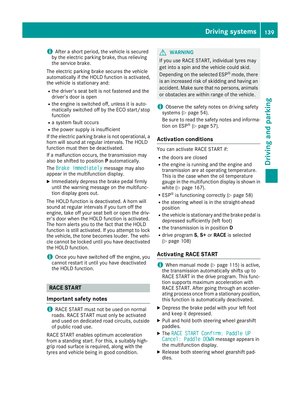 142
142 143
143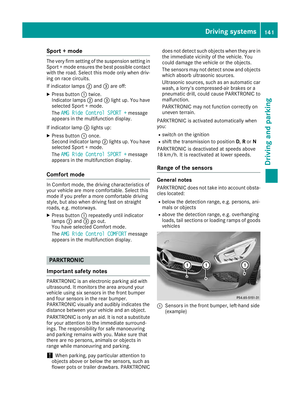 144
144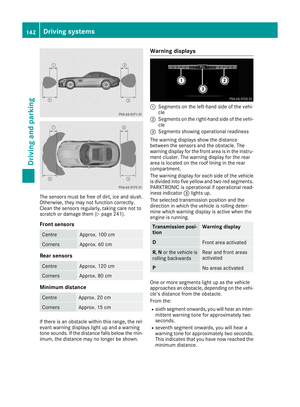 145
145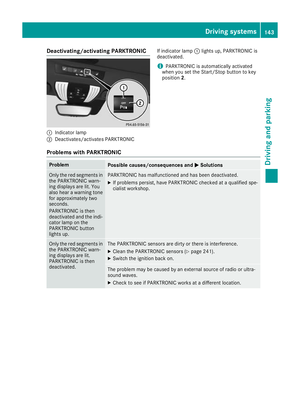 146
146 147
147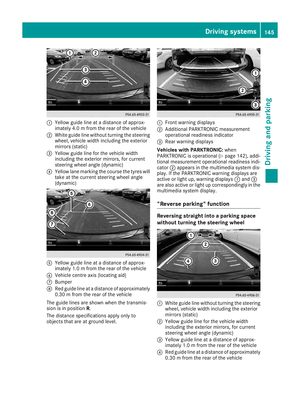 148
148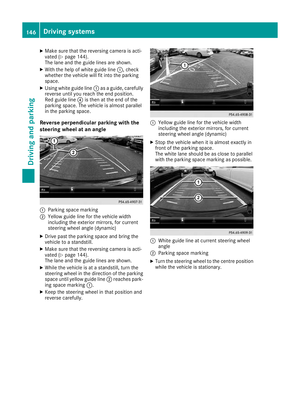 149
149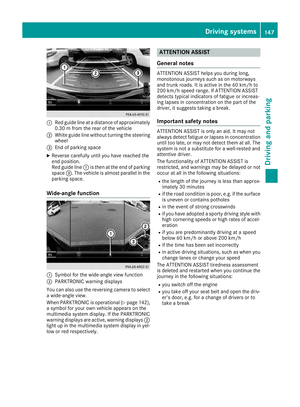 150
150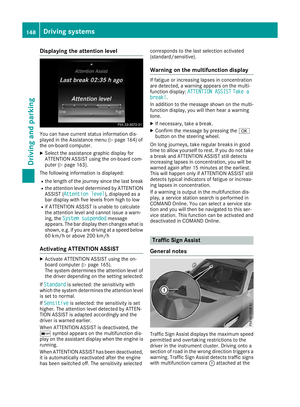 151
151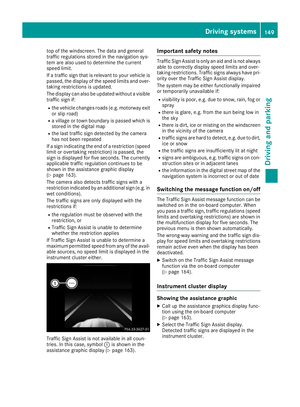 152
152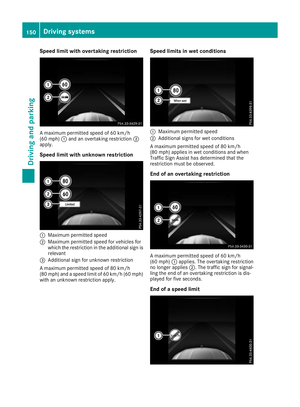 153
153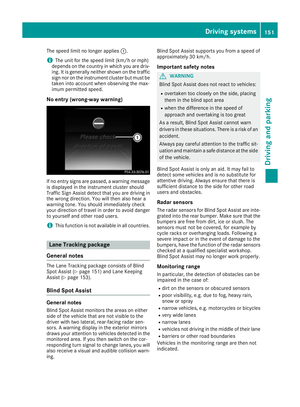 154
154 155
155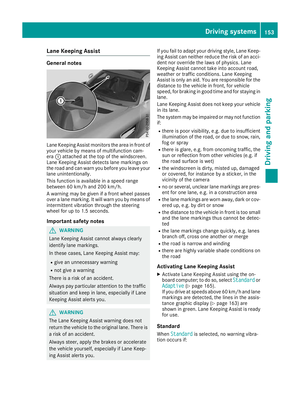 156
156 157
157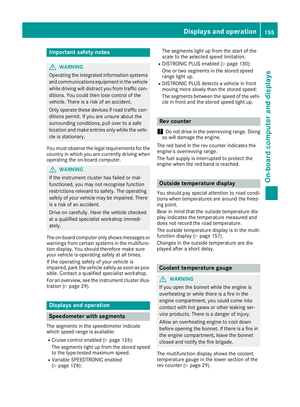 158
158 159
159 160
160 161
161 162
162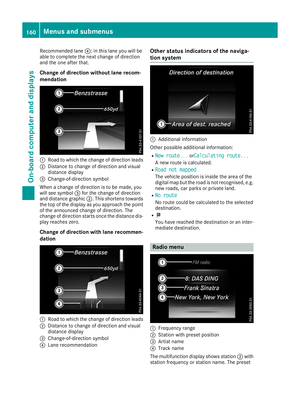 163
163 164
164 165
165 166
166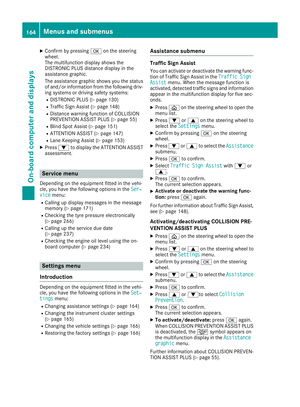 167
167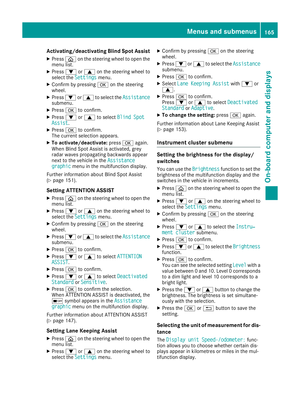 168
168 169
169 170
170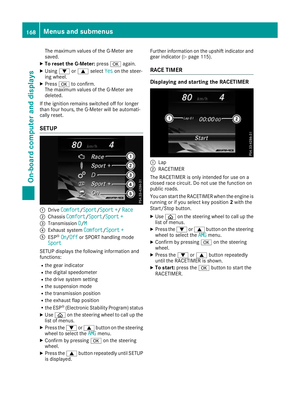 171
171 172
172 173
173 174
174 175
175 176
176 177
177 178
178 179
179 180
180 181
181 182
182 183
183 184
184 185
185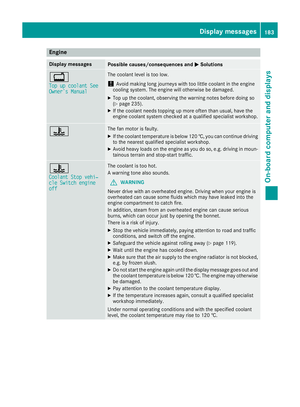 186
186 187
187 188
188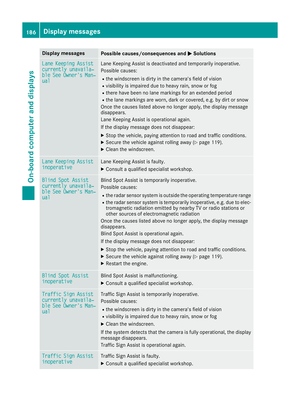 189
189 190
190 191
191 192
192 193
193 194
194 195
195 196
196 197
197 198
198 199
199 200
200 201
201 202
202 203
203 204
204 205
205 206
206 207
207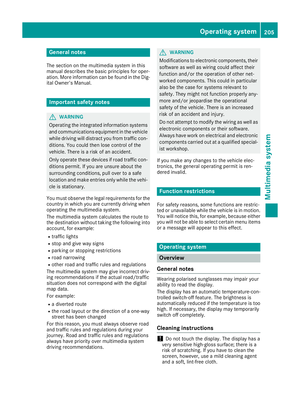 208
208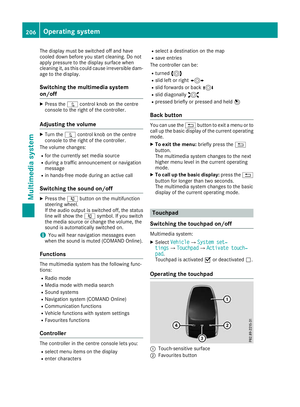 209
209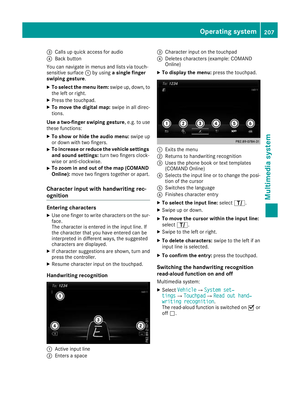 210
210 211
211 212
212 213
213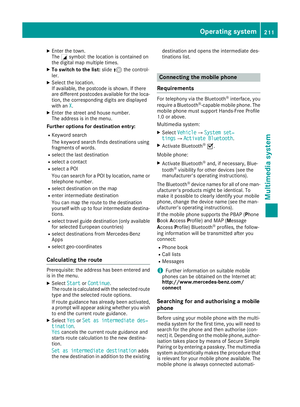 214
214 215
215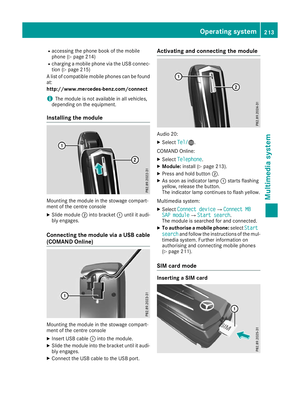 216
216 217
217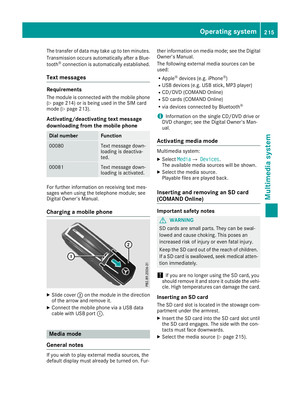 218
218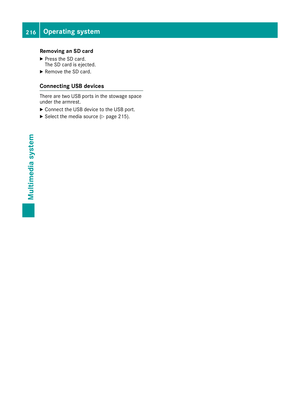 219
219 220
220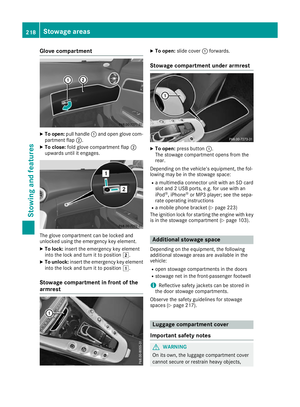 221
221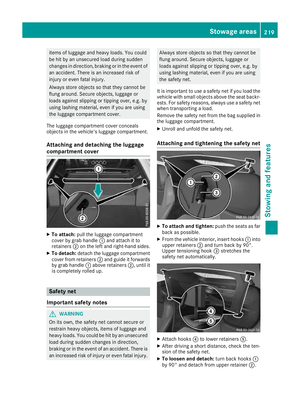 222
222 223
223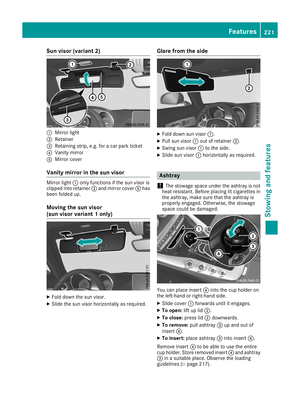 224
224 225
225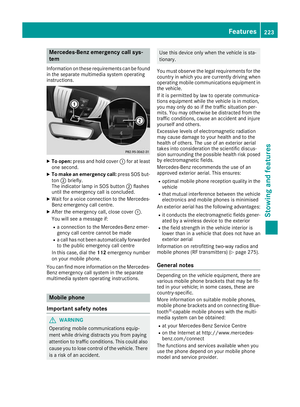 226
226 227
227 228
228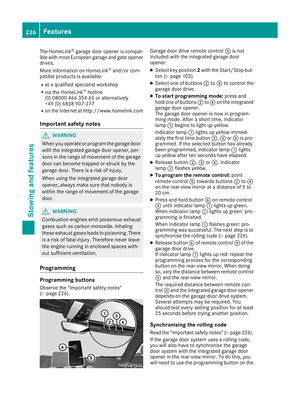 229
229 230
230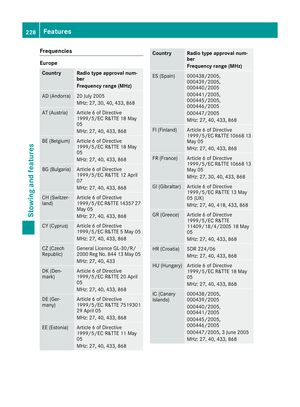 231
231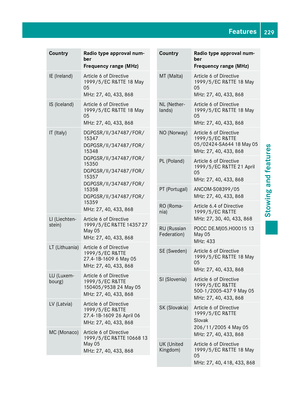 232
232 233
233 234
234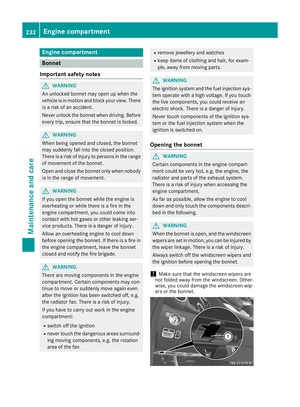 235
235 236
236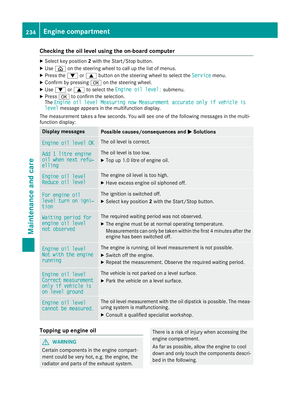 237
237 238
238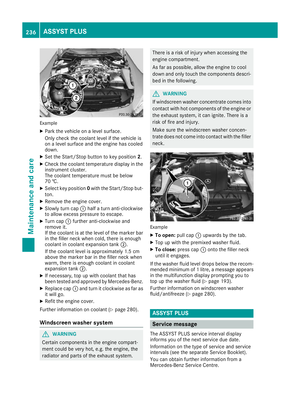 239
239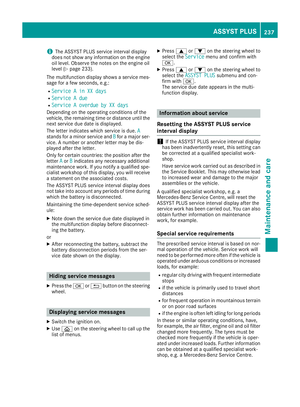 240
240 241
241 242
242 243
243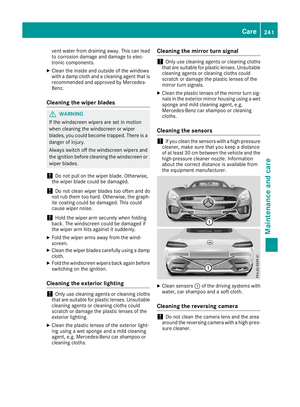 244
244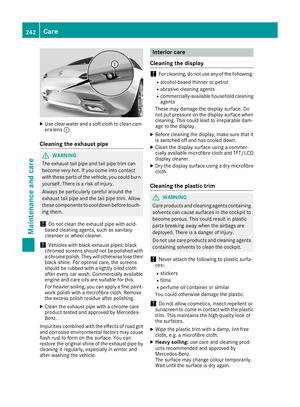 245
245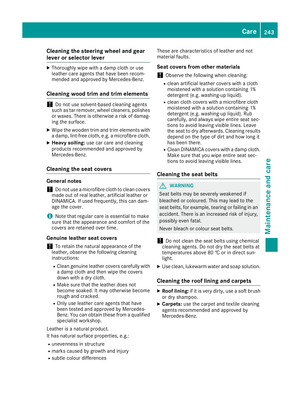 246
246 247
247 248
248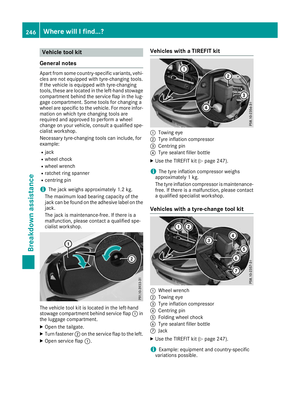 249
249 250
250 251
251 252
252 253
253 254
254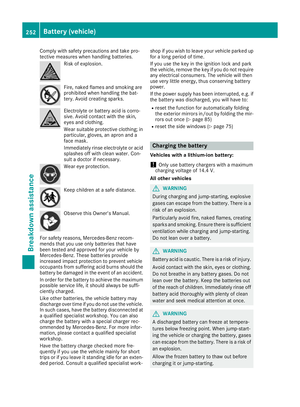 255
255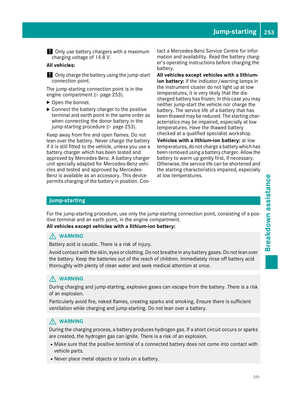 256
256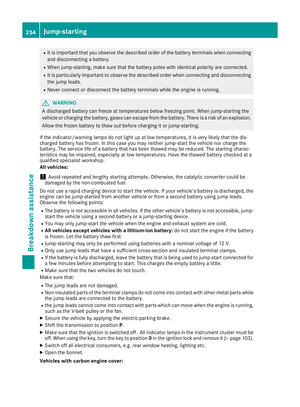 257
257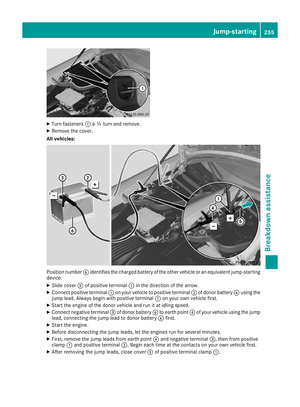 258
258 259
259 260
260 261
261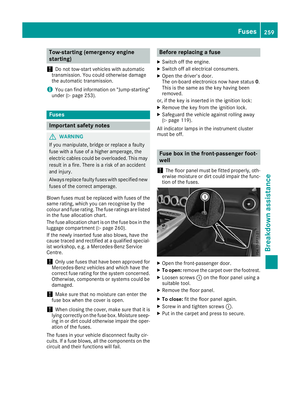 262
262 263
263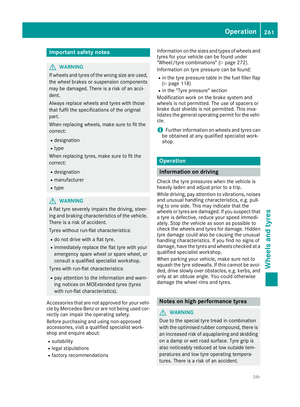 264
264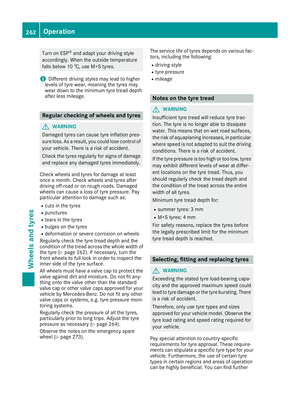 265
265 266
266 267
267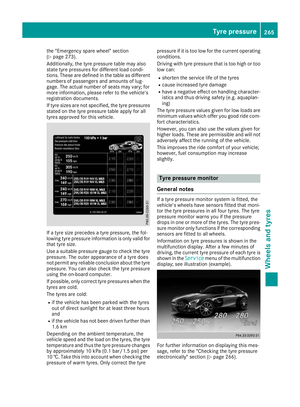 268
268 269
269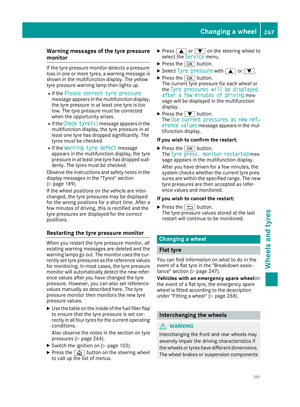 270
270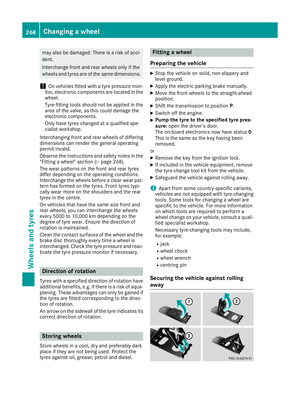 271
271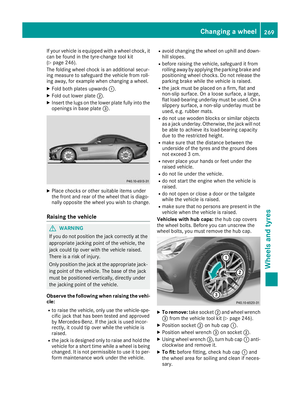 272
272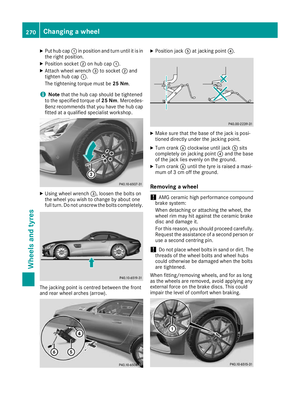 273
273 274
274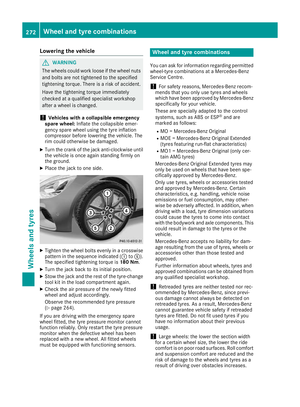 275
275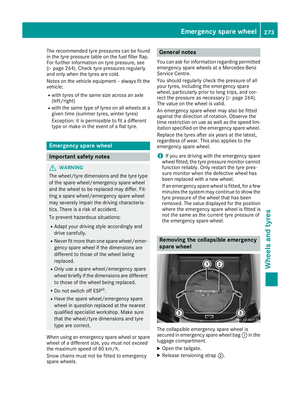 276
276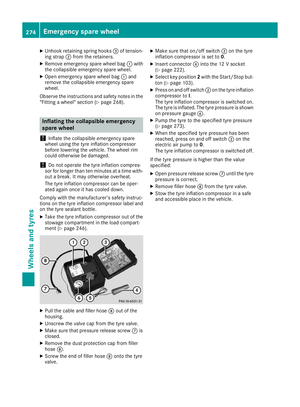 277
277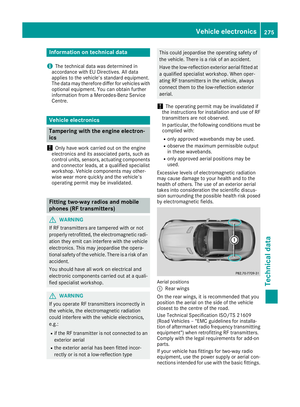 278
278 279
279 280
280 281
281 282
282 283
283 284
284 285
285 286
286 287
287 288
288