2016 MERCEDES-BENZ AMG GT ROADSTER reset
[x] Cancel search: resetPage 8 of 289

Hiding a service message .............. 237
Resetting the service interval dis-
play ................................................ 237
Service message ............................ 236
Special service requirements ......... 237
ATA (Anti-Theft Alarm system)
Activating/deactivating ................... 60
Function ........................................... 60
Switching off the alarm .................... 60
ATTENTION ASSIST
Activating/deactivating ................. 165
Display messag e............................ 185
Function/note s............................. 147
Authorised workshop
see Qualified specialist workshop
AUTO lights
Display message ............................ 182
see Lights
Automatic engine start (ECO start/
stop function) .................................... 106
Automatic engine switch-off (ECO
start/stop function) .......................... 105
Automatic front-passenger front
airbag deactivation system
Operation ......................................... 42
Problems ......................................... 45
System self-test ............................... 44
Automatic headlamp mode ................ 88
Automatic transmission
Accelerator pedal position ............. 112
Automatic drive program ............... 114
Changing gear ............................... 112
Display message ............................ 190
Double-clutch function .................. 112
Drive program display .................... 111
Driving tips .................................... 112
Emergency running mode .............. 117
Gliding mod e................................. 112
Kickdown ....................................... 112
Manual drive progra m.................... 114
Manual mod e................................. 115
Oil temperature (on-board com-
puter) ............................................. 167
Overview ........................................ 109
Problem (fault) ............................... 117
Pulling away ................................... 104
Rocking the vehicle free ................ 112
Starting the engine ........................ 104 Steering wheel gearshift paddle
s... 113
Transmission position display ........ 111
Transmission positions .................. 111
Automatic transmission emer-
gency running mode ......................... 117 B
Back button ....................................... 206
BAS (Brake Assist System) ................. 54
Battery (key)
Checking .......................................... 66
Important safety notes .................... 66
Replacing ......................................... 66
Battery (vehicle)
Charging ........................................ 252
Display message ............................ 184
Important safety notes .................. 250
Jump starting ................................. 253
Belt
see Seat belts
Belt tensioner
Activation ......................................... 46
Blind Spot Assist
Activating/deactivating (on-
board computer) ............................ 165
Display message ............................ 186
Notes/function .............................. 151
Bluetooth ®
Connecting a different mobile
phone ............................................ 212
Searching for a mobile phone ........ 211
See also Digital Owner's Manua l... 205
Telephony ...................................... 211
Bonnet
Closing ........................................... 233
Display message ............................ 192
Important safety notes .................. 232
Opening ......................................... 232
Boot load (maximum) ........................ 281
Boot separator ................................... 218
Brake
EBD .................................................. 60
Brake Assist
see BAS (Brake Assist System)
Brake fluid
Display message ............................ 176
Notes ............................................. 279 Index
5
Page 13 of 289
Checking the oil level using the
dipstick .......................................... 233
Checking the oil level using the
on-board computer ........................ 234
Display message ............................ 184
Filling capacity .............................. .279
Notes about oil grades ................... 279
Notes on oil level/consumption .... 233
Temperature (on-board com-
puter) ............................................. 167
Topping up ..................................... 234
Entering an address
See also Digital Owner's Manual ... 205
Environmental protection
Returning an end-of-life vehicle ....... 22
ESP ®
(Electronic Stability Pro-
gram)
AMG menu (on-board computer) ... 168
Characteristics ................................. 58
Deactivating/activating ................... 58
Display message ............................ 172
Function/notes ................................ 57
General notes .................................. 57
Important safety guidelines ............. 58
Warning lamp ................................. 197
ETS/4ETS (Electronic Traction Sys-
tem) ...................................................... 58
Exhaust pipe (cleaning instruc-
tions) ................................................. .242
Exterior lighting
Cleaning ......................................... 241
see Lights
Exterior mirrors
Adjusting ......................................... 84
Anti-dazzle mode (automatic) .......... 85
Folding in/out (automatically) ......... 85
Folding in/out (electrically) ............. 85
Out of position (troubleshooting) ..... 85
Parking position ............................... 86
Resetting ......................................... 85
Storing settings (memory func-
tion) ................................................. 87 F
Fault message see Display messages Favourites
Overview ........................................ 208
Features ............................................. 220
Filler cap
see Fuel filler flap
Fire extinguisher ............................... 245
First-aid kit ......................................... 245
Fitting a wheel
Fitting a wheel ............................... 271
Lowering the vehicle ...................... 272
Preparing the vehicle ..................... 268
Raising the vehicle ......................... 269
Removing a whee l.......................... 270
Securing the vehicle against roll-
ing away ........................................ 268
Flat tyre
Changing a wheel/fitting the
spare whee l................................... 267
Preparing the vehicle ..................... 247
TIREFIT kit ...................................... 247
see Emergency spare wheel
Floormat ............................................. 230
Frequencies
Garage door opener ....................... 228
Mobile phone ................................. 275
Two-way radio ................................ 275
Front-passenger front airbag deac-
tivation system
Operation ......................................... 42
Problems ......................................... 45
System self-test ............................... 44
Fuel
Additives ........................................ 279
Consumption statistics .................. 158
Displaying the current consump-
tion ................................................ 158
Displaying the range ...................... 158
Driving tip s.................................... 123
E10 ................................................ 278
Fuel gauge ....................................... 29
Grade (petrol) ................................ 278
Important safety notes .................. 277
Problem (malfunction) ................... 119
Refuelling ....................................... 117
Tank content/reserve fue l............. 278
Fuel filler flap
Closing ........................................... 118
General information ....................... 118 10
Index
Page 19 of 289
Roof lining and carpets (cleaning
instructions)
...................................... 243
Route guidance
See also Digital Owner's Manua l... 205 S
Safety Children in the vehicle ..................... 49
see Occupant safety
see Operating safety
Safety net ........................................... 219
Safety system
see Driving safety systems
SD card
Inserting/removing ........................ 215
SD memory card
See also Digital Owner's Manua l... 205
Selecting ........................................ 161
Seat
Adjusting (Performance Seat) .......... 80
Seat belt
Correct usage .................................. 37
Seat belts
Adjusting the driver's and front-
passenger seat belt ......................... 38
Cleaning ......................................... 243
Fastening ......................................... 38
Important safety guidelines ............. 36
Introduction ..................................... 36
Releasing ......................................... 38
Warning lamp ................................. 195
Warning lamp (function) ................... 38
Seats
Adjusting (electrically) ..................... 80
Adjusting (manually) ........................ 79
Adjusting lumbar support ................ 80
Adjusting the head restraint ............ 80
Cleaning the cover ......................... 243
Correct driver's seat position ........... 78
Important safety notes .................... 78
Seat heating problem ...................... 82
Storing settings (memory func-
tion) ................................................. 87
Switching seat heating on/of f......... 81
Selector lever
Cleaning ......................................... 243
Positions ........................................ 109 Sensors (cleaning instructions)
....... 241
Service
see ASSYST PLUS
Service Centre
see Qualified specialist workshop
Service menu (on-board com-
puter) .................................................. 164
Service message
see ASSYST PLUS
Service products
Brake fluid ..................................... 279
Coolant (engine) ............................ 280
Engine oil ....................................... 279
Fuel ................................................ 277
Important safety notes .................. 277
Washer fluid ................................... 280
Setting the date/time format
See also Digital Owner's Manua l... 205
Setting the language
See also Digital Owner's Manua l... 205
Setting the time
See also Digital Owner's Manua l... 205
Settings
Factory (on-board computer) ......... 166
On-board compute r....................... 164
SETUP (on-board computer) ............. 168
Side lamps
Switching on/of f.............................. 89
Side windows
Convenience closing ........................ 75
Convenience opening ...................... 75
Important safety notes .................... 74
Opening/closing .............................. 74
Problem (malfunction) ..................... 76
Resetting ......................................... 75
Reversing feature ............................. 74
Sidebag ................................................ 40
SIM card
Inserting ........................................ 213
SMS
See also Digital Owner's Manua l... 205
Snow chains ...................................... 263
Socket
Luggage compartment ................... 222
Sockets
Centre console .............................. 222
General notes ................................ 222 16
Index
Page 22 of 289
Trim pieces (cleaning instruc-
tions)
.................................................. 243
Trip computer (on-board com-
puter) .................................................. 158
Trip meter
Calling up ....................................... 157
Resetting (on-board computer) ...... 158
Turn signals
Switching on/off .............................. 89
Two-way radio
Frequencies ................................... 275
Installation ..................................... 275
Transmission output (maximum) .... 275
Type identification plate
see Vehicle identification plate
Tyre changing tool kit ....................... 246
Tyre inflation compressor
see TIREFIT kit
Tyre pressure
Calling up (on-board computer) ..... 265
Display message ............................ 189
Not reached (TIREFIT) .................... 249
Reached (TIREFIT) .......................... 249
Recommended ............................... 264
Tyre pressure monitor
Checking the tyre pressure elec-
tronically ........................................ 266
Function/note s............................. 265
General notes ................................ 265
Important safety notes .................. 266
Restarting ...................................... 267
Warning lamp ................................. 203
Warning message .......................... 267
Tyres
Changing a whee l.......................... 267
Checking ........................................ 262
Direction of rotation ...................... 268
Display message ............................ 189
Important safety notes .................. 261
Information on driving .................... 261
Replacing ....................................... 267
Service life ..................................... 262
Storing ........................................... 268
Summer tyres in winter ................. 263
Tyre size (data ).............................. 272
Tyre tread ...................................... 262
Wheel and tyre combinations ........ 272
see Flat tyre U
Unlocking Emergency unlocking ....................... 70
From inside the vehicle (central
unlocking button) ............................. 70
USB devices
Connecting to the Media Inter-
face ............................................... 216 V
Vanity mirror (in sun visor) .............. 221
Vehicle
Correct use ...................................... 25
Data acquisition ............................... 26
Display message ............................ 190
Electronics ..................................... 275
Equipment ....................................... 23
Implied warranty .............................. 25
Individual settings .......................... 164
Leaving parked up ......................... 122
Locking (in an emergency) ............... 70
Locking (key) ................................... 64
Lowering ........................................ 272
Operating safety .............................. 23
Parking .......................................... 119
Pulling away ................................... 104
Raising ........................................... 269
Registration ..................................... 25
Securing from rolling away ............ 268
Towing away .................................. 256
Transporting .................................. 258
Unlocking (in an emergency) ........... 70
Unlocking (key) ................................ 64
Vehicle data ................................... 281
Vehicle data
Boot load (maximum) ..................... 281
Vehicle dimensions ........................... 281
Vehicle emergency locking ................ 70
Vehicle identification number
see VIN
Vehicle identification plate .............. 276
Vehicle tool kit .................................. 246
Video
Operating the DVD ......................... 162
See also Digital Owner's Manua l... 205 Index
19
Page 28 of 289
Diagnostics connection
The diagnostics connection is used for connect- ing diagnostic equipment at a qualified special-
ist workshop. G
WARNING
If you connect equipment to a diagnostics
connection in the vehicle, it may affect the
operation of vehicle systems. As a result, the operating safety of the vehicle could be affec-
ted. There is a risk of an accident.
Only connect equipment to a diagnostics con-
nection in the vehicle, which is approved for
your vehicle by Mercedes-Benz. G
WARNING
Objects in the driver's footwell may restrict
the clearance around the pedals or block a
depressed pedal. This jeopardises the oper-
ating and road safety of the vehicle. There is a risk of an accident.
Stow all objects securely in the vehicle so that
they do not get into the driver's footwell.
Always fit the floormats securely and as pre-
scribed in order to ensure that there is always sufficient room for the pedals. Do not use
loose floormats and do not place several floor- mats on top of one another.
! If the engine is switched off and equipment
on the diagnostics connection is used, the
starter battery may discharge.
Connecting equipment to the diagnostics con-
nection can lead to emissions monitoring infor-
mation being reset, for example. This may lead
to the vehicle failing to meet the requirements of
the next emissions test during the main inspec- tion. Qualified specialist workshop
A qualified specialist workshop has the neces-
sary special skills, tools and qualifications to
correctly carry out any necessary work on your
vehicle. This particularly applies to work rele-
vant to safety.
Observe the notes in the Service Booklet. Always have the following work carried out at a
qualified specialist workshop:
R work relevant to safety
R service and maintenance work
R repair work
R modifications, installations and conversions
R work on electronic components
Mercedes-Benz recommends that you use a
Mercedes-Benz Service Centre. Vehicle registration
Mercedes-Benz may ask its Service Centres to
carry out technical inspections on certain vehi-
cles. The quality or safety of the vehicle is
improved as a result of the inspection.
Mercedes-Benz can only inform you about vehi-
cle checks if it has your registration data.
It is possible that your vehicle has not yet been
registered in your name in the following cases:
R if your vehicle was not purchased at an
authorised specialist dealer
R if your vehicle has not yet been inspected at a
Mercedes-Benz Service Centre
It is advisable to register your vehicle with a
Mercedes-Benz Service Centre.
Inform Mercedes-Benz as soon as possible
about any change in address or vehicle owner-
ship. You can do this at a Mercedes-Benz Ser-
vice Centre, for example. Correct use
If you remove any warning stickers, you or oth-
ers could fail to recognise certain dangers.
Leave warning stickers in position.
Observe the following information when driving
your vehicle:
R the safety notes in this manual
R the vehicle technical data
R traffic rules and regulations
R laws and safety standards pertaining to motor
vehicles Implied warranty
! Follow the instructions in this manual about
the proper operation of your vehicle as well as Operating safety
25Introduction Z
Page 77 of 289
X
Push carpet :down.
X Pull the cable behind the carpet :until the
tailgate unlocks.
The tailgate opens slightly.
X Raise the tailgate.
When you close the tailgate, it is also locked at
the same time. Side windows
Important safety notes
G
WARNING
While opening the side windows, body parts
could become trapped between the side win- dow and the door frame as the side window
moves. There is a risk of injury.
Make sure that nobody touches the side win-
dow during the opening procedure. If some-
body becomes trapped, release the switch or pull the switch to close the side window again. G
WARNING
While closing the side windows, body parts in the closing area could become trapped. There is a risk of injury.
When closing make sure that no parts of the
body are in the closing area. If somebody
becomes trapped, release the switch or press
the switch to open the side window again. G
WARNING
Children could become trapped if they oper-
ate the side windows, particularly when unat- tended. There is a risk of injury.
When leaving the vehicle, always take the key
with you and lock the vehicle. Never leave
children unattended in the vehicle. Side window reversing feature
The side windows are equipped with an auto-
matic reversing feature. If a solid object blocks
or restricts a side window from travelling
upwards during the automatic closing process,
the side window opens again automatically. Dur- ing the manual closing process, the side window only opens again automatically after the corre-
sponding switch is released. The automatic
reversing feature is only an aid and is no substi-
tute for your attention when closing a side win-
dow. G
WARNING
The reversing function does not react:
R to soft, light and thin objects, e.g. small fin-
gers
R while resetting
This means that the reversing feature cannot
prevent someone being trapped in these sit-
uations. There is a risk of injury.
When closing, make sure that no parts of the
body are in the closing area. If someone
becomes trapped, press the switch to open
the side window again. Opening and closing the side win-
dows
The switches for all side windows are located on
the driver's door. There is also a switch on the
front-passenger door for the corresponding side
window.
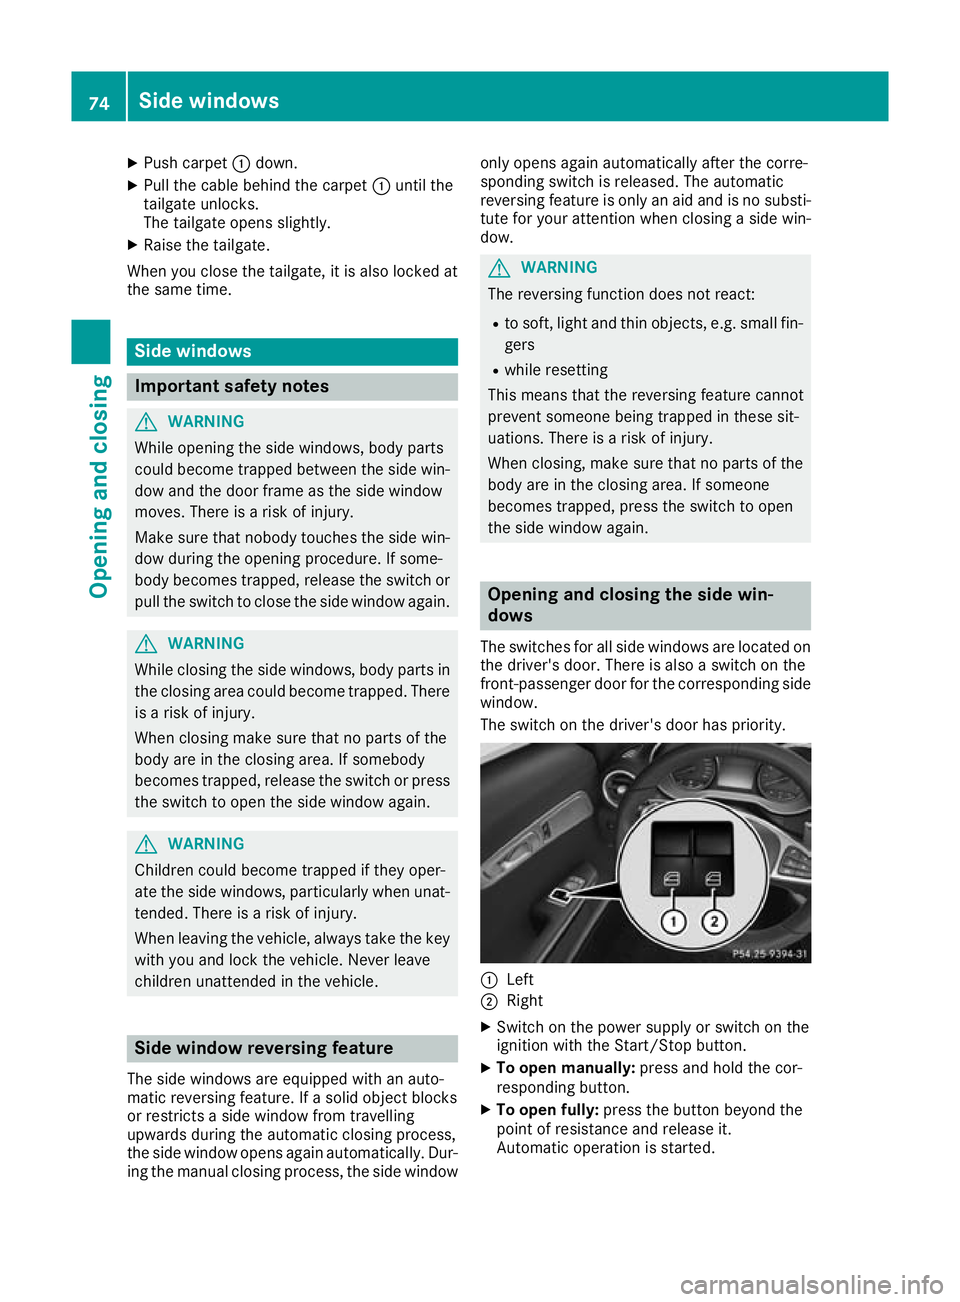
The switch on the driver's door has priority. :
Left
; Right
X Switch on the power supply or switch on the
ignition with the Start/Stop button.
X To open manually: press and hold the cor-
responding button.
X To open fully: press the button beyond the
point of resistance and release it.
Automatic operation is started. 74
Side windowsOpening and closing
Page 78 of 289
X
To close manually: pull the corresponding
button and hold it.
X To close fully: pull the button beyond the
point of resistance and release it.
Automatic operation is started.
X To interrupt automatic operation: press/
pull the corresponding switch again.
If you press/pull the switch beyond the point of resistance and release, automatic operation is
started in the corresponding direction. You can
stop automatic operation by pressing/pulling
again.
You can still operate the side windows when you switch off the power supply or the ignition. This
function remains active for five minutes or until
you open a door. Convenience opening feature
General notes You can ventilate the vehicle before you start
driving.
If the key is in close proximity to the vehicle, the
convenience opening function is available.
To do so, open the side windows using the key.
The "convenience opening" feature is also avail-
able when the vehicle is unlocked.
Convenience opening feature X
After unlocking the vehicle, press and hold
the % button on the key until the side win-
dows begin to open.
or X When the vehicle is unlocked, press and hold
the % button until the side windows have
reached the desired position.
X To interrupt convenience opening: release
the % button. Convenience closing feature
Important safety notes G
WARNING
When using convenience closing, you could
become trapped within the sweep of the clos- ing window. There is a risk of injury. Monitor the entire closing procedure when
using convenience closing. When closing,
make sure that no one has any parts of the
body within the closing area.
When you lock the vehicle, you can close the
windows at the same time.
Using the key X
Press and hold the &button until the side
windows are fully closed.
X Make sure that all the side windows are
closed.
X To interrupt convenience closing: release
the & button.
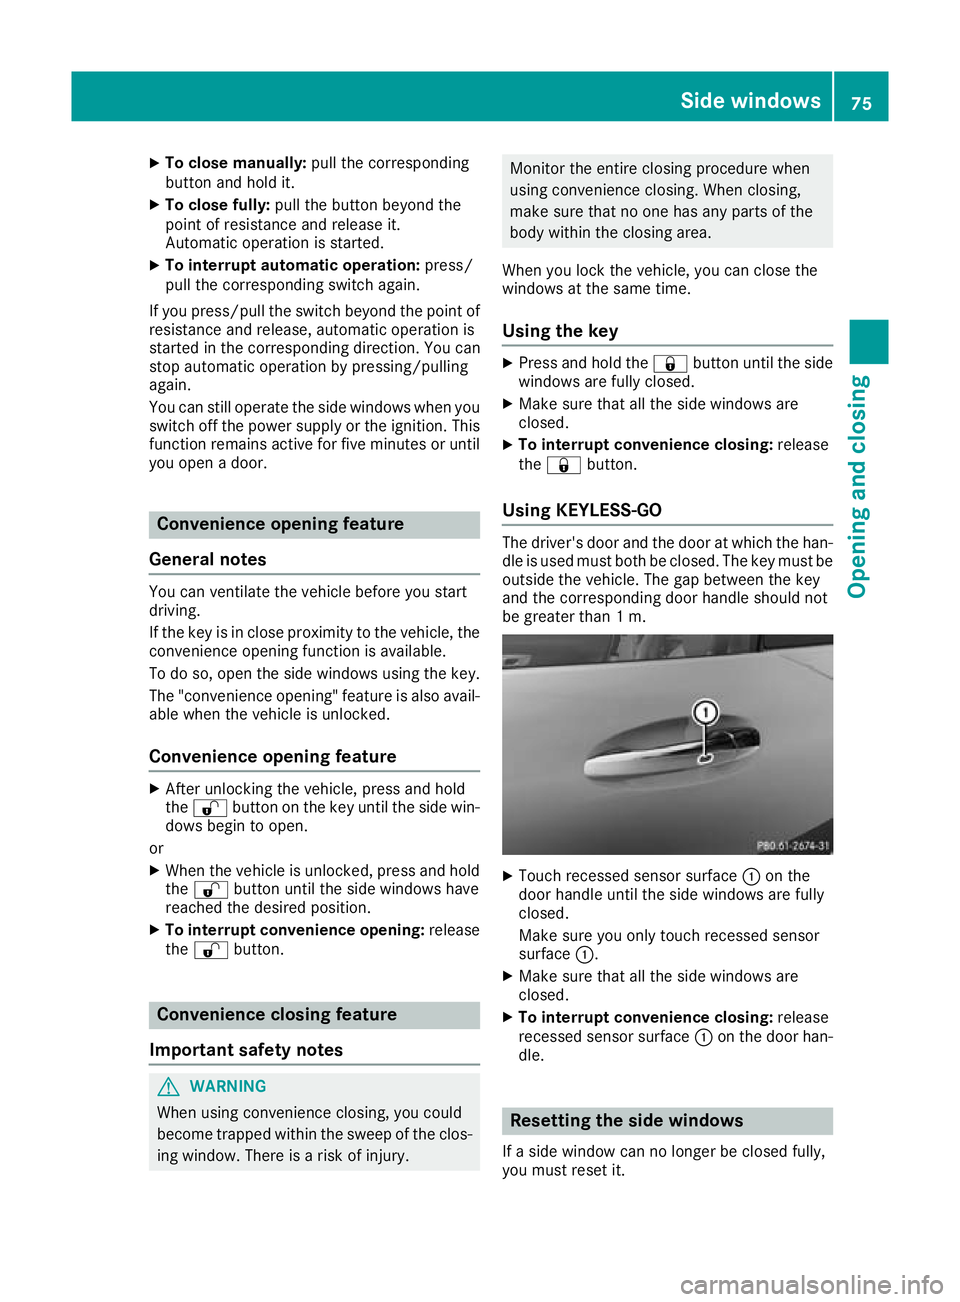
Using KEYLESS-GO The driver's door and the door at which the han-
dle is used must both be closed. The key must beoutside the vehicle. The gap between the key
and the corresponding door handle should not
be greater than 1 m. X
Touch recessed sensor surface :on the
door handle until the side windows are fully
closed.
Make sure you only touch recessed sensor
surface :.
X Make sure that all the side windows are
closed.
X To interrupt convenience closing: release
recessed sensor surface :on the door han-
dle. Resetting the side windows
If a side window can no longer be closed fully,
you must reset it. Side windows
75Opening and closing Z
Page 79 of 289
X
Close all doors.
X Switch on the power supply or switch on the
ignition with the Start/Stop button.
X Pull the corresponding switch on the door
control panel until the side window is com-
pletely closed (Y page 74).
X Hold the switch for an additional second. If the side window opens again slightly:
X Immediately pull the corresponding switch on
the door control panel until the side window is completely closed (Y page 74).
X Hold the switch for an additional second.
X If the corresponding side window remains
closed after the button has been released, the side window has been reset correctly. If this is
not the case, repeat the steps above again. Problems with the side windows
G
WARNING
If you close a side window again immediately after it has been blocked or reset, the side window
closes with increased or maximum force. The reversing function is then not active. Parts of the
body could be trapped in the closing area in the process. This poses an increased risk of injury or even fatal injury.
Make sure that no parts of the body are in the closing area. To stop the closing process, releasethe switch or push the switch again to reopen the side window. Problem
Possible causes/consequences and
M MSolutions A side window cannot be
closed because it is
blocked by objects, e.g.
leaves in the window
guide. X
Remove the objects.
X Close the side window. A side window cannot be
closed and you cannot
see the cause. If a side window is obstructed during closing and reopens again
slightly:
X Immediately after the window blocks, pull the corresponding switch
again until the side window has closed.
The side window is closed with increased force.
If a side window is obstructed again during closing and reopens again slightly:
X Immediately after the window blocks, pull the corresponding switch
again until the side window has closed.
The side window is closed without the automatic reversing feature. 76
Side windowsOpening and closing