Page 225 of 289

Cigarette lighter
G
WARNING
You can burn yourself if you touch the hot
heating element or the socket of the cigarette lighter.
In addition, flammable materials can ignite if:
R the hot cigarette lighter falls
R a child holds the hot cigarette lighter to
objects, for example
There is a risk of fire and injury.
Always hold the cigarette lighter by the knob.
Always make sure that the cigarette lighter is
out of reach of children. Never leave children unattended in the vehicle.
Your attention must always be focused on the
traffic conditions. Only use the cigarette lighter when road and traffic conditions permit. X
Set the Start/Stop button to key position 2
(Y page 103).
X To open: slide cover :forwards until it
engages.
X Press in cigarette lighter ;.
Cigarette lighter ;will pop out automatically
when the heating element is red-hot.
X To close: briefly press cover :at the front. 12 V sockets
General notes X
Select key position 1using the Start/Stop
button (Y page 103). The sockets can be used for accessories with a
maximum draw of 180 W (15 A). Accessories
include such items as mobile phone chargers.
If you use the sockets for long periods when the engine is switched off, the battery may dis-
charge.
An emergency cut-off ensures that the on-boardvoltage does not drop too low. If the on-board
voltage is too low, the power to the sockets is
automatically cut. This ensures that there is suf-
ficient power to start the engine.
Socket on the centre console X
To open: slide cover :forwards until it
engages.
X Lift up the cover of socket ;.
X To close: briefly press cover :at the front.
A socket is fitted in the stowage compartment
under the armrest on vehicles with an ashtray
and a cigarette lighter.
Socket in the luggage compartment X
Lift up the cover of socket :.222
FeaturesStowing and features
Page 226 of 289

Mercedes-Benz emergency call sys-
tem
Information on these requirements can be found in the separate multimedia system operating
instructions. X
To open: press and hold cover :for at least
one second.
X To make an emergency call: press SOS but-
ton ;briefly.
The indicator lamp in SOS button ;flashes
until the emergency call is concluded.
X Wait for a voice connection to the Mercedes-
Benz emergency call centre.
X After the emergency call, close cover :.
You will see a message if:
R a connection to the Mercedes-Benz emer-
gency call centre cannot be made
R a call has not been automatically forwarded
to the public emergency call centre
In this case, dial the 112emergency number
on your mobile phone.
You can find more information on the Mercedes- Benz emergency call system in the separate
multimedia system operating instructions. Mobile phone
Important safety notes G
WARNING
Operating mobile communications equip-
ment while driving distracts you from paying
attention to traffic conditions. This could also cause you to lose control of the vehicle. There
is a risk of an accident. Use this device only when the vehicle is sta-
tionary.
You must observe the legal requirements for the country in which you are currently driving whenoperating mobile communications equipment in
the vehicle.
If it is permitted by law to operate communica-
tions equipment while the vehicle is in motion,
you may only do so if the traffic situation per-
mits. You may otherwise be distracted from the traffic conditions, cause an accident and injure
yourself and others.
Excessive levels of electromagnetic radiation
may cause damage to your health and to the
health of others. The use of an exterior aerial
takes into consideration the scientific discus-
sion surrounding the possible health risk posed
by electromagnetic fields.
Mercedes-Benz recommends the use of an
approved exterior aerial. This ensures:
R optimal mobile phone reception quality in the
vehicle
R that mutual interference between the vehicle
electronics and mobile phones is minimised
An exterior aerial has the following advantages:
R it conducts the electromagnetic fields gener-
ated by a wireless device to the exterior
R the field strength in the vehicle interior is
lower than in a vehicle that does not have an
exterior aerial
Information on retrofitting two-way radios and
mobile phones (RF transmitters) (Y page 275).
General notes Depending on the vehicle equipment, there are
various mobile phone brackets that may be fit-
ted in your vehicle; in some cases, these are
country-specific.
More information on suitable mobile phones,
mobile phone brackets and on connecting Blue-
tooth ®
-capable mobile phones with the multi-
media system can be obtained:
R at your Mercedes-Benz Service Centre
R on the Internet at http://www.mercedes-
benz.com/connect
The functions and services available when you
use the phone depend on your mobile phone
model and service provider. Features
223Stowing and features Z
Page 227 of 289
.
X Place the mobile phone br")
Using a mobile phone
To connect a mobile phone to the exterior aerial
and charge it, insert it into the mobile phone
bracket.
X Open the telephone compartment
(Y page 218).
X Place the mobile phone bracket into the pre-
installed fitting; see the separate installation
instructions for the mobile phone fitting.
X Insert the mobile phone into the mobile phone
bracket; see the separate installation instruc- tions for the mobile phone fitting.
i The mobile phone can also be operated
without being in the bracket. However, the
charging function and aerial function are not
available.
In order to use Bluetooth ®
(SAP profile) on your
telephone module, you must first insert the tele-
phone module into the pre-installed fitting. This connects it to the exterior aerial. If you wish to
charge the mobile phone, then you must con-
nect it to a USB port.
Further information on the telephone module
with Bluetooth ®
(SAP profile) can be found in the
Digital Owner's Manual.
Operating the mobile phone You can operate the telephone using the
6
and ~ buttons on the multifunction steering
wheel. You can operate other mobile phone
functions via the on-board computer
(Y page 162).
When you remove the key from the ignition lock, the mobile phone is disconnected from the vehi-cle. You can then no longer make calls using the
hands-free system.
If a call is active and you remove the key from
the ignition lock, the conversation is transferred over to the mobile phone. It is then possible to
continue the conversation on the mobile phone. Rear spoiler
Overview The rear spoiler improves the handling of the
vehicle. It adapts the vehicle's aerodynamics to
the operating conditions, dependent on the
speed of the vehicle.
Only use button :in the switch strip above the
overhead control unit to extend and retract the
rear spoiler manually for cleaning. Button :is
not used to operate the rear spoiler.
The rear spoiler is extended automatically if you
drive faster than:
R 120 km/ hin drive programs C,Sand S+
R 70 km/h in the RACEdrive program
Button :flashes until the rear spoiler has
extended and then lights up in red.
The rear spoiler is retracted automatically if you
drive slower than:
R 80 km/h in drive programs C,Sand S+
R 30 km/h in the RACEdrive program
Button :flashes until the rear spoiler has
retracted and then goes out.
Extending and retracting the rear
spoiler manually G
WARNING
Body parts could become trapped if you man- ually retract the rear spoiler. There is a risk of
injury.
Make sure that nobody is within the range of
movement of the rear spoiler. Release the
switch immediately if somebody becomes
trapped. The rear spoiler then extends again. 224
FeaturesStowing and features
Page 228 of 289

When leaving the vehicle, always take the key
with you and lock the vehicle. Never leave
children unattended in the vehicle.
! Do not enter an automatic car wash with the
rear aerofoil extended. Otherwise, the rear
aerofoil may be damaged.
Only extend the rear aerofoil in order to wash
it by hand. Retract it again when you have fin- ished cleaning it.
You can extend and retract the rear spoiler man-
ually for cleaning.
X Close the tailgate.
X Select key position 2with the Start/Stop but-
ton (Y page 103). X
To extend: press button :.
The rear spoiler is extended.
Button :flashes until the rear spoiler has
extended and then lights up in red.
X To retract: press and hold button :until the
rear spoiler is completely retracted.
Button :flashes until the rear spoiler has
retracted and then goes out.
Rear spoiler retracts manually Rear spoiler retracts manually
appears in the display.
If you release button :while retracting the rear
spoiler, it extends again automatically.
Problems with the rear spoiler Problem
Possible causes/consequences and
M MSolutions The rear spoiler stops
before reaching the end
position when retracting
manually. You have opened the tailgate while manually retracting the rear
spoiler.
X Close the tailgate.
The rear spoiler extends or, if you press and hold the ¬button,
continues retracting. The rear spoiler stops
before reaching the end
position when retract-
ing/extending manually. You have switched off the ignition.
X Switch the ignition back on.
X Press the ¬button.
The rear spoiler extends/retracts. The rear spoiler cannot
be retracted again after
manually extending it. You have opened the tailgate while manually extending the rear
spoiler.
X Close the tailgate. The rear spoiler does not
extend or retract auto-
matically. The rear spoiler's movement is blocked, e.g. by an object jammed
between the body and the rear spoiler.
X Remove the object. Garage door opener
General notes The HomeLink
®
garage door opener integrated
in the rear-view mirror allows you to operate up
to three different door and gate systems.
Once programmed, the integrated garage door
opener in the rear-view mirror will assume the
function of the garage door system's remote control. Please also read the operating instruc-
tions for the garage door system.
When programming a garage door opener, park
the vehicle outside the garage. Do not run the
engine while programming.
The garage door opener is available only for cer- tain countries. Observe the legal requirements
for each individual country. Features
225Stowing and features Z
Page 229 of 289

The HomeLink
®
garage door opener is compat-
ible with most European garage and gate opener
drives.
More information on HomeLink ®
and/or com-
patible products is available:
R at a qualified specialist workshop
R via the HomeLink ®
hotline
(0) 08000 466 354 65 or alternatively
+49 (0) 6838 907-277
R on the Internet at http://www.homelink.com
Important safety notes G
WARNING
When you operate or program the garage door with the integrated garage door opener, per-
sons in the range of movement of the garage
door can become trapped or struck by the
garage door. There is a risk of injury.
When using the integrated garage door
opener, always make sure that nobody is
within the range of movement of the garage
door. G
WARNING
Combustion engines emit poisonous exhaust
gases such as carbon monoxide. Inhaling
these exhaust gases leads to poisoning. There is a risk of fatal injury. Therefore never leave
the engine running in enclosed spaces with-
out sufficient ventilation.
Programming Programming buttons
Observe the "Important safety notes"
(Y page 226). Garage door drive remote control
Ais not
included with the integrated garage door
opener.
X Select key position 2with the Start/Stop but-
ton (Y page 103).
X Select one of buttons ;to? to control the
garage door drive.
X To start programming mode: press and
hold one of buttons ;to? on the integrated
garage door opener.
The garage door opener is now in program-
ming mode. After a short time, indicator
lamp :begins to light up yellow.
Indicator lamp :lights up yellow immedi-
ately the first time button ;,=or? is pro-
grammed. If the selected button has already
been programmed, indicator lamp :lights
up yellow after ten seconds have elapsed.
X Release button ;,=or?. Indicator
lamp :flashes yellow.
X To program the remote control: point
remote control Atowards buttons ;to?
on the rear-view mirror at a distance of 5 to
20 cm.
X Press and hold button Bon remote control
A until indicator lamp :lights up green.
When indicator lamp :lights up green: pro-
gramming is finished.
When indicator lamp :flashes green: pro-
gramming was successful. The next step is to
synchronise the rolling code (Y page 226).
X Release button Bof remote control Aof the
garage door drive.
If indicator lamp :lights up red: repeat the
programming process for the corresponding
button on the rear-view mirror. When doing
so, vary the distance between remote control A and the rear-view mirror.
The required distance between remote con-
trol Aand the integrated garage door opener
depends on the garage door drive system.
Several attempts may be required. You
should test every setting position for at least
25 seconds before trying another position.
Synchronising the rolling code
Read the "Important safety notes" (Y page 226).
If the garage door system uses a rolling code,
you will also have to synchronise the garage
door system with the integrated garage door
opener in the rear-view mirror. To do this, you
will need to use the programming button on the 226
FeaturesStowing and features
Page 230 of 289

door drive control panel. The programming but-
ton may be placed at different locations depend- ing on the manufacturer. It is usually located on
the door drive unit on the garage ceiling.
Familiarise yourself with the garage door drive
operating instructions, e.g. under "Program-
ming of additional remote controls", before car-
rying out the following steps.
Your vehicle must be within range of the garage
door or gate opener drive. Make sure that nei-
ther your vehicle nor any persons/objects are
present within the sweep of the door or gate.
X Select key position 2with the Start/Stop but-
ton (Y page 103).
X Get out of the vehicle.
X Press the programming button on the door
drive unit.
Usually, you now have 30 seconds to initiate
the next step.
X Get into the vehicle.
X Press previously programmed button ;,=
or ? on the integrated garage door opener
repeatedly until the door closes.
Rolling code synchronisation is then com-
plete.
Problems when programming
If you have problems when programming the
integrated garage door opener on the rear-view mirror, please note the following:
R Check the transmitter frequency used by
garage door drive remote control Aand
whether it is supported. The transmitter fre-
quency can usually be found on the back of
remote control Afor the garage door drive.
R Replace the batteries in garage door drive
remote control A. This increases the likeli-
hood that garage door drive remote control
A will transmit a strong and precise signal to
the integrated garage door opener.
R When programming, hold remote control A
at varying distances and angles from but-
tons ;to? that you are programming. Try
various angles at a distance between 5and
20 cm or at the same angle but at varying
distances.
R If another remote control Ais available for
the same garage door drive, perform the pro-
gramming steps again using this remote con- trol A. Before performing these steps, make
sure that new batteries have been fitted in
garage door drive remote control A.R
Note that some remote controls transmit only
for a limited period (the indicator lamp on theremote control goes out). Press button Bon
remote control Aagain before transmission
ends.
R Align the aerial cable of the garage door
opener unit. This can improve signal recep-
tion/transmission.
Opening/closing the garage door Once programmed, the integrated garage door
opener will assume the function of the garage
door system's remote control. Please also read
the operating instructions for the garage door
system.
X Select key position 2with the Start/Stop but-
ton (Y page 103).
X Press button ;,=or? that you have pro-
grammed to operate the garage door.
Garage door system with a fixed code: indi-
cator lamp :lights up green.
Garage door system with a rolling code: indi-
cator lamp :flashes green.
The transmitter will transmit a signal for as
long as the button is pressed. The transmis-
sion is halted after a maximum of ten seconds and indicator lamp :lights up yellow.
X Press button ;,=or? again if necessary.
Clearing the memory Make sure that you clear the memory of the
integrated garage door opener before selling the
vehicle.
X Select key position 2with the Start/Stop but-
ton (Y page 103).
X Press and hold buttons ;and ?.
The indicator lamp initially lights up yellow
and then green.
X Release buttons ;and ?.
The memory of the integrated garage door
opener in the rear-view mirror is cleared. Features
227Stowing and features Z
Page 231 of 289

AD (Andorra) 20 July 2005
MHz: 27, 30, 40, 433, 868
AT (Austria) Article 6 of Directive
1999/5/EC R&TTE 18 May
05
MHz: 27,")
Frequencies
Europe
Country Radio type approval num-
ber
Frequency range (MHz)
AD (Andorra) 20 July 2005
MHz: 27, 30, 40, 433, 868
AT (Austria) Article 6 of Directive
1999/5/EC R&TTE 18 May
05
MHz: 27, 40, 433, 868
BE (Belgium) Article 6 of Directive
1999/5/EC R&TTE 18 May
05
MHz: 27, 40, 433, 868
BG (Bulgaria) Article 6 of Directive
1999/5/EC R&TTE 12 April
07
MHz: 27, 40, 433, 868
CH (Switzer-
land) Article 6 of Directive
1999/5/EC R&TTE 14357 27
May 05
MHz: 27, 40, 433, 868 CY (Cyprus) Article 6 of Directive
1999/5/EC R&TTE 5 May 05
MHz: 27, 40, 433, 868 CZ (Czech
Republic) General Licence GL-30/R/
2000 Reg No. 844 13 May 05
MHz: 27, 40, 433 DK (Den-
mark) Article 6 of Directive
1999/5/EC R&TTE 20 April
05
MHz: 27, 40, 433, 868
DE (Ger-
many) Article 6 of Directive
1999/5/EC R&TTE 7519301
29 April 05
MHz: 27, 40, 433, 868
EE (Estonia) Article 6 of Directive
1999/5/EC R&TTE 11 May
05
MHz: 27, 40, 433, 868 Country Radio type approval num-
ber
Frequency range (MHz)
ES (Spain) 000438/2005,
000439/2005,
000440/2005
000441/2005,
000445/2005,
000446/2005
000447/2005
MHz: 27, 40, 433, 868 FI (Finland) Article 6 of Directive
1999/5/EC R&TTE 10668 13
May 05
MHz: 27, 40, 433, 868 FR (France) Article 6 of Directive
1999/5/EC R&TTE 10668 13
May 05
MHz: 27, 30, 40, 433, 868 GI (Gibraltar) Article 6 of Directive
1999/5/EC R&TTE 13 May
05 (UK)
MHz: 27, 40, 418, 433, 868
GR (Greece) Article 6 of Directive
1999/5/EC R&TTE
11409/18/4/2005 18 May
05
MHz: 27, 40, 433, 868
HR (Croatia) SDR 224/06
MHz: 27, 40, 433, 868
HU (Hungary) Article 6 of Directive
1999/5/EC R&TTE 18 May
05
MHz: 27, 40, 433, 868
IC (Canary
Islands) 000438/2005,
000439/2005
000440/2005,
000441/2005
000445/2005,
000446/2005
000447/2005, 3 June 2005
MHz: 27, 40, 433, 868 228
FeaturesStowing and featu
res
Page 232 of 289

IE (Ireland) Article 6 of Directive
1999/5/EC R&TTE 18 May
05
MHz: 27, 40, 433, 868
IS (Iceland) Article 6 of Directive
1999/5/EC R&TTE 18 Ma")
Country Radio type approval num-
ber
Frequency range (MHz)
IE (Ireland) Article 6 of Directive
1999/5/EC R&TTE 18 May
05
MHz: 27, 40, 433, 868
IS (Iceland) Article 6 of Directive
1999/5/EC R&TTE 18 May
05
MHz: 27, 40, 433, 868
IT (Italy) DGPGSR/II/347487/FOR/
15347
DGPGSR/II/347487/FOR/
15348
DGPGSR/II/347487/FOR/
15350
DGPGSR/II/347487/FOR/
15357
DGPGSR/II/347487/FOR/
15358
DGPGSR/II/347487/FOR/
15359
MHz: 27, 40, 433, 868 LI (Liechten-
stein) Article 6 of Directive
1999/5/EC R&TTE 14357 27
May 05
MHz: 27, 40, 433, 868 LT (Lithuania) Article 6 of Directive
1999/5/EC R&TTE
27.4-1B-1609 6 May 05
MHz: 27, 40, 433, 868
LU (Luxem-
bourg) Article 6 of Directive
1999/5/EC R&TTE
150405/9538 24 May 05
MHz: 27, 40, 433, 868
LV (Latvia) Article 6 of Directive
1999/5/EC R&TTE
27.4-1B-1609 26 April 06
MHz: 27, 40, 433, 868
MC (Monaco) Article 6 of Directive
1999/5/EC R&TTE 10668 13
May 05
MHz: 27, 40, 433, 868 Country Radio type approval num-
ber
Frequency range (MHz)
MT (Malta) Article 6 of Directive
1999/5/EC R&TTE 18 May
05
MHz: 27, 40, 433, 868
NL (Nether-
lands) Article 6 of Directive
1999/5/EC R&TTE 18 May
05
MHz: 27, 40, 433, 868
NO (Norway) Article 6 of Directive
1999/5/EC R&TTE
05/02424-SA644 18 May 05
MHz: 27, 40, 433, 868 PL (Poland) Article 6 of Directive
1999/5/EC R&TTE 21 April
05
MHz: 27, 40, 433, 868
PT (Portugal) ANCOM-S08399/05
MHz: 27, 40, 433, 868
RO (Roma-
nia) Article 6.4 of Directive
1999/5/EC R&TTE
MHz: 27, 30, 40, 433, 868
RU (Russian
Federation) POCC DE.MJ05.H00015 13
May 05
MHz: 433
SE (Sweden) Article 6 of Directive
1999/5/EC R&TTE 18 May
05
MHz: 27, 40, 433, 868
SI (Slovenia) Article 6 of Directive
1999/5/EC R&TTE
500-1/2005-437 9 May 05
MHz: 27, 40, 433, 868
SK (Slovakia) Article 6 of Directive
1999/5/EC R&TTE
Slovak
206/11/2005 4 May 05
MHz: 27, 40, 433, 868
UK (United
Kingdom) Article 6 of Directive
1999/5/EC R&TTE 18 May
05
MHz: 27, 40, 418, 433, 868 Features
229Stowing and features Z
 1
1 2
2 3
3 4
4 5
5 6
6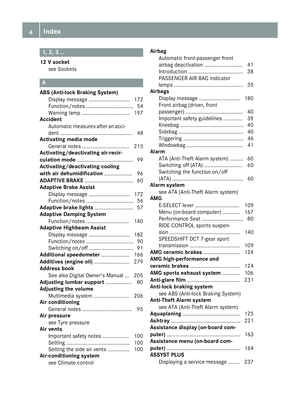 7
7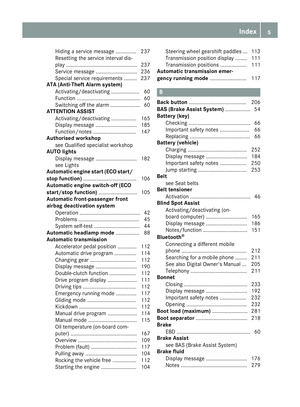 8
8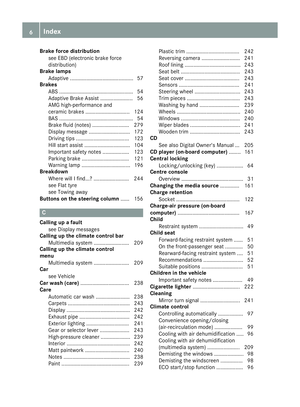 9
9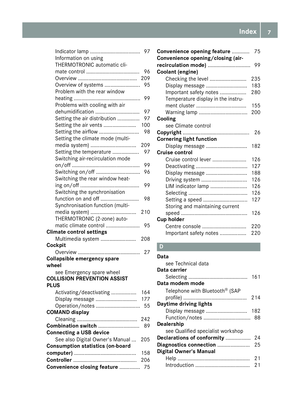 10
10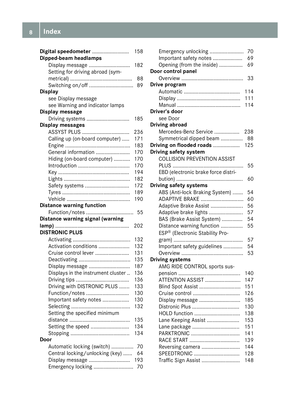 11
11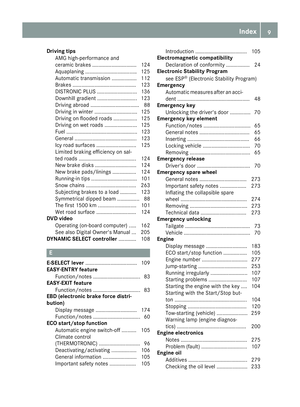 12
12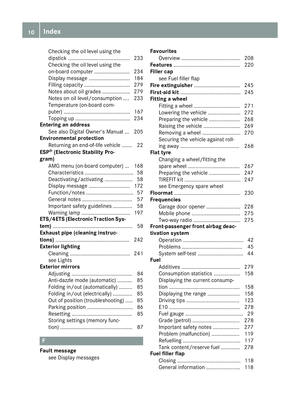 13
13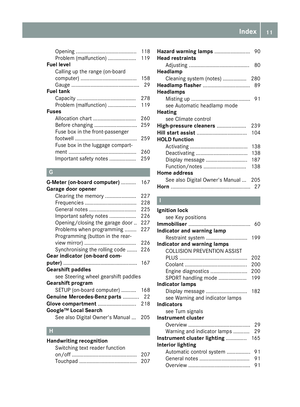 14
14 15
15 16
16 17
17 18
18 19
19 20
20 21
21 22
22 23
23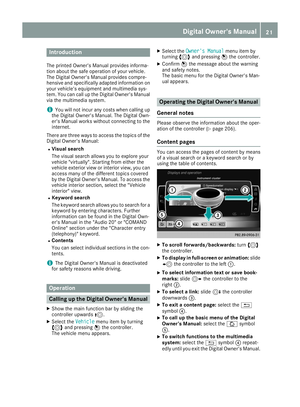 24
24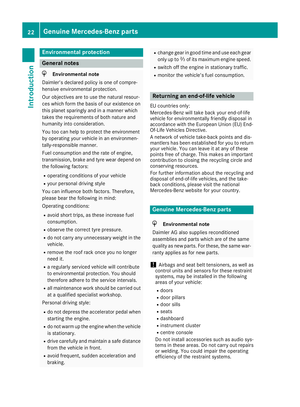 25
25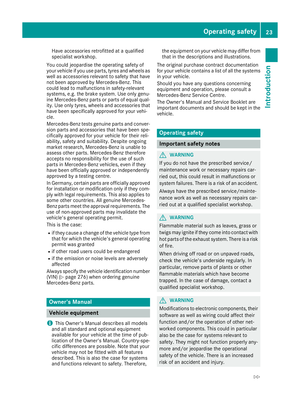 26
26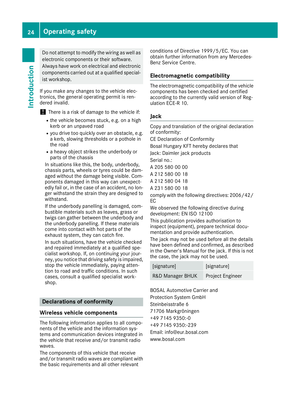 27
27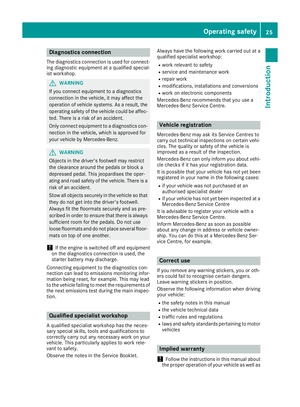 28
28 29
29 30
30 31
31 32
32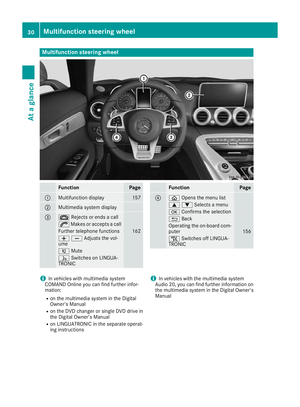 33
33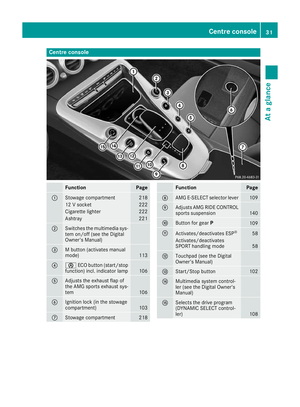 34
34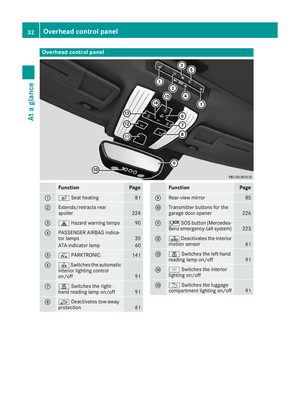 35
35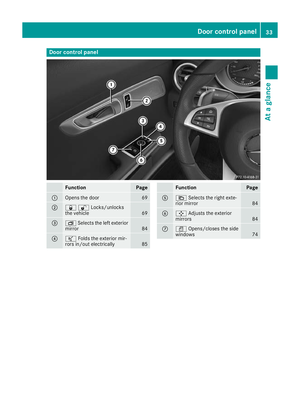 36
36 37
37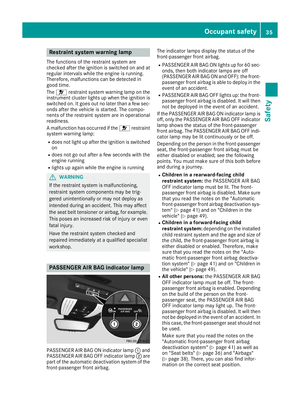 38
38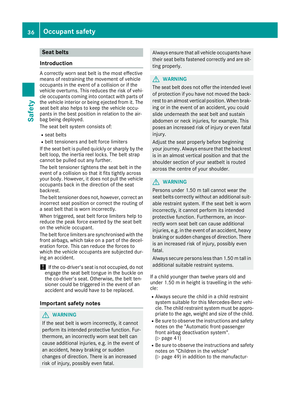 39
39 40
40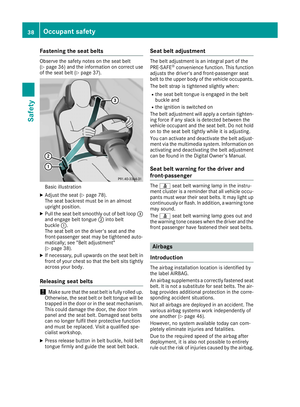 41
41 42
42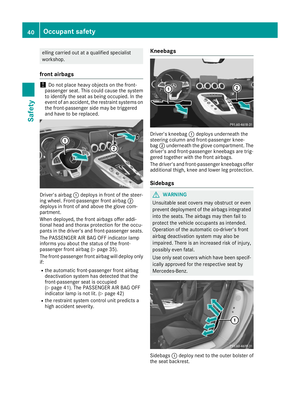 43
43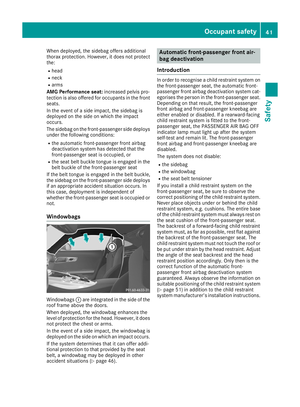 44
44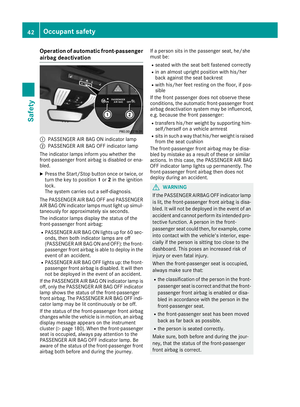 45
45 46
46 47
47 48
48 49
49 50
50 51
51 52
52 53
53 54
54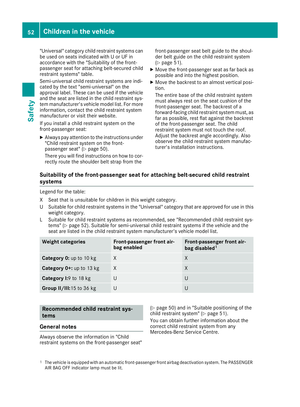 55
55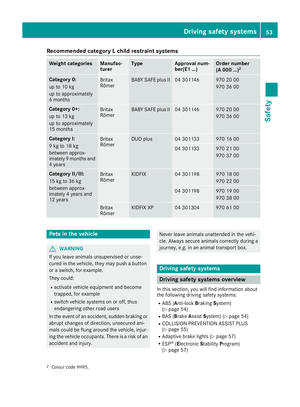 56
56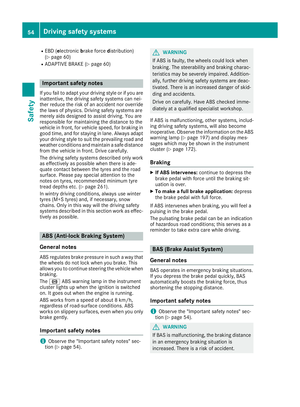 57
57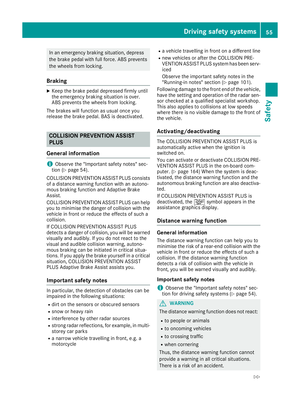 58
58 59
59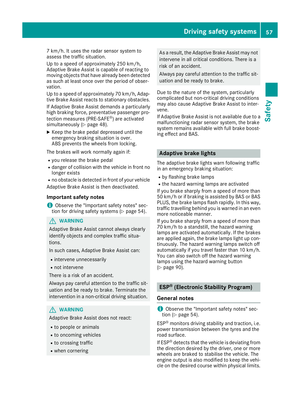 60
60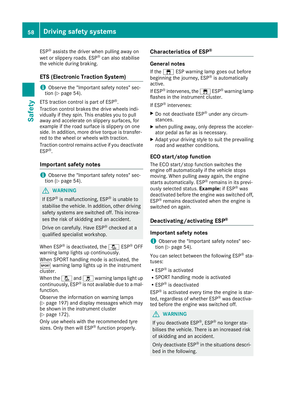 61
61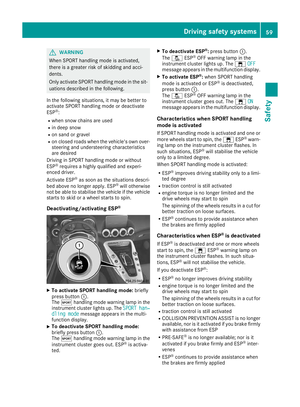 62
62 63
63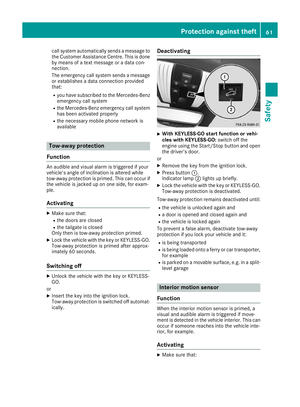 64
64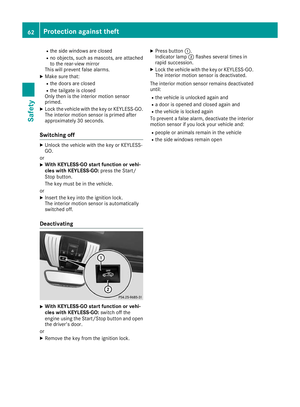 65
65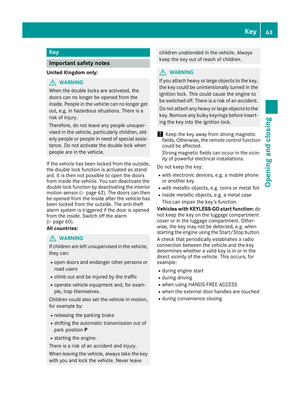 66
66 67
67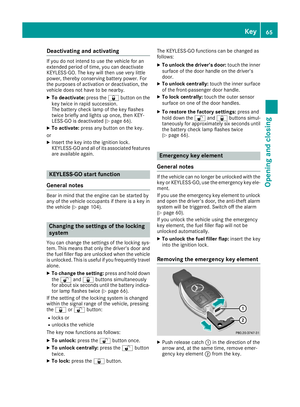 68
68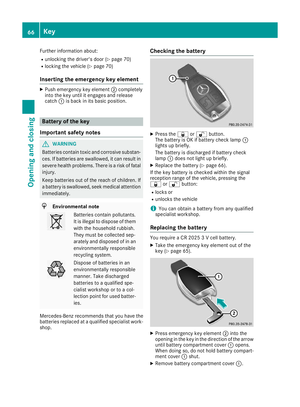 69
69 70
70 71
71 72
72 73
73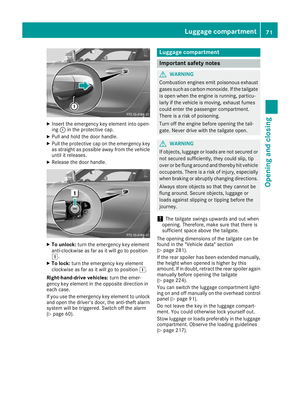 74
74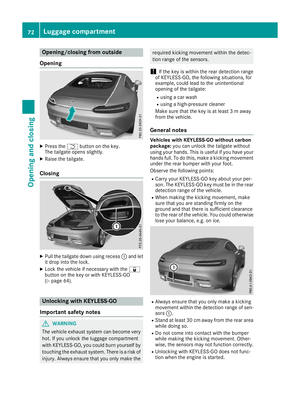 75
75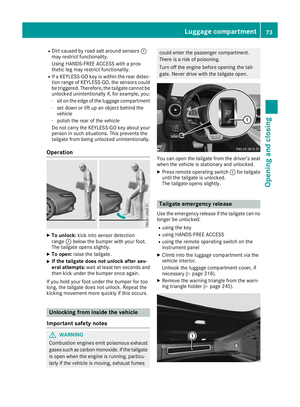 76
76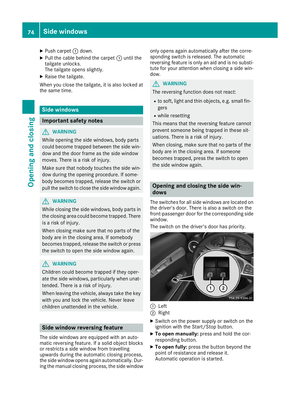 77
77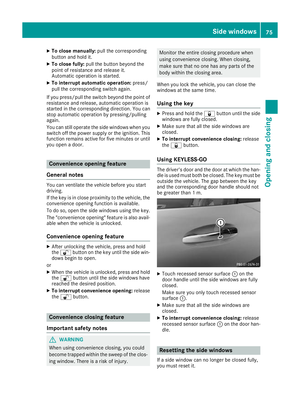 78
78 79
79 80
80 81
81 82
82 83
83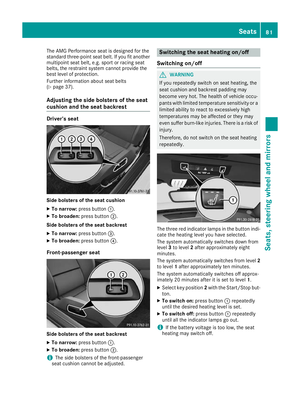 84
84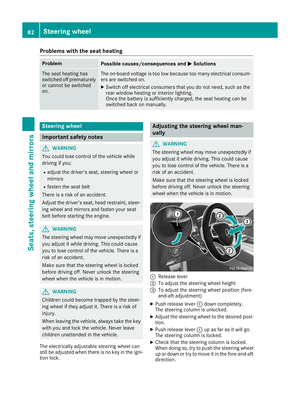 85
85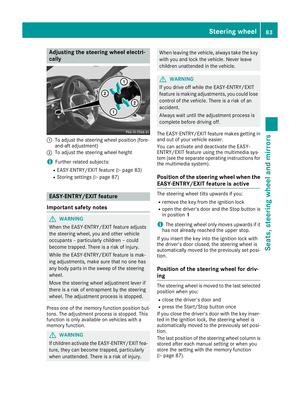 86
86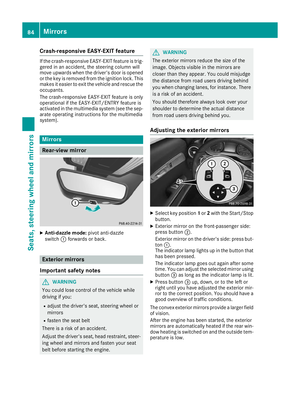 87
87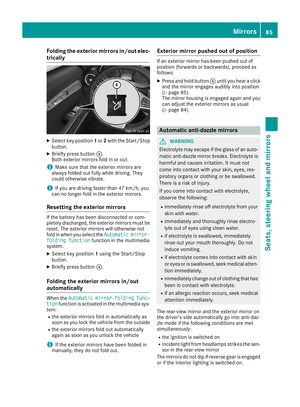 88
88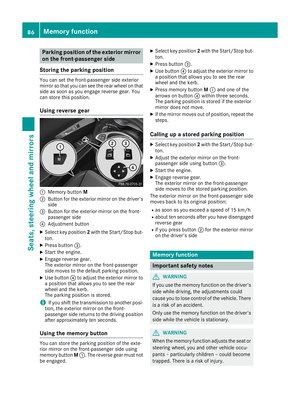 89
89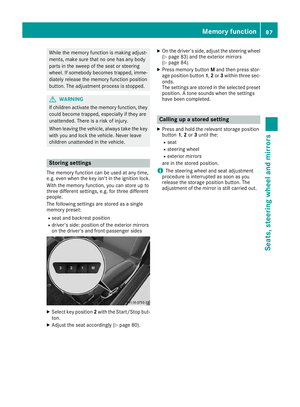 90
90 91
91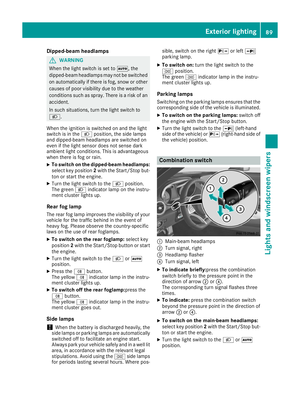 92
92 93
93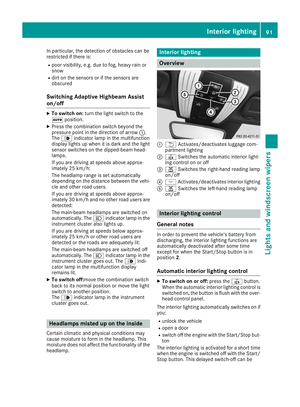 94
94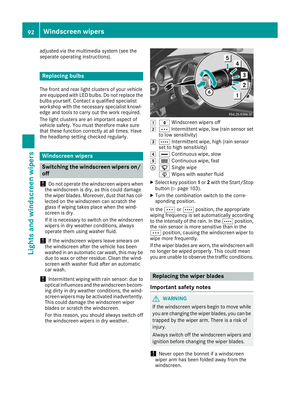 95
95 96
96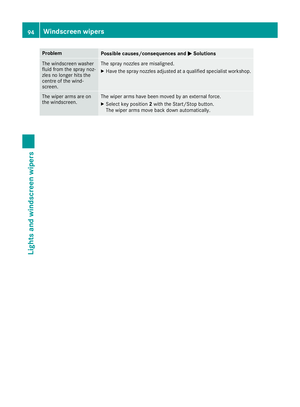 97
97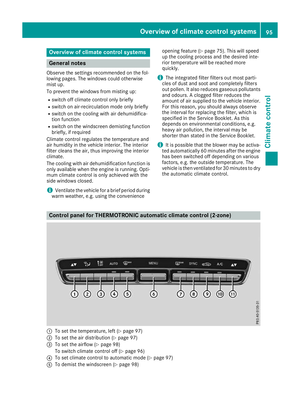 98
98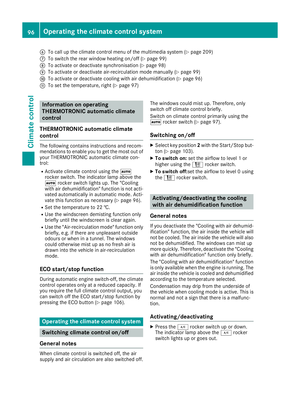 99
99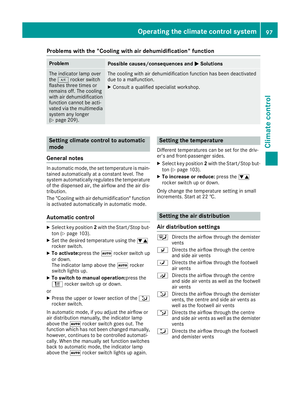 100
100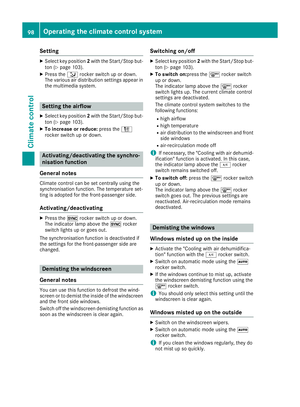 101
101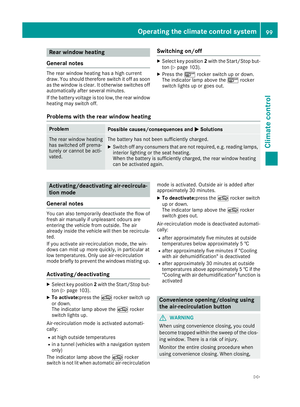 102
102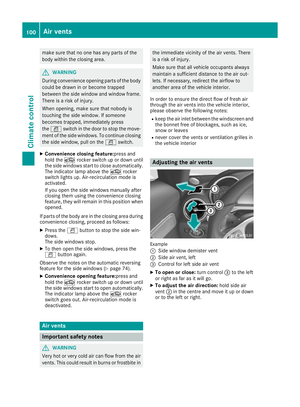 103
103 104
104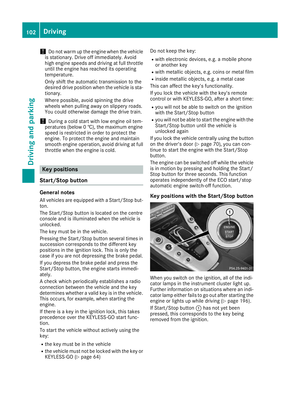 105
105 106
106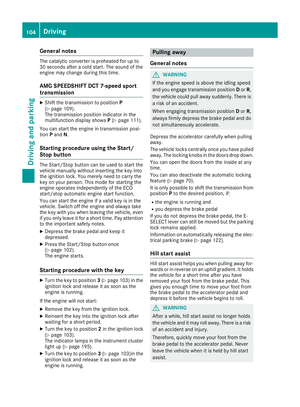 107
107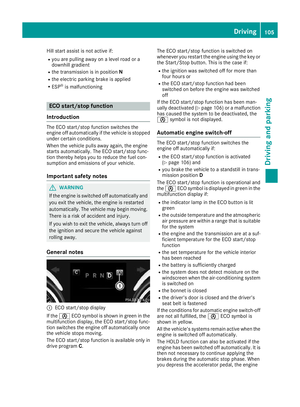 108
108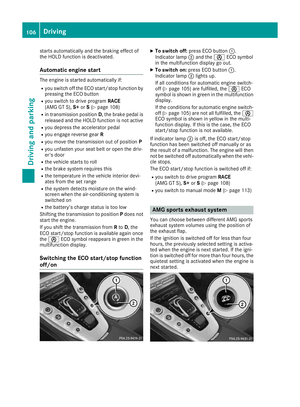 109
109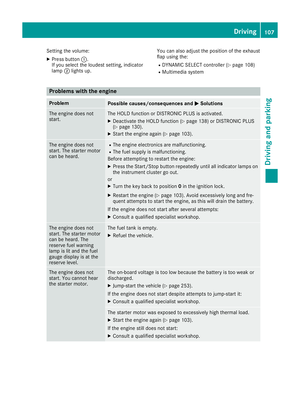 110
110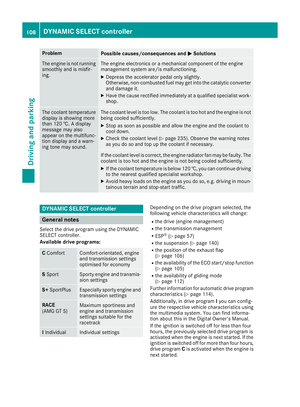 111
111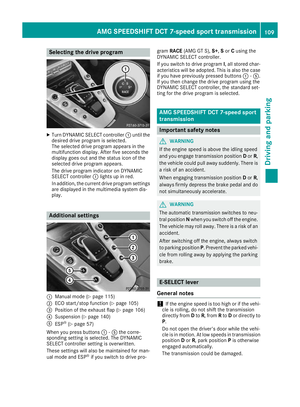 112
112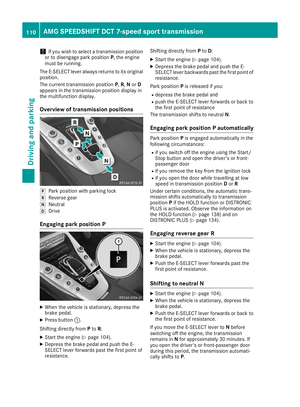 113
113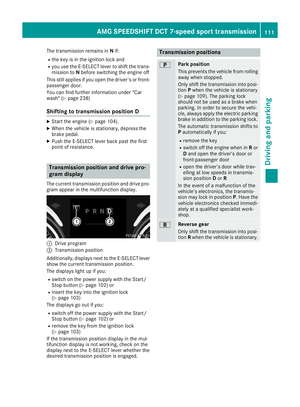 114
114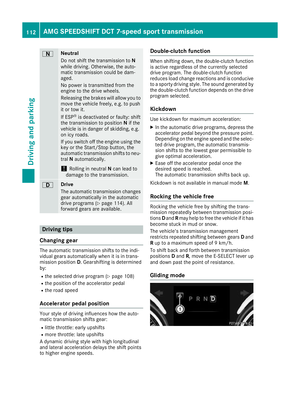 115
115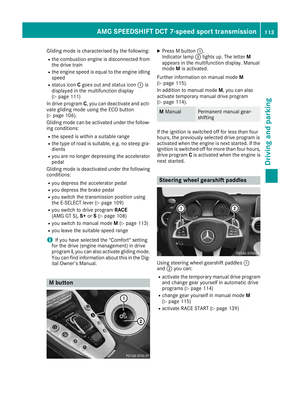 116
116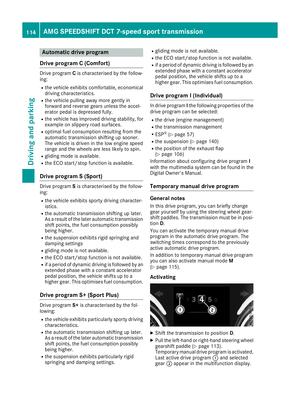 117
117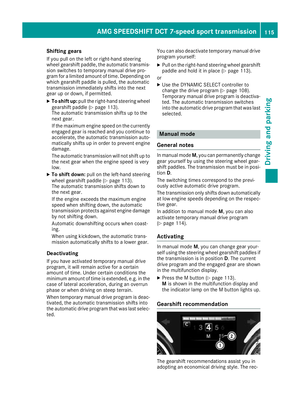 118
118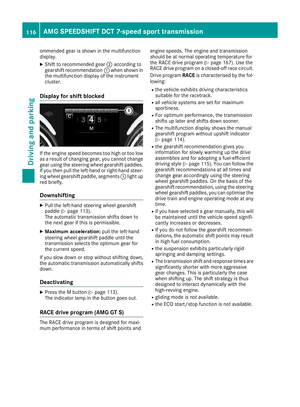 119
119 120
120 121
121 122
122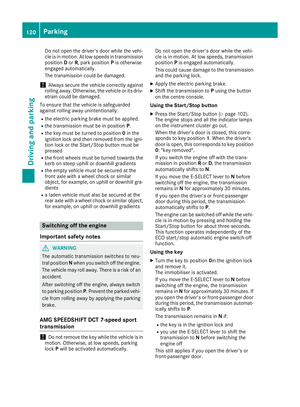 123
123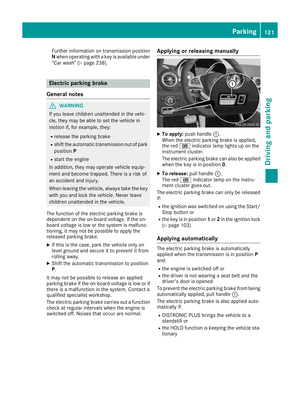 124
124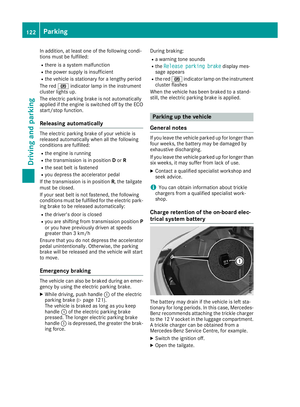 125
125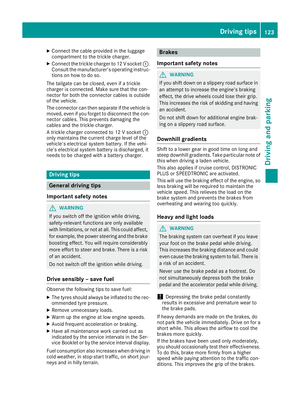 126
126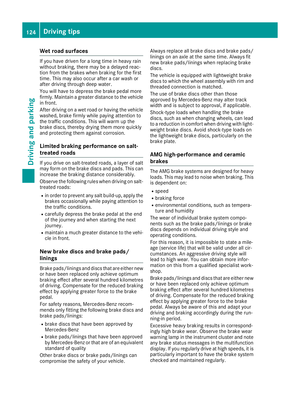 127
127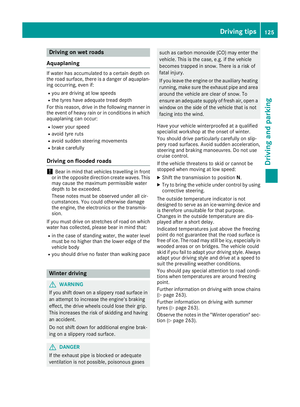 128
128 129
129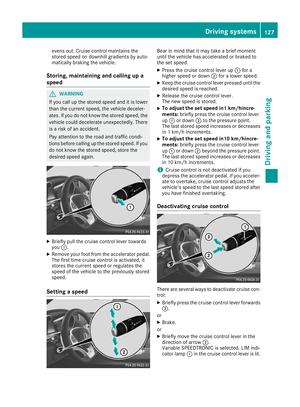 130
130 131
131 132
132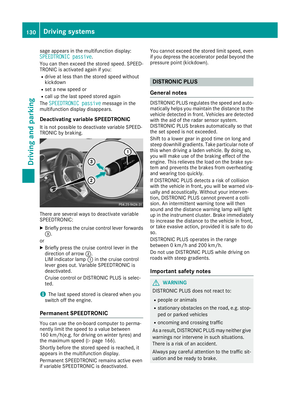 133
133 134
134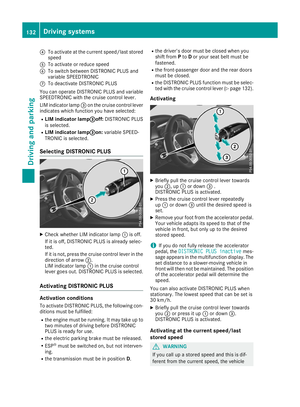 135
135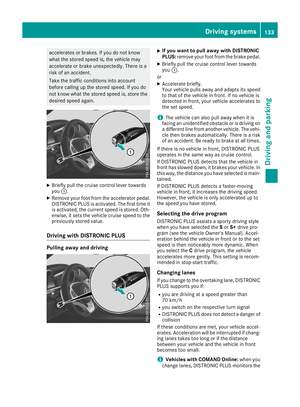 136
136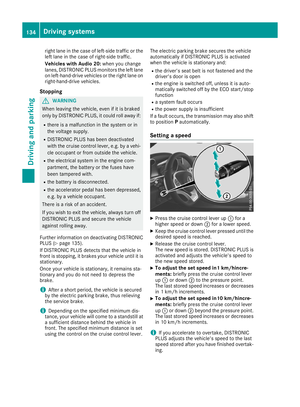 137
137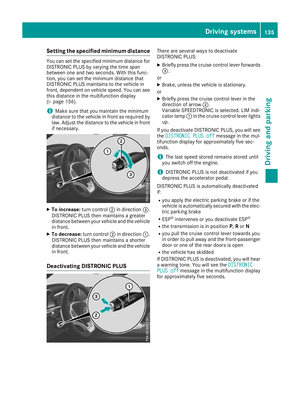 138
138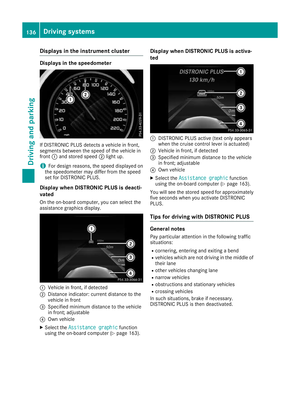 139
139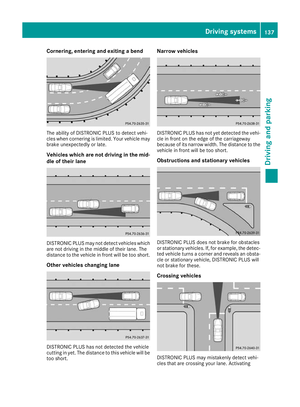 140
140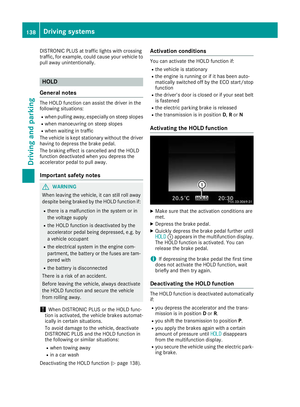 141
141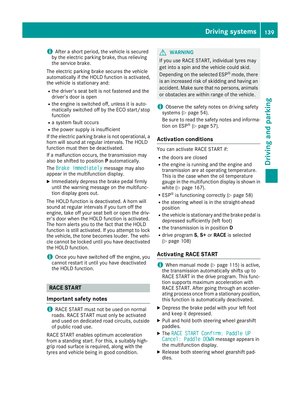 142
142 143
143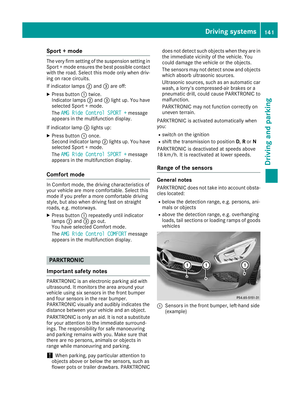 144
144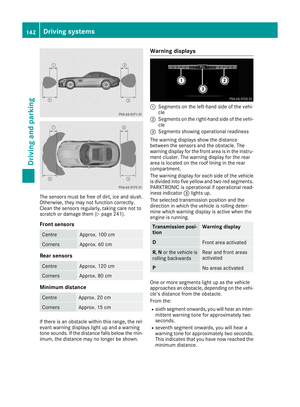 145
145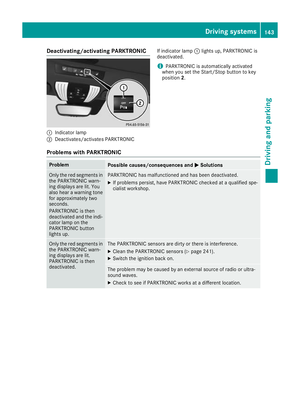 146
146 147
147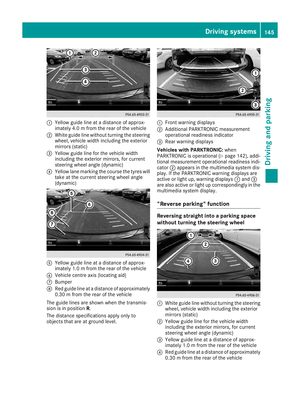 148
148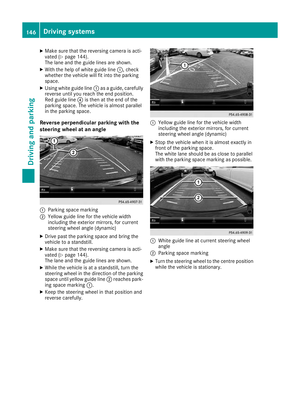 149
149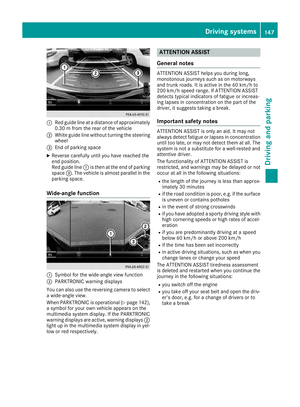 150
150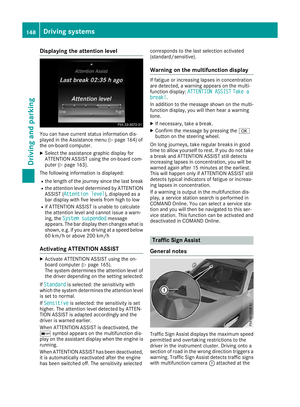 151
151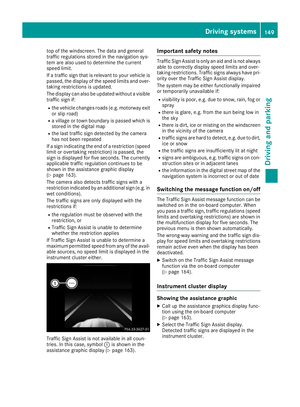 152
152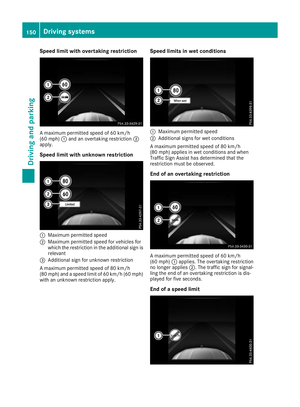 153
153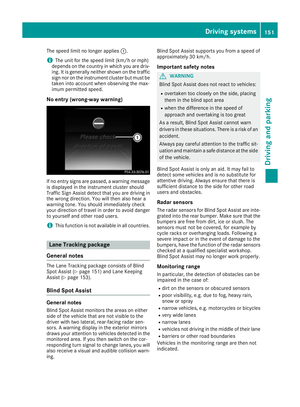 154
154 155
155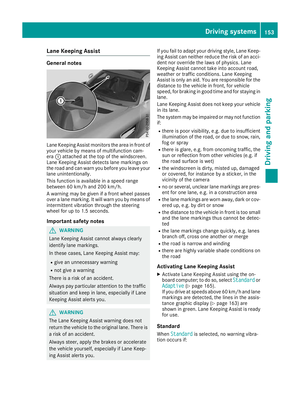 156
156 157
157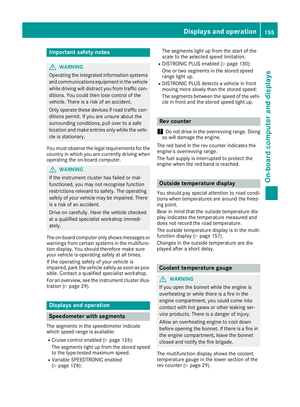 158
158 159
159 160
160 161
161 162
162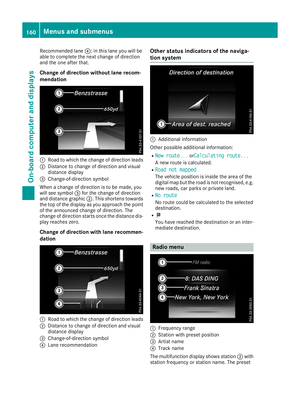 163
163 164
164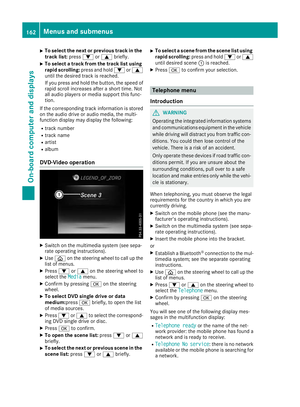 165
165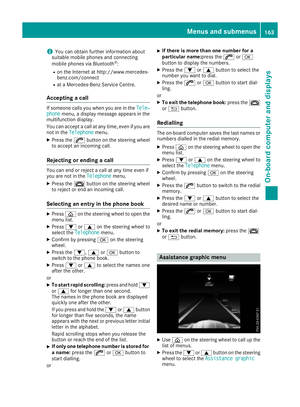 166
166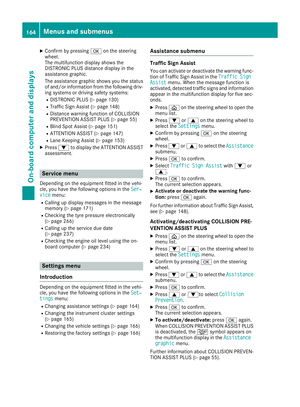 167
167 168
168 169
169 170
170 171
171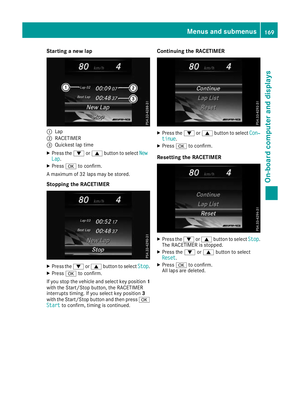 172
172 173
173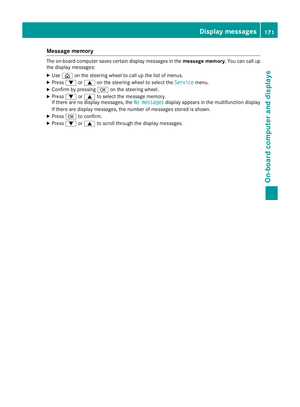 174
174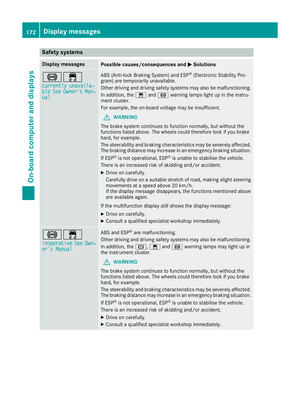 175
175 176
176 177
177 178
178 179
179 180
180 181
181 182
182 183
183 184
184 185
185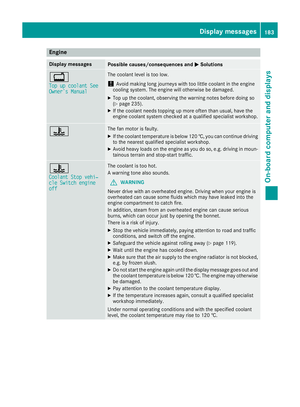 186
186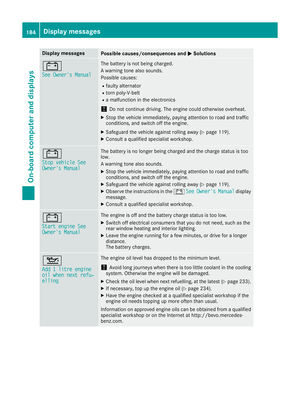 187
187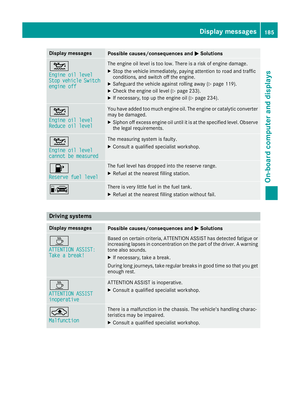 188
188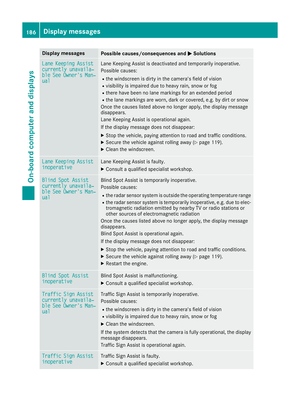 189
189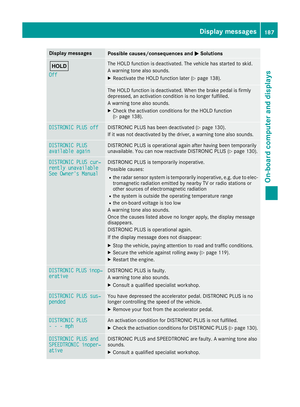 190
190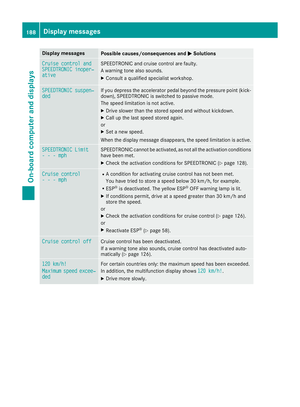 191
191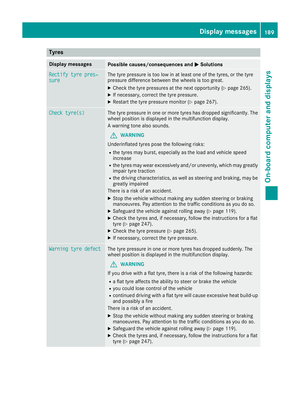 192
192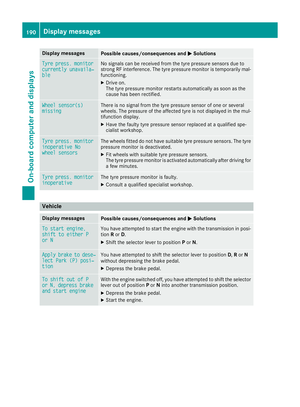 193
193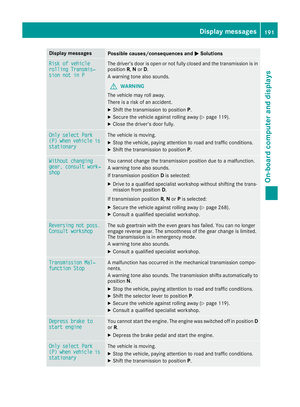 194
194 195
195 196
196 197
197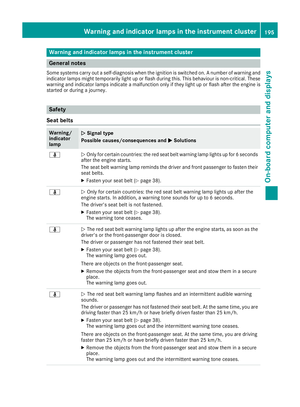 198
198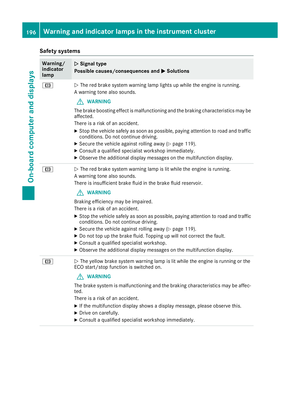 199
199 200
200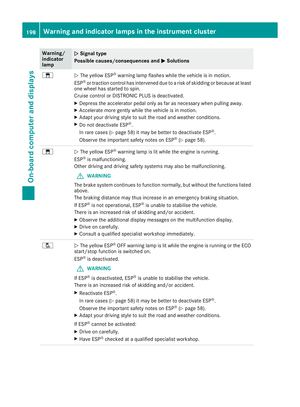 201
201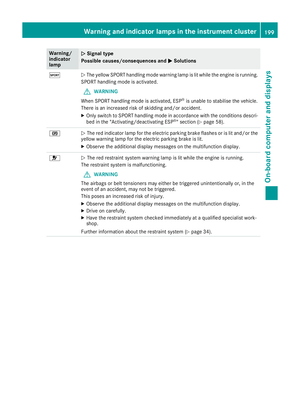 202
202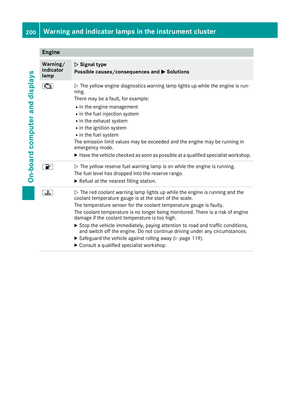 203
203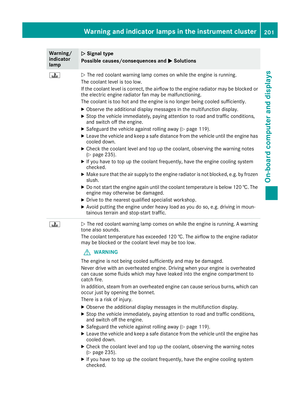 204
204 205
205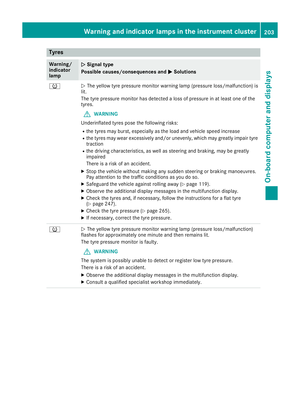 206
206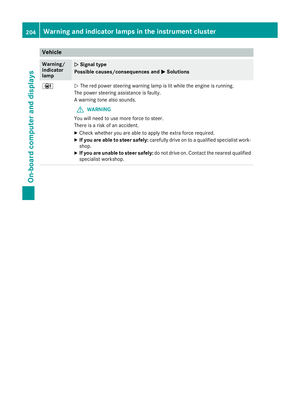 207
207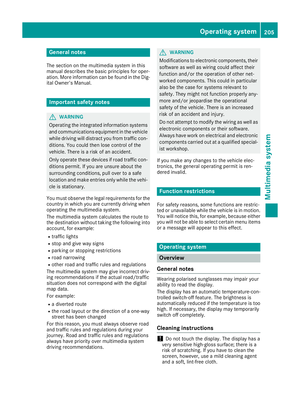 208
208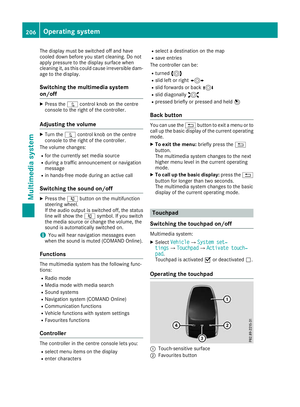 209
209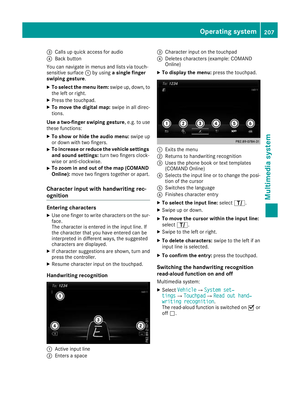 210
210 211
211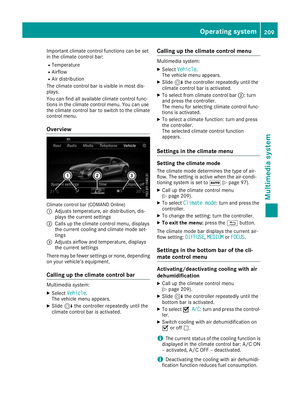 212
212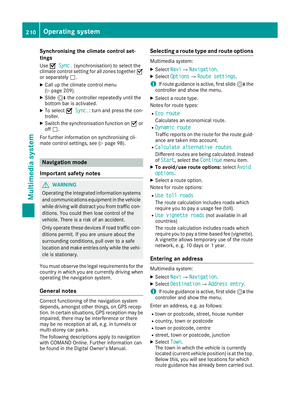 213
213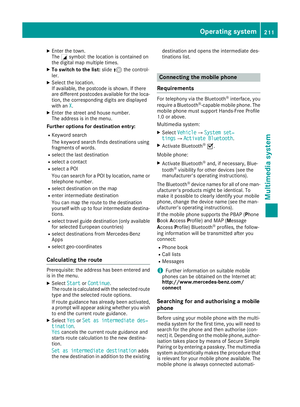 214
214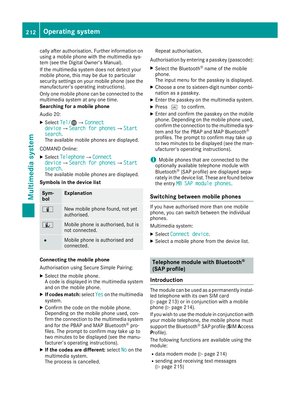 215
215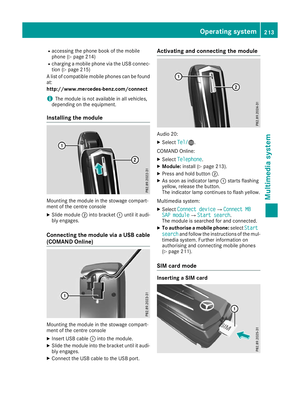 216
216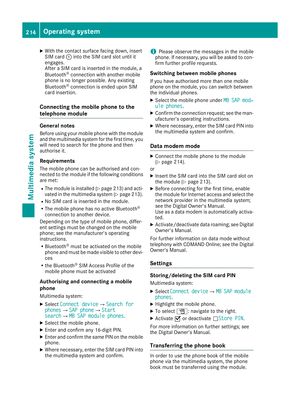 217
217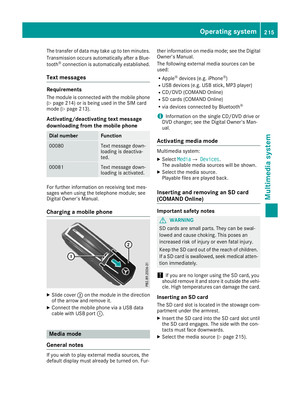 218
218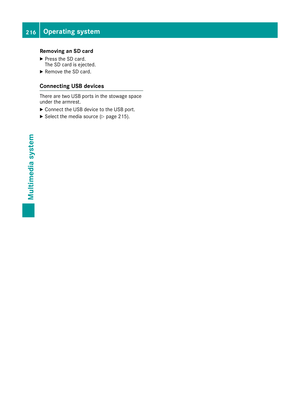 219
219 220
220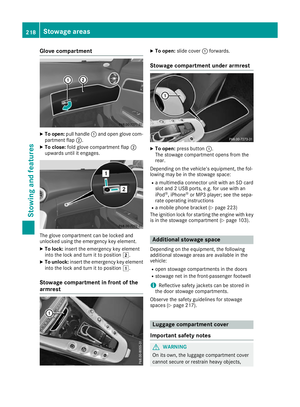 221
221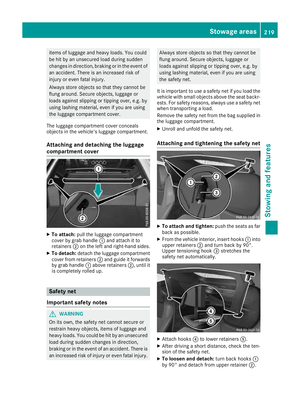 222
222 223
223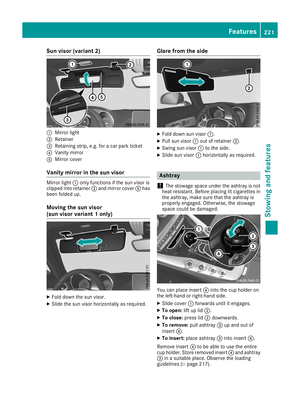 224
224 225
225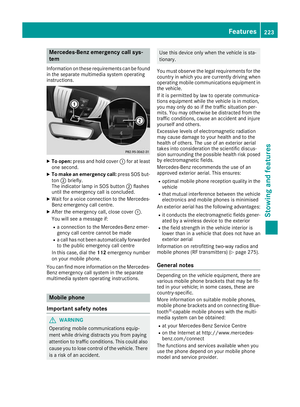 226
226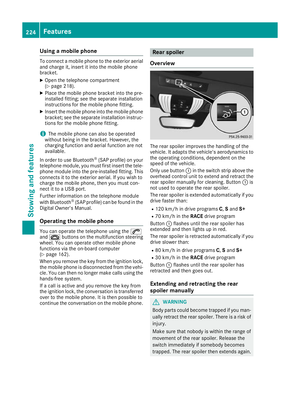 227
227 228
228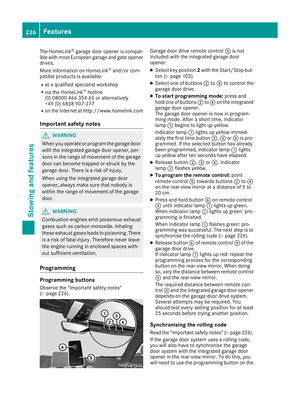 229
229 230
230 231
231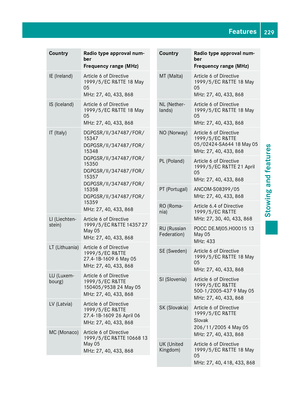 232
232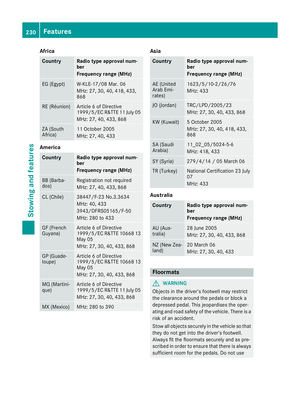 233
233 234
234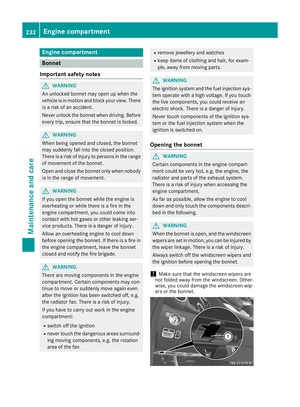 235
235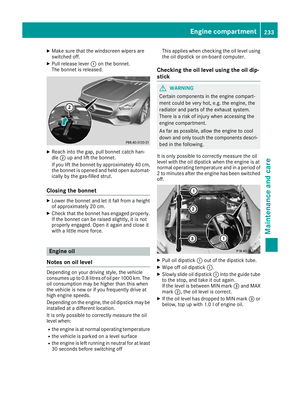 236
236 237
237 238
238 239
239 240
240 241
241 242
242 243
243 244
244 245
245 246
246 247
247 248
248 249
249 250
250 251
251 252
252 253
253 254
254 255
255 256
256 257
257 258
258 259
259 260
260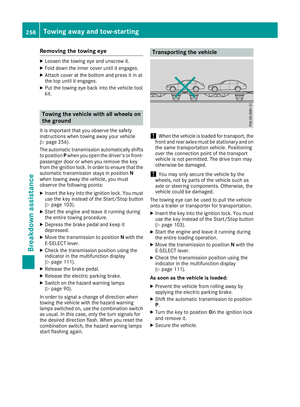 261
261 262
262 263
263 264
264 265
265 266
266 267
267 268
268 269
269 270
270 271
271 272
272 273
273 274
274 275
275 276
276 277
277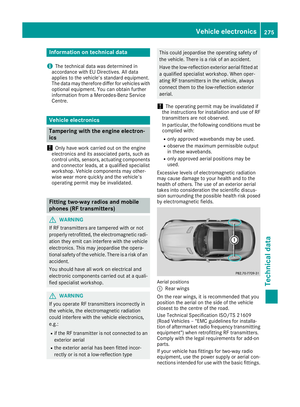 278
278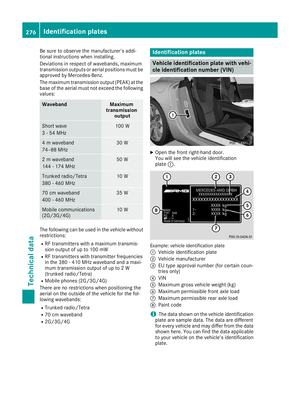 279
279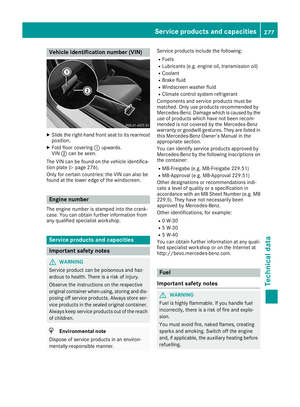 280
280 281
281 282
282 283
283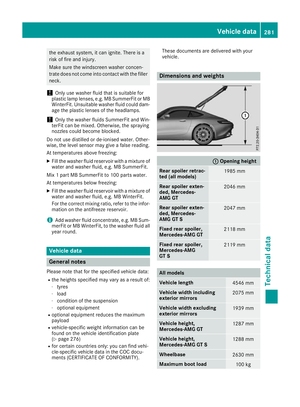 284
284 285
285 286
286 287
287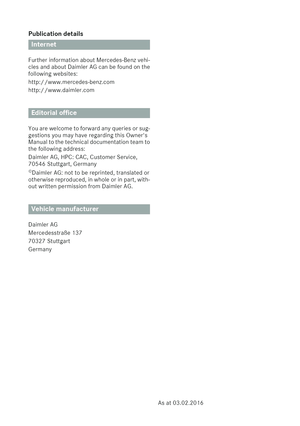 288
288