Page 57 of 182

54)The tyre repair kit (Fix&Go) provided
with the car (for versions/markets, where
provided) is compatible with the TPMS
sensors; using sealants not equivalent with
that in the original kit may adversely affect
its operation. If sealants not equivalent with
the original one are used, it is
recommended to have the TPMS sensors
checked by a qualified repair centre.REFUELLING THE
CAR
The car features the "Fast Fuel" system,
which prevents refuelling with incorrect
fuels (e.g. diesel for a petrol engine).
Stop the engine before refuelling.
Only refuel with unleaded petrol with
octane rating (RON) not less than 95, in
compliance with the European
specification EN228. In particular, the
4C’s engine has been designed to
comply with all emission limits while
simultaneously guaranteeing minimal
consumption and maximum
performance, using premium-quality
unleaded petrol with octane rating
(RON) of 98 or higher.
In order to prevent damage to the
catalytic converter never introduce even
the smallest amount of leaded petrol,
even in the event of an emergency.
IMPORTANT An inefficient catalytic
converter leads to harmful exhaust
emissions, thus contributing to air
pollution.
IMPORTANT Never introduce leaded
petrol to the tank, even in small
amounts in an emergency, as this
would damage the catalytic converter
beyond repair.
FILLING THE TANK
To ensure that you fill the tank
completely, top up twice after the first
click of the fuel supply gun. Avoid
further top-ups, which could cause
faults in the fuel supply system.
REFUELLING
PROCEDURE
The car features a "Fast Fuel" device,
integrated with the opening for the fuel
tank: it opens and recloses
automatically when the fuel supply gun
is inserted/removed.
The "Fast Fuel" device is provided with
an inhibitor which prevents refuelling
with incorrect fuel.
The refuelling procedure described
below is illustrated on the label
fig. 56 located inside the fuel flap. The
label also indicates the fuel type
(UNLEADED FUEL=petrol).
56A0L0045
54
GETTING TO KNOW YOUR CAR
Page 58 of 182

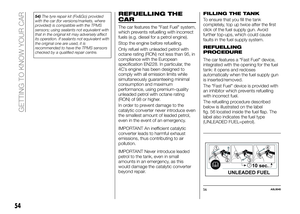
Procedureopen flap A fig. 57, pulling it
outwards;
introduce the dispenser in the filler
and refuel;
after refuelling, before removing the
dispenser, wait for at least 10 seconds
in order for the fuel to flow inside the
tank;
then remove the dispenser from the
filler and close flap A.
Flap A fig. 57 is provided with a dust
cover gaiter B which prevents deposits
of impurities and dust at the end of the
filler when the flap is closed.
55) 56) 57)
Emergency refuelling
If there is no fuel in the car or the supply
circuit is completely empty, proceed as
follows to reintroduce fuel to the tank:
take the dedicated funnel Cfig. 58 from the tool kit located in the
luggage compartment;
open flap A, pulling it outwards;
insert funnel C in the filler as
illustrated in fig. 58 and refuel;
after refuelling, remove the funnel
and close the flap;
finally, put the funnel back in its case
and put this back in the luggage
compartment.
IMPORTANT If the filler compartment is
washed with a high-pressure jet, keep it
at a distance of at least 20 cm.
WARNING
55)Do not apply any object/plug to the
end of the filler which is not provided for
the car. The use of non-compliant
objects/caps could cause a pressure
increase inside the tank, resulting in
dangerous situations.
56)Do not bring naked flames or lit
cigarettes near to the fuel filler: fire risk.
Keep your face away from the fuel filler to
prevent breathing in harmful vapours.
57)Do not use a mobile phone near the
refuelling pump: risk of fire.
57A0L0046
58A0L0151
55
Page 59 of 182
PROTECTING THE
ENVIRONMENT
The following devices are used for
reducing petrol fuel engine emissions:
catalytic converter, oxygen sensors and
evaporation control system.
Do not let the engine run, even for a
test, with one or more spark plugs
disconnected.
58)
WARNING
58)Under operating conditions, the
catalytic converter becomes very hot.
Therefore, do not park the car on
flammable materials (grass, dry leaves,
pine needles etc.) to avoid the risk of fire.
56
GETTING TO KNOW YOUR CAR
Page 60 of 182
KNOWING THE INSTRUMENT PANEL
This section of the booklet gives you all
the information you need to
understand, interpret and use the
instrument panel correctly.CONTROL PANEL AND
INSTRUMENTS..............58
SETUP MENU...............60
MENU OPTIONS.............61
TRIP COMPUTER.............65
WARNING LIGHTS AND
MESSAGES................67
57
Page 61 of 182
CONTROL PANEL AND INSTRUMENTS
Display with metric units
A. Engine coolant temperature indicator B. Time C. Tachometer D. Mode/gear engaged indicator E. Gear Shift Indicator F.
External temperature G. Fuel level indicator (the triangle on the right side of the symbol
indicates the vehicle side where the
fuel filler is located) H. Area dedicated to digital warning light view on the message viewed I. Partial odometer J Speedometer
(Speed indicator) K. "Alfa D.N.A." system driving mode L. Messages/information on display M. Total odometer
59A0L0118
58
KNOWING THE INSTRUMENT PANEL
Page 62 of 182
Display with Imperial units
A. Engine coolant temperature indicator B. Time C. Tachometer D. Mode/gear engaged indicator E. Gear Shift Indicator F.
External temperature G. Fuel level indicator (the triangle on the right side of the symbol indicates the vehicle side where the fuel
filler is located) H. Area dedicated to digital warning light view on the message viewed I. Partial odometer J Speedometer
(Speed indicator) K. "Alfa D.N.A." system driving mode L. Messages/information on display M. Total odometer
60A0L0129
59
Page 63 of 182

SPEEDOMETER (SPEED
INDICATOR)
Indicator J shows the speed of the car.
REV COUNTER
Light C shows the engine revs.
FUEL LEVEL GAUGE
Gauge G shows the amount of fuel in
the tank.
The switching on of the
digital
warning light indicates that 4–5 litres of
fuel are left in the tank; in this situation,
refuel as soon as possible.
Do not travel with the fuel tank almost
empty: any gaps in fuel delivery could
damage the catalytic converter.
ENGINE COOLANT
TEMPERATURE
INDICATOR
Indicator A shows the temperature of
the engine coolant and starts supplying
indications when the fluid temperature
exceeds approximately 50°C.
The
digital warning light may switch
on (together with a message on the
display) to indicate that the coolant
temperature is too high; in this case,
stop the engine and contact a
dedicated Alfa Romeo Dealership.
GEAR SHIFT INDICATOR
The GSI (Gear Shift Indicator) system
advises the driver to change gear
through a specific indication E fig. 59 on
the instrument panel.Through the GSI, the driver is notified
that changing gear will allow a reduction
in fuel consumption.
Therefore, for driving oriented towards
reducing fuel consumption, it is
advisable to stick to “Natural” or “All
Weather” mode and to follow the
suggestions of the Gear Shift Indicator,
where traffic conditions permit.
When the (
) icon is displayed on the
instrument panel, the GSI suggests
switching to a higher gear, while when
the (
) icon is displayed, the GSI
suggests changing to a lower gear.
IMPORTANT The GSI is not active
when the transmission is operating in
AUTO mode.
IMPORTANT The indication in the
instrument panel remains on until the
driver shifts gear or the driving
conditions go back to a situation where
gearshifting is not required to improve
consumption.
SETUP MENU
CONTROL BUTTONS
SET/: press briefly to access the
menu and/or go to next screen or
confirm the selection. Hold down to
return to the standard screen fig. 61.
: to scroll up through the displayed
screen and the related options or to
increase the displayed value.
: to scroll down through the
displayed menu and the related options
or to decrease the value displayed.
IMPORTANT The
andbuttons
activate different functions according to
the following situations:
within the menu, they allow you to
scroll up and down through the options;
during setting operations, they
increase or decrease the displayed
value;
outside of the menu, they permit the
61A0L0125
60
KNOWING THE INSTRUMENT PANEL
Page 64 of 182

adjustment of the control panel
brightness.
MENU
The menu comprises a series of options
which can be selected using theandbuttons to access the different
selection and setting (Setup) operations
indicated below.
Some options have a submenu. The
menu can be activated by briefly
pressing the SET/
button.
The menu comprises the following
options:
MENU
SPEED BEEP
TRIP B ACTIVATION/DATA
SET TIME
SET DATE
AUTOCLOSE (for versions/markets,
where provided)
MEASUREMENT UNIT
LANGUAGE
BUZZER VOLUME
BELT BUZZER/BEEP (may only be
displayed after the SBR system is
deactivated by the dedicated Alfa
Romeo Dealership)
SERVICE
AIRBAG/PASSENGER BAG
DAYTIME RUNNING LIGHTS (for
versions/markets, where provided)
EXIT MENU
Selecting an option from
the main menu without a
submenu:
press the SET/button briefly to
select the main menu setting you wish
to change;
press buttonsor(with single
presses) to select the new setting;
press the SET/button briefly to
save the new setting and go back to
the previous main menu option.
Selecting an option from
the main menu with a
submenu:
briefly press the SET/button to
display the first submenu option;
press buttonsor(with single
presses) to scroll through all the
submenu options;
briefly press the SET/button to
select the displayed submenu option
and to open the relevant settings menu;
press buttonsor(with single
presses) to select a new setting for this
submenu option;
press the SET/button briefly to
save the new setting and go back to
the previous submenu option.
MENU OPTIONS
Menu
This option allows you to access the
Setup Menu.
Press the
orbutton to select the
various Menu options. Hold down the
SET/
button to return to the
standard screen.
Speed warning (Speed
limit)
With this function is possible to set the
car speed limit ("km/h" or "mph"); when
this limit is exceeded the driver is
alerted.
To set the desired speed limit, proceed
as follows:
briefly press the SET/button,
the display will show the wording
"Speed warning";
press buttonorto select
speed limit activation ("On") or
deactivation ("Off");
if the function is on, pressorto
select the desired speed limit and then
press SET/
to confirm.
IMPORTANT Setting is possible
between 30 and 200 km/h, or 20 and
125 mph, according to the previously
set unit. See the "Measurement unit
(Measurement unit adjustment)"
paragraph described below. The setting
will increase/decrease by 5 units each
time button
/is pressed. Hold
61