2015 MERCEDES-BENZ SLS AMG GT COUPE light
[x] Cancel search: lightPage 145 of 290
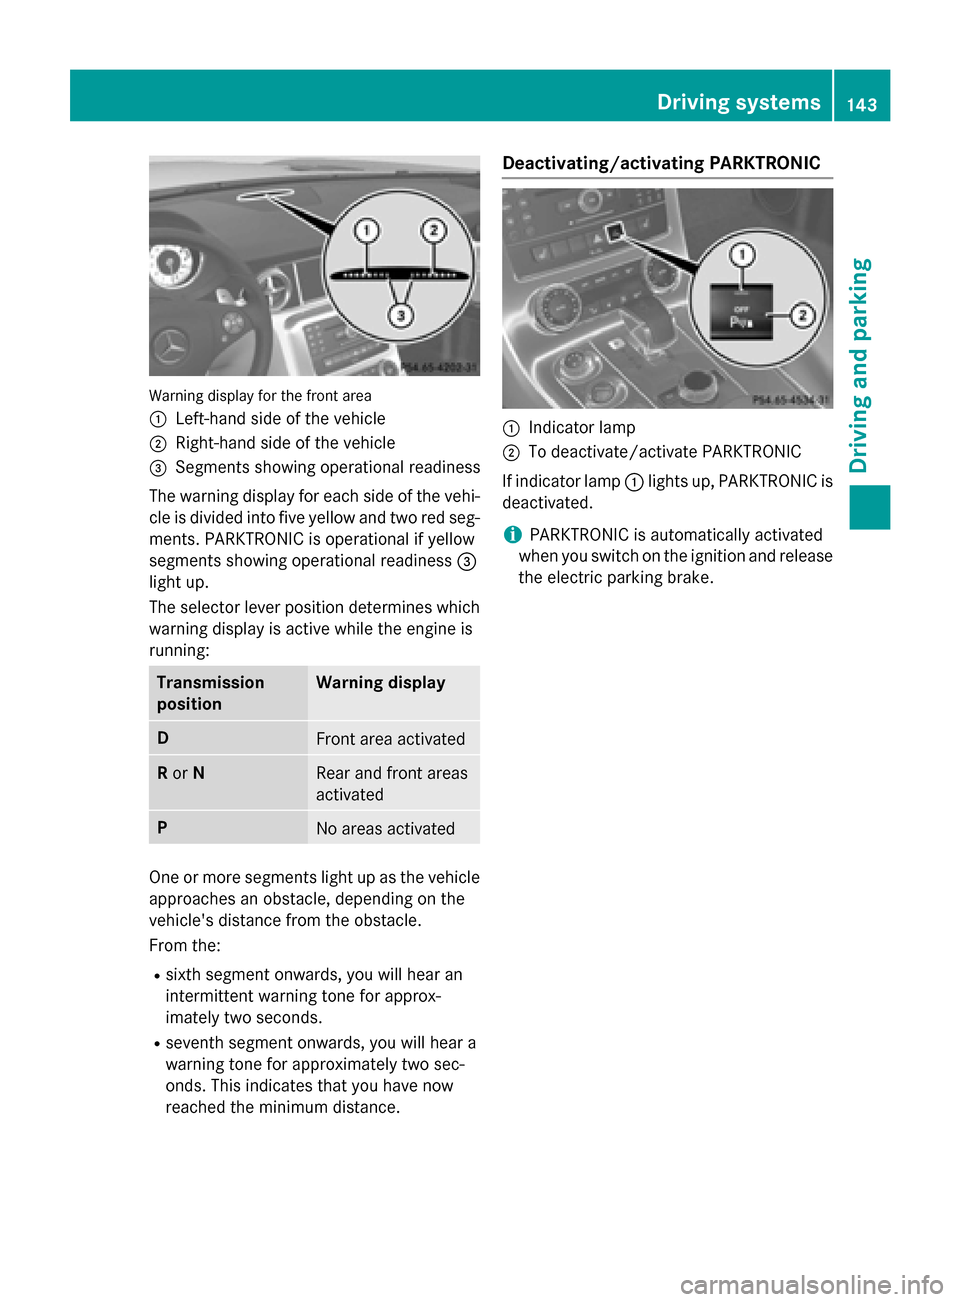
Warning display for the fron
tarea
0043 Left-hand side of the vehicle
0044 Right-han dside of the vehicle
0087 Segments showing operational readiness
The warning display for each side of the vehi- cle is divided into five yellow and two red seg-ments. PARKTRONIC is operational if yellow
segment sshowing operational readiness 0087
light up.
The selector lever position determines which
warning display is active while the engine is
running: Transmission
position Warning display
D
Fron
tarea activated R
or N Rear and fron
tareas
activated P
No areas activated
One or more segment
slight up as the vehicle
approaches an obstacle, depending on the
vehicle's distanc efrom the obstacle.
From the:
R sixt hsegment onwards, you will hear an
intermittent warning tonef or approx-
imately two seconds.
R sevent hsegment onwards, you will hear a
warning tonef or approximately two sec-
onds. This indicates that you have now
reached the minimum distance. Deactivating/activating PARKTRONIC
0043
Indicator lamp
0044 To deactivate/activate PARKTRONIC
If indicator lamp 0043lights up, PARKTRONIC is
deactivated.
i PARKTRONIC is automatically activated
when you switch on the ignition and release
the electric parking brake. Driving systems
143Driving and parking Z
Page 146 of 290
Problems with PARKTRONIC
Problem
Possible causes/consequences and
0050
0050Solutions Only the red segments
in the PARKTRONIC
warning displaysa
re lit.
You also hear awarning
tone for approximately
two seconds.
PARKTRONIC is deacti-
vated after approx-
imately 20 seconds,
and the indicator lamp
in the PARKTRONIC
button lights up. PARKTRONIC has malfunctioned and has switched off.
X If problems persist, have PARKTRONIC checked at aqualified
specialist workshop. Only the red segments
in the PARKTRONIC
warning displaysa
re lit.
PARKTRONIC is deacti-
vated after approx-
imately 20 seconds. The PARKTRONIC sensors are dirty or there is interference.
X Cleant he PARKTRONIC sensors (Y page 228).
X Switch the ignition back on. The problem may be caused by an external source of radio or
ultrasound waves.
X See if PARKTRONIC functions in adifferent location. Rear view camera
Important safety notes The rear view camera is only an aid. It is not a
replacement for your attention to your imme-
diate surroundings. You are always responsi-
ble for safe maneuvering and parking. When
maneuvering or parking, make sure that there are no persons, animals or objectsint he area
in which you are maneuvering.
Under the following circumstances, the rear
view camera will not function, or will function
in alimited manner:
R if the trunk lid is open
R in heavy rain, snow or fog
R at night or in very dark places
R if the camera is exposed to very bright light
R if the area is lit by fluorescent light or LED
lighting (the display may flicker) R
if there is asudden change in temperature,
e.g. when driving into aheated garage in
winter
R if the camera lens is dirty or obstructed
R if the rear of your vehicle is damaged. In this
event, have the camera position and setting checked at aqualified specialist workshop
The field of vision and other functions of the
rear view camera may be restricted due to
additional accessories on the rear of the vehi-
cle (e.g. license plate holder, bicycle rack).
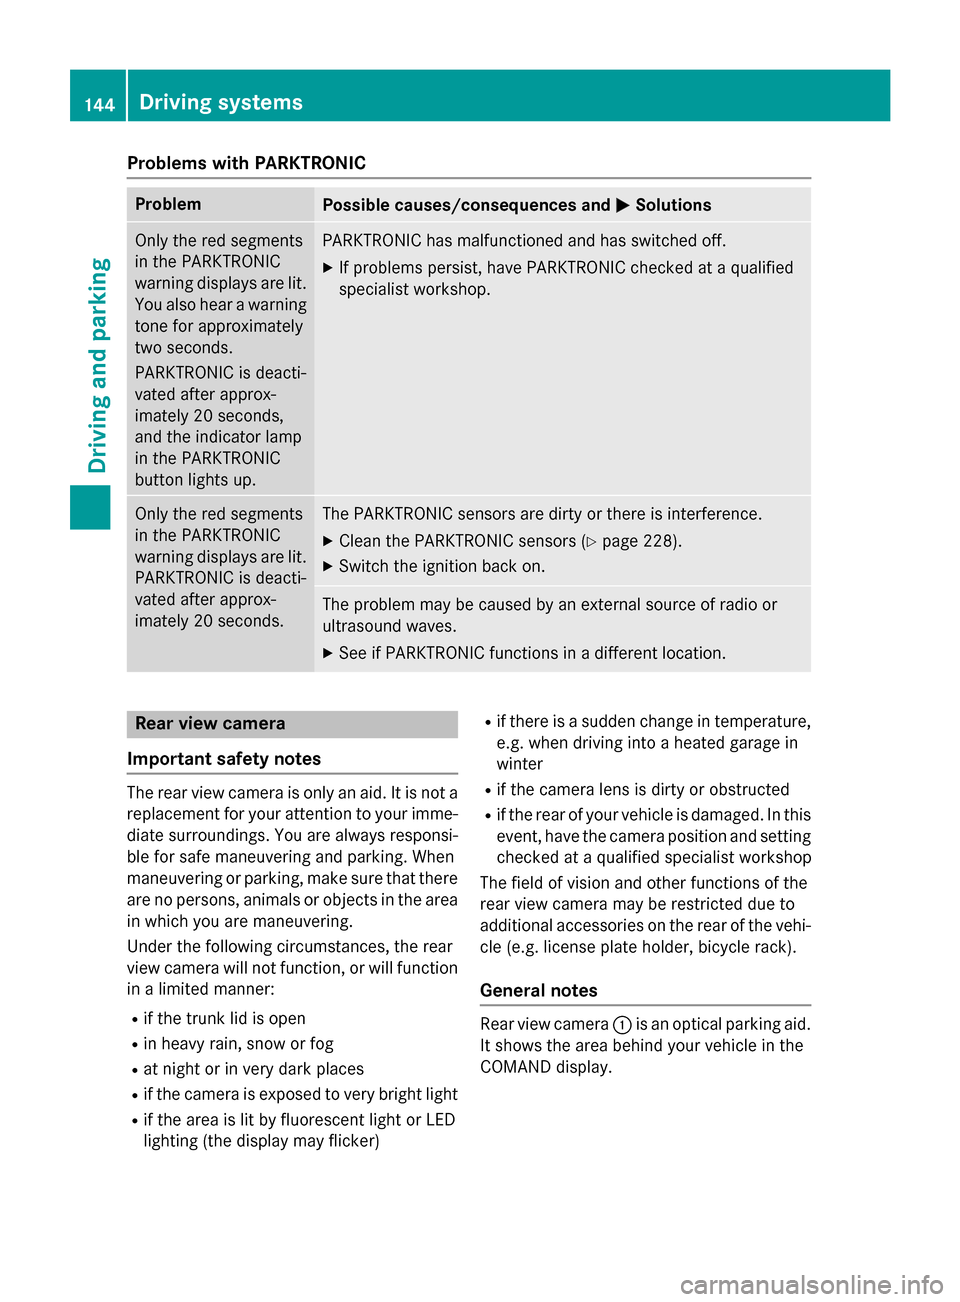
General notes Rear view camera
0043is an optical parking aid.
It shows the area behind your vehicle in the
COMAND display. 144
Driving systemsDriving and parking
Page 148 of 290
with
,ora ltering th edevic ewill void any
warranties, and is not permitted by the
FCC. Do not tamper with ,alter ,oru se in
any non-approved way.
An yu nauthorize dmodification to this
devic ecould void th euser’s authorit yto
operate th eequipment.
Monitorin grange of th esensors In particular
,the detection of obstacles can
be impaired if:
R dirt on th esensor soranythin gelse cover-
ing th esensors
R there is poor visibility, e.g .due to fog ,heavy
rain or snow
R an arrow vehicle travelin ginfront,e.g.a
motorbik eorbicycle
R ther oad has ver ywide lanes
R ther oad has narrow lanes
R you are not driving in th emiddle of th elane
R there are barriers or similar lane borders
Vehicles in th emonitorin grange are then not
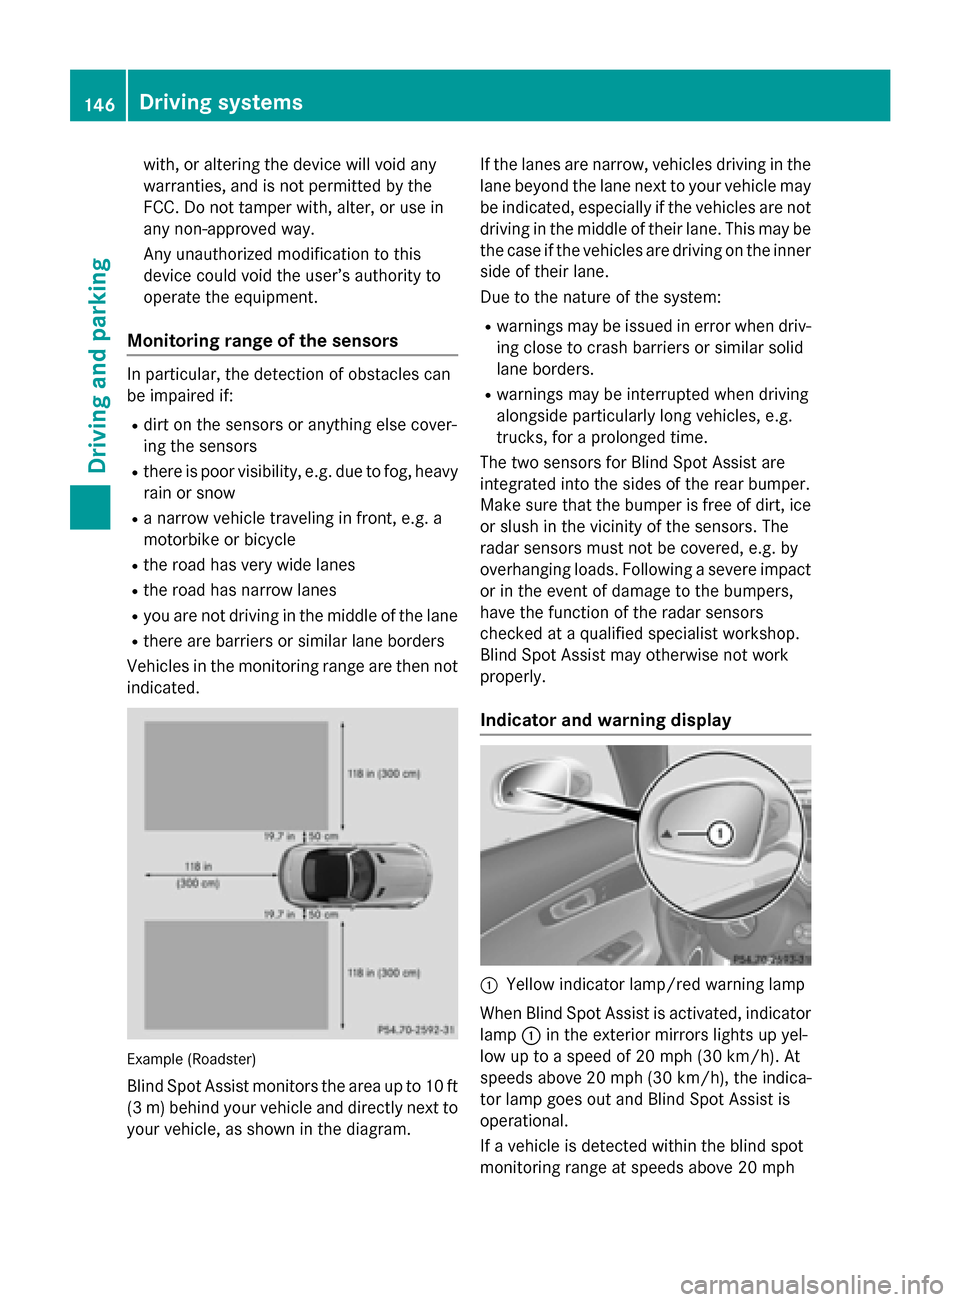
indicated. Example (Roadster)
Blin dSpotA ssist monitors th earea up to 10 ft
(3 m) behi nd your vehicl eand directl ynext to
your vehicle, as shown in the diagram. If the lanes ar
enarrow ,vehicles driving in the
lane beyond the lane next to your vehicl emay
be indicated ,especially if the vehicles ar enot
driving in the middl eoftheirlan e. Thi smaybe
the cas eifthe vehicles ar edriving on the inner
side of thei rlan e.
Due to the nature of the system:
R warning smaybe issued in error when driv-
ing close to crash barriers or similar solid
lane borders.
R warning smaybe interrupte dwhend riving
alongsid eparticularly long vehicles, e.g.
trucks, for aprolonge dtime.
The two sensors for Blind Spo tAssist are
integrated into the side softhe rea rbum per.
Make sure tha tthe bumpe risfreeofd irt, ice
or slus hinthe vicinity of the sensors .The
rada rsensors must not be covered ,e.g.by
overhanging loads. Following asevere impact
or in the event of damage to the bumpers,
have the functio nofthe rada rsensors
checked at aquali fied specialist workshop.
Blind Spo tAssist ma yotherwise not work
properly.
Indicator and warning display 0043
Yellow indicator lamp/red warning lamp
Whe nBlind Spo tAssist is activated ,indicator
lamp 0043in the exterio rmirrors lights up yel-
lo wuptoas peed of 20 mph (30 km/h) .At
speed sabove 20 mph (30 km/h), the indica-
tor lamp goe soutand Blind Spo tAssist is
operational.
If av ehicl eisd etecte dwithi nt he blind spot
monitoring range at speed sabove 20 mph 146
Driving systemsDriving an
dparking
Page 149 of 290
(30 km/h), warnin
glamp 0043on the corre-
sponding side lights up red. This warnin gis
always given when avehicle enters the blind
spot monitoring range from behind or from
the side. When you overtake avehicle, the
warnin gonly occurs if the differenc einspeed
is less than 7mph (12 km/h).
The yellow indicator lamp goes out if reverse gear is engaged. In this event, Blin dSpot
Assist is no longer active.
The brightness of the indicator/warning
lamps is adjusted automatically according to
the ambient light.
Collision warning If
av ehicle is detected in the monitoring range
of Blin dSpot Assist and you switc honthe
corresponding turn signal, adouble warning
ton esounds .Red warnin glamp 0043flashes. If
the turn signal remain son, vehicles detected
are indicated by the flashin gofred warning
lamp 0043.There are no further warnin gtones.
Switching on Blind Spot Assist X
Make sure that Blin dSpot Assist
(Y page 157) is activated in the on-board
computer.
X Ensure that key position 2has been
selected with the Start/Stop button.
Warnin glamps 0043in the exterior mirrors
light up red for approximately 1.5 seconds
and then turn yellow. Driving systems
147Driving and parking Z
Page 159 of 290
X
Press the 0059or0065 button on the steer-
ing wheel to select the Tel Telmenu.
X Press the 0061button to switch to the
redial memory.
X Press the 0063or0064 button to select the
desired name or number.
X Press the 0061or0076 button to start dial-
ing. Assistance menu
Activating/deactivating Blind Spot
Assist You can use the
Blind BlindSpot
SpotAsst.
Asst. function
to activat eordeactivate Blind Spot Assist
(Y page 145).
X Press the 0059or0065 button on the steer-
ing wheel to select the DriveAssist
DriveAssistmenu.
X Press the 0076button.
The curren tselection is displayed.
X To activate/deactivate: press the0076
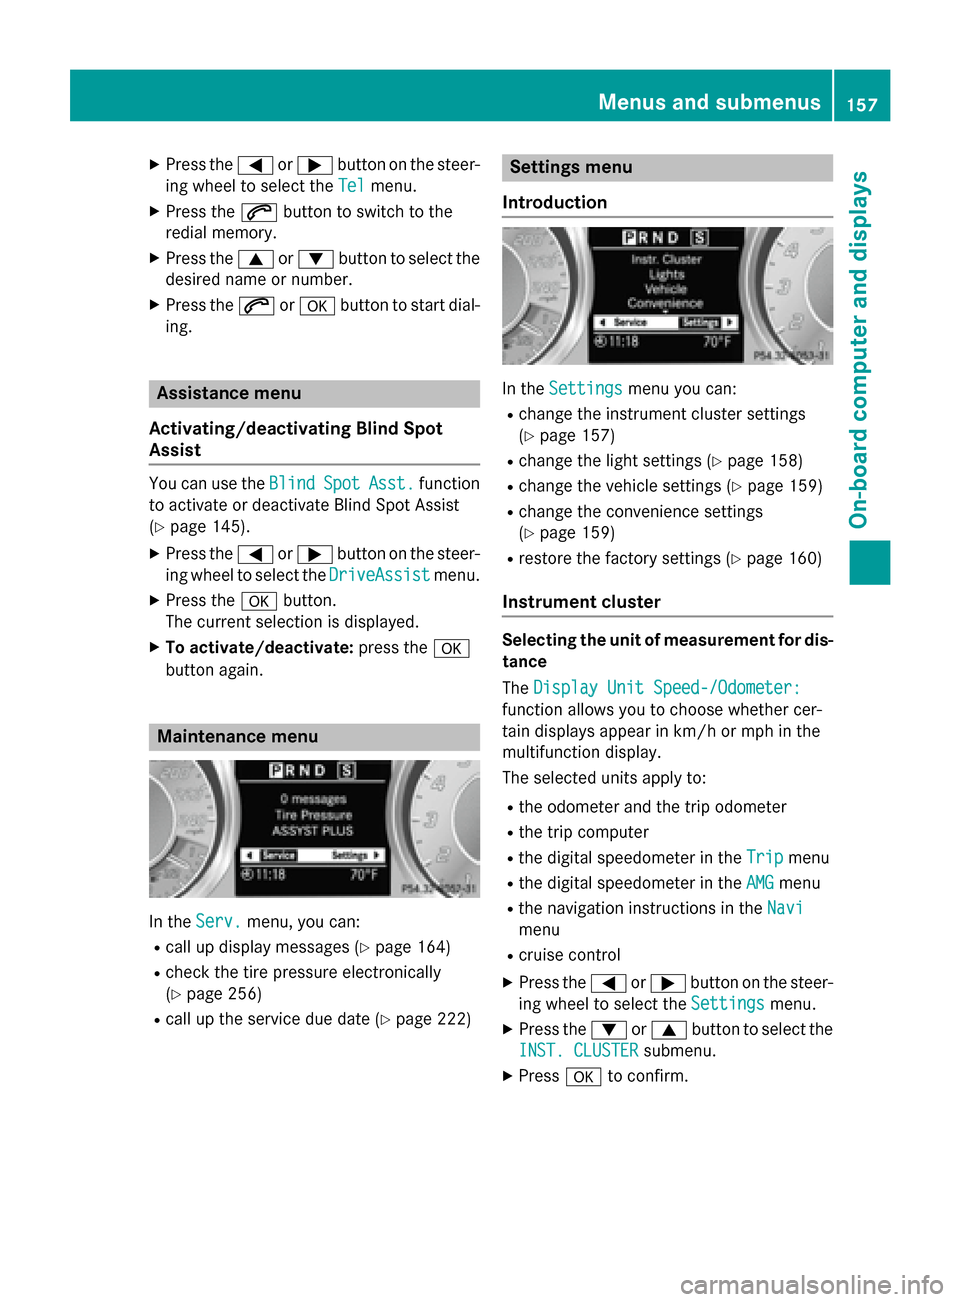
button again. Maintenance menu
In the
Serv.
Serv. menu, you can:
R call up display messages (Y page 164)
R check the tire pressure electronically
(Y page 256)
R call up the service due date (Y page 222) Settings menu
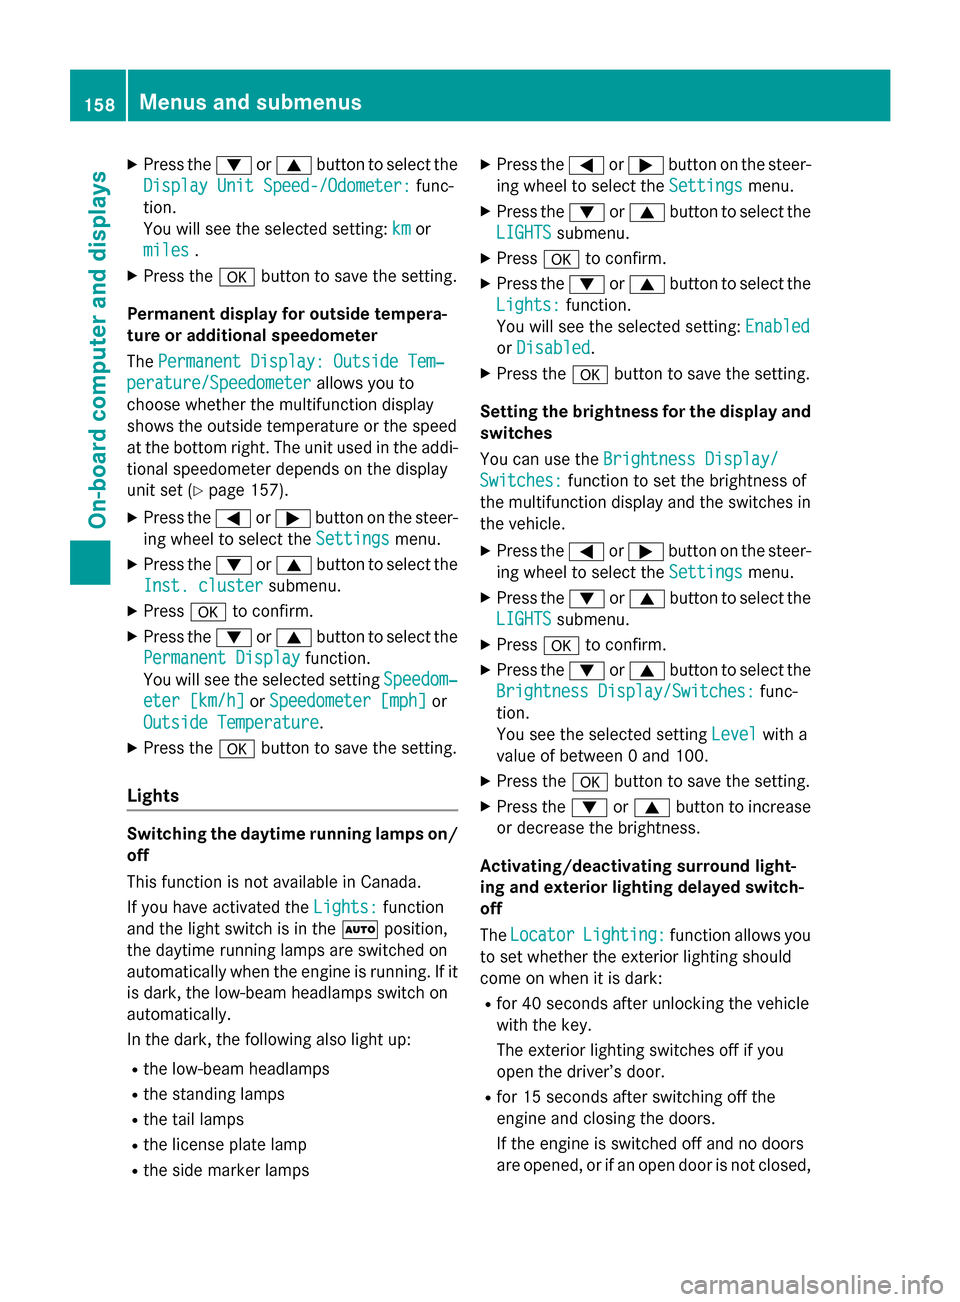
Introduction In the
Settings Settings menu you can:
R change the instrument cluster settings
(Y page 157)
R change the light settings (Y page 158)
R change the vehicle settings (Y page 159)
R change the convenienc esettings
(Y page 159)
R restor ethe factory settings (Y page 160)
Instrument cluster Selecting the unit of measurement for dis-
tance
The Display Unit Speed-/Odometer:
Display Unit Speed-/Odometer:
function allows you to choose whether cer-
tain displays appear in km/ho rmph in the
multifunction display.
The selected units apply to:
R the odometer and the trip odometer
R the trip computer
R the digital speedometer in the Trip
Trip menu
R the digital speedometer in the AMG AMGmenu
R the navigation instruction sintheNavi
Navi
menu
R cruise control
X Press the 0059or0065 button on the steer-
ing wheel to select the Settings
Settingsmenu.
X Press the 0064or0063 button to select the
INST. CLUSTER
INST. CLUSTER submenu.
X Press 0076to confirm. Menus and submenus
157On-board computer and displays Z
Page 160 of 290
X
Press the 0064or0063 button to select the
Display Unit Speed-/Odometer:
Display Unit Speed-/Odometer: func-
tion.
You will see the selected setting: km
km or
miles miles .
X Press the 0076button to save the setting.
Permanent display for outside tempera-
tureora dditional speedometer
The Permanent Display: Outside Tem‐ Permanent Display: Outside Tem‐
perature/Speedometer
perature/Speedometer allows you to
choose whether the multifunction display
shows the outside temperature or the speed
at the bottom right. The unit used in the addi-
tional speedometer depends on the display
unit set (Y page 157).
X Press the 0059or0065 button on the steer-
ing wheel to select the Settings
Settings menu.
X Press the 0064or0063 button to select the
Inst. cluster
Inst. cluster submenu.
X Press 0076to confirm.
X Press the 0064or0063 button to select the
Permanent Display
Permanent Display function.
You will see the selected setting Speedom‐
Speedom‐
eter [km/h]
eter [km/h] orSpeedometer [mph]
Speedometer [mph] or
Outside Temperature
Outside Temperature.
X Press the 0076button to save the setting.
Lights Switching the daytime running lampso
n/
off
This function is not availabl einCanada.
If you have activated the Lights: Lights:function
and the light switch is in the 0058position,
the daytime runnin glamps are switched on
automatically when the engine is running. If it is dark, the low-beam headlamps switch on
automatically.
In the dark, the following also light up:
R the low-beam headlamps
R the standin glamps
R the tail lamps
R the license plate lamp
R the side marker lamps X
Press the 0059or0065 button on the steer-
ing wheel to select the Settings Settingsmenu.
X Press the 0064or0063 button to select the
LIGHTS LIGHTS submenu.
X Press 0076to confirm.
X Press the 0064or0063 button to select the
Lights:
Lights: function.
You will see the selected setting: Enabled
Enabled
or Disabled
Disabled.
X Press the 0076button to save the setting.
Setting the brightness for the display and switches
You can use the BrightnessDisplay/
Brightnes sDisplay/
Switches: Switches: function to set the brightness of
the multifunction display and the switches in
the vehicle.
X Press the 0059or0065 button on the steer-
ing wheel to select the Settings
Settingsmenu.
X Press the 0064or0063 button to select the
LIGHTS
LIGHTS submenu.
X Press 0076to confirm.
X Press the 0064or0063 button to select the
Brightnes sDisplay/Switches:
Brightnes sDisplay/Switches: func-
tion.
You see the selected setting Level
Level with a
value of between 0and 100.
X Press the 0076button to save the setting.
X Press the 0064or0063 button to increase
or decrease the brightness.
Activating/deactivating surround light-
ing and exterior lighting delayed switch-
off
The Locator
Locator Lighting: Lighting: function allows you
to set whether the exterior lighting should
come on when it is dark:
R for 40 seconds after unlocking the vehicle
with the key.
The exterior lighting switches off if you
open the driver’s door.
R for 15 seconds after switchin goff the
engine and closing the doors.
If the engine is switched off and no doors
are opened, or if an open door is not closed, 158
Menus and submenusOn-board computer and displays
Page 161 of 290
the exterior lighting goes ou
tafter
60 second s.
If you activate the Locator
Locator Lighting:
Lighting: func-
tion, the following lightu p:
R the parking lamps
R the low-beam headlamps
R the license plate lamp
R the surround lighting in the exterior mirrors
X Press the 0059or0065 button on the steer-
ing wheeltos elect theSettings
Settings menu.
X Press the 0064or0063 button to select the
LIGHTS
LIGHTS submenu.
X Press 0076to confirm.
X Press the 0064or0063 button to select the
Locator Lighting:
Locator Lighting: function.
You wills ee the selected setting: Enabled
Enabled
or Disabled
Disabled.
X Press the 0076button to save the setting.
Deactivating the delayed switch-off tempora-
rily:
X Select key position 0with the Start/Stop
button before leaving the vehicle.
X Select key position 2and then key position
0 again with the Start/Stop button
The delayed shut-off is deactivated.
The delayed shut-off is reactivated the next
time you start the engine.
Activating/deactivating the interio rlight-
ing delayed switch-off
If you select key position 0with the Start/
Stop button when the Light. delay
Light. delay func-
tion is activated, the interior lighting lights up
for approximately 20 seconds if it is dark.
X Press the 0059or0065 button on the steer-
ing wheeltos elect theSettings Settings menu.
X Press the 0064or0063 button to select the
Light
Light submenu.
X Press 0076to confirm.
X Press the 0064or0063 button to select the
Light. delay
Light. delay function.
You wills ee the selected setting: on
onoroff
off.
X Press the 0076button to save the setting. Vehicle Activating/deactivating the automatic
door locking mechanism
If you select the
Automatic Door Lock: Automatic Door Lock:
function, the vehicle is centrally locked above
as peed of around 9mph(15 km/h).
i For further information on the automatic
locking feature, see (Y page 70).
X Press the 0059or0065 button on the steer-
ing wheeltos elect theSettings
Settings menu.
X Press the 0064or0063 button to select the
Vehicle
Vehicle submenu.
X Press the 0076button to confirm.
X Press the 0064or0063 button to select the
Automatic door locks
Automatic door locks function.
You wills ee the selected setting: Enabled
Enabled
or Disabled Disabled.
X Press the 0076button to save the setting.
Convenience Activating/deactivating the EASY-
ENTRY/EXIT feature
G
WARNING
When the EASY-ENTRY/EXIT feature adjusts
the steering wheel, you and other vehicle
occupants –particularly childre n–could
become trapped .There is arisk of injury.
Whilet he EASY-ENTRY/EXIT feature is mak-
ing adjustments, make sure that no one has
any body parts in the sweep of the steering
wheel.
If somebod ybecomes trapped:
R press one of the memory function position
buttons, or
R move the switch for steering wheela djust-
ment in the opposite direction to that in
which the steering wheelism oving.
The adjustment process is stopped.
You can use the Easy
Easy Entry/Exit: Entry/Exit: function
to activate or deactivate the EASY-ENTRY/
EXIT feature (Y page 89). Menus and submenus
159On-board computer and displays Z
Page 162 of 290
X
Press the 0059or0065 button on the steer-
ing wheel to select the Settings Settingsmenu.
X Press the 0064or0063 button to select the
Convenience
Convenience submenu.
X Press 0076to confirm.
X Press the 0064or0063 button to select the
Easy Entry/Exit
Easy Entry/Exit function.
You will see the selected setting: Enabled Enabled
or Disabled
Disabled.
X Press the 0076button to save the setting.
Switching the fold-in mirrors when lock-
ing feature on/off
If you switch on the Fold FoldMirrors
Mirrors in
inwhen
when
Locking
Locking function, the exterior mirrors fold in
when you lock the vehicle. If you unlock the
vehicle and then open the driver's or front-
passenger door, the exterior mirrors fold out
again.
If you have switched the function on and you fold the exterior mirrors in using the button on
the door (Y page 91), they will not fold out
automatically. The exterior mirrors can then
only be folded out using the button on the
door.
X Press the 0059or0065 button on the steer-
ing wheel to select the Settings
Settings menu.
X Press the 0064or0063 button to select the
CONVENIENCE
CONVENIENCE submenu.
X Press 0076to confirm.
X Press the 0064or0063 button to select the
Fold Mirrors in when Locking
Fold Mirrors in when Locking func-
tion.
You will see the selected setting: Enabled
Enabled
or Disabled Disabled.
X Press the 0076button to save the setting.
Restoring the factor ysettings For safety reasons, the
Lights:
Lights:function in
the LIGHTS
LIGHTS submenu is only reset if the vehi-
cle is stationary. X
Press the 0059or0065 button on the steer-
ing wheel to select the Settings
Settingsmenu.
X Press the 0064or0063 button to select the
Factory Settings
Factory Settings submenu.
X Press 0076to confirm.
The Reset All Settings?
Reset All Settings? message
appears.
X Press the 0064or0063 button to select
Yes
Yes orNo
No.
X Press the 0076button to confirm the selec-
tion.
If you have selected Yes Yes,the multifunction
display shows aconfirmation message. AMG menu
AMG displays X
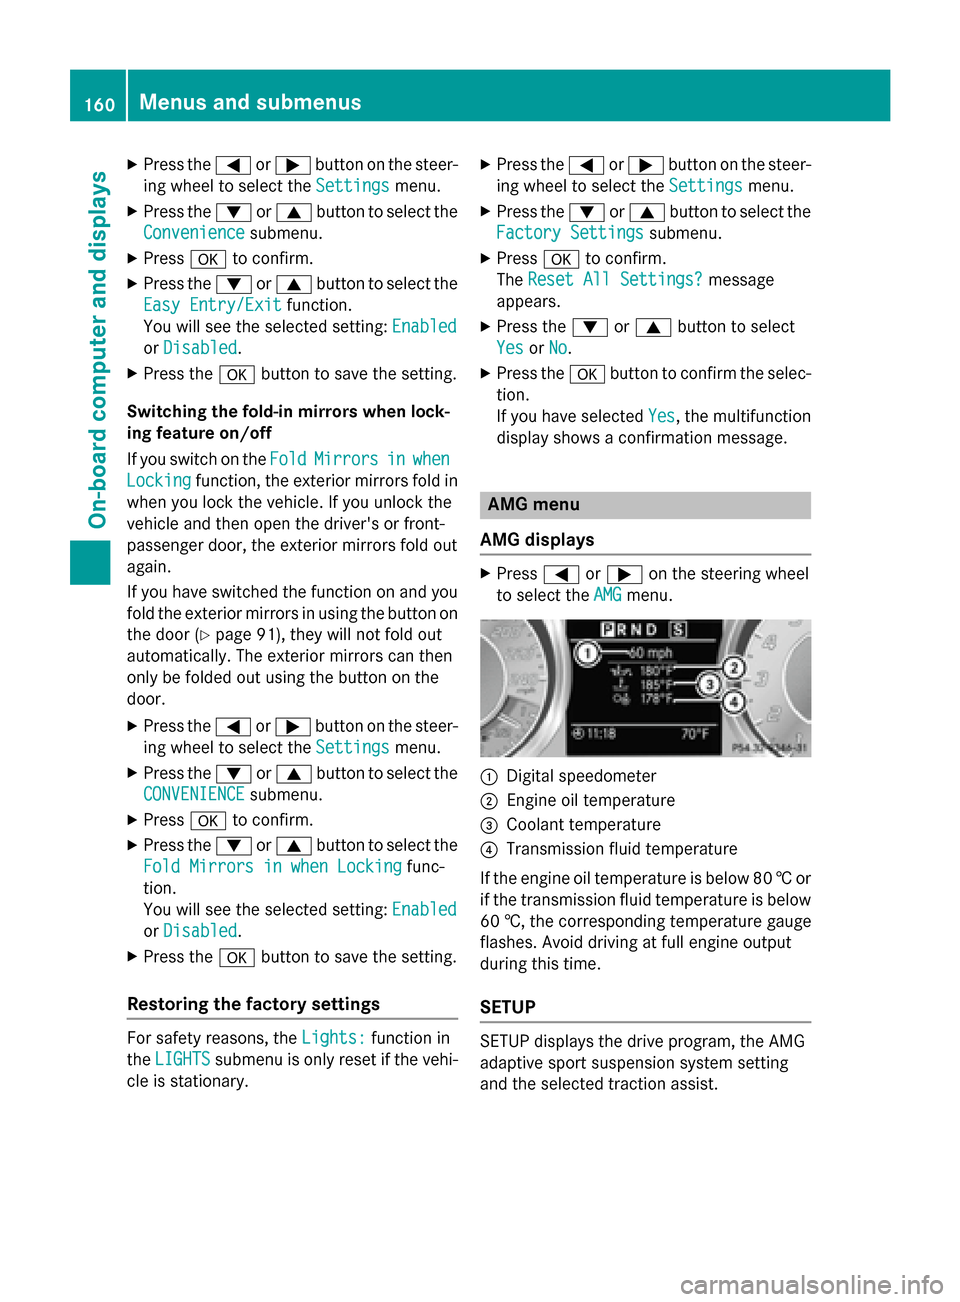
Press 0059or0065 on the steerin gwheel
to select the AMG
AMGmenu. 0043
Digital speedometer
0044 Engine oil temperature
0087 Coolant temperature
0085 Transmission fluid temperature
If the engine oil temperature is below 80 †or
if the transmission fluid temperature is below
60 †, the correspondin gtemperature gauge
flashes .Avoid drivin gatfull engine output
durin gthis time.
SETUP SETUP displays the drive program, the AMG
adaptiv
esport suspension system setting
and the selected traction assist. 160
Menus and submenusOn-board computer and displays