2015 MERCEDES-BENZ GLE SUV tyre pressure
[x] Cancel search: tyre pressurePage 181 of 453
=
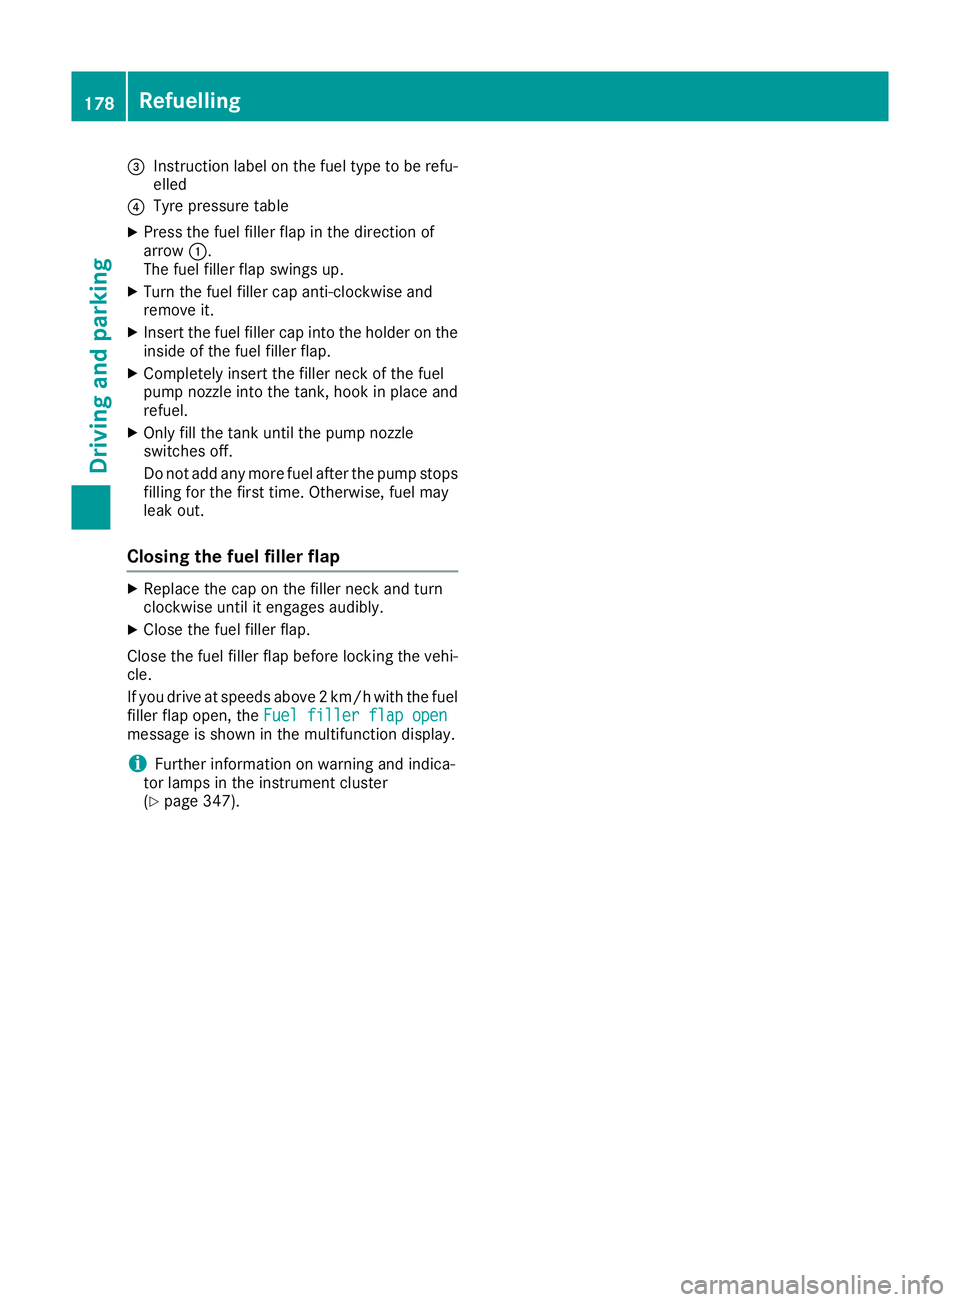
Instruction label on the fuel type to be refu-
elled
? Tyre pressure table
X Press the fuel filler flap in the direction of
arrow :.
The fuel filler flap swings up.
X Turn the fuel filler cap anti-clockwise and
remove it.
X Insert the fuel filler cap into the holder on the
inside of the fuel filler flap.
X Completely insert the filler neck of the fuel
pump nozzle into the tank, hook in place and
refuel.
X Only fill the tank until the pump nozzle
switches off.
Do not add any more fuel after the pump stops
filling for the first time. Otherwise, fuel may
leak out.
Closing the fuel filler flap X
Replace the cap on the filler neck and turn
clockwise until it engages audibly.
X Close the fuel filler flap.
Close the fuel filler flap before locking the vehi-
cle.
If you drive at speeds above 2 km/h with the fuel
filler flap open, the Fuel filler flap open
Fuel filler flap open
message is shown in the multifunction display.
i Further information on warning and indica-
tor lamps in the instrument cluster
(Y page 347). 178
RefuellingDriving and parking
Page 197 of 453
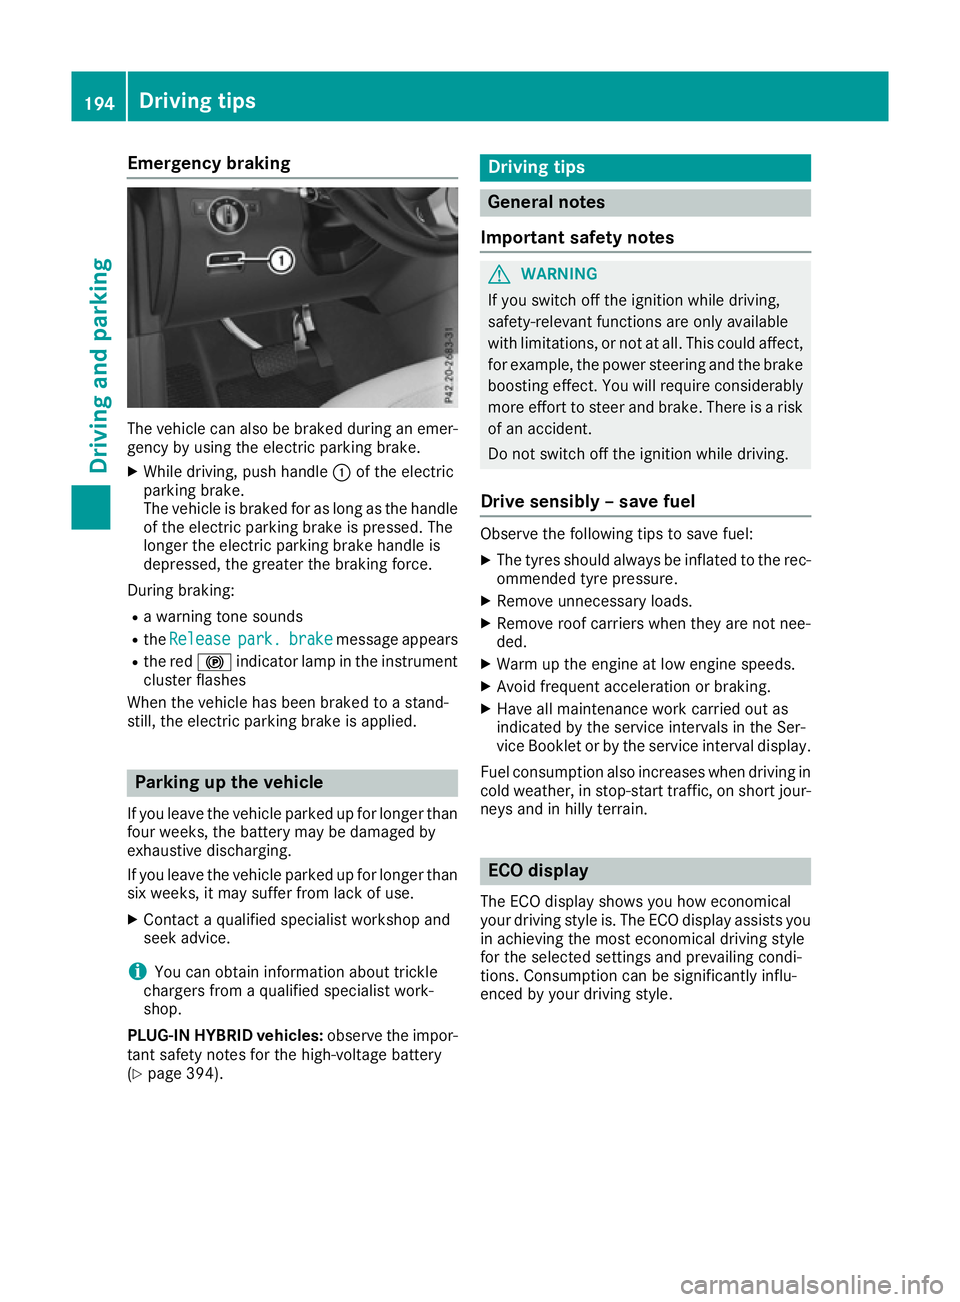
Emergency braking
The vehicle can also be braked during an emer-
gency by using the electric parking brake.
X While driving, push handle :of the electric
parking brake.
The vehicle is braked for as long as the handle of the electric parking brake is pressed. The
longer the electric parking brake handle is
depressed, the greater the braking force.
During braking:
R a warning tone sounds
R the Release
Release park. park.brake
brakemessage appears
R the red !indicator lamp in the instrument
cluster flashes
When the vehicle has been braked to a stand-
still, the electric parking brake is applied. Parking up the vehicle
If you leave the vehicle parked up for longer than
four weeks, the battery may be damaged by
exhaustive discharging.
If you leave the vehicle parked up for longer than
six weeks, it may suffer from lack of use.
X Contact a qualified specialist workshop and
seek advice.
i You can obtain information about trickle
chargers from a qualified specialist work-
shop.
PLUG-IN HYBRID vehicles: observe the impor-
tant safety notes for the high-voltage battery
(Y page 394). Driving tips
General notes
Important safety notes G
WARNING
If you switch off the ignition while driving,
safety-relevant functions are only available
with limitations, or not at all. This could affect, for example, the power steering and the brake
boosting effect. You will require considerably
more effort to steer and brake. There is a risk of an accident.
Do not switch off the ignition while driving.
Drive sensibly – save fuel Observe the following tips to save fuel:
X The tyres should always be inflated to the rec-
ommended tyre pressure.
X Remove unnecessary loads.
X Remove roof carriers when they are not nee-
ded.
X Warm up the engine at low engine speeds.
X Avoid frequent acceleration or braking.
X Have all maintenance work carried out as
indicated by the service intervals in the Ser-
vice Booklet or by the service interval display.
Fuel consumption also increases when driving in
cold weather, in stop-start traffic, on short jour- neys and in hilly terrain. ECO display
The ECO display shows you how economical
your driving style is. The ECO display assists you in achieving the most economical driving style
for the selected settings and prevailing condi-
tions. Consumption can be significantly influ-
enced by your driving style. 194
Driving tipsDriving and parking
Page 199 of 453
In addition to driving style, the actual consump-
tion is affected by other factors, such as:
R load
R tyre pressure
R cold start
R choice of route
R the use of electrical consumers
These factors are not included in the ECO dis-
play.
An economical driving style involves driving at a
moderate engine speed.
To achieve a higher value in the categories
"Acceleration" and "Constant":
R observe the gearshift recommendation
R drive the vehicle in the Comfortdrive pro-
gram.
On long journeys at a constant speed, e.g. on the motorway, only the outer area for "Constant"
will change.
The ECO display summarises the driving style
from the start of the journey to its completion.
Therefore, there are more marked changes in
the outer areas at the start of a journey. During
a prolonged driving time, these changes are
smaller. For more marked changes, perform a
manual reset (Y page 285).
Further information on the ECO display
(Y page 285). Braking
Important safety notes G
WARNING
If you shift down on a slippery road surface in an attempt to increase the engine's braking
effect, the drive wheels could lose their grip.
This increases the risk of skidding and having
an accident.
Do not shift down for additional engine brak-
ing on a slippery road surface.
Downhill gradients Do not depress the brake pedal continuously
while the vehicle is in motion, e.g. never cause
the brakes to rub by constantly applying light
pressure to the pedal. This results in excessive
and premature wear to the brake pads. Use the left-hand gearshift paddle to shift to a
lower gear on long and steep downhill gradients.
Take particular note of this when driving a laden vehicle.
i This also applies if you have activated cruise
control, SPEEDTRONIC or DISTRONIC PLUS.
This will use the braking effect of the engine, so
less braking will be required to maintain vehicle
speed. This relieves the load on the brake sys-
tem and prevents the brakes from overheating
and wearing too quickly.
Heavy and light loads G
WARNING
The braking system can overheat if you leave your foot on the brake pedal while driving.
This increases the braking distance and could
even cause the braking system to fail. There is
a risk of an accident.
Never use the brake pedal as a footrest. Do
not simultaneously depress both the brake
pedal and the accelerator pedal while driving.
! Depressing the brake pedal constantly
results in excessive and premature wear to
the brake pads.
If heavy demands are made on the brakes, do
not park the vehicle immediately. Drive on for a
short while. This allows the airflow to cool the
brakes more quickly.
If the brakes have been used only moderately,
you should occasionally test their effectiveness.
To do this, brake more firmly from a higher
speed. This improves the grip of the brakes.
Wet road surfaces If you have driven for a long time in heavy rain
without braking, there may be a delayed reac-
tion from the brakes when braking for the first
time. This may also occur after a car wash or
after driving through deep water.
You will have to depress the brake pedal more
firmly. Maintain a greater distance to the vehicle in front.
After driving on a wet road or having the vehicle
washed, brake firmly while paying attention to
the traffic conditions. This will warm up the
brake discs, thereby drying them more quickly
and protecting them against corrosion. 196
Driving tipsDriving and parking
Page 203 of 453
The following driving systems are specially
adapted to off-road driving:
R the Offroad drive program (vehicles without
Off-Road Engineering package)
(Y page 254)
R Offroad andOffroad Plus drive programs
(vehicles with Off-Road Engineering pack-
age) . (Y page 254)
R LOW RANGE offroad gear (vehicles with the
Off-Road Engineering package)
(Y page 255)
R Differential lock (vehicles with the Off-Road
Engineering package) (Y page 255)
R Off-road ABS (Y page 71)
R Offroad 4ETS (Y page 76)
R Offroad ESP ®
(Y page 77)
R AIRMATIC package (vehicle level)
(Y page 220)
R DSR (Downhill Speed Regulation)
(Y page 252)
Observe the following notes:
R Stop the vehicle before driving off-road. If
necessary, select the offroad program
(Y page 254) or shift to the LOW RANGE off-
road gear (Y page 255).
R Select a vehicle level suitable for the off-road
terrain. To avoid damaging the vehicle, make sure there is always sufficient ground clear-
ance.
R Make sure that items of luggage and loads are
stowed safely and are well secured
(Y page 355).
R Always keep the engine running and in gear
when driving on a downhill gradient. Activate
DSR (Y page 252).
R Drive slowly and evenly, if necessary at walk-
ing pace.
R Ensure that the wheels are in contact with the
ground at all times.
R Drive with extreme care on unknown off-road
routes where visibility is poor. For safety rea-
sons, get out of the vehicle first and survey
the off-road route.
R Look out for obstacles such as rocks, holes,
tree stumps and furrows.
R Take care when turning on an uphill or down-
hill slope or when driving across a slope. The
vehicle could otherwise tip over. R
Always keep the doors, the tailgate and the
sliding sunroof closed while the vehicle is in
motion.
R Do not stray from marked routes or paths.
R Observe the notes on off-road fording
(Y page 198).
i Information about retrofitting special all-ter-
rain tyres is available from any qualified spe-
cialist workshop.
i Do not use the HOLD function when driving
off-road, on steep uphill or downhill gradients or on slippery or loose surfaces. The HOLD
function cannot hold the vehicle on such sur-faces.
Checklist before driving off-road X
Engine oil level: check the engine oil and top
it up if necessary.
When driving on steep gradients, the oil level must be sufficiently high to ensure a correct
oil supply in the vehicle.
X AdBlue ®
tank (BlueTEC vehicles): check
the level and top up if necessary
(Y page 180).
X Tyre-change tool kit: check that the jack is
working and make sure you have the wheel
wrench, a robust tow cable and a folding
spade in the vehicle.
X Wheels and tyres: check the tyre tread
depth and tyre pressure.
X Check for damage and remove any foreign
objects, e.g. small stones, from the wheels/
tyres.
X Replace any missing valve caps.
X Replace dented or damaged wheels.
X Wheels: dented or bent wheels can lead to a
loss of tyre pressure and damage to the tyre
bead. Before driving off-road, check the
wheels and replace them if necessary.
Checklist after driving off-road !
If you detect damage to the vehicle after
driving off-road, have the vehicle checked
immediately at a qualified specialist work-
shop.
Driving over rough terrain places greater
demands on your vehicle than driving on normal
roads. After driving off-road, check the vehicle.
This allows you to detect damage promptly and 200
Driving tipsDriving and parking
Page 210 of 453
The
SPEEDTRONIC passive
SPEEDTRONIC passive message in the
multifunction display disappears.
Deactivating variable SPEEDTRONIC
There are several ways to deactivate variable
SPEEDTRONIC:
X Briefly press the cruise control lever forwards
B .
or X Briefly press the cruise control lever in the
direction of arrow A.
LIM indicator lamp ;in the cruise control
lever goes out. Variable SPEEDTRONIC is
deactivated.
Cruise control or DISTRONIC PLUS is selec-
ted.
It is not possible to deactivate variable SPEED-
TRONIC by braking.
i The last speed stored is cleared when you
switch off the engine.
Permanent SPEEDTRONIC
You can use the on-board computer to perma-
nently limit the speed to a value between
160 km/h(e.g. for driving on winter tyres) and
the maximum design speed (Y page 294).
Shortly before the stored speed is reached, it
appears in the multifunction display.
Permanent SPEEDTRONIC remains active even
if variable SPEEDTRONIC is deactivated.
You cannot exceed the stored limit speed, even
if you depress the accelerator pedal beyond the
pressure point (kickdown). DISTRONIC PLUS
General notes DISTRONIC PLUS regulates the speed and auto-
matically helps you maintain the distance to the
vehicle detected in front. Vehicles are detected with the aid of the radar sensor system.
DISTRONIC PLUS brakes automatically so that
the set speed is not exceeded.
You must select a lower gear in good time on
long and steep downhill gradients, especially if
the vehicle is laden or towing a trailer. By doing
so, you will make use of the braking effect of the engine. This relieves the load on the brake sys-
tem and prevents the brakes from overheating
and wearing too quickly. If DISTRONIC PLUS detects that there is a risk of
a collision, you will be warned visually and
acoustically. Without your intervention,
DISTRONIC PLUS cannot prevent a collision. An intermittent warning tone will then sound and
the distance warning lamp will light up in the
instrument cluster. Brake immediately to
increase the distance to the vehicle driving in
front, or take evasive action, provided it is safe
to do so.
For DISTRONIC PLUS to assist you, the radar
sensor system must be operational.
DISTRONIC PLUS operates in the range
between 0 km/h and 200 km/h.
Do not use DISTRONIC PLUS while driving on
roads with steep gradients.
Important safety notes G
WARNING
DISTRONIC PLUS does not react to:
R people or animals
R stationary obstacles on the road, e.g. stop-
ped or parked vehicles
R oncoming and crossing traffic
As a result, DISTRONIC PLUS may neither give
warnings nor intervene in such situations.
There is a risk of an accident.
Always pay careful attention to the traffic sit- uation and be ready to brake. G
WARNING
DISTRONIC PLUS cannot always clearly rec-
ognise other road users and complex traffic
conditions.
In such cases, DISTRONIC PLUS may:
R give an unnecessary warning and then
brake the vehicle
R neither give a warning nor intervene
R accelerate or brake unexpectedly
There is a risk of an accident.
Continue to drive carefully and be prepared to
brake, particularly if DISTRONIC PLUS warns
you. Driving systems
207Driving and parking Z
Page 218 of 453
and right), only focusing on the vehicle in front if
detected lane markings are not present.
If these conditions are not present, Steering
Assist and Stop&Go Pilot cannot provide assis-
tance.
DISTRONIC PLUS must be active in order for the
function to be available.
Important safety notes If you fail to adapt your driving style, DISTRONIC PLUS with Steering Assist and Stop&Go Pilot
can neither reduce the risk of an accident nor
override the laws of physics. It cannot take into
account road, weather or traffic conditions.
DISTRONIC PLUS with Steering Assist and
Stop&Go Pilot is only an aid. You are responsible
for the distance to the vehicle in front, for vehi- cle speed, for braking in good time and for stay-
ing in lane.
DISTRONIC PLUS with Steering Assist and
Stop&Go Pilot does not detect road and traffic
conditions and does not detect all road users. If you are following a vehicle which is driving
towards the edge of the carriageway, your vehi-cle could come into contact with the kerb or
other road boundaries. Be particularly aware of
other road users, e.g. cyclists, that are directly
next to your vehicle.
Obstacles such as traffic pylons on the lane or
projecting out into the lane are not detected.
An inappropriate steering intervention, e.g. after
intentionally driving over a lane marking, can be
corrected at any time if you steer slightly in the opposite direction.
DISTRONIC PLUS with Steering Assist and
Stop&Go Pilot cannot continuously keep your
vehicle in lane. In some cases, the steering
intervention is not sufficient to bring the vehicle back to the lane. In such cases, you must steer
the vehicle yourself to ensure that it does not
leave the lane.
The support offered by the system may be
impaired if:
R there is poor visibility, e.g. due to insufficient
illumination of the road, or due to snow, rain,fog or spray
R there is glare, e.g. from oncoming traffic, the
sun or reflection from other vehicles (e.g. if
the road surface is wet)
R the windscreen is dirty, misted up, damaged
or covered, for instance by a sticker, in the
vicinity of the camera R
no or several, unclear lane markings are pres-
ent for one lane, e.g. in a construction area
R the lane markings are worn away, dark or cov-
ered up, e.g. by dirt or snow
R the distance to the vehicle in front is too small
and the lane markings thus cannot be detec-
ted
R the lane markings change quickly, e.g. lanes
branch off, cross one another or merge
R the road is narrow and winding
R there are highly variable shade conditions on
the road
The system is switched to passive and no longer assists you by performing steering interventions
if:
R you actively change lane
R you switch on the turn signal
R you take your hands off the steering wheel or
do not steer for a prolonged period of time
i After you have finished changing lanes,
Steering Assist and Stop&Go Pilot are auto-
matically active again.
Steering Assist and Stop&Go Pilot cannot pro-
vide assistance:
R on very sharp corners
R when towing a trailer
R a loss of tyre pressure or a defective tyre has
been detected and displayed
Pay attention also to the important safety notes
for DISTRONIC PLUS (Y page 207).
The steering interventions are carried out with a limited steering moment. The system requires
the driver to keep his hands on the steering
wheel and to steer himself.
If you do not steer yourself or if you take your
hands off the steering wheel for a prolonged
period of time, the system will first alert you with
a visual warning. A steering wheel symbol
appears in the multifunction display. If you have
still not started to steer and have not taken hold of the steering wheel after five seconds at the
latest, a warning tone also sounds to remind you
to take control of the vehicle. Steering Assist
and Stop&Go Pilot switch to passive mode.
DISTRONIC PLUS remains active. Driving systems
215Driving and parking Z
Page 223 of 453
Activating the HOLD function
X
Make sure that the activation conditions are
met.
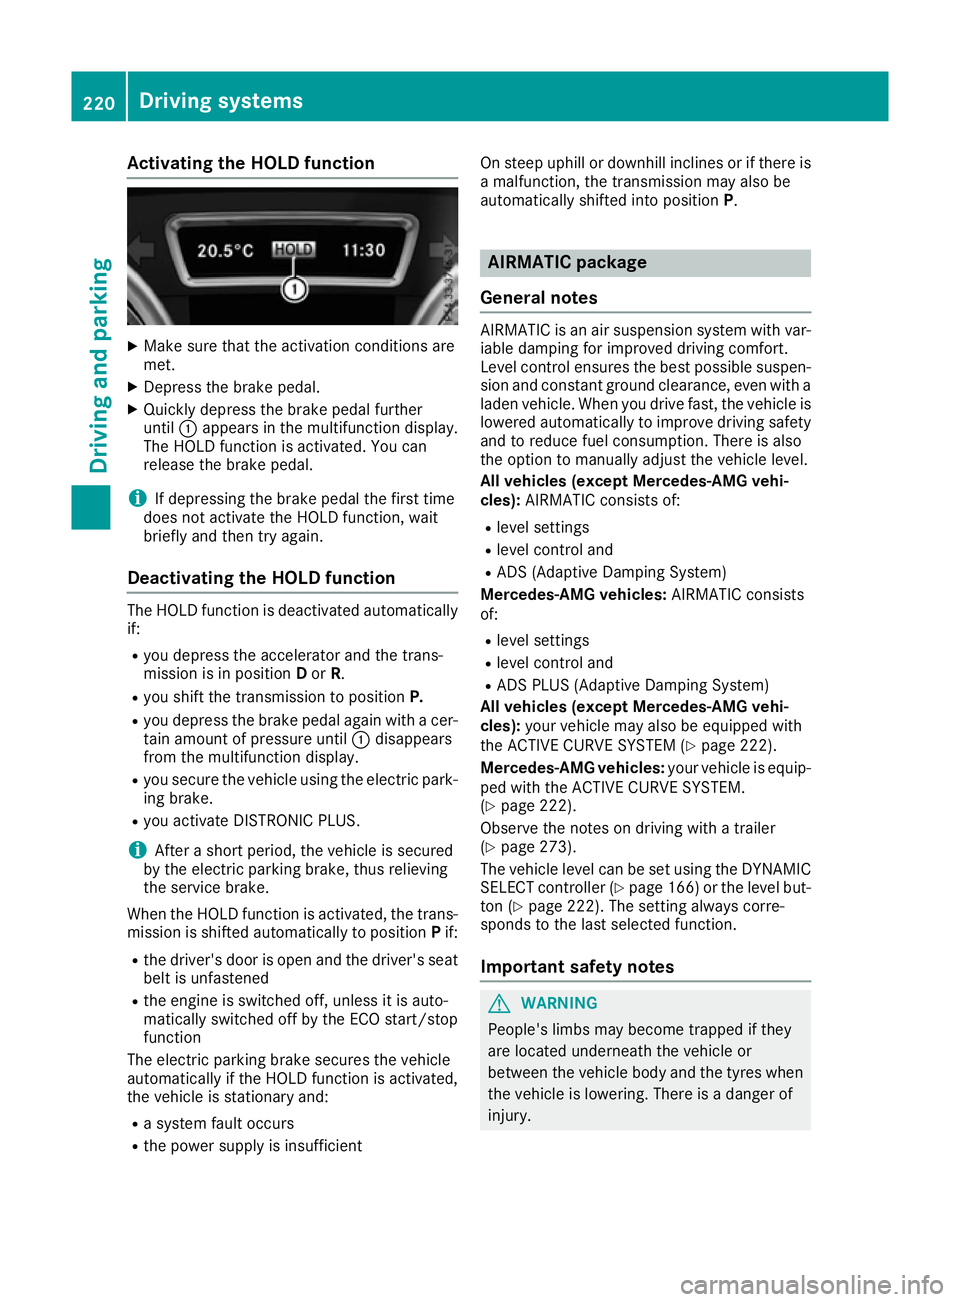
X Depress the brake pedal.
X Quickly depress the brake pedal further
until :appears in the multifunction display.
The HOLD function is activated. You can
release the brake pedal.
i If depressing the brake pedal the first time
does not activate the HOLD function, wait
briefly and then try again.
Deactivating the HOLD function The HOLD function is deactivated automatically
if:
R you depress the accelerator and the trans-
mission is in position Dor R.
R you shift the transmission to position P.
R you depress the brake pedal again with a cer-
tain amount of pressure until :disappears
from the multifunction display.
R you secure the vehicle using the electric park-
ing brake.
R you activate DISTRONIC PLUS.
i After a short period, the vehicle is secured
by the electric parking brake, thus relieving
the service brake.
When the HOLD function is activated, the trans-
mission is shifted automatically to position Pif:
R the driver's door is open and the driver's seat
belt is unfastened
R the engine is switched off, unless it is auto-
matically switched off by the ECO start/stop
function
The electric parking brake secures the vehicle
automatically if the HOLD function is activated,
the vehicle is stationary and:
R a system fault occurs
R the power supply is insufficient On steep uphill or downhill inclines or if there is
a malfunction, the transmission may also be
automatically shifted into position P. AIRMATIC package
General notes AIRMATIC is an air suspension system with var-
iable damping for improved driving comfort.
Level control ensures the best possible suspen- sion and constant ground clearance, even with a laden vehicle. When you drive fast, the vehicle is
lowered automatically to improve driving safety
and to reduce fuel consumption. There is also
the option to manually adjust the vehicle level.
All vehicles (except Mercedes-AMG vehi-
cles): AIRMATIC consists of:
R level settings
R level control and
R ADS (Adaptive Damping System)
Mercedes-AMG vehicles: AIRMATIC consists
of:
R level settings
R level control and
R ADS PLUS (Adaptive Damping System)
All vehicles (except Mercedes-AMG vehi-
cles): your vehicle may also be equipped with
the ACTIVE CURVE SYSTEM (Y page 222).
Mercedes-AMG vehicles: your vehicle is equip-
ped with the ACTIVE CURVE SYSTEM.
(Y page 222).
Observe the notes on driving with a trailer
(Y page 273).
The vehicle level can be set using the DYNAMIC
SELECT controller (Y page 166) or the level but-
ton (Y page 222). The setting always corre-
sponds to the last selected function.
Important safety notes G
WARNING
People's limbs may become trapped if they
are located underneath the vehicle or
between the vehicle body and the tyres when the vehicle is lowering. There is a danger of
injury. 220
Driving systemsDriving and pa
rking
Page 232 of 453
R
snowfall or heavy rain may lead to a parking
space being measured inaccurately
R pay attention to the PARKTRONIC
(Y page 226) warning messages during the
parking procedure
R at any time, you can intervene in the steering
procedure to correct it. Active Parking Assist will then be cancelled.
R when transporting a load which protrudes
from your vehicle, you should not use Active
Parking Assist.
R never use Active Parking Assist when snow
chains are fitted.
R make sure that the tyre pressures are always
correct. This has a direct influence on the
parking characteristics of the vehicle.
Use Active Parking Assist for parking spaces
that are:
R parallel or at right angles to the direction of
travel
R on straight roads, not bends
R on the same level as the road, e.g. not on the
pavement
Detecting parking spaces Objects located above the height range of Active
Parking Assist will not be detected when the
parking space is measured. These are not taken into account when the parking procedure is cal-culated, e.g. overhanging loads, tail sections or
loading ramps of goods vehicles. G
WARNING
If there are objects above the detection range:
R Active Park Assist may steer too early
R the vehicle may not stop in front of these
objects
This could cause a collision. There is a risk of
an accident.
If objects are located above the detection
range, stop and deactivate Active Parking
Assist.
For further information on the detection range
(Y page 225). Active Parking Assist does not assist you park-
ing in spaces at right angles to the direction of
travel if:
R two parking spaces are located directly next
to one another
R the parking space is directly next to a low
obstacle such as a low kerb
R you forward park
Active Parking Assist does not assist you park-
ing in spaces that are parallel or at right angles
to the direction of travel if:
R the parking space is on a kerb
R the system reads the parking space as being
blocked, for example by foliage or grass pav-
ing blocks
R the area is too small for the vehicle to
manoeuvre into
R the parking space is bordered by an obstacle,
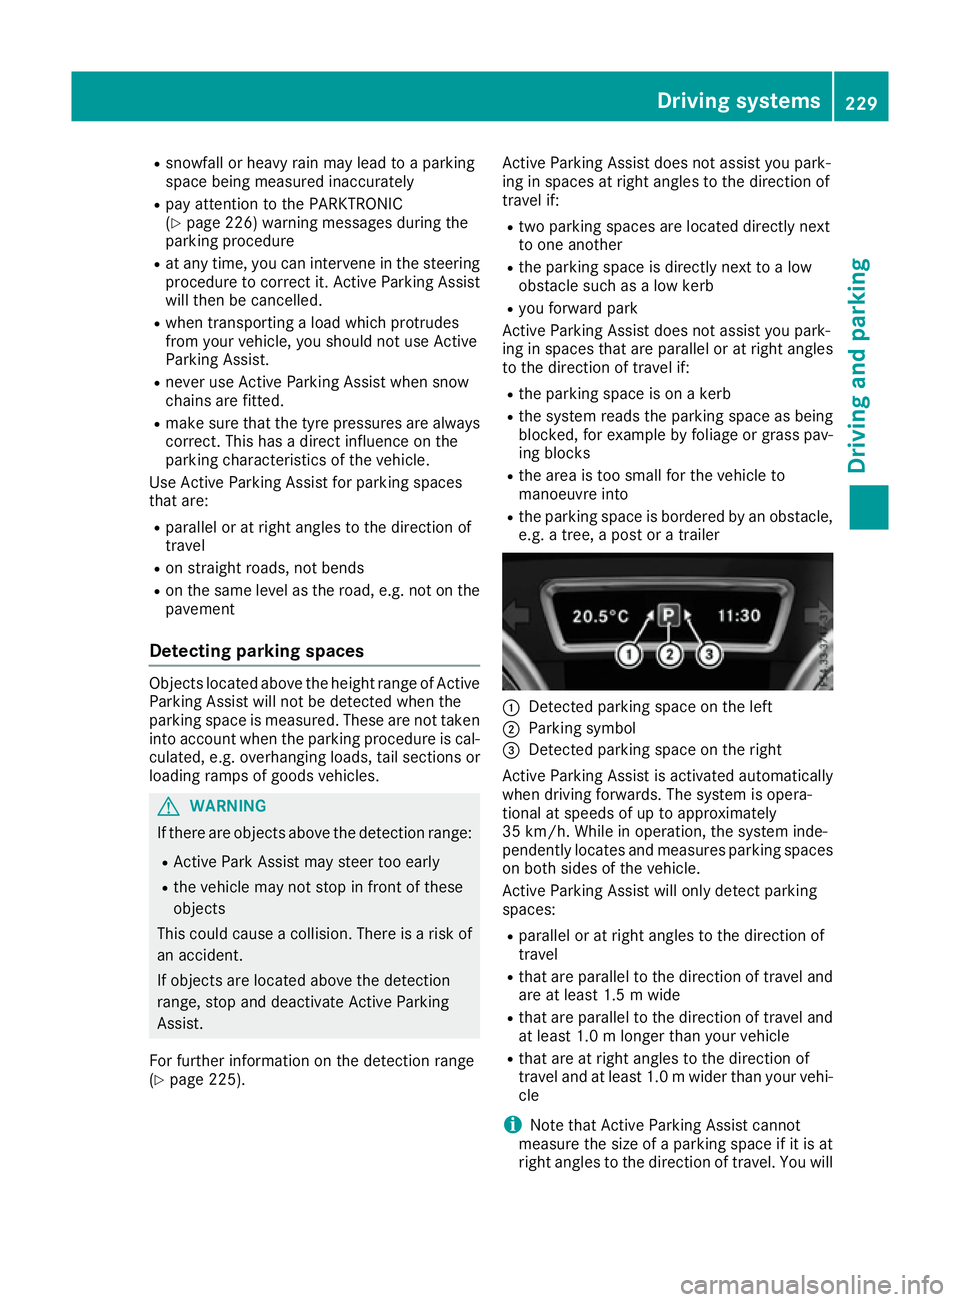
e.g. a tree, a post or a trailer :
Detected parking space on the left
; Parking symbol
= Detected parking space on the right
Active Parking Assist is activated automatically
when driving forwards. The system is opera-
tional at speeds of up to approximately
35 km/h. While in operation, the system inde-
pendently locates and measures parking spaces on both sides of the vehicle.
Active Parking Assist will only detect parking
spaces:
R parallel or at right angles to the direction of
travel
R that are parallel to the direction of travel and
are at least 1.5 m wide
R that are parallel to the direction of travel and
at least 1.0 m longer than your vehicle
R that are at right angles to the direction of
travel and at least 1.0 mwider than your vehi-
cle
i Note that Active Parking Assist cannot
measure the size of a parking space if it is at
right angles to the direction of travel. You will Driving systems
229Driving and parking Z